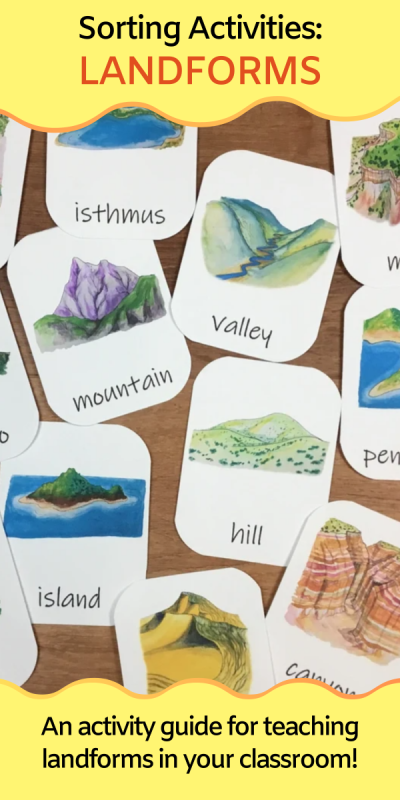
Teaching landforms in your classroom? If you’re searching for a quick and easy way to help students learn about landforms—without needing lots of extra supplies—you’ve come to the right place! This post shares simple sorting and compare/contrast activities perfect for introducing landforms. All you’ll need are some landform flashcards or pictures, making this activity both fun and hassle-free!
Materials
All you need for this simple learning activity is some good landform flashcards or pictures. I recommend downloading and printing my landform three-part cards. Optionally, you can also purchase my water features three-part cards. You’ll receive high-quality illustrations of each landform on printable flashcards, plus you’ll support my blog with your purchase!
Or, if you’re looking for EVEN MORE landforms materials for your lessons, I recommend checking out my complete Landforms Unit. It includes the landforms flashcards, a printable version of the directions in this blog post, and additional activities and printable materials.
There’s no need to scramble to put together the perfect landforms lesson – I’ve already created it for you! This set includes all the printable materials you need for studying landforms in your classroom or homeschool!
Soil is often overlooked as a classroom topic, yet it’s a fascinating and practical area of science to explore with one’s students. Whether you’re introducing elementary schoolers to the basics of earth science or tackling advanced environmental science concepts with high schoolers, soil science offers countless opportunities for hands-on learning with real-world applications. Here are five compelling reasons to incorporate soil science into your classroom curriculum.
But first: if you’re already on the hunt for great soil science teaching materials, I think you and your students will love my complete soil science unit. It includes directions for five soil lab activities, worksheets, readings, and engaging diagrams. Plus you’ll support this blog with your purchase!
1. Soil Science is an Interdisciplinary STEM Subject
One of the most exciting things about teaching soil science is its interdisciplinary nature. It bridges various STEM (Science, Technology, Engineering, and Math) fields, letting your students experience how scientific disciplines interconnect. For example, students will use math to calculate soil porosity and permeability and apply chemistry to analyze pH levels and organic matter content. Biology comes into play when learning about soil microorganisms! And even physics will come up when looking at how water moves through different soils.
Teaching soil science allows you to create lessons that naturally integrate multiple disciplines. For instance, you might try a lab where students add water to sandy and silty soils, calculate porosity, and graph their results. You can read my blog post about how to calculate porosity in your classroom! Activities like this, while simple, reinforce STEM skills!
2. Soils Impact Our Food, Water, Climate, and Ecosystems
Soil is so much more than just dirt! Soil is necessary for food production, water filtration, carbon storage, and ecosystem health. Teaching students about soil helps them understand the connections between soil and global challenges like food security and climate change.
For example, healthy soils are necessary to grow crops that feed Earth’s growing population. Soils also act as natural filters, purifying water as it percolates through its layers. Furthermore, soils tie into ecosystems and the climate, since they store carbon and other nutrients. Studying soil science is a great way to begin a discussion on sustainability and environmental conservation with your students.
3. Soil is Great for Hands-on Activities!
When you teach soil science, you’ll have the chance to try many hands-on learning activities with your students. For example, you could analyze soil textures – for example, by doing the soil textures “jar lab” I wrote previously about in my blog. The basic idea is this: students mix soil samples with water, shake them, and let the particles settle into layers of sand, silt, and clay. The larger, heavier particles settle out first, which lets your students observe the amount of sand, silt, and clay in the soil. This simple experiment visually demonstrates the concept of soil texture and allows students to connect theoretical knowledge with real-world observations.
Another activity is testing soils’ organic matter content. This activity relies on chemistry: when applied to soil, hydrogen peroxide reacts with organic matter, causing bubbling and fizzing. If you’d like to try this activity, you can find step-by-step directions in my blog post about detecting soil organic matter with hydrogen peroxide.
Truly, there’s no shortage of soil science experiments and activities to try. Additional options could include measuring soil pH levels and growing plants in different soil types to observe how soil composition impacts growth. These hands-on labs make lessons more interactive and also teach science skills like hypothesis testing and data collection.
A little soil science knowledge goes a long way for students who dream of working outdoors or making a difference in the environment. Professions in agriculture, conservation, environmental science, land management, and urban planning all require a deep understanding of soil. Additionally, careers in engineering, hydrology, and ecology often intersect with soil science, offering even more opportunities for students with this foundational knowledge.
Introducing soil science in the classroom helps students see how their lessons could lead to fulfilling careers. You can highlight professionals who work in these fields, invite guest speakers, or assign projects where students explore soil-related careers. These activities provide opportunities to explore a variety of career paths for students who may not yet see how their classroom studies relate to their future goals.
Soil knowledge is key in many careers, including agriculture. Photo by Flambo on Pexels.com
5. Soil Science Gets Students Outside
Another great reason to teach soil science is the opportunity to take your class outdoors. No matter where you live, there’s soil to explore! Outdoor activities like digging into a local soil horizon, observing soil erosion, or starting a classroom composting project can help students apply their classroom knowledge to real-world observations.
Fieldwork can be as simple or elaborate as you want it to be. You might organize a short walk around your school grounds to collect soil samples or partner with a local park for a more in-depth study. Outdoor experiences are sure to enrich your soil lessons. Plus, they’re a great way to encourage physical activity and break up the monotony of a traditional classroom setting.
Teaching Soil Science in Your Classroom
If you’re an educator planning to teach soil science, great learning resources are key to deepening understanding! I think you and your students will love my complete Soil Science Unit (plus you’ll support my blog with your purchase!)
Are you teaching your students about the parts of a flower or plant anatomy? Sometimes the best way to understand how something works is by taking it apart. A flower dissection is a simple and engaging hands-on activity that brings plant anatomy to life in your classroom. In this activity, students will carefully examine and identify key flower structures like petals, sepals, carpels, and stamens. Plus, they’ll explore the fascinating connection between flowers and Fibonacci numbers in nature!
If you’re looking for more background information about flower anatomy, be sure to check out my blog post where I cover the four main whorls of a flower. You can also learn more about the functions of flowers and their various parts in the plant life cycle in this post about pollination and the plant life cycle!
Please Note: I’ve made the directions for this flower dissection activity available for free here in this post. If you would like printable directions and worksheets for this activity, you can find them in my complete Flowers Unit in my shop.
Printed student directions and lab worksheet (available in my Flower Unit)
Tips for Success
Have flower and plant anatomy diagrams on hand so your students can reference them as they dissect their flowers. Need diagrams? Try one of these options:
You can find my hand-drawn flower & plant anatomy diagrams in my flowers unit (linked above)
You can also find a free flower diagram on my free resources page (pictured below)!
Use a large flower so that students can easily see all the parts.
Use a complete flower with all four main flower parts: sepals, petals, carpels, and stamens. For example, lilies, hibiscuses, or tulips are all good choices.
Directions
Part 1: Flower Dissection
Pass out the materials to your students. Give a brief overview of the main parts of a flower. Then, assist your students as they work through the following steps to dissect their flowers:
Use the tweezers or your fingers to carefully remove the sepals and then the petals from your flower.
Break apart the carpel(s) and stamens.
Count the number of sepals, petals, carpels, and stamens and record the number of each.
Glue one of each part to the lab worksheet.
Use a pencil or pen to draw arrows and label the stigma, style, and ovary on the carpel glued to the lab worksheet.
Use a pencil or pen to draw arrows and label the anther and filament on the stamen glued to the lab worksheet.
Part 2: Fibonacci Numbers in Nature
Fibonacci numbers form a sequence so that each number is the sum of the previous two numbers (e.g., 1+1 = 2; 2+1 = 3, 3+2 = 5; 5+3=8; and so on). Fibonacci numbers are often found in nature. Students should answer the following questions:
Calculate and write down the next 5 numbers in the Fibonacci sequence: 1,1,2,3,5,8,… ___, ___, ___, ___, ___
Look back at your lab worksheet. How many petals did your flower have? Is this a Fibonacci number? What about the sepals? Carpels? Stamens?
Study Flowers with Wild Earth Lab!
If you enjoyed this activity, I know you’ll love my Flowers Unit! It includes everything you need for this activity and other flower projects too!
OR – take your botany learning to the next level with my Botany Collection. It’s a bundle of three plant units: Flowers, Pollination, and Fruit!
Ready for another dissection?
Read my blog post on how to do a Mushroom Dissection Lab!
Studying the parts of a mushroom is a fun biology activity for students at many levels. One of the best, hands-on ways to learn mushroom anatomy is by dissecting one. In this mushroom dissection activity, students will observe the…
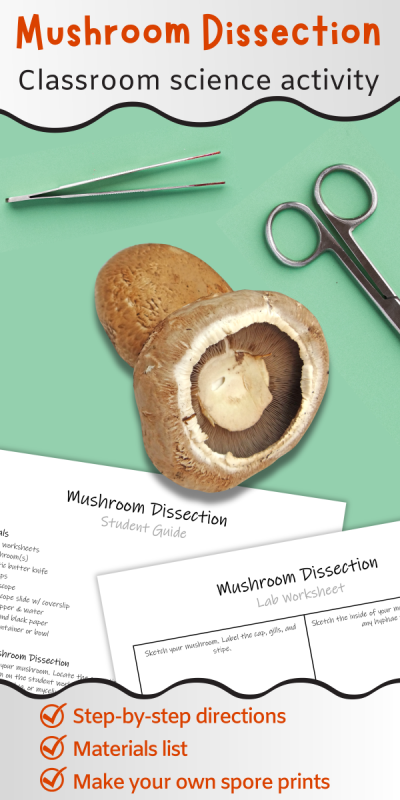
Studying the parts of a mushroom is a fun biology activity for students at many levels. One of the best, hands-on ways to learn mushroom anatomy is by dissecting one. In this mushroom dissection activity, students will observe the internal and external parts of a mushroom. Students will operate a microscope to observe spores and mushroom gill anatomy. Finally, students will create their own spore prints by allowing mushrooms to release their spores onto paper.
Please Note: I’ve made the directions for this mushroom dissection activity available for free here in this post. If you would like printable directions and worksheets for this activity, you can purchase them in my shop. You can find these materials and more mushroom learning materials in my complete Mushrooms Unit!
A mushroom is the fruiting body of certain fungi. By dissecting a mushroom, you can see the parts of a mushroom up close. These parts help the fungi produce and release spores to create more fungi.
Examine your mushroom. Locate the cap, stipe, and gills (or veil covering the gills). Sketch your mushroom on the student worksheet, labeling the cap, stipe, gills, and other parts you see such as an annulus, volva, or mycelium still attached.
Using fingers or forceps, gently peel away and remove any veil covering the gills (if needed).
Remove the stipe from the cap by gently pulling or twisting on the stipe.
Break or cut the stipe in half length-wise.
Do you see any long, thin filaments or strings on the inside of the stipe? These are hyphae. Sketch the inside of the stipe on the student worksheet, labeling any hyphae.
Remove one gill from the mushroom. Use the forceps to grasp and gently pull away one gill.
Place the gill on a microscope slide. Add a drop of water and a coverslip.
Examine your gill under the microscope and sketch what you see. Basidia are tiny knobs on the gill that make spores. Label the basidia and any spores you see attached to them in your sketch.
If you have a second type of mushroom, repeat steps 1-8 with the second mushroom.
Once finished, discard all mushroom parts EXCEPT for the cap(s) and clean your microscope slide.
Part 2: Spore Prints
Spores are released from mushrooms as part of the life cycle of a fungus. You can make unique artwork by allowing mushroom caps to drop their spores onto paper.
You can use the mushroom cap(s) from part 1 to make a spore print. Ask your instructor for additional mushrooms to make additional prints.
With any new mushrooms: remove the stipes and peel away any veils covering the gills.
Spores may be light or dark-colored. Try using both black and white paper for your spore prints to ensure the spores are visible.
Place the mushroom caps with the gills facing down on top of the papers.
Place an upside-down container or bowl over the mushroom caps to protect them.
Leave the caps alone overnight. During this time, the gills will release spores which will fall onto the paper.
The next day: remove the containers and mushroom caps to reveal the spore prints.
Are you searching for a fun and unique ecology topic to teach in your science classroom? Look no further! In this post, I’ve compiled seven fascinating ecology topics that will spark curiosity about the natural world in your students. Additionally, this post compiles resources and science lessons related to bioindicators, symbiotic relationships, ecological succession, and more – to help you plan and find materials for teaching your next ecology lesson. Whether you’re a science teacher or a homeschool parent, these engaging subjects will inspire your students and make your lessons unforgettable.
A note for educators: The activities from this blog post come from my complete Ecology Units. These units are packed with all the materials you need for teaching ecology – including hands-on activities and visual aids designed to deepen understanding. These units make teaching ecology fun and easy – and every purchase helps support this blog!
A symbiotic relationship is a long-term interaction between two species. Symbiotic relationships typically benefit at least one and sometimes both of the two species involved. Symbiosis is a great topic to cover when teaching students about ecology. There are so many examples: pollination, lichens, seed dispersal, parasites, and more!
Pollination is a classic example of a symbiotic relationship between a plant and an animal – try out some pollination activity ideas and science lessons from my blog, or purchase my complete Pollination Unit
This is a fun, interdisciplinary topic that relates to both ecology and engineering! Biomimicry, also called biomimetics, is when people draw inspiration from nature to design items and solve problems. Plant, fungi, and animal species evolved features and behaviors over vast periods of time to overcome challenges they face in their habitats. Engineers may mimic these features and behaviors from nature to improve their own designs.
My origami frog mini study touches on the topic of biomimicry
3. Camouflage
Camouflage is an adaptation that helps an animal disguise its appearance. Studying camouflage goes hand-in-hand with learning about animal adaptations. There are many types of camouflage. Camouflage may help an animal blend into its background or look like something inedible or toxic.
Read my blog post about the cool adaptations of desert animals and plants
This bird beaks lab activity is a great way to learn about adaptations and natural selection – find the directions for this activity in my blog.
5. Bioindicators & Aquatic Macroinvertebrates
Macroinvertebrates make an awesome ecology lesson because you can find them in almost any stream or pond near you! Just flip over a few rocks in shallow water, and you’re sure to start finding aquatic macroinvertebrates! This can make a great field trip activity!
Furthermore, macroinvertebrates are a type of bioindicator used by scientists. A bioindicator is a type of organism whose wellbeing relates closely to ecological conditions and is studied by scientists. Certain macroinvertebrates are very sensitive to poor water quality and other human impacts. They are a great way to teach your students about healthy aquatic ecosystems.
Resources for teaching bioindicators & aquatic macroinvertebrates:
Looking through a lake sample for aquatic insects.
6. Disturbance and Succession
Disturbance and succession are good ecology topics to tie in with studies of wildfires, volcanic eruptions, and other natural disasters. These are natural events in ecosystems. A disturbance is some sort of event that causes a large and rapid change in an ecosystem – like a wildfire or a volcanic eruption. Succession is what follows – the natural and gradual change in an ecosystem over time.
Resources for teaching disturbance and succession:
Studying food webs is a fantastic way to learn about the flow of energy between organisms. A food web is a complex network of feeding relationships between organisms in an ecosystem. Energy flows from the organism being eaten to the organism doing the eating.
When you study food webs, you can also teach related topics such as predator-prey relationships, trophic cascades, and the important role of decomposers in ecosystems. Best of all, kids can be creative and learn about wildlife by mapping their own example food webs.
Try this fun food-webs activity, detailed in my blog post
Study Ecology with Wild Earth Lab
I’ve saved you the trouble of putting together materials for an awesome ecology unit. Choose from my large collection of science lessons, which all include activities, worksheets, handouts, posters, and more:
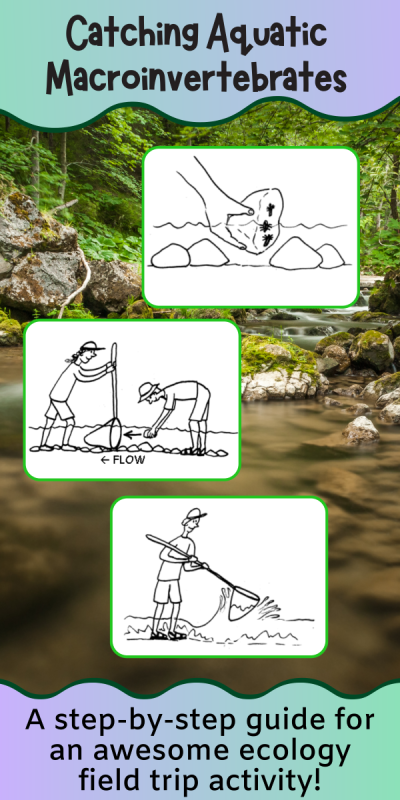
Catching aquatic macroinvertebrates is an exciting, hands-on activity that makes for an unforgettable ecology field trip. This is an outdoor activity and is a great way to examine the diverse organisms of freshwater ecosystems with your homeschool or science class. This activity will enhance your classroom studies of biodiversity, bioindicators, entomology, or aquatic food webs. In this post, I’ll guide you through three different techniques to successfully catch and observe aquatic macroinvertebrates. Let’s begin!
Before we dive in: If you’re an educator planning to teach macroinvertebrates, great visuals and activities are key to deepening understanding! I think you and your students will love my complete Macroinvertebrates Unit (plus you’ll support my blog with your purchase! ❤️)
Aquatic macroinvertebrates from left to right: mayfly nymph, stonefly nymph, and larval caddisfly.
An aquatic macroinvertebrate is an animal with no backbone that lives in or on water and is big enough that you can see it with your naked eye. This includes animals like aquatic insects, other aquatic arthropods, aquatic mollusks, aquatic worms, and more.
Macroinvertebrates play an important role in aquatic ecosystems. Many macroinvertebrates help recycle nutrients back into the food web by consuming detritus (decaying matter) that settles to the bottom of the water. They may also eat algae or even other macroinvertebrates. These tiny creatures are an important food source for fish, birds, and other animals that live in and around ponds, streams, and wetlands.
Furthermore, aquatic macroinvertebrates are used by scientists as bioindicators – basically, they help tell us if a stream, pond, or wetland is healthy. You can read more about macroinvertebrates and their use as bioindicators in this blog post.
Catching Aquatic Macroinvertebrates Activity
Materials
Each group will need the following materials.
Fine-mesh net such as a pool net for collecting aquatic macroinvertebrates
Tweezers
Large, deep-sided pans (e.g., foil roast pans, pie tins)
You can save time and support my blog when you purchase my aquatic macroinvertebrates unit – complete with all the worksheets and handouts for this activity!
Set-Up & Directions
Safety Note: Only attempt activities in extremely shallow, easily wadable streams and water bodies. Do not enter deep or swiftly moving water. Adult supervision is required at all times while in and around water.
Assign groups of 2-4 students.
Introduce and demonstrate the three methods for collecting aquatic macroinvertebrates (details below).
Pass out the materials.
Allow students to try out the three methods for collecting aquatic macroinvertebrates (details below).
Aquatic macroinvertebrates like to be in water and cannot survive for long out of water. While examining your aquatic macroinvertebrate catches, be sure to always keep them in a pan or jar of water.
At the end of the activity, instruct students to gently pour the aquatic macroinvertebrates back into the pond or stream.
Method 1: Flipping over rocks
Works best in: shallow flowing or standing water
In shallow water such as near the edge of a pond or stream, flip over submerged rocks and logs. Benthic (bottom-dwelling) macroinvertebrates such as insect larvae are often clinging to the underside of rocks or logs. Use tweezers or fingers to gently remove the macroinvertebrates from the rock/log and place them in a pan filled with water.
Method 2: Net in flowing water
Works best in: shallow flowing water only
Have one person hold a net touching the bottom of a shallow stream, facing upstream. This should allow water to flow through the net. A second person will use their hands to gently move and scrub the rocks and sediments directly upstream of the net. As you scrub, macroinvertebrates will let go of the rocks and the flowing water will sweep them directly into the net. Empty the net’s contents into a pan filled with water.
Method 3: Net in standing water
Works best in: shallow standing water
You may be familiar with this technique as pond dipping. Use a net to scoop up sediments and plant matter from the bottom of a pond and empty it into a pan of water. Use tweezers to pick through the sample to find the aquatic macroinvertebrates that were hiding in the sediments and plant matter. You can place the macroinvertebrates you pick out into a separate small jar filled with water.
Identifying Aquatic Macroinvertebrates
There are many types of aquatic macroinvertebrates. Once you catch some macroinvertebrates, you will probably want to sort them into a few basic categories to begin with.
Aquatic macroinvertebrates include:
Aquatic insects:
Larvae/nymphs (e.g., EPT, dragonflies, dipterans)
Insects that are aquatic for their whole life cycle (e.g., water scorpions, water beetles)
Crayfish
Aquatic snails
Aquatic worms
Bivalves
Water mites
What do these ten animals have in common? They are all aquatic macroinvertebrates! 1. stonefly, 2. caddisfly, 3. mayfly, 4. aquatic beetle, 5. water strider, 6. freshwater snail, 7. freshwater mussel, 8. aquatic worm, 9. water mite, 10. crayfish.
Resources for Macroinvertebrate ID:
You have options when it comes to identifying macroinvertebrates. For beginners and younger learners, you may wish to sort macroinvertebrates into just a few basic categories (e.g., insects, worms, bivalves, etc.). Middle and high school classes often identify aquatic insects by order (e.g., mayflies, stoneflies, caddisflies, dipterans, etc.).
University-level classes and researchers sort macroinvertebrates down to the family, genus, or even species level. This level of ID typically requires a dissection microscope and a dichotomous key.
There are many resources for identifying aquatic macroinvertebrates and aquatic insects. Here are a few:
Troutnut is a fly fishing website with some wonderful photos of aquatic insects. It’s a great resource if you’re already pretty familiar with aquatic insects and ID at the genus/species level
This webpage from the University of New Hampshire has many aquatic insect photos and a stream key for advanced ID (genus/species level)
My Macroinvertebrates Unit has beginner-friendly materials for studying aquatic macroinvertebrates and identifying aquatic insects at the order level
My macroinvertebrates flashcards (these are found in the unit, but you can also purchase them separately here)
My three-part cards feature my drawings and are perfect for beginner-level aquatic macroinvertebrate ID!
Expanding on this Activity
Once you’ve learned how to catch aquatic macroinvertebrates, there are many ways that you can expand on this activity. Here are just a few ideas:
Compare two locations: compare the macroinvertebrates captured in flowing and standing water. Are they the same or different?
Life stages: bring a butterfly net and also capture flying insects in the area. Many aquatic insects like mayflies, stoneflies, caddisflies, dragonflies, and more are only aquatic until they reach maturity. Can you capture the flying adult forms of any aquatic macroinvertebrates around your pond or stream?
Sorting & counting: in ecology, “richness” refers to the number of different taxa (e.g., species, orders) found in a community. This is an important measure of biodiversity and one of many metrics that ecologists use to assess the health of an ecosystem. Introduce this concept to your students by having them create a list of the different types aquatic macroinvertebrates that they find during the field trip activity.
Teach Macroinvertebrates with Wild Earth Lab
Planning to teach this activity? Save time and support my blog when you purchase my Macroinvertebrates Unit, referenced throughout this post.
The unit includes everything you need to complete this activity: student handouts, worksheets, and readings, plus tons of other materials for learning all about macroinvertebrates!
Are you searching for an engaging and educational ecology activity to try with your students? Building your own food webs is a fantastic way to study the flow of energy between organisms – all while allowing kids to be creative! Best of all, this is an activity that you can complete outside, making it perfect for homeschool parents and teachers who enjoy having class outdoors! Get ready to inspire your students with this unique and interactive ecology project!
A special note for educators: are you planning to teach this food webs activity? If so, I’ve already created all the worksheets, printable materials, handouts, and directions that you will need. Find these materials in my complete Food Webs Unit – and you’ll support this blog with your purchase! 💚
A food web is a complex network of feeding relationships between organisms in an ecosystem. Energy flows from the organism being eaten to the organism doing the eating. We represent food webs using diagrams with arrows between the organisms. Food web diagrams map the many paths for the movement of energy between organisms.
I wrote a separate blog post in which you and your students can read more about food webs and food chains. It includes lots of diagrams and examples!
What types of organisms make a food web?
All the different lifeforms coexisting in an ecosystem form a community. The community is made of many individual, diverse lifeforms – like plants, animals, and fungi – called organisms.
When you build your food web model, it will include many different types of organisms. These organisms fall into three main categories, based on the roles they play in the food web. Knowing the difference between these roles will help you and your students build food webs.
In an ecosystem, you will find the following types of organisms:
1. Producer:
An organism that produces its own food through photosynthesis. Producers use sunlight, water, and carbon dioxide to make their own food. They also need soil nutrients.
Examples: trees and other plants, some plankton, moss, some microorganisms
2. Consumer:
An organism that eats other organisms as food. Consumers cannot make their own food. Consumers can be herbivores, omnivores, carnivores, and scavengers.
Examples: insects, birds, frogs, deer, other animals
3. Decomposer:
An organism that recycles nutrients back into the soil by eating and digesting decayed plant and animal matter and waste.
Examples: mushrooms, some worms, soil bacteria
Make your own food webs activity:
Gather your materials and follow these steps to create your own food webs with your students. You can all work on one big food web together, or each student can make their own mini-food web! There are many possibilities!
Materials
Flashcards or pictures of the organisms in an ecosystem (plants, animals, fungi, etc…)
Or, get a set for an ecosystem of interest (e.g., desert, arctic, forest, etc…)
You can also make your own set!
Sidewalk chalk
A large, paved area outdoors that is free of cars and heavy foot traffic
Step-by-Step Directions
Set-Up:
Sort the organism cards into 3 piles:
producers
consumers
decomposers
Look through your producers pile.
This pile represents the food sources for herbivores and omnivores (primary consumers) in your ecosystem.
Look through the consumers pile.
Sort these cards further or make a mental note of which organisms are likely to eat plants (herbivores and omnivores) and which organisms are likely to eat animals (carnivores and omnivores).
Research the diets of unfamiliar animals.
If students are unfamiliar with some of the animals and their diets, it may help to research the animals online. You can take notes on the backs of the cards if needed.
Note: if you’re using my food webs unit, a handout is provided with info on the diets of the included animals!
Build Your Food Web:
Choose your producers.
It is easiest to start with one to three producers.
Which consumers eat your producers? These are your primary consumers.
Place the primary consumers above your producers and draw arrows to represent the flow of energy from food to eater.
Which consumers eat your primary consumers? These are your secondary consumers.
Place the secondary consumers above your primary consumers and draw arrows to represent the flow of energy from food to eater.
Which consumers eat your secondary consumers? These are your tertiary consumers.
Place the tertiary consumers above your secondary consumers and draw arrows to represent the flow of energy from food to eater.
Repeat this process as needed, until your reach a consumer that is not eaten by anyone else – this is your top predator!
You can make your food web as big or small as you’d like! It could include dozens of organisms or just a few.
Add additional arrows as needed.
Food webs can be messy! Many any animals have multiple food sources and are preyed on by multiple predators.
Optional: place any decomposer cards underneath the food web. Decomposers recycle nutrients back into the soil to help producers like plants grow!
Example Food Webs:
An example of building your own food web!
Study Food Webs with Wild Earth Lab:
Of course, you can put together your own food web materials to complete this activity. Or, save time and support my blog when you purchase my food webs unit! The unit includes everything you need to complete this activity plus additional handouts, worksheets, and readings!
Are you in search of engaging ways to teach earth science in your homeschool or classroom? Hands-on activities help make complex concepts more memorable and enjoyable for students. Whether you’re building models of Earth’s layers, measuring stream flow, or exploring plate boundaries, these interactive lessons will bring earth science to life in your classroom!
In this post, you’ll find nine earth science activities that are perfect for homeschool parents and classroom teachers looking to inspire curiosity about the earth. Let’s get started!
1. Make a map of the continents and oceans
Teach students the names and locations of the oceans and continents. I’ve created a FREE printable worksheet for this activity. Simply print it out and color in the different continents and oceans with your students. Download the free worksheet here.
Earth science isn’t just about soils and rocks – water is an important part of our earth too! Hydrologists collect stream measurements to ensure we are not using our water resources too quickly or in unsustainable ways. With a few household items, you can collect river measurements too!
I’ve already written up the full directions for this activity online in my blog. Find the complete guide for this activity with materials and calculations at the end of this blog post about stream measurements! Or better yet, you can support my blog by purchasing the printable directions and handouts for this activity from my shop!
Porosity and permeability are important topics in both soil science and geology. Examining soil porosity and permeability is an easy lab experiment that you can complete with common household items. Compare the porosity and permeability of three sediments: gravel, sand, and clay/silt.
You can find the full written directions with materials and calculations for a porosity and permeability lab activity online in my porosity and permeability blog post! You can save time and support my blog with your purchase of the printable directions and handouts for this activity from my shop!
There are many ways to build a model of the Earth’s layers. You can model Earth’s three basic (compositional) layers: core, mantle, and crust. Or to make this activity more advanced, make a model of earth’s mechanical layers instead – lithosphere, asthenosphere, etc…
You can make your model of the Earth’s layers out of many different types of materials. A few options include:
Play dough or clay
Food, such as packing together different colors of rice cereal-marshmallow treats, and candy
Construction paper circles
Stacked nesting bowls
Printable templates, like these ones I created (for purchase in my shop)!
5. Build a model of the soil horizons snack-tivity!
Perhaps you have made a “cup of dirt” from pudding. But you can turn this simple snack into a tasty science activity by creating a soil horizons parfait!
The basic idea is this: you will make a parfait with 6 layers to represent the 6 horizons. This is an entertaining and tasty way to teach your students about soil horizons during a gardening, soil science, or agriculture unit in your classroom.
Minerals are the building blocks of rocks and an important topic in any geology or earth science class. You can teach your students how to identify common minerals by following a few simple steps.
These directions and handouts are available for purchase in my shop.
7. Build play dough landforms
Creating landforms out of play dough or clay is sure to be a memorable earth science lesson for students! All you need is enough play dough for each student. Students can build common landforms such as islands, hills, mesas, peninsulas, isthmuses, and more. Or try creating landforms specific to your area – do you live near volcanoes? Moraines? Caves? Canyons?
I recommend starting by sculpting the following 7 easy landforms:
Hill
Mountain
Island
Isthmus
Peninsula
Volcano
Mesa (flat-topped mountain)
This activity is pretty straightforward. But, if you’d like to elevate your landforms lesson with printable directions, landform flashcards, and more, you should check out my landforms unit, available in my shop.
If you need directions and printable materials for this play dough activity, find them within my complete landforms unit
8. Model tectonic plate boundaries with cookies!
Create a model of the three main tectonic plate boundary types using sandwich cookies. Remove the top layer of the sandwich cookie (lithosphere), break it in half, and place it back on top of the crème (asthenosphere), arranged as a boundary type.
Be sure to create the following three boundary types:
There’s no need to scramble to put together the perfect earth science unit – I’ve already created several for you! Choose from plate tectonics, rocks & minerals, landforms, water features, the water cycle, glaciers, and soil science! Each is packed with earth science activities, worksheets, readings, and more!
Wild Earth Lab is supported by readers like you. This post includes links to my own products and affiliate products. If you purchase through links on my site, I may earn a small commission at no additional cost to you.
Are you studying birds in your homeschool or classroom? Engaging your students with interactive bird activities can make learning about these unique animals memorable. Birds provide a great opportunity to explore animal biology concepts, from understanding bird adaptations and behaviors to investigating their diets and life cycles.
To support your bird study, I’ve curated eight fun and educational bird activity ideas that are perfect for homeschool parents and classroom teachers alike. Whether you’re teaching elementary science or simply looking for creative ways to bring nature into your lessons, these hands-on bird activities are sure to inspire!
Download this FREE bird anatomy worksheet that I created just for you! It features a heron and is perfect for learning about the different feathers and body parts of a bird. The set includes a labeled diagram and an unlabeled diagram for practice!
My newsletter subscribers can access my free resources page, where you’ll find this diagram and many other freebies.
It’s easy to observe wild birds in action when you set up a bird feeder. You can do this outside your classroom window or in another outdoor area. Bird feeders are a great way to observe the feeding habits of birds up close.
Before you set up your bird feeder, have students research the diets of common birds in your area, with a wildlife research project (free worksheets!). Birds eat a wide range of food – seeds, berries, insects, flower nectar, small animals, and more! Furthermore, they feed in different ways. Some crack nuts with strong beaks, while others drill into wood or catch flying insects from the air!
Since different birds have different diets and feeding habits, there are many different types of bird feeders to choose from. After researching the local birds and their feeding habits, students can help select the best type of bird feeder for your classroom. A few different bird feeder options include:
Tray feeders
Hummingbird feeders (e.g., these hand-made glass feeders)
Hopper feeders (e.g., this feeder made from recycled plastic!)
Nyjer feeders
Window feeder – great for seeing birds up close! (example)
DIY bird feeders – gather your own materials or get a kit (example)
3. Try a fun bird beaks lab
A bird beaks lab is a hilarious and hands-on way to experience competition between species and learn about natural selection and animal adaptations. Students will experience first-hand how specialized beaks can help birds quickly gather the most food and outcompete other types of birds.
In my blog, I’ve created a guide for completing your own bird beaks lab! Check out my directions for setting up your own bird beaks lab in this post!
Raptors, or birds of prey, are top predators that can be found in almost any type of habitat, from coastal areas to mountains, wetlands to deserts, grasslands to forests. Some of these incredible birds can even adapt to live alongside humans in urban areas!
Raptor centers provide homes for injured birds of prey that can no longer survive in the wild, as well as raptor outreach and education for their local communities. You can learn all about raptors from the experts at your local raptor center or wildlife sanctuary while seeing these amazing birds up close! Many Raptor centers offer tours to school groups and homeschoolers, and some have outreach programs that will come to your school.
You can also find more raptor activity ideas and raptor information in my blog posts:
Building or decorating a birdhouse is a wonderful activity to go along with studying bird life cycles. Learn about the nesting habits of birds and create a little bird home where you can watch the bird life cycle take place!
There are many birdhouse options to choose from. You can get a birdhouse kit where you assemble the parts yourself (example) or pre-made birdhouses ready for kids to decorate (example)!
Birds have lots of special adaptations, and the most obvious ones are their wings! However, bird wings are not one size fits all – bird wings come in many specialized forms that are serve different functions and fit different lifestyles. Read my blog post about bird wings to take a look at a few different types of wings and what they do!
Nothing beats seeing birds in their natural habitat! Birds can be found in all sorts of different environments, from forests to grasslands, wetlands to deserts, coasts to mountains! They can even be found adapting to live in urban areas alongside humans, in some cases!
Don’t forget to bring all the right equipment when you go bird watching. You’ll need:
There’s no need to scramble to put together the perfect bird lesson plan – I’ve already done the work for you! Choose from seabirds & shorebirds, waterfowl & waterbirds, and birds of prey! You’ll find even more activities, printable learning materials, worksheets, and more in my bird units!
Wild Earth Lab is supported by readers like you. This post includes links to my own products and affiliate products. If you purchase through links on my site, I may earn a small commission at no additional cost to you.
Rocks and minerals are an important topic in the field of geology. Learning about rocks and minerals can be so fun for both kids and adults. Here are 7 hands-on rocks and minerals activity ideas to try out in your classroom or homeschool.
A note for teachers:if you’re planning to teach rocks & minerals, great learning resources are key to deepening understanding. That’s why I created my complete Rocks & Minerals Unit. It’s packed with hands-on lab activities, thoughtfully crafted visuals, and all the worksheets and handouts you need to study rocks and minerals. Plus, every purchase helps support this blog! ❤️
Try making a model of the rock cycle. This is a popular rock and mineral activity for the classroom! There are many ways to do this – with chocolate, marshmallows, Starburst candies, crayons – the list goes on.
The basic concept is this:
Sedimentary Rocks: big solid chunks lightly compacted until they stick together. This can be done by cutting up the material into pieces and then squeezing the pieces together in your hands until they stick together.
Metamorphic Rocks: warped under heat and/or pressure, but not enough to fully melt. This is done by briefly warming your material to a moderate temperature in an oven and then applying pressure.
Igneous Rocks: fully melted, the re-solidified material. This can be done by fully melting your material in an oven and then allowing it to cool at room temperature.
You can use chocolate to model the rock cycle! Melted chocolate symbolizes molten rock! Photo by Monstera Production on Pexels.com
This activity is great for teaching the basics of the rock cycle before continuing on with the other rocks and minerals activity ideas.
2. Mineral Lab
Minerals are the building blocks of rocks. Geologists can examine minerals for their physical properties and then identify them. A minerals lab is super fun because it involves testing minerals for magnetism, acid reaction, and other unique physical properties! To test for these properties, you will need to make or buy a mineral test kit, such as this test kit (external link).
With a little practice, you and your students can identify common minerals too. Read my separate post here about how to set up your own minerals lab in your classroom. You can also download my Minerals Mini Study, which includes all of the worksheets, handouts, and directions that you’ll need for an awesome mineral lab in your classroom!
The activities in the blog post come from my Minerals Mini Study. Download the mini study with worksheets, handouts, directions, and more.
3. Guided Geology Hike
Are there any national parks or state parks in your area? Some have rangers who will put on guided nature hikes covering many topics, including local geology.
If not, you could also reach out to a local geology expert to join your class or homeschool group on a hike to learn about geology. When I was a graduate student, a homeschool group reached out to me to lead a geology hike like this. We hiked a short way through a canyon and talked about how plate tectonics and flowing water helped shape the area.
4. Make Rock Candy
This is a tasty way to learn about mineral precipitates, which you may know form some of our sedimentary rocks, such as limestone. This activity takes several days, during which you will watch crystals form! You can follow a rock candy recipe, such as this recipe (external link).
5. Rock Identification
Rock IDcan be challenging, but it is so rewarding to be able to identify common rocks in your area. Learn about foliation, grain size, rock compositions, textures, and more! If you are looking for a good place to get started with Rock ID, I think you’ll love my Rocks Mini Study. It includes all the printable handouts, worksheets, and directions you will need for an awesome Rocks Lab! Another fun activity to try is Rock ID Bingo – more on this below!
If you are looking to learn how to identify rocks, try out my Rocks Mini Study. It includes all the handouts, worksheets, and directions for a rock ID activity!
6. Play Rock or Mineral Bingo
These are great review games for practicing rock and mineral identification. Each student gets a bingo card with different rocks or minerals. The teacher then reads out the properties of a mystery rock or mineral. The students must figure out which rock or mineral it is, then mark it on the bingo card!
I’ve created these mineral bingo and rock bingo sets (complete with calling cards!) to help you play this game in your classroom:
7. DIY Fossils
Unlike living things, which come and go, rocks stick around for incredibly long periods. This allows rocks to act as time capsules, preserving clues about our planet’s past – fossils! Learn about how fossils form by creating your own fossils (external link).
Bonus: see real fossils up close for inspiration! Look for a geology museum in your area to see collections of amazing and rare gems, minerals, rocks, fossils, and much more! You can also look for gem and mineral show events in your area (external link).
Many of the rock and mineral activity ideas from this post are found in or go great with my complete Rocks and Minerals Unit! It is a complete set of printable materials including worksheets, handouts, classroom posters, lab activities, and much more!