Posted on Leave a comment

Metamorphic Rocks: properties, formation, and subtypes!

a large foliated rock sample being examined by students
text that says share this post

Learning about rocks and the rock cycle in your classroom this year? You may already know that there are three main types of rocks: igneous, sedimentary, and metamorphic. In this post, we will take a closer look at metamorphic rocks. Get ready to explore the formation, subtypes, properties, and examples of metamorphic rocks!

For Teachers:ย If youโ€™re an educator planning to teach rocks, great visuals and activities are key to deepening understanding! Try my my Rocks Unit – a complete set of all the printable worksheets, activity directions, and visuals you’ll need (plus youโ€™ll support this blog with your purchase! โค๏ธ)

How do metamorphic rocks form?

Metamorphic rocks form deep below the Earthโ€™s surface.ย Metamorphic rocks form when other rocks experience lots of heat and pressure underground. The heat comes from the Earth’s interior and the pressure comes from the weight of overlying layers of rock and sediment.

Every metamorphic rock was once a different rock, called the parent rock, or protolith. The protolith can be sedimentary, igneous, or even a different metamorphic rock. For example, when the sedimentary rock sandstone is exposed to intense heat and pressure, it can become the metamorphic rock quartzite. This transformation, called metamorphism, forces the minerals in the parent rock to reorganize into a more compact structure, making metamorphic rocks quite sturdy and dense.

Metamorphism can only happen when the amount of heat and pressure are just right. If there is too little heat and pressure, metamorphism will not happen. If the heat and pressure grow too high, the rock will melt into magma instead.

Properties of Metamorphic Rocks

There are many different metamorphic rocks, and they do not all look the same. Shimmering schist, sturdy slate, and glimmering marble are all metamorphic! Their varied appearances are influenced by several properties including their mineral composition, grain (crystal) size, and foliation. Let’s learn some more about each of these properties…

Composition

As you now know, metamorphic rocks all share one important thing in common: they formed under heat and pressure. However, each rock has its own special blend of minerals. Metamorphic rocks are made of one or more minerals. If you can identify the mineral(s) in a rock, it will help you identify the rock.

Grain Size

Metamorphic rocks are made of crystals of minerals. Crystals come in different sizes. Rocks with large crystals can appear sparkly or shimmery, like schist or marble. But not all crystals are big. In fact, some rocks are made of crystals so tiny that you need a microscope to see them. Rocks made of microscopic crystals may appear more dull.

In general, bigger crystals form under higher heat and pressure. A rock with large, visible crystals formed under higher heat and pressure than a rock made of tiny crystals.

Foliation

Some (but not all) metamorphic rocks have foliation – which means banding or layering. Foliation presents in several different ways, depending on the conditions while the rock is formed and the mineral crystals in the rock. A foliated rock with large crystals formed under high heat and pressure. This rock may appear to have bands or stripes of different colored mineral crystals. An example of this is gneiss, which appears to have alternating bands of light and dark crystals. However, a foliated rock with microscopic crystals formed under lower heat and pressure. This rock may appear to be made of layers or plates, like slate.

diagram of igneous rock textures: phaneritic, aphanitic, porphyritic, bubbly, glassy, and pyroclastic

Metamorphic Subtypes

There are two types of metamorphic rocks: foliated and nonfoliated. With a little practice, you can learn to tell them apart. Let’s learn a little more about each.

Metamorphic Foliated

Metamorphic foliated rocks have bands or layers. Some, like gneiss, have alternating bands of light and dark crystals. Others, like phyllite and slate, look like they are made of sheets or layers. Foliation forms when a rock is being squeezed hardest in a particular direction rather than from all sides. This may happen when a rock is buried deep underground. The directed pressure forces the minerals to line up in the same direction, creating the bands or layers.

Metamorphic Nonfoliated

Metamorphic nonfoliated rocks form when the pressure comes from all sides or if the minerals do not line up. Consequently, nonfoliated rocks do not have bands or layers. Instead, nonfoliated rocks are usually a single solid color and made of interlocking mineral crystals. These crystals can be quite large or appear fine-grained. Some nonfoliated rocks, like marble, are prized for their strength and beauty, which makes them popular in construction and fine arts.

Teaching rocks? Check out my printable handouts with info on metamorphic, igneous, and sedimentary rocks!

Examples of metamorphic rocks

Here are some examples of common metamorphic rocks. If you’re studying rock identification or creating a rock collection, you’ll want to make sure to examine the following rocks:

Foliated Rocks

  • Gneiss
  • Schist
  • Phyllite
  • Slate

Nonfoliated Rocks

  • Marble
  • Quartzite
  • Hornfels

What’s Next?

For everyone: there’s more to learn about rocks! Take a closer look at igneous rocks or sedimentary rocks. Or, continue reading more about the rock cycle or the difference between rocks and minerals.

For educators: check out my posts on how to set up a rock ID lab activity, directions for a fun rock ID review bingo game, and a list of rock and mineral activity ideas that you can try in your classroom!

Study this topic with Wild Earth Lab!

Iโ€™ve already created an easy way for you to make teaching rocks & minerals in your classroom fun and engaging! This set includes all the printable materials you need for studying rocks and minerals, including diagrams, readings, activity directions, and worksheets!

Explore more lessons from Wild Earth Lab:

If you enjoyed this post, I know you will love trying my other printable science and nature units in your classroom too!


Are you interested in reading more posts like this? Subscribe or follow Wild Earth Lab using the links below!


References and Further Reading

  1. Earle, S. (2019). Physical Geology. BCcampus Open Education. (Chapters 2-7). Available: https://opentextbc.ca/physicalgeology2ed/
  2. Johnson, C., Affolter, M.D., Inkenbrandt, P., & Mosher, C. (2017). An Introduction to Geology. Salt Lake Community College. (Chapters 3-6). Available: https://opengeology.org/textbook/
  3. Jones, C. E. (n.d.). Igneous Textures. University of Pittsburg. Department of Geology and Planetary Science. Available: https://sites.pitt.edu/~cejones/GeoImages/2IgneousRocks/IgneousTextures.html
  4. Plummer C.C., Carlson D.H., & Hammersley L. (2019). Physical Geology. McGraw-Hill Education. (Chapters 1-7).

Subscribe, share, and comment:

Posted on Leave a comment

Sedimentary Rocks: properties, formation, and subtypes!

students examining rock samples in a science classroom
text that says share this post

Are you ready to learn all about rocks and the rock cycle in your classroom this year? If so, it’s important to know all about the three main types of rocks: igneous, sedimentary, and metamorphic. In this post, we will take a closer look at sedimentary rocks. Get ready to learn all about the formation, subtypes, properties, and examples of sedimentary rocks!

For Teachers: If youโ€™re an educator planning to teach rocks, great visuals and activities are key to deepening understanding! Try my sedimentary rock printables, also found within my complete Rocks Unit – a complete set of all the printable worksheets, activity directions, and visuals you’ll need (plus youโ€™ll support this blog with your purchase! โค๏ธ)

How do sedimentary rocks form?

Sedimentary rocks form at or near the Earthโ€™s surface.  They form from deposits of sediments, minerals, and/or organic matter.

On the Earth, forces like water and shifting temperatures work endlessly to break rocks down. The tiny broken-down pieces of rocks are called sediments. Some of the minerals in rocks may also dissolve in water, the same way sugar dissolves in tea. We call the dissolved minerals solutes.

Sediments and solutes move and are deposited in new places through a process called erosion. As sediments build up, something special happens. Sediments compact together under their own weight or are cemented together by crystallizing minerals. This forms new rocks, known as sedimentary.

Properties of Sedimentary Rocks

There are many different sedimentary rocks, and they do not all look the same. Soft mudstones, rough sandstones, and even coal are all sedimentary! Their varied appearances are influenced by several properties including their mineral makeup and grain (sediment particle) size. Let’s learn more about some of the properties of sedimentary rocks…

Sedimentary Grain Sizes

You already know that many sedimentary rocks are made from compacted and cemented sediments. The size of those sediments determines the type of sedimentary rock. Mudstones are made from the tiniest clay particles that are so small you cannot see them. Sandstones are made from little grains of sand, which you can see with your naked eye if you look at them up close. Conglomerate and breccia are made from the largest sediments – like gravel and small pebbles.

diagram of igneous rock textures: phaneritic, aphanitic, porphyritic, bubbly, glassy, and pyroclastic

Geologists call the size of the particles in a rock the “grain size”. Grain size is important because it impacts the porosity and permeability of a rock. Very porous rocks like sandstone and conglomerate make good aquifers that store water underground. Do you know where your drinking water comes from? If you drink well water, then your drinking water comes from an aquifer!

Sedimentary Composition

Sedimentary rocks contain compacted and cemented grains, crystals of mineral precipitates, or sometimes organic materials. However, each rock has its own special blend of minerals.

Some sedimentary chemical rocks (those made from recrystallized solutes) contain carbonates. Carbonates are minerals that react with acid – just like how baking soda reacts with vinegar. Geology students find out if a rock contains carbonates by placing a drop of acid on the rock and watching for bubbling or fizzing. Rocks that fizz or bubble in a reaction with acid contain carbonates.

Other sedimentary rocks contain organic carbon and consequently burn. Geologists test for organic matter by attempting to combust a rock. The organic matter in the rock will burn in a combustion reaction – allowing the geologist to see how much of the rock was organic.

Sedimentary Subtypes

There are several subtypes of sedimentary: clastic, chemical, organic, and biochemical. They are formed from different materials. Letโ€™s learn a little more about each.

Sedimentary Clastic Rocks

Sedimentary clastic rocks, such as sandstone and siltstone, form from tiny solid particles of rock called sediments. Sediments form through a process called weathering, in which rocks break down over time into smaller pieces. These pieces move around thanks to forces like flowing water, wind, and gravity, eventually coming together to form new rocks.

But how do loose sediments become a solid rock? Two processes, compaction and cementation, are responsible. Compaction happens when sediments are buried and pressed into a rock by the weight above. Cementation happens when water evaporates, leaving behind minerals that act like cement, holding the sediments together. Clastic rocks vary in their grain sizes, from microscopic particles in mudstone to large gravel pieces in breccia and conglomerates.

Sedimentary Chemical Rocks

Have you ever stirred sugar into water until it disappears?  Although you cannot see the sugar, it is still there, dissolved in the water. Like sugar, many minerals dissolve in water too! Most liquid water on Earth contains dissolved minerals.

Now perhaps you are wondering: how does water make rocks? Imagine an ancient ocean, with water rich in dissolved minerals. As time passes, the ocean begins to shrink, eventually drying up completely. When the water evaporates, the minerals from the water recrystallize to form sedimentary chemical rocks. This process, called precipitation, is the opposite of dissolving. Sedimentary chemical rocks are crystalline but often look fine-grained. Some are made of carbonate and react strongly to acid. Rock salt and limestone are two examples of sedimentary chemical rocks.

Sedimentary Organic Biochemical Rocks

Sedimentary organic and biochemical rocks are similar to sedimentary clastic rocks. However, they aren’t composed of sediments but rather form from buried plant and animal matter. Through compaction and cementation, the matter eventually becomes rock. Examples include coal, formed from compressed plant matter, and coquina, made of compacted and cemented shell fragments. These rocks can tell us fascinating stories about life on Earth in prehistoric times!

Examples of sedimentary rocks

Here are some examples of common sedimentary rocks. If you’re studying rock identification or creating a rock collection, you’ll want to make sure to examine the following rocks:

Clastic Rocks

  • Mudstone
  • Siltstone
  • Sandstone
  • Conglomerate
  • Breccia

Chemical Rocks

  • Limestone
  • Rock salt
  • Chert
  • Ironstone

Biochemical and Organic Rocks

  • Fossiliferous Limestone
  • Coquina
  • Diatomite
  • Anthracite
  • Coal

What’s Next?

For everyone: there’s more to learn about rocks! Take a closer look at igneous rocks. Or, continue reading more about the rock cycle or the difference between rocks and minerals.

For educators: check out my posts on how to set up a rock ID lab activity, directions for a fun rock ID review game, and a list of rock and mineral activity ideas that you can try in your classroom!

Study this topic with Wild Earth Lab!

Iโ€™ve already created an easy way for you to make teaching rocks & minerals in your classroom fun and engaging! This set includes all the printable materials you need for studying rocks and minerals, including diagrams, readings, activity directions, and worksheets!

Explore more lessons from Wild Earth Lab:

If you enjoyed this post, I know you will love trying my other printable science and nature units in your classroom too!


Are you interested in reading more posts like this? Subscribe or follow Wild Earth Lab using the links below!


References and Further Reading

  1. Earle, S. (2019). Physical Geology. BCcampus Open Education. (Chapters 2-7). Available: https://opentextbc.ca/physicalgeology2ed/
  2. Johnson, C., Affolter, M.D., Inkenbrandt, P., & Mosher, C. (2017). An Introduction to Geology. Salt Lake Community College. (Chapters 3-6). Available: https://opengeology.org/textbook/
  3. Jones, C. E. (n.d.). Igneous Textures. University of Pittsburg. Department of Geology and Planetary Science. Available: https://sites.pitt.edu/~cejones/GeoImages/2IgneousRocks/IgneousTextures.html
  4. Plummer C.C., Carlson D.H., & Hammersley L. (2019). Physical Geology. McGraw-Hill Education. (Chapters 1-7).

Subscribe, share, and comment:

Posted on Leave a comment

Igneous Rocks: properties, formation, and subtypes!

igneous rocks - texture diagram
text that says share this post

Are you studying rocks and the rock cycle in your classroom this year? If you’re ready to take a deep dive into all things rocks, it’s important to know all about the three main types of rocks: igneous, sedimentary, and metamorphic. In this post, we will take a closer look at igneous rocks. Get ready to learn all about the formation, subtypes, properties, and examples of igneous rocks!

For Teachers: If youโ€™re an educator planning to teach rocks, great learning resources are key to deepening understanding! I think you and your students will love my complete Rocks Unit – a set of all the printable worksheets, activity directions, and visuals you’ll need (plus youโ€™ll support my blog with your purchase! โค๏ธ)

How do igneous rocks form?

All igneous rocks form from molten rock. When molten rock is underground, we call it magma. Molten rock is only called lava when it’s on Earth’s surface. The intense pressure and heat deep underground keep magma in the molten (liquid) form. However, when the heat and pressure lessen, the molten rock solidifies, forming crystals. This can happen very slowly while the rock is still underground. If the molten rock reaches the Earth’s surface, it cools much more rapidly. This is because the surface of the Earth is very cool compared to the Earth’s insides.

Properties of Igneous Rocks

There are many different igneous rocks, and they do not all look the same. Bubbly pumice, smooth obsidian, and sparkly granite are all igneous rocks! Their varied appearances are influenced by their mineral makeup and the specific conditions during their formation. Igneous rocks come in a wide variety of different textures and compositions. Let’s learn more about both of these properties…

Igneous Textures

As molten rock cools, it forms crystals. The size of these crystals depends on how quickly the rock cools. Slow cooling provides time for big, interlocking crystals to form. Rapid cooling makes tiny, fine-grained crystals. We use special terms to describe these different textures: phaneritic (big crystals), aphanitic (tiny crystals), and porphyritic (a mixture of both).  But thatโ€™s not all! Some lava rocks, like pumice, have a bubbly texture filled with tiny holes. Others, like obsidian, are smooth and look glassy. There are even rocks made of many pieces of volcanic debris all stuck together, giving them what is known as a pyroclastic texture.

diagram of igneous rock textures: phaneritic, aphanitic, porphyritic, bubbly, glassy, and pyroclastic

Igneous Compositions

Igneous rocks also come in different colors, which can tell us a lot about the minerals inside them โ€“ i.e., their mineral compositions. Light-colored minerals rich in silicon and oxygen are called felsic minerals. Rocks with lots of felsic minerals, like granite and rhyolite, are usually light and warm in color. On the other hand, dark-colored minerals rich in iron or magnesium are called mafic minerals. Rocks with lots of mafic minerals, like gabbro and basalt, are mostly dark gray, black, or green.

Subtypes

There are two main subtypes of igneous rocks: intrusive and extrusive. The main difference between them is where they form. Intrusive rocks form within the Earth while extrusive rocks form on the Earthโ€™s surface.

Igneous Intrusive Rocks

More specifically, an igneous intrusive rock starts as magma, which is what we call molten rock located underground. The magma is insulated deep within the Earth, so it cools very slowly. The slow cooling allows plenty of time for large interlocking crystals to form. Granite, diorite, and gabbro are examples of igneous intrusive rocks.

Igneous Extrusive Rocks

In contrast, igneous extrusive rocks form when hot lava cools on the Earthโ€™s surface such as when a volcano erupts. Lava cools very quickly on the surface, so there is not enough time for big crystals to form. If you are trying to decide if an igneous rock is intrusive or extrusive, texture is your biggest clue! While intrusive rocks are always made of large interlocking crystals, extrusive rocks come in a variety of other textures: fine-grained, glassy, bubbly, and more! Basalt, rhyolite, and pumice are igneous extrusive rocks.

Examples of igneous rocks

Here are some examples of common igneous rocks. If you’re studying rock identification or creating a rock collection, you’ll want to make sure to examine the following rocks:

Aphanitic or Porphyritic Rocks

  • Granite
  • Diorite
  • Gabbro
  • Peridotite

Phaneritic Rocks

  • Rhyolite
  • Andesite
  • Basalt

Vesicular Rocks

  • Pumice
  • Basalt
  • Scoria

Others (pyroclastic & glassy)

  • Tuff
  • Volcanic Breccia
  • Obsidian

What’s Next?

For everyone: there’s more to learn about rocks! Continue reading more about the rock cycle or the difference between rocks and minerals.

For educators: check out my posts on how to set up a rock ID lab activity, directions for a fun rock ID review game, and a list of rock and mineral activity ideas that you can try in your classroom!

Study this topic with Wild Earth Lab!

Thereโ€™s no need to scramble to put together the perfect rocks lesson  โ€“ Iโ€™ve already created it for you! This set includes all the printable materials you need for studying rocks and minerals.

Explore more lessons from Wild Earth Lab:

If you enjoyed this post, I know you will love trying my other printable science and nature units in your classroom too!


Are you interested in reading more posts like this? Subscribe or follow Wild Earth Lab using the links below!


References and Further Reading

  1. Earle, S. (2019). Physical Geology. BCcampus Open Education. (Chapters 2-7). Available: https://opentextbc.ca/physicalgeology2ed/
  2. Johnson, C., Affolter, M.D., Inkenbrandt, P., & Mosher, C. (2017). An Introduction to Geology. Salt Lake Community College. (Chapters 3-6). Available: https://opengeology.org/textbook/
  3. Jones, C. E. (n.d.). Igneous Textures. University of Pittsburg. Department of Geology and Planetary Science. Available: https://sites.pitt.edu/~cejones/GeoImages/2IgneousRocks/IgneousTextures.html
  4. Plummer C.C., Carlson D.H., & Hammersley L. (2019). Physical Geology. McGraw-Hill Education. (Chapters 1-7).

Subscribe, share, and comment:

Posted on Leave a comment

How to Play Rock ID Bingo: directions for a review game!

rock id bingo cards
text that says share this post

Rock identification can be a challenging but fun subject to teach in any science classroom. If you’ve taught your students the basics of rock ID, but need a fun review game to end your unit or prepare for a test, I’ve got you covered! In this post, I’ll share the materials and directions for playing rock ID bingo in your classroom!

If you’re teaching rock identification, you are probably studying minerals too! If you’d like to review mineral ID as well, you can head over to my separate post about how to play mineral ID bingo!

Before we dive in:ย If you’re an educator planning to try this game with your students, you can save yourself the time of making your own bingo cards and calling cards. My printable rock ID bingo card set is available on TpT and Etsy. The set includes 25 unique bingo cards with illustrations of each rock, plus calling cards with each rock’s key traits and other hints (plus youโ€™ll support this blog with your purchase! โค๏ธ)

Prior Knowledge Required

To do this activity, your students must know the difference between rocks and minerals. They should have already practiced some rock ID and be familiar with common rocks such as:

  • Granite
  • Basalt
  • Pumice
  • Marble
  • Gneiss
  • Slate
  • Sandstone
  • Limestone
a box of rock samples

Furthermore, your class should be familiar with the following rock-related concepts:

You can brush up on rock ID by working through a rock identification lab activity with your class by following these directions. Or, read my list of fun rock & mineral activity ideas for other geology projects and lessons for your classroom.

Finally, you can get my most comprehensive rock and mineral teaching materials in the Rocks and Minerals Unit. It’s my complete set of printable materials for teaching rocks and minerals – with worksheets, activity directions, tons of diagrams, and much more. I know you will love it!

Materials

To play rock ID bingo, you will need the following materials

  • 25 unique bingo cards featuring different rocks (download & print mine here, featuring common rocks, or create your own with your rocks of choice)
  • Calling cards – a list of each rock’s traits (hints) on small pieces of paper or index cards (also included in my printable bingo set!)
  • A hat or bucket
  • Bingo chips or small items (pennies, candies) to place over the squares on the bingo cards

How to Play

Follow these steps to play rock ID bingo with your students:

  1. Each student gets one unique bingo card.
  2. Cut apart the calling cards with each rock’s properties/hints. Place your calling cards into a hat or bucket.
  3. Pull one calling card at a time and read it out loud to the class, sharing the hints and properties of the rock without revealing the name of the rock.
  4. Students should find the corresponding rock on their bingo cards and mark or cover it.
  5. The first student to get four rocks in a row gets โ€œbingoโ€ (across, diagonal, or vertical).
  6. Check the student’s card to ensure all rocks were identified correctly.

Helpful Hints

When reading out clues for a rock, start with the more obscure hints, and then progress to the more obvious clues.

Products Mentioned in this Post:

Thereโ€™s no need to scramble to put together the perfect printable materials for this activity ย โ€“ Iโ€™ve already created it for you! This bingo set includes all the printable materials you need for playing rock ID bingo.

For more rocks and minerals learning fun, try my Rocks & Minerals Unit – a complete set of printable classroom materials for teaching this subject:

Studying mineral ID too? Check out my mineral ID bingo review game as well:

Explore more lessons from Wild Earth Lab:

If you enjoyed this post, I know you will love trying my other printable science and nature units in your classroom too!


Are you interested in reading more posts like this? Subscribe or follow Wild Earth Lab using the links below!


Subscribe, share, and comment:

Posted on Leave a comment

Rock ID Lab: directions and materials list for a classroom geology activity

a box of rock samples

In this activity, students will become familiar with rocksโ€™ physical properties and the basics of rock identification. Students will sort rocks into groups based on their observations and learn about the physical properties of rocks. At the end of the rock ID lab, students can try identifying rocks by type, subtype, and name.

No prior rock ID experience is needed for students to complete this lab activity. Part A especially is a great way for beginners to explore the physical properties of rocks! However, before beginning parts B and C of this activity, students should already be familiar with the rock cycle and the three main types of rocks (igneous, sedimentary, and metamorphic!) and their sub-types.

Before starting the lab, students should also know the difference between rocks and minerals. Often, it makes sense to do a mineral lab before diving into a rocks ID lab. You can find my mineral lab online write up (free) or the printable directions (for purchase).

Please Note: I’ve made the directions for this rock ID lab activity available for free here in this post. However, if you want printable directions, worksheets, flashcards, readings, and teaching posters for a rock ID lab, you can purchase them in my shop. The printable rock ID flashcards are included but also sold individually. Or, you can find all these materials plus more in my complete Rocks and Minerals Unit.

Materials

This activity requires one of each item per lab group unless stated otherwise.

  • 10+ rock  samples labeled with numbers 1-10+
    • Recommended: granite, gabbro, rhyolite, basalt, limestone, conglomerate, mudstone, gneiss, slate, and marble
    • You can complete this lab with a different rock sample set, but it is ideal to have a mixture of common igneous, sedimentary, and metamorphic rocks.
  • Hand lens or microscope
  • Juice of a lemon
  • Eye dropper
  • Student worksheets (1 set per student)
  • Teaching posters
  • Rock cards
Save preparation time AND support my blog: purchase all the printable materials you need to complete a rock ID lab in my shop!

Modifications (optional)

  • To make this rock ID lab simpler, do parts B and C all together as a class.
  • As an alternative to parts B and C, you could tell students which rocks are igneous, sedimentary, and metamorphic and then ask students to find some similarities between the rocks within each group.
  • To simplify part C, tell your students which 10 rock samples they have, but do not tell them which is which. This allows students to use the process of elimination to identify the most difficult samples.

Safety Notes

  • Read and comply with any warnings on the packaging and safety information sheets of rock samples and test kit tools used to complete this lab.
  • Adult supervision is required at all times while completing this lab.

Directions

Part A: Examine the Rocks

  1. Allow the students to familiarize themselves with the rock samples by picking them up, looking at them, etc…
  2. Ask the students to take note of which rock samples…
    • Are light colored?
    • Are dark colored?
    • Have several different colors?
    • Are one solid color?
    • Are made of crystals? (use hand-lens or microscope)
    • Are made of sediment particles stuck together? (use hand-lens or microscope)
    • Are fine-grained?
    • Sparkle?
    • Are dull?
    • Are soft or break or crumble easily?
    • Are very solid and don’t break or crumble?
    • Have stripes or layers? (foliation)
    • React to an acid (lemon juice)?
      • Note for acid reactions: rocks with a very high calcium carbonate content (e.g., marble, limestone, and coquina) should react with a drop or two of acidic lemon juice. They will bubble and fizz. Rocks with a lower calcium carbonate content (e.g., some mudstones) may bubble and fizz slightly.
Need worksheets and handouts? Purchase my set of printable materials that complement this activity!

Part B: Rock Types & Sub-Types

  1. As a class, review or research the properties of igneous, sedimentary, and metamorphic rocks and their sub-types. Create a list of the properties (texture, composition, foliation, etc…) you might see in each of these rock types and subtypes:
    • Igneous:
      • Extrusive
      • Intrusive
    • Sedimentary:
      • Chemical
      • Clastic
      • Biochemical and organic
    • Metamorphic:
      • Foliated
      • Nonfoliated
  2. As you create your lists, introduce/review the following concepts: mafic vs felsic, igneous textures, grain sizes, and foliation. For this step, the teaching posters found in my product will be a helpful visual aid.
  3. Students should write detailed descriptions of each rock sample, noting the following physical properties:
    • Texture (use a microscope or hand lens)
    • Composition
    • Luster
    • Color
    • Foliation (use hand lens if needed)
    • Acid reaction (strong reaction, weak reaction, no reaction)
    • Other properties
  4. See if your students can correctly identify the type or subtype of any of the rock samples.
    • Start with rocks that can be most easily identified. For example, a rock with clear foliation can quickly be identified as a metamorphic foliated rock. A rock that is made of sediment particles cemented together can be quickly identified as a sedimentary clastic rock.
    • It is OK if there are some rocks that your students are unsure about. Discuss why they are unsure and if there are any types/sub-types they can rule out. It may not be possible to identify certain rocks in a classroom setting.
  5. After this part of the lab is complete, reveal which rocks were sedimentary, igneous, and metamorphic. You may also lead a discussion on how the physical properties of rocks relate to how they formed. E.g., large crystals form deep underground, foliation forms under directional pressure, etc…
Teaching posters for this Rock ID activity(available for purchase)

Part C: Rock ID

  1. Pass out the rock information flashcards or a different rock ID guide of your choosing.
    • For an added challenge: encourage students to only look at the front (info/text-only) side of the flashcards while making their IDs. The backs of the flashcards include pictures and names of the rocks.
  2. The students should read the properties listed on each flashcard.
  3. Students can compare the rock properties on the flashcards to their written descriptions of each sample.
  4. Students should do their best to match each rock sample to its correct identity.
  5. Rock ID is challenging: assist students if they become stuck.
  6. End the lab by revealing the correct identity of each sample.
My Rock ID cards make identifying common rocks a breeze!

Study Rocks and Minerals with Wild Earth Lab!

Save time by purchasing all the printable materials you need for a rock ID lab! This set includes all the worksheets, teaching posters, flashcards, and handouts you need for completing this rock ID activity:

OR: you can also find all the above materials plus more in my full Rocks and Minerals Unit:

Explore more lessons from Wild Earth Lab:

If you enjoyed this post, I know you will love trying my other science and nature units in your classroom too!


Are you interested in more earth science activity ideas? Subscribe or follow Wild Earth Lab using the links below!


Subscribe, share, and comment:

Posted on 1 Comment

9 Interactive Earth Science Activities for Homeschool and Classroom Learning

A banner for a blog post about 9 Earth Science Activities for hands-on learning in your classroom and homeschool with a photo of some landforms made of clay and the text "+Free map coloring activity" at the bottom of the banner.
text that says share this post

Are you in search of engaging ways to teach earth science in your homeschool or classroom? Hands-on activities help make complex concepts more memorable and enjoyable for students. Whether you’re building models of Earth’s layers, measuring stream flow, or exploring plate boundaries, these interactive lessons will bring earth science to life in your classroom!

In this post, you’ll find nine earth science activities that are perfect for homeschool parents and classroom teachers looking to inspire curiosity about the earth. Let’s get started!

1. Make a map of the continents and oceans

Teach students the names and locations of the oceans and continents. I’ve created a FREE printable worksheet for this activity. Simply print it out and color in the different continents and oceans with your students. Download the free worksheet here.

2. Measure stream flow

Earth science isn’t just about soils and rocks – water is an important part of our earth too! Hydrologists collect stream measurements to ensure we are not using our water resources too quickly or in unsustainable ways. With a few household items, you can collect river measurements too!

I’ve already written up the full directions for this activity online in my blog. Find the complete guide for this activity with materials and calculations at the end of this blog post about stream measurements! Or better yet, you can support my blog by purchasing the printable directions and handouts for this activity from my shop!

painting showing three people taking measurements in a stream

3. Examine porosity and permeability

Porosity and permeability are important topics in both soil science and geology. Examining soil porosity and permeability is an easy lab experiment that you can complete with common household items. Compare the porosity and permeability of three sediments: gravel, sand, and clay/silt.

You can find the full written directions with materials and calculations for a porosity and permeability lab activity online in my porosity and permeability blog post! You can save time and support my blog with your purchase of the printable directions and handouts for this activity from my shop!

person digging on soil using garden shovel

4. Build a model of the Earth’s layers

There are many ways to build a model of the Earth’s layers. You can model Earth’s three basic (compositional) layers: core, mantle, and crust. Or to make this activity more advanced, make a model of earth’s mechanical layers instead – lithosphere, asthenosphere, etc…

You can make your model of the Earth’s layers out of many different types of materials. A few options include:

  • Play dough or clay
  • Food, such as packing together different colors of rice cereal-marshmallow treats, and candy
  • Construction paper circles
  • Stacked nesting bowls
  • Printable templates, like these ones I created (for purchase in my shop)!
paper model of the layers of the earth
You can find my templates for creating this paper model of the Earth’s layers in my shop!

5. Build a model of the soil horizons snack-tivity!

Perhaps you have made a โ€œcup of dirtโ€ from pudding. But you can turn this simple snack into a tasty science activity by creating a soil horizons parfait!

The basic idea is this: you will make a parfait with 6 layers to represent the 6 horizons. This is an entertaining and tasty way to teach your students about soil horizons during a gardening, soil science, or agriculture unit in your classroom.

Best of all, you can find the online directions for this activity for free on my blog! Alternatively, you can save time and support my website when you purchase the printable directions and handouts for this activity in my shop!

a strawberry yogurt parfait in a cup
Photo by Farhad Ibrahimzade on Pexels.com

6. Identify common minerals

Minerals are the building blocks of rocks and an important topic in any geology or earth science class. You can teach your students how to identify common minerals by following a few simple steps.

I’ve written a whole blog post on how to set up a minerals lab in your classroom or homeschool. You can follow these online directions, or purchase printable directions and handouts from my shop.

Worksheets and classroom handouts
These directions and handouts are available for purchase in my shop.

7. Build play dough landforms

Creating landforms out of play dough or clay is sure to be a memorable earth science lesson for students! All you need is enough play dough for each student. Students can build common landforms such as islands, hills, mesas, peninsulas, isthmuses, and more. Or try creating landforms specific to your area – do you live near volcanoes? Moraines? Caves? Canyons?

I recommend starting by sculpting the following 7 easy landforms:

  • Hill
  • Mountain
  • Island
  • Isthmus
  • Peninsula
  • Volcano
  • Mesa (flat-topped mountain)

This activity is pretty straightforward. But, if you’d like to elevate your landforms lesson with printable directions, landform flashcards, and more, you should check out my landforms unit, available in my shop.

A photo showing classroom handouts for building your own landforms out of play dough
If you need directions and printable materials for this play dough activity, find them within my complete landforms unit

8. Model tectonic plate boundaries with cookies!

Create a model of the three main tectonic plate boundary types using sandwich cookies. Remove the top layer of the sandwich cookie (lithosphere), break it in half, and place it back on top of the crรจme (asthenosphere), arranged as a boundary type.

Be sure to create the following three boundary types:

  • Convergent
  • Divergent
  • Transform
black round cookies on white surface

9. Study earth science with Wild Earth Lab

There’s no need to scramble to put together the perfect earth science unit – I’ve already created several for you! Choose from plate tectonics, rocks & minerals, landforms, water features, the water cycle, glaciers, and soil science! Each is packed with earth science activities, worksheets, readings, and more!

Explore even more units from Wild Earth Lab:

If you enjoyed these earth science activities, I know you will love using my other environmental science materials in your classroom!


Are you interested in more hands-on classroom activity ideas? Subscribe or follow Wild Earth Lab using the links below!

Subscribe, Share, and Comment:

Posted on Leave a comment

7 Rocks & Minerals Activity Ideas: learning activities to try in your classroom!

child's hand holding a model of a fossil and paintbrush

Wild Earth Lab is supported by readers like you. This post includes links to my own products and affiliate products. If you purchase through links on my site, I may earn a small commission at no additional cost to you.

Rocks and minerals are an important topic in the field of geology. Learning about rocks and minerals can be so fun for both kids and adults. Here are 7 hands-on rocks and minerals activity ideas to try out in your classroom or homeschool.

A note for teachers: if you’re planning to teach rocks & minerals, great learning resources are key to deepening understanding. That’s why I created my complete Rocks & Minerals Unit. It’s packed with hands-on lab activities, thoughtfully crafted visuals, and all the worksheets and handouts you need to study rocks and minerals. Plus, every purchase helps support this blog! โค๏ธ

1. Rock Cycle Model

Try making a model of the rock cycle. This is a popular rock and mineral activity for the classroom! There are many ways to do this – with chocolate, marshmallows, Starburst candies, crayons – the list goes on.

The basic concept is this:

  • Sedimentary Rocks: big solid chunks lightly compacted until they stick together. This can be done by cutting up the material into pieces and then squeezing the pieces together in your hands until they stick together.
  • Metamorphic Rocks: warped under heat and/or pressure, but not enough to fully melt. This is done by briefly warming your material to a moderate temperature in an oven and then applying pressure.
  • Igneous Rocks: fully melted, the re-solidified material. This can be done by fully melting your material in an oven and then allowing it to cool at room temperature.
melted chocolate in white bowl
You can use chocolate to model the rock cycle! Melted chocolate symbolizes molten rock! Photo by Monstera Production on Pexels.com

This activity is great for teaching the basics of the rock cycle before continuing on with the other rocks and minerals activity ideas.

2. Mineral Lab

Minerals are the building blocks of rocks. Geologists can examine minerals for their physical properties and then identify them. A minerals lab is super fun because it involves testing minerals for magnetism, acid reaction, and other unique physical properties! To test for these properties, you will need to make or buy a mineral test kit, such as this test kit (external link).

With a little practice, you and your students can identify common minerals too. Read my separate post here about how to set up your own minerals lab in your classroom. You can also download my Minerals Mini Study, which includes all of the worksheets, handouts, and directions that you’ll need for an awesome mineral lab in your classroom!

The activities in the blog post come from my Minerals Mini Study. Download the mini study with worksheets, handouts, directions, and more.

3. Guided Geology Hike

Are there any national parks or state parks in your area? Some have rangers who will put on guided nature hikes covering many topics, including local geology.

If not, you could also reach out to a local geology expert to join your class or homeschool group on a hike to learn about geology. When I was a graduate student, a homeschool group reached out to me to lead a geology hike like this. We hiked a short way through a canyon and talked about how plate tectonics and flowing water helped shape the area.

4. Make Rock Candy

This is a tasty way to learn about mineral precipitates, which you may know form some of our sedimentary rocks, such as limestone. This activity takes several days, during which you will watch crystals form! You can follow a rock candy recipe, such as this recipe (external link).

5. Rock Identification

Rock ID can be challenging, but it is so rewarding to be able to identify common rocks in your area. Learn about foliation, grain size, rock compositions, textures, and more! If you are looking for a good place to get started with Rock ID, I think you’ll love my Rocks Mini Study. It includes all the printable handouts, worksheets, and directions you will need for an awesome Rocks Lab! Another fun activity to try is Rock ID Bingo – more on this below!

If you are looking to learn how to identify rocks, try out my Rocks Mini Study. It includes all the handouts, worksheets, and directions for a rock ID activity!

6. Play Rock or Mineral Bingo

These are great review games for practicing rock and mineral identification. Each student gets a bingo card with different rocks or minerals. The teacher then reads out the properties of a mystery rock or mineral. The students must figure out which rock or mineral it is, then mark it on the bingo card!

I’ve created these mineral bingo and rock bingo sets (complete with calling cards!) to help you play this game in your classroom:

7. DIY Fossils

Unlike living things, which come and go, rocks stick around for incredibly long periods. This allows rocks to act as time capsules, preserving clues about our planet’s past – fossils! Learn about how fossils form by creating your own fossils (external link).

Bonus: see real fossils up close for inspiration! Look for a geology museum in your area to see collections of amazing and rare gems, minerals, rocks, fossils, and much more! You can also look for gem and mineral show events in your area (external link).

paper dyeing with brown dried leaves
Photo by Paul Seling on Pexels.com
white dinosaur skeleton displayed on a wooden table in a museum
Photo by Ansbert Bignon on Pexels.com

Study Rocks and Minerals with Wild Earth Lab

Many of the rock and mineral activity ideas from this post are found in or go great with my complete Rocks and Minerals Unit! It is a complete set of printable materials including worksheets, handouts, classroom posters, lab activities, and much more!

Explore curriculum from Wild Earth Lab:

If you enjoyed the rocks and minerals activity ideas in this post, I know you will love using my environmental science materials in your classroom!


Are you interested in reading more posts with learning activity ideas? Subscribe or follow Wild Earth Lab using the links below!


Sharing options and discussion for this post:

Posted on 3 Comments

Rocks vs Minerals: the difference between rocks and minerals

A banner advertising a blog post with a picture of rocks, and text saying "let's study rocks and minerals" and "the difference between rocks and minerals"

If you are studying rocks and minerals, you may be wondering: “what is the difference between rocks and minerals? Are they the same?”. The simple answer is no, they are not the same. You see, minerals are the building blocks of rocks. Below, we will dive into exactly what a rock and a mineral are, using baked goods as an analogy!

Some common minerals: pyrite, fluorite, gypsum, galena, calcite, quartz, feldspar, and biotite

Rocks vs Minerals: a baking analogy

You may be wondering: are rocks and minerals the same? Well, not quite. Minerals are the building blocks of rocks. If a rock was a baked good, minerals would be its ingredients โ€“ sugar, flour, salt, and so on. Imagine reaching into your pantry for a scoop of sugar. Every time, without fail, it is the same pure substance, consistent throughout. Minerals are just like that โ€“ they always have the same unique makeup, called a chemical composition. Take the mineral calcite, for instance: always made from a chemical compound called calcium carbonate.

Expanding on our baking analogy, letโ€™s explore what happens when you use that sugar in a recipe. Depending on the ingredients you use and how you combine and bake them, you could whip up cookies, bread, pancakes, and more. Similarly, rocks like granite, sandstone, and schist are made from different mineral combinations and form through distinct processes. They share a few of the same mineral ingredients, but are distinguishable from one another.

Now, imagine chocolate chip cookies as a specific rock, like granite. No two chocolate chip cookies are identical, just like no two pieces of granite are identical. Furthermore, there are countless different chocolate chip cookie recipes, each with their own unique twist, but all are alike in that they are baked in an oven and share the same basic ingredients. Similarly, even though not all granite is the same, it always forms from magma cooling underground and is made from the same essential mineral ingredients. You see, unlike minerals, rocks do not stick to a single formula. Each one is its own unique blend crafted by nature.

close up of a woman making a dough with eggs and flour on the table

Why study rocks and minerals?

From the surface to Earthโ€™s deepest layers, rocks form much of our planet. Unlike living things, which come and go, rocks stick around for incredibly long periods. This allows rocks to act as time capsules, preserving clues about our planet’s past. Imagine rocks as storytellers, helping us learn about ancient oceans, ice ages, prehistoric swamps, volcanic eruptions, and more!

Rocks and minerals do much more than tell us about the past. In fact, chances are that rocks and minerals play a role in your day-to-day life! Think about the buildings, roads, and technology you use every day โ€“ many of them are made using rocks and minerals. Glass, cement, metals, and even the graphite in pencils all come from rocks and minerals! Minerals can even be food โ€“ for example, table salt comes from the mineral halite! And donโ€™t forget that certain minerals and rocks are valued for their beauty and are used in jewelry making, sculptures, and other fine arts.

Studying minerals? Be sure to grab my double-sided mineral ID flashcards!
You can also get common rock flashcards here! Identifying characteristics are listed on the back of each flashcard.

Examples of Minerals

  • Apatite
  • Biotite
  • Calcite
  • Copper
  • Diamond
  • Feldspar
  • Galena
  • Gypsum
  • Halite
  • Magnetite
  • Muscovite
  • Pyrite
  • Pyroxene
  • Quartz
  • Talc

Examples of Rocks

  • Basalt
  • Breccia
  • Conglomerate
  • Coquina
  • Diorite
  • Gneiss
  • Granite
  • Limestone
  • Marble
  • Pumice
  • Quartzite
  • Rhyolite
  • Sandstone
  • Schist
  • Slate

Wild Earth Lab’s Rocks & Minerals Unit:

If you are preparing to study rocks and minerals with your class or homeschool, look no further than my Rocks and Minerals Unit. It is a huge set of geology activities, labs, printables, readings, posters, and much more!

Explore curriculum from Wild Earth Lab:

If you enjoyed this post, I know you will love using my environmental science materials in your classroom!


Are you interested in reading more posts about earth sciences? Subscribe or follow Wild Earth Lab using the links below!


References and Further Reading

  1. Earle, S. (2019). Physical Geology. BCcampus Open Education. (Chapter 2). Available:ย https://opentextbc.ca/physicalgeology2ed/
  2. Geology.com (n.d.). What are Minerals? Available: https://geology.com/minerals/
  3. GeologyScience (2018). Top 10 Minerals Used in Everyday Life. Available: https://geologyscience.com/gallery/geologic-lists/top-10-minerals-used-in-everyday-life/
  4. Johnson, C., Affolter, M.D., Inkenbrandt, P., & Mosher, C. (2017). An Introduction to Geology. Salt Lake Community College. (Chapter 3). Available:ย https://opengeology.org/textbook/
  5. Plummer C.C., Carlson D.H., & Hammersley L. (2019). Physical Geology. McGraw-Hill Education. (Chapters 1-2).

Sharing options and discussion for this post:

Posted on 2 Comments

Minerals Lab: a hands-on geology activity for your classroom!

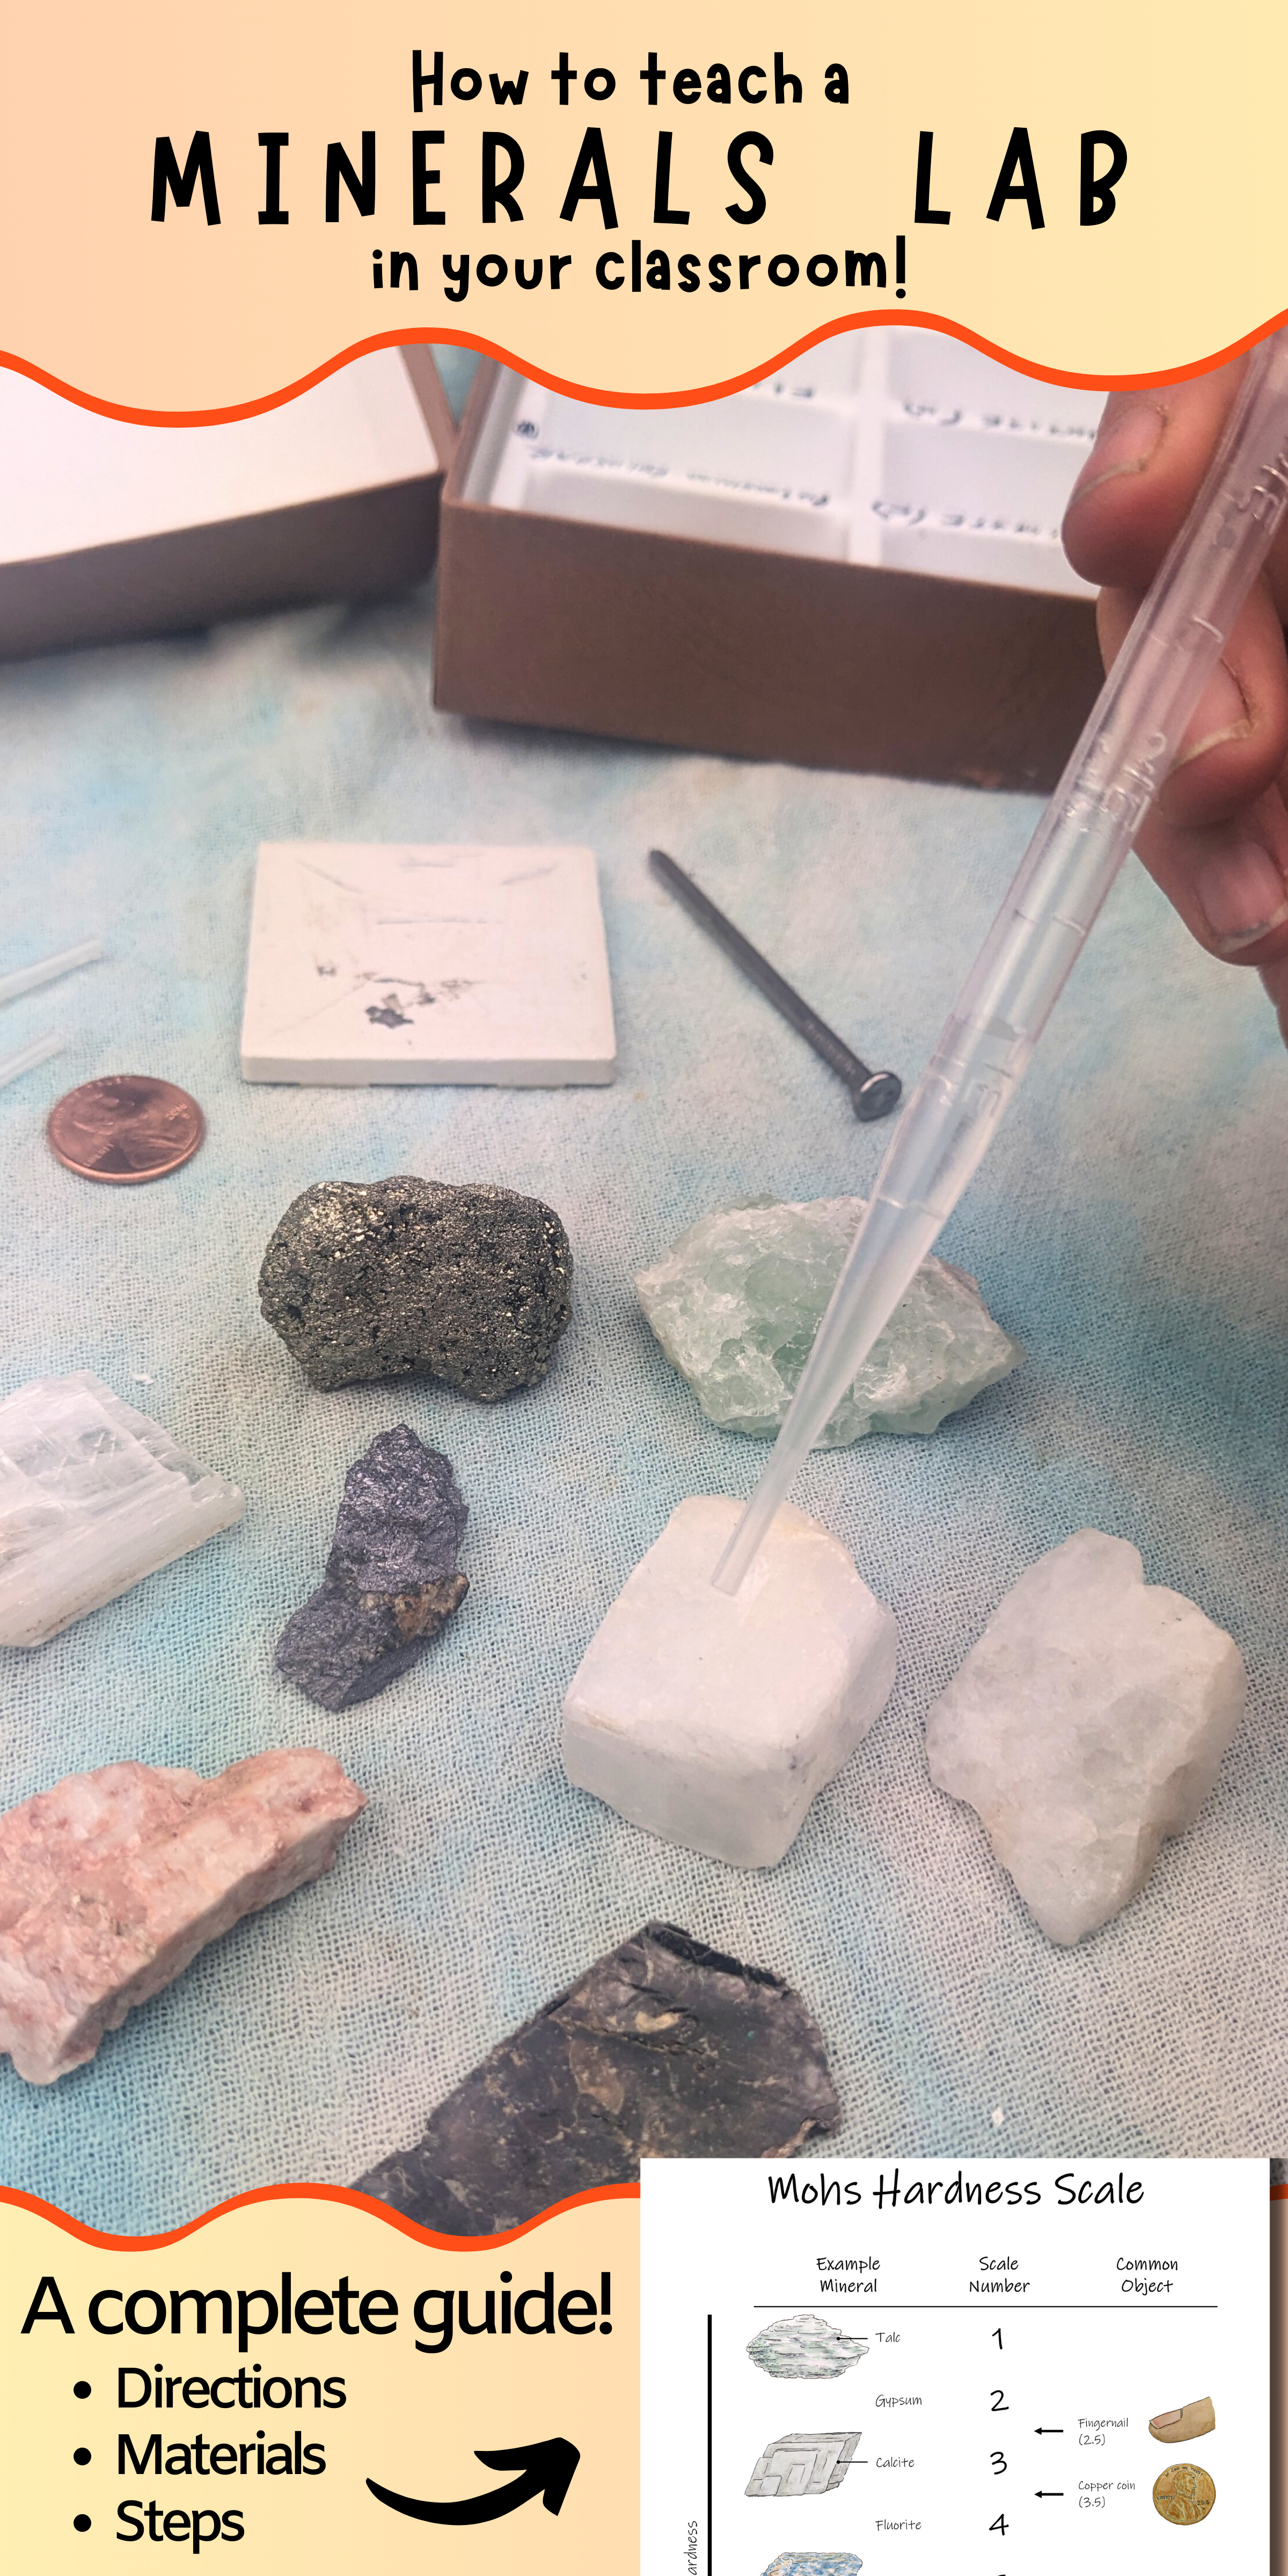
A banner saying "how to teach a minerals lab in your classroom!" and "A complete guide! Directions, materials, steps", with a picture of an eyedropper held over some minerals

Wild Earth Lab is supported by readers like you. This post includes links to my own products and affiliate products. If you purchase through links on my site, I may earn a small commission at no additional cost to you.

In this lab, you will dive into the amazing world of minerals! Minerals are the building blocks of rocks, but they are also so much more. In fact, chances are that rocks and minerals play a role in your day-to-day life! Think about the buildings, roads, and technology you use every day โ€“ many of them are made using rocks and minerals. Glass, cement, metals, and even the graphite in pencils all come from rocks and minerals! Minerals can even be food โ€“ for example, table salt comes from the mineral halite!

In this activity, students will begin by sorting and comparing different mineral samples. This will help your students begin thinking about the similarities and differences between minerals – an important step in learning to identify minerals. Then, students will learn about the physical properties of minerals. Your students will love testing minerals for acid reactions, magnetism, streak, and more! Finally, end this lab by attempting mineral identification.

A Special Note for Teachers: In this post, you will learn how to set up a minerals lab in your classroom. You can also get printable versions of these directions, worksheets, handouts, and directions to use during this lab in myย Minerals Mini Study or in my complete Rocks and Minerals Unit! (And you’ll support this blog with your purchase! ๐Ÿ’š)

The activities in the blog post come from my Minerals Mini Study. Download the mini study with worksheets, handouts, directions, and more.
Materials (per lab group)
  • Mineral Sample Set
    • Assemble your own test kit with any 10+ mineral samples (e.g., feldspar, quartz, calcite, halite, muscovite, pyrite, magnetite, gypsum, amphibole, and pyroxene)
  • Mineral Test Kit (assemble your own, or purchase a pre-made test kit)
    • Hand lens or microscope
    • Black and white streak plates
    • Magnet
    • Glass plate or nail
    • Copper coin
    • Eye dropper/acid bottle
    • Juice of a lemon
  • Scale
  • Beaker of water
  • Mineral info, such as these Double-sided Mineral Flashcards
  • Student worksheets
  • Permanent marker (for instructor use only)
  • Tiny labeling stickers (for instructor use only)
Set Up
  1. Label the mineral samples with numbers. This can be done with small labeling stickers and a permanent marker.
  2. Place a set of minerals at each lab station.
  3. If you do not have access to mineral samples, it is possible to complete parts 1 and 2 only of this lab using mineral picture cards like these instead.
  4. Assemble the test kits, which you will use for parts 3 and 4 only. Each lab group should have one of each: hand lens/microscope, magnet, beaker of water, scale, lemon juice with eye dropper, streak plate, glass plate, and copper coin.
Part 1: Sorting Minerals
  1. Ask students to look over the mineral samples and pick them up, feel them, etc.
  2. Students should sort the minerals. Which minerals:
    • Are light colored?
    • Are dark colored?
    • Are see-through?
    • Look like metal?
    • Are soft or breakable?
    • Are hard?
    • Have flat surfaces?
    • Are jagged or rough?
  3. Students may record their answers in Part 1 on the student worksheet, available here.
You can find all the worksheets for completing this lab activity in my Minerals Study on Etsy!
Part 2: Compare and Contrast
  1. Students will compare and contrast pairs of minerals. You should select up to 6 pairs of minerals for students to compare and contrast.
  2. Write the pairings you selected on the board for the students to see, using the mineralsโ€™ numbers rather than their names. Below are some good pairs for this part, but work with what is available to you.
  3. For each pairing, students should find at least one difference and one similarity.
  • Feldspar and quartz
  • Calcite and halite
  • Muscovite and gypsum
  • Pyrite and magnetite
  • Quartz and gypsum
  • Amphibole and pyroxene
Part 3: Physical Properties of Minerals
  1. Briefly explain the physical Properties of Minerals: color, streak, luster, hardness, magnetism, acid reaction, density, cleavage/fracture, and crystal form. More info on these properties can be found in this blog post.
  2. Then give the students time to examine each mineral for each property. Work through one property at a time, examining all minerals for the property.
  3. Students should use a table to record each physical property for each mineral.
  4. Below are a few key things to keep in mind as you teach the physical properties of minerals:
Mineral physical properties – key reminders
  1. Color: do not rely on color alone to identify a mineral. This property varies a lot and can be deceiving.
  2. Streak: scratch the mineral across both black and white streak plates like sidewalk chalk. Please note that some minerals will leave no streak at all.
  3. Luster: this is a descriptive property, describing the “shininess” of a mineral. A mineral’s luster is described using words like “glassy”, “metallic”, “dull”, “sparkly”, and more.
  4. Hardness: scratch a mineral against each of the items from the Mohs hardness scale (fingernail, coin, glass plate, streak plate). If the item scratches the mineral, then the mineral is softer than the item. If the mineral scratches the item, then the mineral is harder than the item. The streak plate can be confusing, because minerals that are harder than the streak plate do not leave behind any streak.
  5. Magnetism: perhaps the most straightforward property; this simply means whether or not the mineral is attracted to a magnet.
  6. Acid reaction: a drop or two of lemon juice should be enough to observe a reaction with calcite.
  7. Density: use the scale to measure the mass of a mineral. Then place the mineral into a beaker of water. The volume of water displaced is equal to the mineralโ€™s volume. Density equals mass divided by volume.
  8. Planes of cleavage, fracture and crystal form: these can be challenging properties for beginners, and may be skipped. For advanced groups, teach these properties and include them under the โ€œother propertiesโ€ column on the observations worksheet. You can read more about these properties here.
Mohs hardness scale
Mineral Planes of Cleavage and Fracture
Part 4: Mineral ID
  1. If you attempt this step, keep in mind that mineral identification is challenging, especially for beginners, and may not be possible for all samples in a classroom setting.
  2. Students will need to compare their recorded observations to a list of known physical properties for various minerals, such as these mineral ID flashcards.
  3. Then, students should make an educated guess on the identity of each mineral sample.
Studying minerals? Be sure to grab my double-sided mineral ID flashcards!

Rocks and Minerals Unit

All of the lessons and materials seen in this post can also be found in my complete Rocks and Minerals Unit.

Explore units from Wild Earth Lab:

If you enjoyed this post, I know you will love using my earth and environmental science materials in your classroom!


Are you interested in reading more posts about earth sciences? Subscribe or follow Wild Earth Lab using the links below!


References and Further Reading

  1. Earle, S. (2019). Physical Geology. BCcampus Open Education. (Chapter 2). Available: https://opentextbc.ca/physicalgeology2ed/
  2. Johnson, C., Affolter, M.D., Inkenbrandt, P., & Mosher, C. (2017). An Introduction to Geology. Salt Lake Community College. (Chapter 3). Available: https://opengeology.org/textbook/
  3. Plummer C.C., Carlson D.H., & Hammersley L. (2019). Physical Geology. McGraw-Hill Education. (Chapters 1-2).

Sharing options and discussion for this post:

Posted on 3 Comments

The Physical Properties of Minerals: color, luster, hardness, and more!

A banner that says "the physical properties of minerals!", "Geology!", and "Resources for Identifying Minerals"

Are you studying rocks and minerals? Mineral identification may seem challenging at first, but by using these physical properties, you can identify many common minerals! Below, you will find a list of the physical properties of minerals that will help you identify minerals.

Before we dive in: If youโ€™re an educator planning to teach mineral physical properties, great activities and visuals are key to deepening understanding! I think you and your students will love my Minerals Mini Study, which you can also find within my complete Rocks and Minerals Unit (plus youโ€™ll support my blog with your purchase! โค๏ธ)

Color

Color(s) can help you identify a mineral. But proceed with caution โ€“ some minerals come in several different colors. Many different minerals are the same or similar colors as one another. For these reasons, color can be a deceptive property.

Streak

Streak is the color that a mineral leaves behind when you rub it across a streak plate. A streak plate is a hard porcelain plate for testing minerals. It is easiest to observe the color of mineral streaks if you have both a black and a white streak plate.

You can rub the mineral across the streak plate like sidewalk chalk, to see the color of the mark it leaves behind. Very hard minerals like quartz and diamond will not leave a streak at all.

A streak plate

Luster

Luster is a descriptive property, describing the โ€œshininessโ€ of a mineral. It can be described using words like โ€œmetallicโ€, โ€œnon-metallicโ€, โ€œglassyโ€, pearlyโ€, โ€œadamantineโ€, โ€œdullโ€, and more.

Studying minerals? Be sure to grab my double-sided mineral ID flashcards! (Also found within my minerals mini study and Rocks & Minerals Unit)

Hardness

You can think of hardness as โ€œscratch-abilityโ€. For example, a mineral that I can scratch with my fingernail is very soft. A mineral that can scratch glass is fairly hard. Hardness is measured on a scale of 1 to 10 with 1 as the softest and 10 as the hardest.  Refer to the Mohs Hardness Scale poster for more details.

Think of it this way: if the item scratches the mineral, then the mineral is softer than the item. If the mineral scratches the item, then the mineral is harder than the item. The streak plate can be confusing because minerals that are harder than the streak plate do not leave behind any streak.

Mohs hardness scale

Magnetism

Is a mineral magnetic? Find out by holding a magnet close to the mineral. This is perhaps the most straightforward physical property and is very easy to test if you have a magnet.

Acid Reaction

Carbonate minerals will react to acid. This is an acid-base reaction, similar to baking soda and vinegar. When the acid touches the mineral, you will see fizzing and bubbling.

A drop or two of acid will be enough to see a reaction. You can even use lemon juice as an acid to see a reaction in minerals made of carbonate!

Density

Density is mass divided by volume. It is a number that tells us about how much space something takes up relative to its mass.

Use a scale to measure the mass of a mineral. Then place the mineral into a beaker of water. The volume of water displaced is equal to the mineralโ€™s volume. Density equals mass divided by volume.

If you do not have a scale, you can also roughly estimate density by holding a mineral. Does it feel unusually heavy or light for a mineral of its size?

Cleavage and fracture

How does the mineral look when it breaks? Some minerals break along one or more flat surfaces called planes of cleavage. When describing planes of cleavage, pay attention to both the number of different planes and the angle(s) at which they intersect.

A mineral that fractures breaks more randomly, appearing jagged or rounded. Conchoidal fracture is a special type of fracture, in which the mineral breaks along smooth, curved surfaces. Quartz is one example of a mineral with conchoidal fracture.

Mineral Planes of Cleavage and Fracture

Crystal form

When a mineral forms crystals, what shape are they? Crystal form means the shapes that naturally develop during formation, rather than the way the mineral breaks.

What’s next?

Once you and your students master the physical properties of minerals, you’re ready to move on to learning how to identify common minerals. You can also teach your students about the difference between rocks and minerals and learn to identify common rocks.

Looking for specific activities? Take your lessons up a notch with my blog post on 7 rock and mineral activity ideas! You can also save time on lesson planning by purchasing my complete Rocks and Minerals Unit (more info below โ†“)!

Wild Earth Lab’s Rocks & Minerals Unit:

If you are preparing to study rocks and minerals with your class or homeschool, look no further than my Rocks and Minerals Unit. It is a huge set of printable geology activities, labs, handouts, readings, posters, and much more!

Explore more lessons from Wild Earth Lab:

If you enjoyed this post, I know you will love using my earth and environmental science materials in your classroom!


Are you interested in reading more posts like this? Subscribe or follow Wild Earth Lab using the links below!


References and Further Reading

  1. Earle, S. (2019). Physical Geology. BCcampus Open Education. (Chapter 2). Available: https://opentextbc.ca/physicalgeology2ed/
  2. Geology.com (n.d.). What are Minerals? Available: https://geology.com/minerals/
  3. GeologyScience (2018). Top 10 Minerals Used in Everyday Life. Available: https://geologyscience.com/gallery/geologic-lists/top-10-minerals-used-in-everyday-life/
  4. Johnson, C., Affolter, M.D., Inkenbrandt, P., & Mosher, C. (2017). An Introduction to Geology. Salt Lake Community College. (Chapter 3). Available: https://opengeology.org/textbook/
  5. Plummer C.C., Carlson D.H., & Hammersley L. (2019). Physical Geology. McGraw-Hill Education. (Chapters 1-2).

Sharing options and discussion for this post: