In this post, you will learn about pollination: the process of pollen transfer between flower parts. Then, you will read about the important role that insect pollinators like honeybees play in this process.
Before we dive in: If you’re an educator planning to teach pollinators and pollination, great learning resources are key to deepening understanding! You can download a printable handout version of this article with a vocab list and review activity! Or, you can also find these materials within my complete Insects Unit (plus you’ll support my blog with your purchase! ❤️)
You can download this article as a printable classroom handout – complete with a vocab list and reading comprehension activity
Pollination is the movement of pollen from one flower part to another. Specifically, pollen is moved from the stamen (male flower part) to the carpel (female flower part) of a flower. After a flower is pollinated, a fruit begins to grow. Fruits contain seeds, which will grow into new plants.
The stamen and carpel of a flower. Pollen moves from the stamen to the carpel during pollination.
What are Pollinators?
Plants cannot move. So how do they get their pollen from the stamen of one flower to the carpel of another? Many plants rely on animals called pollinators to help with pollination. Pollinators are animals that carry pollen from flower to flower. Many pollinators are insects, such as bees. However, birds, mammals, and other animals can also be pollinators!
Pollinators visit flowers to feed on flower nectar or pollen. When they do this, they help carry pollen from one plant to another. Pollen from the stamen attaches to the body of a pollinator. As the pollinator visits other flowers, some of the pollen rubs off onto their carpels.
When this butterfly drinks nectar, it brushes against flowers’ stamens and carpels. As it flies from flower to flower, it carries pollen from one plant to another.
Working Together: Pollinators and Plants
Plants and pollinators have a symbiotic relationship– a close relationship between two living things. Both the plant and pollinator benefit from this close relationship. The pollinator gets a tasty meal of nectar. The plant gets pollinated so it can make seeds and reproduce. It’s a win-win!
Pollinators are very important in their ecosystems because they help plants make fruits and reproduce. Many pollinated plants produce fruits, seeds, and leaves that other animals eat. Pollinators also help humans because they pollinate many of our food crops. For example, a tomato could not form from a tomato plant’s flower without being pollinated by a bee!
Download this Article As a Printable Handout
Includes a vocab list and review activity worksheets – ideal for classroom use!
You can download this article as a printable classroom handout – complete with a vocab list and reading comprehension activity
Or: Find these materials within my complete Insects Unit
There’s no need to scramble to put together the perfect insects lesson – I’ve already created it for you! This set includes all the printable materials you need for studying insects.
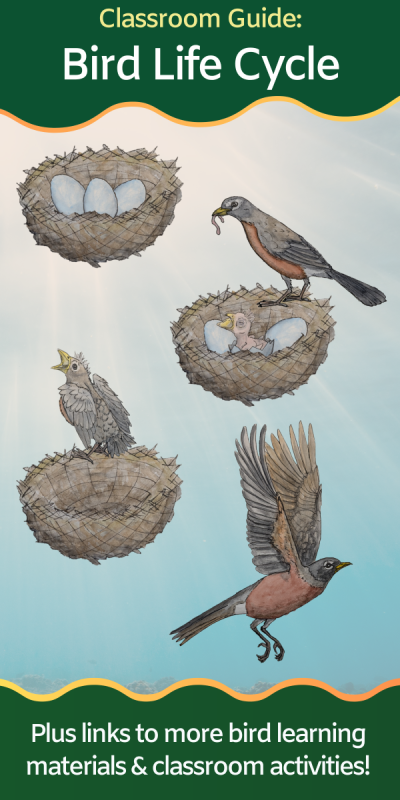
In this post, we’ll dive into the stages of the bird life cycle: egg, hatchling, nestling, fledgling, and adult. At the bottom of this post, you’ll find links to bird life cycle learning materials and more educational posts and activities related to birds. Get ready to take flight into the world of birds with your classroom!
Before we dive in: If you’re an educator planning to teach bird life cycles, great learning resources are key to deepening understanding! I think you and your students will love my bird life cycle mini study, which you can also find within my complete Bird Unit (plus you’ll support my blog with your purchase! ❤️)
Life Begins in an Egg
Baby birds hatch from eggs. Inside an egg, a chick develops while protected by a hard eggshell. The unborn chick is nourished by a yolk, which provides food as it grows.
Most birds lay their eggs in nests, which they build in trees, on the ground, on cliffs, or even on buildings. Nests come in several shapes and sizes. Some are tiny woven cups made of dried grass, while others are huge platforms constructed from sticks. Parent birds sit on the nest to keep the eggs warm, an act called incubation.
Hatching
When chicks hatch, they use a special bump on their bill called an egg tooth to crack open the eggshell. Newly hatched chicks are small, weak, and cannot care for themselves. They are sometimes called hatchlings. Many are born with their eyes sealed closed. They have only a few soft feathers called down to help keep them warm.
Growing and Fledging
Parent birds play a critical role in caring for their young chicks in the nest, sometimes called nestlings. They bring food, protect the nest, and keep chicks warm. As the chicks grow, they develop flying feathers and stronger muscles. Eventually, they leave the nest for the first time. This stage is called fledging. Young birds at this stage are known as fledglings. Even after leaving the nest, fledglings may still rely on their parents until they learn to find food and fly longer distances. As adults, birds may migrate, build their own nests, and establish territories.
More Bird Posts & Classroom Activities:
Continue learning about birds in your classroom with these educational posts and activities for kids:
Study birds and their life cycles with Wild Earth Lab!
There’s no need to scramble to put together the perfect lesson on birds and their life cycles. I’ve already created it for you! This bird unit includes all the printable materials you need for studying bird life cycles, adaptations, anatomy, types of birds, and much more!
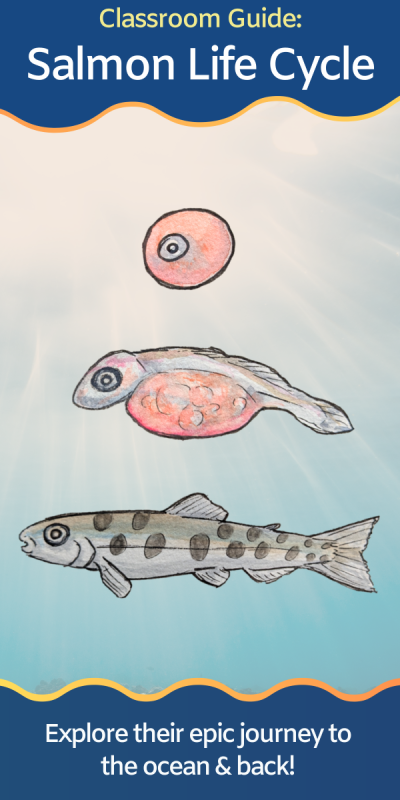
Salmon have one of the most incredible life cycles among fish. Unlike most fish, salmon live in two very different habitats—freshwater and saltwater. They begin their lives in cool, clear mountain streams, but migrate to the ocean where they spend much of their adulthood. Later, they make an epic journey back upstream to where they were born to lay eggs and start the cycle all over again.
Before we dive in: If you’re an educator planning to teach salmon or fish life cycles, great learning resources are key to deepening understanding! I think you and your students will love my salmon mini study, which you can also find within my complete Fish Unit (plus you’ll support my blog with your purchase! ❤️)
Life Begins in a Stream
A female salmon lays her eggs in a gravel nest in a freshwater stream. When the eggs hatch, the tiny fish are called alevins. They stay hidden among the gravel, sustained by the nutrients in their yolk sacs. Once the yolk sac is gone, they become fry and begin to feed and swim freely. As they grow, faint markings appear on their sides—these young fish are now called parr. They feed and begin defending small territories within the stream.
Salmon development – from egg to fry.
Journey to the Ocean
When the salmon are large and strong enough, they go through changes that prepare them for saltwater life. At this stage, they are called smolts. The smolts migrate downstream, swimming with the current, to the ocean. In the ocean, they will spend several years feeding on ocean prey and growing into adult salmon.
Returning Home
After maturing in the ocean, adult salmon return to the same stream where they were born—a journey that can cover hundreds of miles! This journey is especially challenging because the fish are swimming into the current. They must navigate around obstacles like fast-flowing water, log jams, and even waterfalls!
Once they reach their birthplace, the spawning adults lay and fertilize eggs. Female salmon lay their eggs in gravel nests, where they will hatch and begin the next generation of salmon. After spawning, most salmon die, but their bodies provide nutrients that enrich the stream ecosystem.
Examples of female and male adult spawning salmon.
The role of salmon
Salmon are a key part of both ocean and land ecosystems. In the ocean, they serve as food for animals like sharks and seals. When they return to freshwater, they feed predators such as bears, eagles, and otters. Even after death, their bodies nourish the soil and plants near the streams, making salmon vital to the health of the whole ecosystem.
Salmon in a stream. Photo by Line Knipst on Pexels.com
Salmon face many challenges throughout their long journey. Dams can block their migration routes, making it hard for them to reach their spawning grounds. Competition with invasive fish species can also reduce the number of young salmon that survive to adulthood. Human activities—like building cities and roads, farming, and mining—can damage salmon habitats by changing stream flow, increasing pollution, and removing trees that shade and cool the water. Climate change adds even more stress, warming rivers and oceans, altering streamflow patterns, and shifting ocean currents that salmon depend on for food and navigation.
To help, people are taking action. Fish ladders and fish-friendly dams allow salmon to swim upstream more easily. Habitat restoration projects work to clean up streams and remove barriers to migration. Scientists are also studying how to protect salmon as the climate changes, ensuring these remarkable fish can continue their journey for generations to come.
Study fish and salmon with Wild Earth Lab!
There’s no need to scramble to put together the perfect lesson on salmon or fish life cycles – I’ve already created it for you! This fish unit includes all the printable materials you need for studying fish life cycles, salmon, and more.
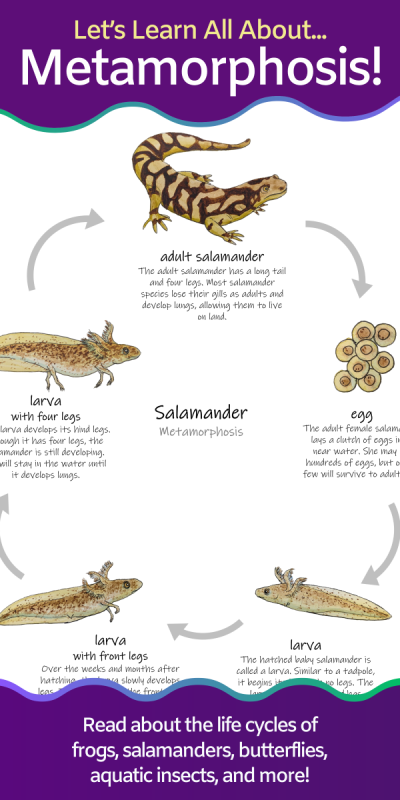
From tadpoles turning into frogs to caterpillars transforming into butterflies, metamorphosis is one of nature’s most incredible processes. Understanding metamorphosis helps students see how organisms grow, adapt, and survive in their environments. Whether you’re exploring amphibians, insects, or life cycles in general, this fascinating transformation is a perfect way to bring nature and science to life in your classroom.
📚A Note for Teachers 🍎: If you’re an educator planning to teach metamorphosis and animal life cycles in your classroom, great learning resources are key to deepening understanding! You can find materials for teaching metamorphosis in my Amphibians Unit and Insects Unit, as well as my Aquatic Macroinvertebrates Unit – plus tons of other materials and activities for these fun topics! (And you’ll support this blog with your purchase! ❤️)
Metamorphosis is a process where an animal’s body changes form at different stages of its life cycle. Many insects and amphibians go through metamorphosis, developing in two or more distinct stages, like a legless tadpole becoming a frog or a wingless caterpillar transforming into a butterfly.
In contrast, reptiles, birds, and mammals (including humans) do not undergo metamorphosis. Consider human babies—as we grow, we get bigger and taller, but our basic body shape stays the same. We don’t develop wings, extra limbs, or entirely new body parts like a butterfly or frog.
Amphibians and Metamorphosis
The word “amphibian” means “double life”, referring to how most amphibians begin their lives in water before transitioning to land. This transformation happens through metamorphosis. Take frogs, for example – tadpoles swim using their tails and breathe underwater through gills. During metamorphosis, they grow limbs and lungs, allowing them to live on land as adults. Just like tadpoles transform into frogs, most salamanders start as aquatic, legless larvae before developing their adult forms.
Salamander Life Cycle Diagram
Most amphibians go through metamorphosis, but there are a few exceptions. Some species of caecilians, a group of legless amphibians, develop differently and don’t go through metamorphosis the way frogs and salamanders do.
Insects and Metamorphosis
Amphibians are not the only animals that go through metamorphosis. Many (though not all) insects go through metamorphosis too. One of the most classic examples is a butterfly. A butterfly starts life as a wingless larva called a caterpillar, a life stage in which the main goal is to eat and grow! After some time, the caterpillar stops munching and forms a chrysalis. During this stage, called the pupa stage, it doesn’t eat, but continues to develop. Finally, the winged butterfly emerges from its chrysalis – now it is an adult.
However, butterflies are far from the only insect to go through metamorphosis. Caddisflies, ladybugs, beetles, and ants are a few other examples of insects whose lives take place in three stages: larva, pupa, and adult. Insects like these with three distinct life stages go through what scientists call “complete metamorphosis“. In contrast, some other insects, like dragonflies and mayflies, go through “incomplete metamorphosis“. These insects only have two life stages: nymph and adult.
Why Metamorphosis?
Why change forms at all? Metamorphosis helps animals use different habitats and resources at each stage of life. For example, tadpoles live in aquatic habitats like ponds and eat plants, so they have gills, a small mouth, and a tail for swimming. But as they grow into adult frogs that hunt insects on land, they develop lungs, strong legs, and a wide mouth with a sticky tongue for catching prey.
Similarly, caddisflies, mayflies, dragonflies, and other aquatic insects begin their lives in water as larvae or nymphs. This allows them to feed on aquatic plant matter, detritus, or small organisms found in habitats at the bottoms of streams and ponds. As they go through metamorphosis, these insects emerge from the surface of the water as winged adults. After this, they use their wings to take advantage of a new habitat above the surface. For example, adult dragonflies are ferocious aerial predators of other insects. Contrastingly, adult mayflies do not eat at all, but simply use their short adult life stage to fly around and find a mate.
Finally, consider butterflies. Unlike frogs and aquatic insects, a butterfly lives on land for its whole life. However, butterflies use different food sources at different stages. For example, the monarch butterfly is in a close symbiotic relationship with the milkweed plant. As a caterpillar, the monarch eats the milkweed leaves. After metamorphosis, the adult butterfly eats a different part of the milkweed plant – the nectar of the milkweed flowers. As an added benefit, when the adult butterfly drinks flower nectar, it pollinates milkweed plants, which helps the plants reproduce. Thanks to the butterfly’s pollination services, a new generation of milkweed plants will grow, providing leaves for future caterpillars to eat!
A monarch butterfly caterpillar munches on milkweed.
Study Metamorphosis with Wild Earth Lab!
Whether you’re teaching your students about the metamorphosis of amphibians or insects, I’ve got the perfect learning resources for you! These sets include all the printable materials you need for studying amphibians and aquatic insects – including life cycle diagrams and much, much more!
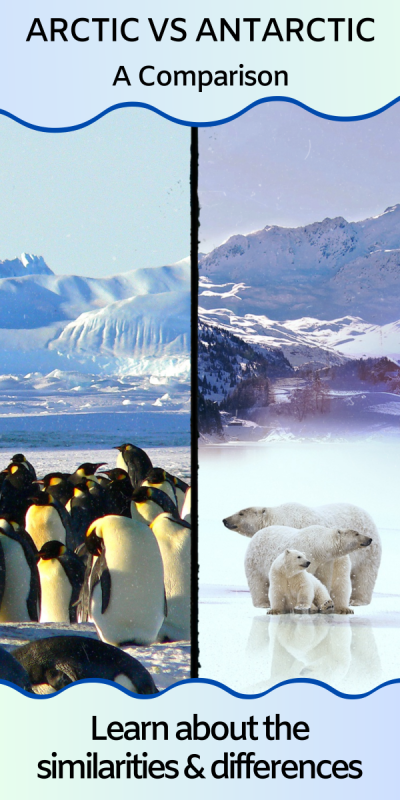
The Arctic and Antarctic sit at opposite ends of the Earth. While these icy extremes share surprising similarities, there are some big differences between them too. From their unique geographies to the wildlife and weather, these polar regions offer endless opportunities for comparison. In this post, we’ll explore the fascinating ways the Arctic and Antarctic are alike—and how they differ.
Before we dive in: If you’re an educator planning to teach about the Arctic or Antarctica in your classroom, great learning resources are key to deepening understanding! I think you and your students will love my Arctic and Antarctica Units (plus you’ll support my blog with your purchase! ❤️)
Arctic vs Antarctic: key differences & similarities
The Arctic and Antarctic are polar regions, located at opposite ends of our planet. At the center of the Antarctic, you will find the South Pole. The North Pole is in the center of the Arctic. Though they are far apart, the Arctic and Antarctic are similar in many ways. For example, both have a period of round-the-clock daylight in mid-summer and a period of total darkness in mid-winter. Furthermore, both the Arctic and Antarctic experience some of the coldest temperatures on our planet.
Geography
Geographically, there are some big differences between the Arctic and Antarctic. The Antarctic Circle is centered over one big continent: Antarctica. On the other hand, the Arctic Circle is filled by the Arctic Ocean, islands, and coastlines. Both the Arctic and Antarctic have lots of ice. Antarctica is covered in a gigantic glacial ice sheet and surrounded by seas covered in ice shelves and pack ice. The Arctic is filled with lots of floating sea ice.
Animals & Plants
The Arctic and Antarctic are home to some of the same animals. Both have whales, seals, and seabirds. But the similarities end there. For example, you won’t find penguins in the Arctic – they live in Antarctica only. This is good for the penguins because there are hungry polar bears in the Arctic. Polar bears are not the only animals found in the Arctic but not in the Antarctic. Walrus, puffins, reindeer, wolves, and foxes are all found in the far north, but not in Antarctica.
Compared to other places, both the Arctic and Antarctic have very few plants. So what do the animals eat? Tiny plants in the ocean called phytoplankton are an important food source in the Arctic and Antarctic. The phytoplankton are food for little ocean invertebrates called zooplankton (e.g., krill). The krill feed many larger animals – from fish and seabirds to baleen whales!
Weather and More
Both the Arctic and Antarctic are pretty chilly year-round. However, they get their coldest weather at different times of year. In July, when it is summer in the Arctic, it is winter in the Antarctic. Then in January, it is winter in the Arctic but summer in the Antarctic.
Another cool thing about the Arctic and Antarctic is that they both have dancing polar lights in the sky at night. These lights are called the Aurora Borealis in the north and Aurora Australis in the south. These incredible, natural light shows are caused when tiny particles from the sun bump into the Earth’s magnetic field.
Teaching Polar Regions in Your Classroom
There’s no need to scramble to put together the perfect lesson for the polar regions – I’ve already created it for you! This set includes all the printable materials you need for studying this subject.
If you enjoyed reading about the Arctic vs the Antarctic in this post, I know you will also love my printable science and nature units in your classroom!
Antarctica and the Arctic are the coldest places on Earth, yet many animals not only survive but thrive in these icy environments. How do they do it? Polar animals have incredible adaptations that help them cope with extreme cold and scarce food in winter. Let’s explore five fascinating polar animal adaptations that make life in the Arctic and Antarctica possible.
Before we dive in: If you’re an educator planning a study of the polar regions, check out my Polar Bundle! It combines my full Arctic and Antarctic learning units at a discount—perfect for busy teachers and homeschoolers looking to bring polar science to life in their classrooms.
1. Hibernation
Some polar animals survive the winter by hibernating. Hibernation is more than just sleeping: the animal’s breathing rate, body temperature, and heart rate become much lower than normal. This helps the animal conserve energy when food is scarce in winter. During hibernation, animals usually stay in a safe, protected space like a den or burrow.
Even if an animal doesn’t hibernate, it may still find a cozy hiding place to escape the cold. A den, borrow, or even a tunnel under the snow will keep an animal sheltered from the wind and cold. Inside, the animal will rest and reduce its activity to conserve energy, but they don’t enter full hibernation.
Examples of animals that shelter in burrows/dens:
Arctic lemmings
Polar bears (females while birthing cubs overwinter)
Why face the brutal cold when you can avoid it? Some polar animals migrate to warmer regions during the winter, returning to the Arctic or Antarctic for the breeding season. This is a great option for animals that can cover long distances by flying, swimming, or walking. Migration helps these animals find food and better conditions to raise their young.
Examples of animals that migrate:
Arctic terns (famous for traveling from pole to pole!)
Humpback whales
Humpback whale. Photo by Elianne Dipp on Pexels.com
4. Insulation
Thick fur, feathers, or layers of blubber act as natural insulation, helping polar animals retain body heat. This polar animal adaptation works like a winter jacket, trapping heat and keeping cold air out. Insulation is important for warm-blooded animals that need to maintain a steady body temperature.
Examples of animals with insulation:
Whales (blubber)
Seals (blubber and fur)
Arctic foxes (thick fur)
Penguins (dense feathers)
An Arctic fox with thick fur. Photo by Lena Heckendorn on Pexels.com
5. Huddling
What’s warmer than a group hug? Many polar animals huddle together to share body heat and stay warm. By forming a tight group, they reduce heat loss and create a barrier against cold winds. Emperor penguins, for example, are experts at huddling—taking turns on the outer edges to keep everyone warm on the inside of the huddle!
Examples of animals that huddle:
Penguins
Arctic hares
A penguin chick huddles close to its parent for warmth.
Polar animals have evolved some incredible strategies to survive in some of the harshest conditions on Earth. From huddling through the winter to migrating thousands of miles, these polar animal adaptations are a testament to the resilience of life on Earth!
What’s your favorite polar animal adaptation? Share it in the comments below!
Study Polar Animal Adaptations and Ecosystems with Wild Earth Lab!
There’s no need to scramble to put together the perfect lesson on polar regions – I’ve already created it for you! Grab my Polar Bundle, which includes my Antarctica Unit and Arctic Unit at a discount!
Are you interested in reading more about animal adaptations and other cool environmental science topics? Subscribe or follow Wild Earth Lab using the links below!
Wild Earth Lab is supported by readers like you. This post includes links to my own products and affiliate products. If you purchase through links on my site, I may earn a small commission at no additional cost to you.
Although mushrooms grow out of the ground like plants, they belong to a completely different kingdom—the fungi kingdom. The life cycle of fungi, like mushrooms, is unique and distinct from the life cycles of plants and animals. Understanding the stages of a mushroom life cycle provides fascinating insights into how fungi grow, reproduce, and contribute to their ecosystems. In this post, we’ll explore the life cycle of a mushroom step-by-step. For homeschool parents and biology teachers looking for engaging ways to introduce the fungi kingdom, be sure to check out my printable mushroom life cycle materials featuring my artwork!
Before diving into the mushroom life cycle, be sure to review the parts of a mushroom. It helps to be familiar with mushroom anatomy terms including mycelium, hyphae, and spores.
1. Spores Germinate and Hyphae Form
The life cycle of a mushroom begins with spores. A spore is a single cell, but not just any cell – it’s a special cell for reproduction. When spores land on the soil or another surface, they germinate, which means start growing. The spores develop into hyphae: long branching filaments made of many cells.
2. Hyphae Meet
In animals, there are two mating types, known as male and female. Fungi also have different mating types (two or more depending on the species). When two hyphae of different but compatible mating types come into contact, they fuse together. This fusion allows new, unique hyphae to grow.
3. Mycelium Expands and Primordia Form
As the hyphae grow and expand, they form a mycelium – the underground part of a fungus. As the mycelium spreads, clusters of hyphae called hyphal knots start to develop. These hyphal knots are a sign that a mushroom may soon form. The knots grow into small structures called primordia, which are like baby mushrooms.
4. Button Forms
Many hyphal knots and primordia form in the mycelium, but only a few grow into mature mushrooms. A mushroom is the fruiting body of a fungus – its reproductive structure that makes spores. When a mushroom is young, it is called a button. Buttons have protective veils covering their gills.
Looking for a hands-on mushroom activity to try with your class? You can grow your own edible mushrooms using a kit, and watch buttons form from the mycelium! Try this grow-your-own oyster mushroom kit from ForestOriginsShop on Etsy.
5. Spores Release
Once the mushroom is fully developed, it opens, revealing its gills. The gills release spores. A single mushroom can produce billions of spores. Spores are very light, allowing them to travel easily through the air. If they land in a good spot, some will germinate and start the life cycle all over again.
Teach Mushroom Life Cycles with Wild Earth Lab!
Do you needclassroom materials for teaching fungi life cycles? I’ve created some for you! This set includes all the printable materials you need for studying how mushrooms form! Your purchase will support this blog.
Or, get these life cycle materials PLUS more mushroom activities in my complete Mushroom Unit:
Various Authors (n.d.). Introductory Biology: Evolutionary and Ecological Perspectives. Chapter XVI. Fungi. Available via University of Minnesota PressBooks: https://pressbooks.umn.edu/introbio/
Are you searching for a fun and unique ecology topic to teach in your science classroom? Look no further! In this post, I’ve compiled seven fascinating ecology topics that will spark curiosity about the natural world in your students. Additionally, this post compiles resources and science lessons related to bioindicators, symbiotic relationships, ecological succession, and more – to help you plan and find materials for teaching your next ecology lesson. Whether you’re a science teacher or a homeschool parent, these engaging subjects will inspire your students and make your lessons unforgettable.
A note for educators: The activities from this blog post come from my complete Ecology Units. These units are packed with all the materials you need for teaching ecology – including hands-on activities and visual aids designed to deepen understanding. These units make teaching ecology fun and easy – and every purchase helps support this blog!
A symbiotic relationship is a long-term interaction between two species. Symbiotic relationships typically benefit at least one and sometimes both of the two species involved. Symbiosis is a great topic to cover when teaching students about ecology. There are so many examples: pollination, lichens, seed dispersal, parasites, and more!
Pollination is a classic example of a symbiotic relationship between a plant and an animal – try out some pollination activity ideas and science lessons from my blog, or purchase my complete Pollination Unit
This is a fun, interdisciplinary topic that relates to both ecology and engineering! Biomimicry, also called biomimetics, is when people draw inspiration from nature to design items and solve problems. Plant, fungi, and animal species evolved features and behaviors over vast periods of time to overcome challenges they face in their habitats. Engineers may mimic these features and behaviors from nature to improve their own designs.
My origami frog mini study touches on the topic of biomimicry
3. Camouflage
Camouflage is an adaptation that helps an animal disguise its appearance. Studying camouflage goes hand-in-hand with learning about animal adaptations. There are many types of camouflage. Camouflage may help an animal blend into its background or look like something inedible or toxic.
Read my blog post about the cool adaptations of desert animals and plants
This bird beaks lab activity is a great way to learn about adaptations and natural selection – find the directions for this activity in my blog.
5. Bioindicators & Aquatic Macroinvertebrates
Macroinvertebrates make an awesome ecology lesson because you can find them in almost any stream or pond near you! Just flip over a few rocks in shallow water, and you’re sure to start finding aquatic macroinvertebrates! This can make a great field trip activity!
Furthermore, macroinvertebrates are a type of bioindicator used by scientists. A bioindicator is a type of organism whose wellbeing relates closely to ecological conditions and is studied by scientists. Certain macroinvertebrates are very sensitive to poor water quality and other human impacts. They are a great way to teach your students about healthy aquatic ecosystems.
Resources for teaching bioindicators & aquatic macroinvertebrates:
Looking through a lake sample for aquatic insects.
6. Disturbance and Succession
Disturbance and succession are good ecology topics to tie in with studies of wildfires, volcanic eruptions, and other natural disasters. These are natural events in ecosystems. A disturbance is some sort of event that causes a large and rapid change in an ecosystem – like a wildfire or a volcanic eruption. Succession is what follows – the natural and gradual change in an ecosystem over time.
Resources for teaching disturbance and succession:
Studying food webs is a fantastic way to learn about the flow of energy between organisms. A food web is a complex network of feeding relationships between organisms in an ecosystem. Energy flows from the organism being eaten to the organism doing the eating.
When you study food webs, you can also teach related topics such as predator-prey relationships, trophic cascades, and the important role of decomposers in ecosystems. Best of all, kids can be creative and learn about wildlife by mapping their own example food webs.
Try this fun food-webs activity, detailed in my blog post
Study Ecology with Wild Earth Lab
I’ve saved you the trouble of putting together materials for an awesome ecology unit. Choose from my large collection of science lessons, which all include activities, worksheets, handouts, posters, and more:
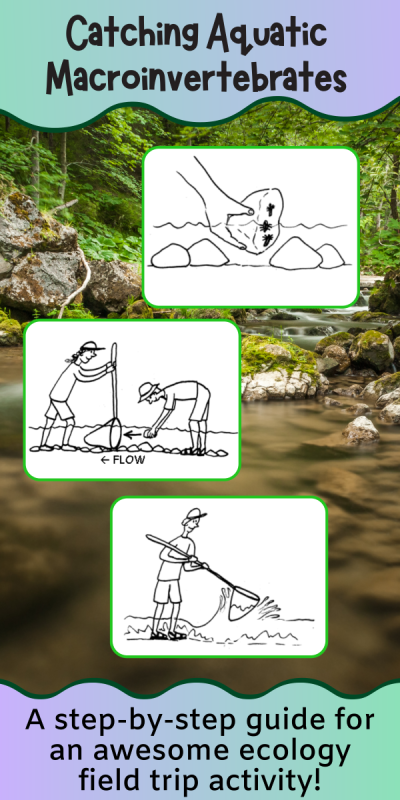
Catching aquatic macroinvertebrates is an exciting, hands-on activity that makes for an unforgettable ecology field trip. This is an outdoor activity and is a great way to examine the diverse organisms of freshwater ecosystems with your homeschool or science class. This activity will enhance your classroom studies of biodiversity, bioindicators, entomology, or aquatic food webs. In this post, I’ll guide you through three different techniques to successfully catch and observe aquatic macroinvertebrates. Let’s begin!
Before we dive in: If you’re an educator planning to teach macroinvertebrates, great visuals and activities are key to deepening understanding! I think you and your students will love my complete Macroinvertebrates Unit (plus you’ll support my blog with your purchase! ❤️)
Aquatic macroinvertebrates from left to right: mayfly nymph, stonefly nymph, and larval caddisfly.
An aquatic macroinvertebrate is an animal with no backbone that lives in or on water and is big enough that you can see it with your naked eye. This includes animals like aquatic insects, other aquatic arthropods, aquatic mollusks, aquatic worms, and more.
Macroinvertebrates play an important role in aquatic ecosystems. Many macroinvertebrates help recycle nutrients back into the food web by consuming detritus (decaying matter) that settles to the bottom of the water. They may also eat algae or even other macroinvertebrates. These tiny creatures are an important food source for fish, birds, and other animals that live in and around ponds, streams, and wetlands.
Furthermore, aquatic macroinvertebrates are used by scientists as bioindicators – basically, they help tell us if a stream, pond, or wetland is healthy. You can read more about macroinvertebrates and their use as bioindicators in this blog post.
Catching Aquatic Macroinvertebrates Activity
Materials
Each group will need the following materials.
Fine-mesh net such as a pool net for collecting aquatic macroinvertebrates
Tweezers
Large, deep-sided pans (e.g., foil roast pans, pie tins)
You can save time and support my blog when you purchase my aquatic macroinvertebrates unit – complete with all the worksheets and handouts for this activity!
Set-Up & Directions
Safety Note: Only attempt activities in extremely shallow, easily wadable streams and water bodies. Do not enter deep or swiftly moving water. Adult supervision is required at all times while in and around water.
Assign groups of 2-4 students.
Introduce and demonstrate the three methods for collecting aquatic macroinvertebrates (details below).
Pass out the materials.
Allow students to try out the three methods for collecting aquatic macroinvertebrates (details below).
Aquatic macroinvertebrates like to be in water and cannot survive for long out of water. While examining your aquatic macroinvertebrate catches, be sure to always keep them in a pan or jar of water.
At the end of the activity, instruct students to gently pour the aquatic macroinvertebrates back into the pond or stream.
Method 1: Flipping over rocks
Works best in: shallow flowing or standing water
In shallow water such as near the edge of a pond or stream, flip over submerged rocks and logs. Benthic (bottom-dwelling) macroinvertebrates such as insect larvae are often clinging to the underside of rocks or logs. Use tweezers or fingers to gently remove the macroinvertebrates from the rock/log and place them in a pan filled with water.
Method 2: Net in flowing water
Works best in: shallow flowing water only
Have one person hold a net touching the bottom of a shallow stream, facing upstream. This should allow water to flow through the net. A second person will use their hands to gently move and scrub the rocks and sediments directly upstream of the net. As you scrub, macroinvertebrates will let go of the rocks and the flowing water will sweep them directly into the net. Empty the net’s contents into a pan filled with water.
Method 3: Net in standing water
Works best in: shallow standing water
You may be familiar with this technique as pond dipping. Use a net to scoop up sediments and plant matter from the bottom of a pond and empty it into a pan of water. Use tweezers to pick through the sample to find the aquatic macroinvertebrates that were hiding in the sediments and plant matter. You can place the macroinvertebrates you pick out into a separate small jar filled with water.
Identifying Aquatic Macroinvertebrates
There are many types of aquatic macroinvertebrates. Once you catch some macroinvertebrates, you will probably want to sort them into a few basic categories to begin with.
Aquatic macroinvertebrates include:
Aquatic insects:
Larvae/nymphs (e.g., EPT, dragonflies, dipterans)
Insects that are aquatic for their whole life cycle (e.g., water scorpions, water beetles)
Crayfish
Aquatic snails
Aquatic worms
Bivalves
Water mites
What do these ten animals have in common? They are all aquatic macroinvertebrates! 1. stonefly, 2. caddisfly, 3. mayfly, 4. aquatic beetle, 5. water strider, 6. freshwater snail, 7. freshwater mussel, 8. aquatic worm, 9. water mite, 10. crayfish.
Resources for Macroinvertebrate ID:
You have options when it comes to identifying macroinvertebrates. For beginners and younger learners, you may wish to sort macroinvertebrates into just a few basic categories (e.g., insects, worms, bivalves, etc.). Middle and high school classes often identify aquatic insects by order (e.g., mayflies, stoneflies, caddisflies, dipterans, etc.).
University-level classes and researchers sort macroinvertebrates down to the family, genus, or even species level. This level of ID typically requires a dissection microscope and a dichotomous key.
There are many resources for identifying aquatic macroinvertebrates and aquatic insects. Here are a few:
Troutnut is a fly fishing website with some wonderful photos of aquatic insects. It’s a great resource if you’re already pretty familiar with aquatic insects and ID at the genus/species level
This webpage from the University of New Hampshire has many aquatic insect photos and a stream key for advanced ID (genus/species level)
My Macroinvertebrates Unit has beginner-friendly materials for studying aquatic macroinvertebrates and identifying aquatic insects at the order level
My macroinvertebrates flashcards (these are found in the unit, but you can also purchase them separately here)
My three-part cards feature my drawings and are perfect for beginner-level aquatic macroinvertebrate ID!
Expanding on this Activity
Once you’ve learned how to catch aquatic macroinvertebrates, there are many ways that you can expand on this activity. Here are just a few ideas:
Compare two locations: compare the macroinvertebrates captured in flowing and standing water. Are they the same or different?
Life stages: bring a butterfly net and also capture flying insects in the area. Many aquatic insects like mayflies, stoneflies, caddisflies, dragonflies, and more are only aquatic until they reach maturity. Can you capture the flying adult forms of any aquatic macroinvertebrates around your pond or stream?
Sorting & counting: in ecology, “richness” refers to the number of different taxa (e.g., species, orders) found in a community. This is an important measure of biodiversity and one of many metrics that ecologists use to assess the health of an ecosystem. Introduce this concept to your students by having them create a list of the different types aquatic macroinvertebrates that they find during the field trip activity.
Teach Macroinvertebrates with Wild Earth Lab
Planning to teach this activity? Save time and support my blog when you purchase my Macroinvertebrates Unit, referenced throughout this post.
The unit includes everything you need to complete this activity: student handouts, worksheets, and readings, plus tons of other materials for learning all about macroinvertebrates!
Are you searching for an engaging and educational ecology activity to try with your students? Building your own food webs is a fantastic way to study the flow of energy between organisms – all while allowing kids to be creative! Best of all, this is an activity that you can complete outside, making it perfect for homeschool parents and teachers who enjoy having class outdoors! Get ready to inspire your students with this unique and interactive ecology project!
A special note for educators: are you planning to teach this food webs activity? If so, I’ve already created all the worksheets, printable materials, handouts, and directions that you will need. Find these materials in my complete Food Webs Unit – and you’ll support this blog with your purchase! 💚
A food web is a complex network of feeding relationships between organisms in an ecosystem. Energy flows from the organism being eaten to the organism doing the eating. We represent food webs using diagrams with arrows between the organisms. Food web diagrams map the many paths for the movement of energy between organisms.
I wrote a separate blog post in which you and your students can read more about food webs and food chains. It includes lots of diagrams and examples!
What types of organisms make a food web?
All the different lifeforms coexisting in an ecosystem form a community. The community is made of many individual, diverse lifeforms – like plants, animals, and fungi – called organisms.
When you build your food web model, it will include many different types of organisms. These organisms fall into three main categories, based on the roles they play in the food web. Knowing the difference between these roles will help you and your students build food webs.
In an ecosystem, you will find the following types of organisms:
1. Producer:
An organism that produces its own food through photosynthesis. Producers use sunlight, water, and carbon dioxide to make their own food. They also need soil nutrients.
Examples: trees and other plants, some plankton, moss, some microorganisms
2. Consumer:
An organism that eats other organisms as food. Consumers cannot make their own food. Consumers can be herbivores, omnivores, carnivores, and scavengers.
Examples: insects, birds, frogs, deer, other animals
3. Decomposer:
An organism that recycles nutrients back into the soil by eating and digesting decayed plant and animal matter and waste.
Examples: mushrooms, some worms, soil bacteria
Make your own food webs activity:
Gather your materials and follow these steps to create your own food webs with your students. You can all work on one big food web together, or each student can make their own mini-food web! There are many possibilities!
Materials
Flashcards or pictures of the organisms in an ecosystem (plants, animals, fungi, etc…)
Or, get a set for an ecosystem of interest (e.g., desert, arctic, forest, etc…)
You can also make your own set!
Sidewalk chalk
A large, paved area outdoors that is free of cars and heavy foot traffic
Step-by-Step Directions
Set-Up:
Sort the organism cards into 3 piles:
producers
consumers
decomposers
Look through your producers pile.
This pile represents the food sources for herbivores and omnivores (primary consumers) in your ecosystem.
Look through the consumers pile.
Sort these cards further or make a mental note of which organisms are likely to eat plants (herbivores and omnivores) and which organisms are likely to eat animals (carnivores and omnivores).
Research the diets of unfamiliar animals.
If students are unfamiliar with some of the animals and their diets, it may help to research the animals online. You can take notes on the backs of the cards if needed.
Note: if you’re using my food webs unit, a handout is provided with info on the diets of the included animals!
Build Your Food Web:
Choose your producers.
It is easiest to start with one to three producers.
Which consumers eat your producers? These are your primary consumers.
Place the primary consumers above your producers and draw arrows to represent the flow of energy from food to eater.
Which consumers eat your primary consumers? These are your secondary consumers.
Place the secondary consumers above your primary consumers and draw arrows to represent the flow of energy from food to eater.
Which consumers eat your secondary consumers? These are your tertiary consumers.
Place the tertiary consumers above your secondary consumers and draw arrows to represent the flow of energy from food to eater.
Repeat this process as needed, until your reach a consumer that is not eaten by anyone else – this is your top predator!
You can make your food web as big or small as you’d like! It could include dozens of organisms or just a few.
Add additional arrows as needed.
Food webs can be messy! Many any animals have multiple food sources and are preyed on by multiple predators.
Optional: place any decomposer cards underneath the food web. Decomposers recycle nutrients back into the soil to help producers like plants grow!
Example Food Webs:
An example of building your own food web!
Study Food Webs with Wild Earth Lab:
Of course, you can put together your own food web materials to complete this activity. Or, save time and support my blog when you purchase my food webs unit! The unit includes everything you need to complete this activity plus additional handouts, worksheets, and readings!