Posted on Leave a comment

Stargazing for Beginners: 9 Incredible Objects to Spot in the Night Sky

illustrations of planets, satellites, and meteors
text that says share this post

The night sky is full of incredible sightsโ€”you just need to know what to look for! Whether you’re gazing up from your backyard or planning a stargazing lesson, there’s so much to discover beyond just stars. From planets and galaxies to satellites and shooting stars, this guide will introduce nine fascinating night sky objects you can spot with the naked eye or a simple pair of binoculars. Grab a cozy blanket, head outside, and get ready to explore the wonders of the night sky!

A Note for Teachers: If youโ€™re an educator planning to teach the night sky, great learning resources are key to deepening understanding! I think you and your students will love my complete printable Night Sky Unit (plus youโ€™ll support my blog with your purchase! โค๏ธ)

The Moon

The Moon is the largest and brightest object in the night sky. It is about one-quarter the diameter of Earth and shines because it reflects light from the Sun. The Moon goes through all its phases once every 29.5 days.

If you are lucky, you might even be able to watch a lunar eclipse! Read about lunar eclipses and find the dates of upcoming eclipses.

photo of moon on a dark sky
A crescent moon in the night sky. Photo by Rok Romih on Pexels.com

Planets

Planets in our solar system can be seen from Earth. To the naked eye, they look like stars, but some appear larger and brighter because they are closer to Earth or reflect more sunlight. Venus and Jupiter are two of the brightest planets in the night sky!

To see the details of a planet, you will need a good telescope. Even though planets are large, they are so far away that they look like dots of light to the naked eye. To grasp the massive scale of our solar system, try out this solar system distance lab activity.

Crescent Jupiter with the Great Red Spot
Jupiter (telescope). Crescent Jupiter with the Great Red Spot by NASA’s Marshall Space Flight Center is licensed under CC-BY-NC 2.0

Stars

Stars are huge balls of hot gases held together by gravity. Our Sun is a star, but there are many others in our galaxy. Stars shine brightly or faintly depending on how much light they produce and how far away they are.

Constellations are patterns that people see in the stars.  With a little imagination, you can see people, animals, mythical beasts, and other images in the skyโ€™s stars! Today, the International Astronomical Union recognizes 88 modern constellations. You can learn more about constellations in this blog: read about the Zodiac Constellations and easy-to-find constellations for beginner stargazers in the Northern Hemisphere.

silhouette of trees and mountain under blue starry sky
The starry night sky. Photo by Sindre Fs on Pexels.com

Comets

Comets are icy chunks of space rock that orbit the Sun. Unlike planets, their orbits are long and stretched out. Comets are visible only when they travel close to the Sun, appearing as a speck of light with a faint, glowing tail.

star flying through the sky
Photo by Scott Lord on Pexels.com

Meteors/Shooting Stars

Shooting stars happen when tiny space rocks burn up while entering Earthโ€™s atmosphere. They appear as quick, bright streaks of light across the night sky.

Lots of meteors can be seen during meteor showers when Earth passes through a cometโ€™s debris trail. Different meteor showers take place at different times. You can look up the dates of meteor showers here (external link).

meteoroid in the sky
A shooting star over a house. Photo by Thirdman on Pexels.com

Galaxies

Galaxies are massive groups of stars, gas, dust, and dark matter held together by gravity. They come in different shapes, like spirals and ellipses. The Andromeda Galaxy, our closest neighboring galaxy, can be seen without a telescope in very dark skies.

gray and black galaxy wallpaper
A spiral-shaped galaxy. Photo by Pixabay on Pexels.com

Our Galaxy: The Milky Way

The Milky Way is our galaxy. When we see it in the night sky, we are viewing it from the inside! From Earth, it looks like a cloudy, gray streak across the sky, but from the outside, it would look like a giant spiral.

night sky
The milky way (and a shooting star). Photo by Neale LaSalle on Pexels.com

Aurora (Polar Lights)

The aurora is seen near the poles in winter. These glowing lights look like swirling ribbons or curtains and happen when charged particles from the Sun meet Earthโ€™s magnetic field.

aurora borealis
The aurora in the night sky. Photo by Visit Greenland on Pexels.com

Human-made Objects

Human-made objects, like satellites, can also be seen in the night sky. Satellites move steadily across the sky and donโ€™t blink like airplanes. They help with communication, navigation, and more.

You can even see the International Space Station pass through the night sky if you know when to look. Track the International Space Station here (external link).

electric lamp over black background
Satellite, photographed from space. Photo by Pixabay on Pexels.com

What’s Next?

Ready to learn more about the night sky or outer space? Read my posts about lunar eclipses and solar eclipses! You can also read more about the life cycle of a star. If you’re an educator, try out these 11 outer space activity ideas for kids or these 9 sun and star classroom activities!

Study this night sky with Wild Earth Lab!

Trying to plan the perfect Night Sky lesson for your classroom or homeschool? Iโ€™ve already created it for you! This set includes all the printable materials you need for studying night sky objects and outer space!

Explore more lessons from Wild Earth Lab:

If you enjoyed this post, I know you will love trying my other printable science and nature units in your classroom too!


Are you interested in reading more posts like this? Subscribe or follow Wild Earth Lab using the links below!


Subscribe, share, and comment:

Posted on Leave a comment

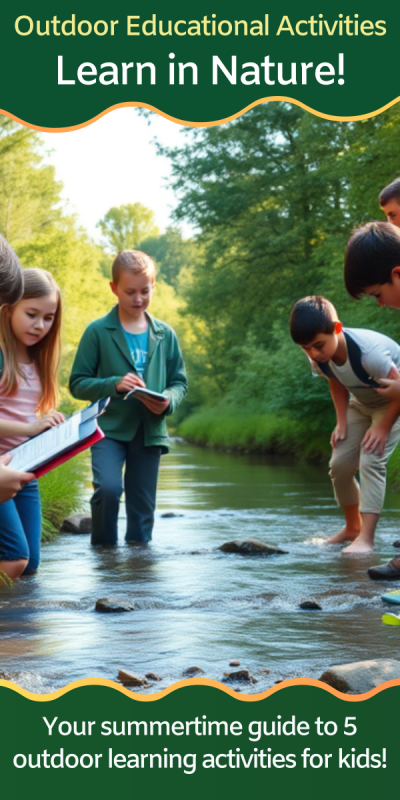
Learning in Nature: 5 outdoor educational activities to try this summer!

children with clipboards wading in a shallow river
text that says share this post

Are you a parent or educator looking for fun ways to take learning outside this summer? Whether you’re reviewing math and science concepts from the school year or looking for ways to connect with your local ecosystems, I’ve got you covered with these 5 outdoor educational activities!

In this post, you’ll find directions for nature activities for learning outside this summer! From catching aquatic macroinvertebrates to measuring the infiltration rates of soils, your students are sure to enjoy these fun outdoor learning activities!

Before we dive in:ย If youโ€™re an educator or parent looking for fun outdoor educational activities, great learning resources are key to deepening understanding! I think you and your students will love my Earth & environmental science units (plus youโ€™ll support my blog with your purchase! โค๏ธ)

Stream Measurements

painting showing three people taking measurements in a stream
Illustration of students measuring the width and depth of a stream!

For this activity, learn how to measure water flow with your students as a river field trip activity! With a few household items, you can collect river measurements. All you need are some simple measurement tools like a tape measure, yardstick, and stopwatch!

Water resource scientists, called hydrologists, collect stream measurements to ensure we are not using our water resources too quickly or in unsustainable ways. In this hands-on activity, students will not only practice math and measurements, but they’ll also learn about how scientists measure and study our rivers!

Catch Aquatic Macroinvertebrates

types of aquatic macroinvertebrates
A poster of the types of aquatic macroinvertebrates.
A cartoon of two people in a river using a net to catch aquatic insects
A diagram showing two students collecting aquatic macroinvertebrates in a stream using a net.

Catching aquatic macroinvertebrates is a memorable and educational field trip experience your students will love! Aquatic macroinvertebrates are little creatures like insect larvae and crayfish found at the bottoms of most ponds and streams. Just flip over a few river rocks or submerged logs near the shore of a pond and you’re likely to spot a macroinvertebrate underneath!

But here’s the cool part: macroinvertebrates are bioindicators – creatures that teach us a lot about the overall health of their ecosystems! That makes this outdoor activity a great way to review your classroom studies of biodiversity, bioindicators, entomology, or aquatic food webs. It’s also a great way to build connections with local ecosystems – almost any pond or small stream will work for this activity!

Measure the heights of trees using math!

A diagram showing how to find the height of a tree, with equations. Line 1: tree height above eye level equals distance times tan of angle. Second line: tree height equals eye level plus tree height above eye level.
This diagram shows how you can calculate the height of a tree using math!

Unless you are measuring a short seedling, you probably wonโ€™t be able to measure tree height directly because you canโ€™t reach the top. So how do you measure something so tall? Answer: use an inclinometer and trigonometry!

I donโ€™t know about you, but I think math is more interesting when we can apply it to real-world situations! If youโ€™re reviewing trigonometry, right triangles, or angles in your classroom or homeschool, you and your students will love this tree-height appliedย math activity! In this simple learning activity, students will learn how to make a homemade inclinometer โ€“ a device for measuring the angle of inclination. Then, they will take measurements and calculate the height of a tree in this outdoor educational activity.

Outdoor Experiment for Climate Change & Sea Ice

yellow arrows from the sun bouncing off of ice but not water
Sea ice is more reflective than ocean water.
two tubs of water, one covered in foil
Materials for a sea ice experiment.

A sunny summer day is the perfect time for this outdoor activity that’s all about heat, solar radiation, and reflection! For this activity, all you need is a warm sunny day, containers with cold water, foil, and a thermometer!

ย In this outdoor educational activity, students will create a model of sea ice and ocean water albedo using aluminum foil and two tubs of water. Students will track the temperature in a covered and uncovered tub on a sunny day. It’s a great way to learn about albedo and the impacts ofย positive feedback loopsย in climate change.

Measure Soil Infiltration Rates

sketches showing a tube being hammered into the soil then filled with water.
Steps for measuring soil infiltration rate

Summer is the perfect time to study soils! If you have a summer garden, you know the importance of healthy and permeable soil. Measuring soil infiltration rates is an activity that you can easily do in your garden with a few simple household items.

Why study soil infiltration? Infiltration rates of soils are important for many reasons. First, they are important in agriculture – different crops require soils that drain at different rates. Soil infiltration also plays a role in natural disasters like flooding and landslides. Finally, infiltration is an important part of the water cycle – when water seeps into the earth, it becomes part of the groundwater. Humans access groundwater with wells – an important source of water for drinking and growing plants!

Learn in Nature with Wild Earth Lab!

Thereโ€™s no need to scramble to put together the perfect materials for your outdoor educational activitiesโ€“ Iโ€™ve already created them for you! Check out my Earth and environmental science units, complete sets of printable learning materials with activities, posters, handouts, and more!


Are you interested in reading more posts with outdoor educational activities? Subscribe or follow Wild Earth Lab using the links below!


Subscribe, share, and comment:

Posted on Leave a comment

Explore the Universe: 11 Hands-On Night Sky and Outer Space Activities

stargazer with telescope
text that says share this post

Wild Earth Lab is supported by readers like you. This post includes links to my own products and affiliate products. If you purchase through links on my site, I may earn a small commission at no additional cost to you.

Studying the night sky is a great way to spark curiosity and wonder about the universeโ€”and the best way to learn is by doing! Whether you’re teaching about constellations, the solar system, or space exploration, these hands-on activities will bring astronomy to life in your classroom or homeschool. From creative art projects and snack activities to real-world stargazing, this list has something for every young space enthusiast. Plus, I’ve included links to both free and paid ready-to-use materials to make your space lessons even more engaging. Get ready to explore the cosmos with your students with 11 hands-on space activities.

A Note For Teachers: If youโ€™re an educator planning to teach the night sky in your classroom, great activities & visuals are key to deepening understanding! Materials for many of the night sky and space activities in this post are included in my Night Sky Unit. It’s a bundle of printable classroom resources for learning all about the night sky and space (plus youโ€™ll support my blog with your purchase! โค๏ธ)

Constellation Snacks

Form different constellations using mini marshmallows as stars and pretzel sticks as the lines. Then eat them!

Constellation printable classroom materials – includes the printable directions and constellation image cards needed for this activity (purchase)

Online directions (free)

constellation flashcards and constellations made from pretzel sticks and marshmallows
A constellation snack activity!

Night Sky Scratch Art

Try scratch art; itโ€™s the perfect artistic medium for drawing objects in the night sky like stars, meteors, and planets!

Make your own scratch art boards guide (external link)

Purchase scratch art supplies (external link)

scratch art of an owl and the moon
Scratch art of the moon and stars.

Planetarium Field Trip

Plan a trip to a planetarium if thereโ€™s one in your area. At a planetarium, your program guide may show you how to identify stars and planets, tell you about constellation mythology, or teach you about deep-space objects.

Find a planetarium near you (external link)

Phases of the Moon Snack

Make the Moonโ€™s phases from crรจme-filled sandwich cookies. Remove the top cookie and part of the crรจme to create each lunar phase.

Printable worksheet and directions for this activity (Available to this blog’s newsletter subscribers on my Free Resources Page!)

Moon mini study printables (purchase)

moon phases sandwich cookie (e.g., Oreo) activity worksheets

Distance Model

Make a mini model of our solar system. Calculate each planetโ€™s relative distance from the Sun on a tape measure and mark it.

Distance model worksheets & printable directions (purchase)

Online directions (free)

Spot the International Space Station

If you know when and where to look, you can watch the International Space Station as it passes through the night sky above your area.

Track the International Space Station online (external link)

Star Charts

Find a star chart for your location and season. Head outside to a dark area at night and try to locate some constellations and stars. For recommended websites for online star charts, visit WildEarthLab.com/night-sky

Stellarium online star chart (external link)

Sky & Telescope online star chart (external link)

Constellation printable classroom materials (purchase)

Constellation printable classroom materials

Watch a Meteor Shower

Mark the dates of the next meteor shower on your calendar. Go to a dark area away from city lights and see how many shooting stars you can spot.

Find a meteor shower (external link)

meteoroid in the sky
A meteor seen over a house. Photo by Thirdman on Pexels.com

Eclipse Model

Model eclipses using two orbs on sticks and a flashlight. For a lunar eclipse: place the larger orb (Earth) between the light source and the smaller orb (Moon) to cast a shadow over the smaller orb. For a solar eclipse: place the smaller orb (Moon) between the light source and the larger orb (Earth).

Lunar eclipse mini study (purchase)

Solar eclipse mini study (purchase)

Read my blog posts all about solar eclipses and lunar eclipses (free)

eclipse worksheets and handouts

Become an Astrophotographer

Head outside to a dark area and capture pictures of the stars, Moon, planets, and more! Some smartphones have an astrophotography setting. A tripod will help keep the phone/camera still.

Lunar photography guide from NASA (external link)

A Guide to Smartphone Astrophotography; free online book from NASA (external link)

night sky
A photo of the Night sky. Photo by Neale LaSalle on Pexels.com

Moon Calendar

Print or create a calendar that shows the phase of the Moon on each day for the current month.

Free moon calendar (external link)

Printable moon activity pack (purchase)

Grab the complete set from Wild Earth Lab!

Thereโ€™s no need to scramble to pull together the perfect Night Sky lesson materials  โ€“ Iโ€™ve already created them for you! This set is a big bundle of many night sky printable materials and activities, many of which were linked in the blog post.

AND for even more outer space activities, try out my complete Sun and Stars Unit!

Explore more lessons from Wild Earth Lab:

If you enjoyed the space activities in this post, I know you will love trying my other printable science and nature units in your classroom too!


Are you interested in reading more posts like this? Subscribe or follow Wild Earth Lab using the links below!


Subscribe, share, and comment:

Posted on Leave a comment

Freshwater Visualization: Learning Activity With Kitchen Measurements

water cycle diagram and worksheet on a table next to measuring cups
text that says share this post

Itโ€™s hard to imagine just how little freshwater exists on Earth compared to saltwater. If you’re teaching the water cycle, your students might be amazed to learn that less than 3% of the Earthโ€™s water is freshwaterโ€”the rest is saltwater. In this post, Iโ€™ll show you a hands-on freshwater learning activity that uses simple kitchen measurements to help your students visualize these proportions. This activity is a powerful way to help students truly understand how rare freshwater is!

Before we dive in:ย If youโ€™re an educator planning toย teach the water cycle, great learning resources are key to deepening understanding! I think you and your students will love my complete Water Cycle Unit (plus youโ€™ll support my blog with your purchase! โค๏ธ)

Background Information

Most of the water on earth is saltwater (~97.5%), like the water in our oceans. Also, a significant amount of earthโ€™s water is frozen such as in glaciers and ice sheets (~1.7%). Fresh groundwater makes up ~0.75% of the water on Earth, and fresh surface water such as the water in streams and lakes is about ~0.01% of the water on Earth. Additionally, about ~0.001% of earthโ€™s water is in its gas form as water vapor in our atmosphere. Having trouble visualizing this?ย  This activity can help you visualize the relative amounts of freshwater on Earth!

Materials

Gather the following materials. You can complete this entire lab with common kitchen measuring cups.

  • ~1 gallon of water
  • Large 1+ gallon bucket or container
  • Liquid measuring cup
  • Tablespoon
  • 8 ice cubes
  • Teaspoon
  • Eye dropper
  • Extra containers to hold water

Step-by-Step Directions

Work through the following steps with your students. Explain what each measurement represents as you work through the activity.

  1. Measure 1 gallon (16 cups) of water into the bucket. This represents all the water on earth.
  2. From the water in the bucket, remove ยผ cup of water and set aside. Replace it with 8 ice cubes. These represent the earthโ€™s frozen water such as glaciers and ice sheets.
  3. From the water in the bucket, measure 2 tablespoons into an extra container.ย  This represents the Earthโ€™s fresh groundwater.
  4. From the water in the bucket, use an eyedropper to measure 8 drops of water into an extra container. This represents all the surface water on earth, such as streams and lakes.
  5. From the water in the bucket, use an eyedropper to measure 1 drop of water into an extra container. The amount of water vapor in our atmosphere at any time is represented by slightly less than this amount!
  6. Look at the water remaining in the bucket. This represents the saltwater on earth, mostly water in our oceans but also including salty groundwater near coasts and saltwater lakes, ponds, and marshes.

Free Printable Directions for This Activity

A printable version of these directions can be found on my free resources page. As my email subscriber, you’ll gain access to the free resources page and get updates about new activity ideas, project guides, new freebies and units, and cool science topics to teach in your classroom! Subscribe now to access the freebies page and more!

Water cycle diagram, measuring cups, free printable science activity guide for homeschooling, at-home-learning, or elementary school age children.

What’s Next?

If you’re teaching the water cycle, I think you’ll love some of my other blog posts too. Read my posts about explaining the water cycle in 10 stages and human impacts on the water cycle. You can also learn how to measure different water cycle processes including evaporation, precipitation, infiltration, and stream flow!

Explore more lessons from Wild Earth Lab:

If you enjoyed this freshwater learning activity, I know you will love trying my printable science and nature units in your classroom too!


Are you interested in reading more posts with science activity ideas? Subscribe or follow Wild Earth Lab using the links below!


Subscribe, share, and comment:

Posted on Leave a comment

Measuring Soil Infiltration Rates: A Science Classroom Activity

students observe a white cylinder inserted into the soil
text that says share this post

Are you teaching the water cycle or studying soil in your classroom or homeschool? Measuring infiltration rates in different types of soils is a hands-on activity that helps students explore how water interacts with the ground. This soil infiltration activity also ties in perfectly with studies of porosity and permeability. This engaging experiment works as a stand-alone lesson or as part of a broader unit on soil science or the water cycle.

Before we dive in: The activity from this post comes from my complete Water Cycle Unit. If youโ€™re an educator planning to teach infiltration and the water cycle, you’ll find printable directions, worksheets, and much more in the Water Cycle Unit (plus youโ€™ll support my blog with your purchase! โค๏ธ)

Materials

Gather the following materials to complete this activity:

  • Short tube or pipe with openings on both ends, something sturdy works best:
    • A short PVC pipe
    • Or potentially a sturdy can opened on both ends (file down any sharp edges before use)
  • Ruler
  • Permanent marker
  • Hammer or rubber mallet
  • Water
  • Stopwatch
  • Student worksheets & printable directions (available in my Water Cycle Unit!)
A photo showing classroom handouts for studying infiltration of water into soil

Measuring Soil Infiltration: Step-by-Step Directions

The basic idea of this soil infiltration activity is that you will hammer a tube shallowly into the soil, then pour water in, and observe the water level drop as the water seeps into the ground. Assist your students as they work through the following steps.

Pre-Lab

In this lab, students will compare the infiltration rate in at least three different locations with different types of soil. For example, they could compare a sandy soil, a clay soil, and a soil rich in organic matter.

Before starting the lab activity, ask your students to observe and handle the three different soils. Students should write a description of each soil’s observable properties (color, texture, moisture, particle size). Then, students should predict which soils will have the highest and lowest infiltration rates. Students should explain their reasoning for their predictions.

Part 1: Set Up Your Infiltrometer

First, you and your students will need to set up your “infiltrometer” (tube for measuring infiltration rates).

  1. Use a ruler and permanent marker to make measurement markings up the inside of the tube, starting from one end.
  2. Hammer the infiltrometer (tube) into the soil โ€“ the goal is to create a seal with the soil so that water wonโ€™t leak out under the tubeโ€™s rim. (An adult should complete this step for younger students.)
sketches showing a tube being hammered into the soil then filled with water.

Part 2: Measure Infiltration

Once you’ve set up the infiltrometer, you are ready to continue with the soil infiltration activity and collect your measurements.

  1. Pour water into the infiltrometer.
  2. Note the starting height of the water and start the stopwatch.
  3. Watch the water level in the infiltrometer lower as the water seeps into the soil.
  4. Repeatedly record the water level over time on the student worksheet.
  5. Repeat in different soils โ€“ compare a sandy soil, flowerbeds, mulch, gravel, sand, compost, etc.

Post-Lab

For an extra math challenge: Calculate the infiltration rate for each of the soils:

You may also wish to ask your students to reflect on their predictions. Were their predictions correct? Which soil had the highest infiltration rate? The lowest? What might cause this?

What’s Next?

Once you’ve measured infiltration, why not measure other water cycle processes? Be sure to check out my blog post explaining how to measure evaporation and my post on making a DIY rain gauge to measure precipitation with your students!

Materials for Teaching Infiltration and the Water Cycle

Save time preparing for this activity! My Water Cycle Unit includes printable directions and worksheets for this activity and two other water cycle activities. Plus flashcards, diagrams, and more. Check it out:

photo of at home science lab activity handouts and worksheets

Explore more lessons from Wild Earth Lab:

If you enjoyed this post, I know you will love trying my other printable science and nature units in your classroom too!


Are you interested in reading more posts with science activity ideas? Don’t forget to subscribe or follow Wild Earth Lab using the links below!


Subscribe, share, and comment:

Posted on Leave a comment

DIY Rain Gauge Activity for Teaching the Water Cycle

plastic bottles and scissors on a classroom desk
text that says share this post

Teaching your students about the water cycle? Building a DIY rain gauge from a plastic bottle is a fun, hands-on activity to explore a key water cycle process: precipitation. This simple project is perfect for your classroom or homeschool and can be a stand-alone lesson or part of a larger study of water cycle processes.

Before we dive in:ย The activity from this post comes from my complete Water Cycle Unit. If youโ€™re an educator planning toย teach precipitation and the water cycle, you’ll find printable directions, worksheets, and much more in the Water Cycle Unit (plus youโ€™ll support my blog with your purchase! โค๏ธ)

Materials

Gather the following materials to complete this activity:

  • 2 empty plastic soda bottles of the same size
  • Scissors
  • Ruler
  • Permanent marker
  • Student worksheets & printable directions (available in my Water Cycle Unit!)
A photo showing classroom handouts for teaching students how to build a precipitation gauge

Measuring Precipitation: Step-by-Step Directions

The basic idea of this lab is that you will build your own rain gauges out of plastic soda bottles and then use them to collect and measure precipitation in two places. Assist your students as they work through the following steps.

Pre-Lab

In this lab, students will compare the precipitation measured in at least two different locations. For example, they could compare an area with trees and an area out in the open. Or they could give one rain gauge to a friend on the opposite side of town.

Before starting the lab activity, ask your students to make some predictions and explain their reasoning. Which location will receive more precipitation? Or will both locations receive the same amount? Explain your reasoning.

Part 1: Make Your Precipitation Gauge

You will need to build your precipitation gauges and then wait several days to collect your results. First, here’s how to make your own precipitation gauges from plastic bottles:

  1. Cut the plastic soda bottles in half below the tapered necks (an adult should do this step for younger children).
  2. Turn the bottlenecks upside down to make funnels.
  3. Use a ruler and permanent marker to make measurement markings (e.g., centimeters or inches) up the side of the bottle, starting from the bottom.
images depicting cutting a bottle in half then using the top half to make a funnel into the bottom half

Part 2: Measure Precipitation

Several days later, complete the experiment:

  1. Place each precipitation gauge outside. You may wish to stack rocks around the gauges to keep them from tipping over.
  2. Compare the precipitation in two locations. Try placing one precipitation gauge somewhere with trees and one out in the open. Or give one gauge to a friend or family member who lives nearby.
  3. In winter, if you have snow, remove the funnel from the top of each gauge bottle to allow snow to fall directly into the base of the bottle. Bring the gauge inside to allow the collected snow to melt to measure snow water equivalent.

Post-Lab

For an extra math challenge: Measure the diameter (D) of the precipitation gauge and then calculate the volume of water that you collected in each rain gauge using the volume of a cylinder equation:

volume of a cylinder equations

You may also wish to ask your students to reflect on their predictions. Were their predictions correct? Which location received more precipitation? What mechanism might have caused this?

What’s Next?

Once you’ve measured precipitation, why not measure other water cycle processes? Be sure to check out my blog post explaining how to measure stream flow with your students and how to measure evaporation!

Materials for Teaching Precipitation and the Water Cycle

Save time preparing for this activity! My Water Cycle Unit includes printable directions and worksheets for this activity and two other water cycle activities. Plus flashcards, diagrams, and more. Check it out:

photo of at home science lab activity handouts and worksheets

Explore more lessons from Wild Earth Lab:

If you enjoyed this post, I know you will love trying my other printable science and nature units in your classroom too!


Are you interested in reading more posts with science activity ideas? Subscribe or follow Wild Earth Lab using the links below!


Subscribe, share, and comment:

Posted on Leave a comment

Hands-On Water Cycle Activity: Measure Evaporation

Jars with blue water
text that says share this post

Looking for a simple, hands-on way to teach the water cycle? Measuring evaporation is an easy activity that brings the process to life for your students. Perfect for classrooms or homeschools, this experiment makes learning about the water cycle engaging and interactive! You can measure evaporation as a stand-alone activity or as part of a larger exploration of water cycle processes.

Before we dive in: The activity from this post comes from my complete Water Cycle Unit. If youโ€™re an educator planning to teach evaporation and the water cycle, you’ll find printable directions, worksheets, and much more in the Water Cycle Unit (plus youโ€™ll support my blog with your purchase! โค๏ธ)

Materials

Gather the following materials to complete this activity:

  • Two small see-through jars or cups
  • Liquid measuring cup (or graduated cylinder)
  • Water
  • Food coloring
  • Permanent marker
  • Student worksheets & printable directions (available in my Water Cycle Unit!)
A photo showing classroom handouts for teaching evaporation lab activities

Measuring Evaporation: Step-by-Step Directions

The basic idea of this lab is that you will have two jars, one with a lid and one without. You will observe the change in the water level in the two jars over several days due to evaporation. Assist your students as they work through the following steps.

Pre-Lab

Before starting the lab activity, ask your students to make some predictions and explain their reasoning.

Will the jar with the lid:

  • Loose water?
  • Gain water?
  • Remain the same?

Will the jar without a lid:

  • Loose water?
  • Gain water?
  • Remain the same?

Part 1: Set Up

You will need to set up the experiment and then wait several days to collect your results. On the first day, take the following steps:

  1. Use a liquid measuring cup to measure equal amounts of water into two small glass jars.
  2. Put a drop of food coloring in each jar.
  3. Use the marker to mark the water level in each jar.
  4. Leave one jar open. Put a lid on the other jar โ€“ this will be your control. Discuss with your classmates and/or instructor the purpose of a control in a science experiment.
  5. Place the jars under a covered area so rain canโ€™t fall into them. Wait several days or weeks. Evaporation may occur very slowly in humid climates.

Part 2: Measure Evaporation

Several days later, complete the experiment:

  1. Once the water level is visibly lower in the open jar, use the graduated cylinder or liquid measuring cup to measure the amount of water in each jar. Record the volume on the student worksheet.
  2. The difference between the two jars is the amount of water that evaporated.
  3. Discuss whether water evaporated from each jar โ€“ why or why not?

Post-Lab

Ask your students to reflect on their predictions. Were their predictions correct? Why or why not? Which jar lost water? What caused it to lose water?

What’s Next?

Are your students up for a bigger challenge? Now that you’ve observed evaporation, why not measure some other water cycle processes? Be sure to check out my blog post explaining how to measure stream flow with your students and how to measure snow!

Materials for Teaching Evaporation and the Water Cycle

Save time preparing for this activity! My Water Cycle Unit includes printable directions and worksheets for this activity and two other water cycle activities. Plus flashcards, diagrams, and more. Check it out:

photo of at home science lab activity handouts and worksheets

Explore more lessons from Wild Earth Lab:

If you enjoyed this post, I know you will love trying my other printable science and nature units in your classroom too!


Are you interested in reading more posts with science activity ideas? Subscribe or follow Wild Earth Lab using the links below!


Subscribe, share, and comment:

Posted on Leave a comment

Teaching Climate Change: hands-on sea ice albedo experiment

Albedo lab materials - tubs with water and foil

Are you looking for a hands-on activity to teach climate change? In this lab, students will create a model of sea ice and ocean water albedo using aluminum foil and two tubs of water. Students will track the temperature in a covered and un-covered tub on a sunny day. Students will learn about albedo and the impacts of positive feedback loops in climate change.

Important: Iโ€™ve made the directions for this albedo lab activity available for free here in this post. If you would like printable directions and worksheets for this activity, you can purchase them in my Albedo Lab mini-study. These materials are also included within my complete Antarctica Unit and Polar Bundle.

Printable directions for the albedo lab activity are available in my mini-study.

Materials

Each lab group will need the following materials:

  • Two clear-bottomed shallow plastic tubs of equal size
  • Cold liquid water
  • A large piece of dark blue or black paper or cloth
  • Aluminum foil
  • 2 thermometers
  • Printed student handouts and worksheets
Student worksheets for the albedo lab activity.

Tips for Success

  • Complete this lab on a sunny, warm day close to mid-day when the sun is overhead. This lab may not work on cold or overcast days, or in the early morning or afternoon when the sun is at a lower angle in the sky.
  • Students should record the water temperature in the two tubs at a 5-minute interval. If the water is warming slowly, you can instruct students to switch to a 10-minute interval.
  • Once students see a clear trend or pattern, you may instruct them to stop taking measurements.
two tubs of water, one covered in foil

Activity Structure and Emphasizing Key Concepts

  • Before starting the lab, ask your students if they would feel cooler wearing a black or white shirt on a sunny day. Or, ask them if they would be more comfortable standing barefoot on blacktop or grass on a hot day.
  • During the lab, introduce the term โ€œalbedoโ€ to your students โ€“ the amount of solar radiation reflected by a surface. Relate this to the black vs white shirt example and the blacktop vs grass example.
  • After completing the lab procedure, ask your students what they think happens to ocean water at the poles when it is no longer covered in sea ice. Discuss how positive feedback loops work.
positive feedback loop diagram
I created this positive feedback loop diagram for you. It’s available in my shop, and you can support my blog with your purchase!

Step-by-Step Procedure

Head out to a sunny area, pass out the materials, then help your students work through the following steps:

  1. Fill the two clear plastic tubs with equal amounts of cold liquid water.
  2. Check the starting temperature of the water in both tubs. Record the temperatures on the worksheet. The starting temperature should be the same in both tubs.
  3. Fully cover one tub in aluminum foil. This tub represents ocean water covered in a layer of reflective sea ice. The other tub represents uncovered ocean water.
  4. Lay your dark fabric on the ground or table outside in direct sunlight. The dark fabric represents the dark color of ocean water.
  5. Position your tubs on top of the dark fabric in direct sunlight.
  6. Wait 5 minutes.
  7. Check the temperature in both tubs, by inserting the thermometer into the water at the center of the container. Poke a small hole through the foil to insert the thermometer when you check the temperature in the foil-covered tub. Record the temperatures on your worksheet.
  8. Continue to check and record the temperatures every 5 minutes.
  9. Which tub is warming faster? Discuss why.

Discussion Questions

After working through the lab procedure, have your students discuss the following questions in small groups or as a whole class.

  1. Which tub became warmer faster? Explain why.
  2. Which would get warm faster, ocean water covered in reflective sea ice or exposed ocean water? Explain why.
  3. What is albedo? *in your own words
  4. What is a positive feedback loop? *in your own words
  5. In your own words, describe a positive feedback loop involving melting sea ice and climate change.

Worksheets and Printable Directions

There’s no need to put together worksheets and handouts for this lab – I’ve already created them for you! You can purchase them in my Albedo Lab Mini Study. These materials are also found within my complete Antarctica Unit and Polar Bundle.

The albedo lab materials are also found within these products:

Explore more units from Wild Earth Lab:

If you enjoyed this post, I know you will love trying my other science and nature units in your classroom too!


Are you interested in reading more posts with science activity ideas? Subscribe or follow Wild Earth Lab using the links below!


Subscribe, share, and comment:

Posted on Leave a comment

Flower Dissection: try this simple hands-on science activity in your classroom!

pink flower, tweezers, and scissors with worksheets.

Are you teaching your students about the parts of a flower or plant anatomy? Sometimes the best way to understand how something works is by taking it apart. A flower dissection is a simple and engaging hands-on activity that brings plant anatomy to life in your classroom. In this activity, students will carefully examine and identify key flower structures like petals, sepals, carpels, and stamens. Plus, theyโ€™ll explore the fascinating connection between flowers and Fibonacci numbers in nature!

If you’re looking for more background information about flower anatomy, be sure to check out my blog post where I cover the four main whorls of a flower. You can also learn more about the functions of flowers and their various parts in the plant life cycle in this post about pollination and the plant life cycle!

Please Note: I’ve made the directions for this flower dissection activity available for free here in this post. If you would like printable directions and worksheets for this activity, you can find them in my complete Flowers Unit in my shop.

Materials

Each student will need the following materials:

  • Flowers
  • Tweezers
  • Glue
  • Pencils or pens
  • Printed student directions and lab worksheet (available in my Flower Unit)

Tips for Success

  • Have flower and plant anatomy diagrams on hand so your students can reference them as they dissect their flowers.
    • You can find my hand-drawn flower & plant anatomy diagrams in my flowers unit (linked above)
    • You can also find a free flower diagram on my free resources page (pictured below)!
  • Use a large flower so that students can easily see all the parts.
  • Use a complete flower with all four main flower parts: sepals, petals, carpels, and stamens. For example, lilies, hibiscuses, or tulips are all good choices.
diagram showing the parts of a flower

Directions

Part 1: Flower Dissection

Pass out the materials to your students. Give a brief overview of the main parts of a flower. Then, assist your students as they work through the following steps to dissect their flowers:

  1. Use the tweezers or your fingers to carefully remove the sepals and then the petals from your flower.
  2. Break apart the carpel(s) and stamens.
  3. Count the number of sepals, petals, carpels, and stamens and record the number of each.
  4. Glue one of each part to the lab worksheet.
  5. Use a pencil or pen to draw arrows and label the stigma, style, and ovary on the carpel glued to the lab worksheet.
  6. Use a pencil or pen to draw arrows and label the anther and filament on the stamen glued to the lab worksheet.

Part 2:  Fibonacci Numbers in Nature

Fibonacci numbers form a sequence so that each number is the sum of the previous two numbers (e.g., 1+1 = 2; 2+1 = 3, 3+2 = 5; 5+3=8; and so on). Fibonacci numbers are often found in nature. Students should answer the following questions:

  1. Calculate and write down the next 5 numbers in the Fibonacci sequence: 1,1,2,3,5,8,… ___, ___, ___, ___, ___
  2. Look back at your lab worksheet. How many petals did your flower have? Is this a Fibonacci number? What about the sepals? Carpels? Stamens?

Study Flowers with Wild Earth Lab!

If you enjoyed this activity, I know you’ll love my Flowers Unit! It includes everything you need for this activity and other flower projects too!

OR – take your botany learning to the next level with my Botany Collection. It’s a bundle of three plant units: Flowers, Pollination, and Fruit!

Ready for another dissection?

Read my blog post on how to do a Mushroom Dissection Lab!

Explore more lessons from Wild Earth Lab:

If you enjoyed this post, I know you will love trying my other science and nature units in your classroom too!


Are you interested in reading more posts with directions for science activities? You can subscribe or follow Wild Earth Lab using the links below!


Subscribe, share, and comment:

Posted on Leave a comment

5 Winter-Themed STEM Activities: snowflakes, glaciers, and more!

Winter classroom STEM activities

Looking for fun and educational ways to bring STEM learning into your homeschool or classroom this winter? These winter-themed activities are perfect for exploring science, technology, engineering, and math through hands-on projects that celebrate the season. From measuring snow and studying glaciers to investigating the science behind snowflakes and symmetry, these activities will keep students engaged all winter long. Grab your winter coat and get ready to dive into these exciting winter STEM activities!

Wild Earth Lab is supported by readers like you. This post includes links to my own products and affiliate products. If you purchase through links on my site, I may earn a small commission at no additional cost to you.

1. Measure snow like a scientist

If you live somewhere that gets snow in winter, youโ€™ve likely measured the depth of snow before! But with a few extra steps, you can turn this simple task into an awesome, hands-on snow science activity.

Start by learning about snow water equivilent and how to calculate it. This can be a great way to start a conversation about snow in the water cycle, and the ways snow supplies our rivers and aquifers with an important input of water.

You can find the full activity directions for a snow measurements activity in my blog! Or better yet, you can save time and support my blog when you purchase the printable worksheets and directions for this activity in my complete Science in the Snow Unit.

โ˜ž Upgrade your outdoor learning:

Measuring snow with your students? You can track the snow all winter long by placing a metal snow gauge in your yard or outdoor learning area. Whether you’re teaching in the classroom or at home, you can create an inspiring outdoor learning area for studying snow, weather, and more.

Cardinal Snow Gauge: product and image from Soldarmetals on Etsy.
Snow Gauge: product and image from Swenproducts on Etsy.

2. Explore glaciers and climate science

Why study glaciers this winter? Glaciers tie in to many important science topics – not just geology and landforms, but also climate science, sea level rise, and water resources! Glaciers are an important reservoir of frozen freshwater on Earth. However, glaciers all over the world are receding and disappearing due to climate change, putting communities at risk of flooding and altering ecosystems.

Furthermore, glaciers teach scientists about our Earth’s past! Glacial ice is like a time capsule, holding important clues about the history of our Earth and its climate. By studying glaciers, students can learn about and discuss the past, present, AND future of our climate!

Ready to study glaciers? You can read more about the types of glaciers and how they form in my blog post! Or better yet, you can save time and support my blog when you purchase my Glaciers Unit – complete with classroom activities, worksheets, handouts and more.

valley glacier diagram

3. Read about how snowflakes form

If you’ve ever looked at a snowflake under a microscope or magnifying glass, you know that each snowflake is a unique, beautiful formation. But how do these amazing water crystal structures form? It all starts high in earth’s atmosphere, with a dust particle and water vapor. Since every snowflake takes a slightly different path to the ground, each snowflake runs into unique conditions along the way. These different experiences impact the way each snowflake forms.

Learning about the formation of snow ties in to studies of meterology and the three phases of water. Because of this, snowflake formation is an engaging winter science topic at many different levels.

Need materials for studying snowflakes? Read a step-by-step description of how snowflakes form in my blog post! Or, find printable snowflake formation materials in my Snowflake Mini Study or in my complete Geometry in the Snow Unit.

formation of a snowflake diagram

4. Learn about symmetry with paper snowflakes

When it comes to geometry, snowflakes provide a great tool for learning about symmetry with a winter-y twist! Cutting paper snowflakes from coffee filters or paper is a great hands-on way to study rotational symmetry, planes of symmetry, and more!

Paper snowflakes are an easy activity to DIY! But if you’re looking for a little guidance, I’ve got you covered. Activity directions and worksheets for a paper snowflakes & lines of symmetry lesson are also found in my Geometry in the Snow Unit.

lines of symmetry classroom handouts

5. Study the animals of the poles!

Winter is the perfect time to study the survival strategies of animals that live in the coldest places on earth! Topics could include survival strategies like migration, hibernation, and insulation or the food webs and ecosystems of the Arctic or Antarctic.

Studying and modeling arctic food webs is a fun, hands-on ecology activity that students love. You can learn how to build your own food webs in my blog post. Furthermore, you can learn all about arctic ecology and find materials for an arctic food webs lesson in my Arctic Unit.

handouts and classroom printables

Winter studies with Wild Earth Lab!

Thereโ€™s no need to scramble to put together the perfect winter science lesson  โ€“ Iโ€™ve already created some for you! The winter stem activities from this post come from my winter STEM units:

Explore more lessons from Wild Earth Lab:

If you enjoyed these winter stem activities, I know you will love trying my other science and nature units in your classroom too!


Are you interested in reading more posts with STEM activity ideas? Subscribe or follow Wild Earth Lab using the links below!

Subscribe, share, and comment: