It’s hard to imagine just how little freshwater exists on Earth compared to saltwater. If you’re teaching the water cycle, your students might be amazed to learn that less than 3% of the Earth’s water is freshwater—the rest is saltwater. In this post, I’ll show you a hands-on freshwater learning activity that uses simple kitchen measurements to help your students visualize these proportions. This activity is a powerful way to help students truly understand how rare freshwater is!
Before we dive in: If you’re an educator planning to teach the water cycle, great learning resources are key to deepening understanding! I think you and your students will love my complete Water Cycle Unit (plus you’ll support my blog with your purchase! ❤️)
Background Information
Most of the water on earth is saltwater (~97.5%), like the water in our oceans. Also, a significant amount of earth’s water is frozen such as in glaciers and ice sheets (~1.7%). Fresh groundwater makes up ~0.75% of the water on Earth, and fresh surface water such as the water in streams and lakes is about ~0.01% of the water on Earth. Additionally, about ~0.001% of earth’s water is in its gas form as water vapor in our atmosphere. Having trouble visualizing this? This activity can help you visualize the relative amounts of freshwater on Earth!
Materials
Gather the following materials. You can complete this entire lab with common kitchen measuring cups.
~1 gallon of water
Large 1+ gallon bucket or container
Liquid measuring cup
Tablespoon
8 ice cubes
Teaspoon
Eye dropper
Extra containers to hold water
Step-by-Step Directions
Work through the following steps with your students. Explain what each measurement represents as you work through the activity.
Measure 1 gallon (16 cups) of water into the bucket. This represents all the water on earth.
From the water in the bucket, remove ¼ cup of water and set aside. Replace it with 8 ice cubes. These represent the earth’s frozen water such as glaciers and ice sheets.
From the water in the bucket, measure 2 tablespoons into an extra container. This represents the Earth’s fresh groundwater.
From the water in the bucket, use an eyedropper to measure 8 drops of water into an extra container. This represents all the surface water on earth, such as streams and lakes.
From the water in the bucket, use an eyedropper to measure 1 drop of water into an extra container. The amount of water vapor in our atmosphere at any time is represented by slightly less than this amount!
Look at the water remaining in the bucket. This represents the saltwater on earth, mostly water in our oceans but also including salty groundwater near coasts and saltwater lakes, ponds, and marshes.
Free Printable Directions for This Activity
A printable version of these directions can be found on my free resources page. As my email subscriber, you’ll gain access to the free resources page and get updates about new activity ideas, project guides, new freebies and units, and cool science topics to teach in your classroom! Subscribe now to access the freebies page and more!
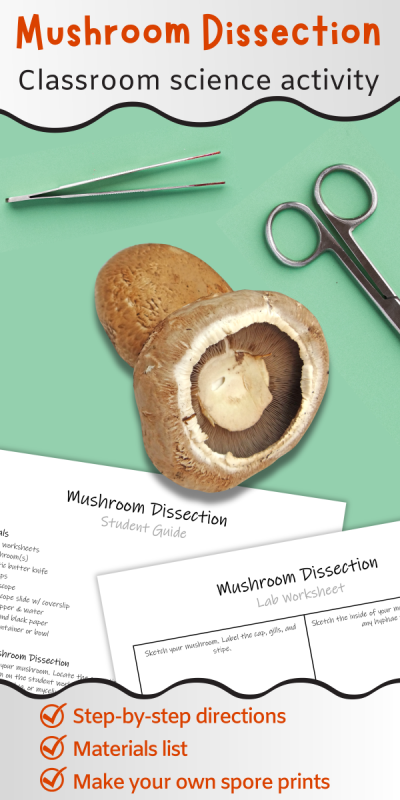
Studying the parts of a mushroom is a fun biology activity for students at many levels. One of the best, hands-on ways to learn mushroom anatomy is by dissecting one. In this mushroom dissection activity, students will observe the internal and external parts of a mushroom. Students will operate a microscope to observe spores and mushroom gill anatomy. Finally, students will create their own spore prints by allowing mushrooms to release their spores onto paper.
Please Note: I’ve made the directions for this mushroom dissection activity available for free here in this post. If you would like printable directions and worksheets for this activity, you can purchase them in my shop. You can find these materials and more mushroom learning materials in my complete Mushrooms Unit!
A mushroom is the fruiting body of certain fungi. By dissecting a mushroom, you can see the parts of a mushroom up close. These parts help the fungi produce and release spores to create more fungi.
Examine your mushroom. Locate the cap, stipe, and gills (or veil covering the gills). Sketch your mushroom on the student worksheet, labeling the cap, stipe, gills, and other parts you see such as an annulus, volva, or mycelium still attached.
Using fingers or forceps, gently peel away and remove any veil covering the gills (if needed).
Remove the stipe from the cap by gently pulling or twisting on the stipe.
Break or cut the stipe in half length-wise.
Do you see any long, thin filaments or strings on the inside of the stipe? These are hyphae. Sketch the inside of the stipe on the student worksheet, labeling any hyphae.
Remove one gill from the mushroom. Use the forceps to grasp and gently pull away one gill.
Place the gill on a microscope slide. Add a drop of water and a coverslip.
Examine your gill under the microscope and sketch what you see. Basidia are tiny knobs on the gill that make spores. Label the basidia and any spores you see attached to them in your sketch.
If you have a second type of mushroom, repeat steps 1-8 with the second mushroom.
Once finished, discard all mushroom parts EXCEPT for the cap(s) and clean your microscope slide.
Part 2: Spore Prints
Spores are released from mushrooms as part of the life cycle of a fungus. You can make unique artwork by allowing mushroom caps to drop their spores onto paper.
You can use the mushroom cap(s) from part 1 to make a spore print. Ask your instructor for additional mushrooms to make additional prints.
With any new mushrooms: remove the stipes and peel away any veils covering the gills.
Spores may be light or dark-colored. Try using both black and white paper for your spore prints to ensure the spores are visible.
Place the mushroom caps with the gills facing down on top of the papers.
Place an upside-down container or bowl over the mushroom caps to protect them.
Leave the caps alone overnight. During this time, the gills will release spores which will fall onto the paper.
The next day: remove the containers and mushroom caps to reveal the spore prints.
Wild Earth Lab is supported by readers like you. This post includes links to my own products and affiliate products. If you purchase through links on my site, I may earn a small commission at no additional cost to you.
Although mushrooms grow out of the ground like plants, they belong to a completely different kingdom—the fungi kingdom. The life cycle of fungi, like mushrooms, is unique and distinct from the life cycles of plants and animals. Understanding the stages of a mushroom life cycle provides fascinating insights into how fungi grow, reproduce, and contribute to their ecosystems. In this post, we’ll explore the life cycle of a mushroom step-by-step. For homeschool parents and biology teachers looking for engaging ways to introduce the fungi kingdom, be sure to check out my printable mushroom life cycle materials featuring my artwork!
Before diving into the mushroom life cycle, be sure to review the parts of a mushroom. It helps to be familiar with mushroom anatomy terms including mycelium, hyphae, and spores.
1. Spores Germinate and Hyphae Form
The life cycle of a mushroom begins with spores. A spore is a single cell, but not just any cell – it’s a special cell for reproduction. When spores land on the soil or another surface, they germinate, which means start growing. The spores develop into hyphae: long branching filaments made of many cells.
2. Hyphae Meet
In animals, there are two mating types, known as male and female. Fungi also have different mating types (two or more depending on the species). When two hyphae of different but compatible mating types come into contact, they fuse together. This fusion allows new, unique hyphae to grow.
3. Mycelium Expands and Primordia Form
As the hyphae grow and expand, they form a mycelium – the underground part of a fungus. As the mycelium spreads, clusters of hyphae called hyphal knots start to develop. These hyphal knots are a sign that a mushroom may soon form. The knots grow into small structures called primordia, which are like baby mushrooms.
4. Button Forms
Many hyphal knots and primordia form in the mycelium, but only a few grow into mature mushrooms. A mushroom is the fruiting body of a fungus – its reproductive structure that makes spores. When a mushroom is young, it is called a button. Buttons have protective veils covering their gills.
Looking for a hands-on mushroom activity to try with your class? You can grow your own edible mushrooms using a kit, and watch buttons form from the mycelium! Try this grow-your-own oyster mushroom kit from ForestOriginsShop on Etsy.
5. Spores Release
Once the mushroom is fully developed, it opens, revealing its gills. The gills release spores. A single mushroom can produce billions of spores. Spores are very light, allowing them to travel easily through the air. If they land in a good spot, some will germinate and start the life cycle all over again.
Teach Mushroom Life Cycles with Wild Earth Lab!
Do you needclassroom materials for teaching fungi life cycles? I’ve created some for you! This set includes all the printable materials you need for studying how mushrooms form! Your purchase will support this blog.
Or, get these life cycle materials PLUS more mushroom activities in my complete Mushroom Unit:
Various Authors (n.d.). Introductory Biology: Evolutionary and Ecological Perspectives. Chapter XVI. Fungi. Available via University of Minnesota PressBooks: https://pressbooks.umn.edu/introbio/
Catching aquatic macroinvertebrates is an exciting, hands-on activity that makes for an unforgettable ecology field trip. This is an outdoor activity and is a great way to examine the diverse organisms of freshwater ecosystems with your homeschool or science class. This activity will enhance your classroom studies of biodiversity, bioindicators, entomology, or aquatic food webs. In this post, I’ll guide you through three different techniques to successfully catch and observe aquatic macroinvertebrates. Let’s begin!
Before we dive in: If you’re an educator planning to teach macroinvertebrates, great visuals and activities are key to deepening understanding! I think you and your students will love my complete Macroinvertebrates Unit (plus you’ll support my blog with your purchase! ❤️)
Aquatic macroinvertebrates from left to right: mayfly nymph, stonefly nymph, and larval caddisfly.
An aquatic macroinvertebrate is an animal with no backbone that lives in or on water and is big enough that you can see it with your naked eye. This includes animals like aquatic insects, other aquatic arthropods, aquatic mollusks, aquatic worms, and more.
Macroinvertebrates play an important role in aquatic ecosystems. Many macroinvertebrates help recycle nutrients back into the food web by consuming detritus (decaying matter) that settles to the bottom of the water. They may also eat algae or even other macroinvertebrates. These tiny creatures are an important food source for fish, birds, and other animals that live in and around ponds, streams, and wetlands.
Furthermore, aquatic macroinvertebrates are used by scientists as bioindicators – basically, they help tell us if a stream, pond, or wetland is healthy. You can read more about macroinvertebrates and their use as bioindicators in this blog post.
Catching Aquatic Macroinvertebrates Activity
Materials
Each group will need the following materials.
Fine-mesh net such as a pool net for collecting aquatic macroinvertebrates
Tweezers
Large, deep-sided pans (e.g., foil roast pans, pie tins)
You can save time and support my blog when you purchase my aquatic macroinvertebrates unit – complete with all the worksheets and handouts for this activity!
Set-Up & Directions
Safety Note: Only attempt activities in extremely shallow, easily wadable streams and water bodies. Do not enter deep or swiftly moving water. Adult supervision is required at all times while in and around water.
Assign groups of 2-4 students.
Introduce and demonstrate the three methods for collecting aquatic macroinvertebrates (details below).
Pass out the materials.
Allow students to try out the three methods for collecting aquatic macroinvertebrates (details below).
Aquatic macroinvertebrates like to be in water and cannot survive for long out of water. While examining your aquatic macroinvertebrate catches, be sure to always keep them in a pan or jar of water.
At the end of the activity, instruct students to gently pour the aquatic macroinvertebrates back into the pond or stream.
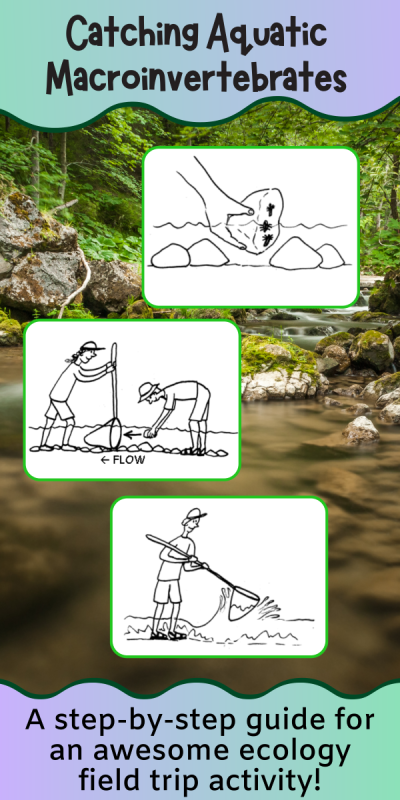
Method 1: Flipping over rocks
Works best in: shallow flowing or standing water
In shallow water such as near the edge of a pond or stream, flip over submerged rocks and logs. Benthic (bottom-dwelling) macroinvertebrates such as insect larvae are often clinging to the underside of rocks or logs. Use tweezers or fingers to gently remove the macroinvertebrates from the rock/log and place them in a pan filled with water.
Method 2: Net in flowing water
Works best in: shallow flowing water only
Have one person hold a net touching the bottom of a shallow stream, facing upstream. This should allow water to flow through the net. A second person will use their hands to gently move and scrub the rocks and sediments directly upstream of the net. As you scrub, macroinvertebrates will let go of the rocks and the flowing water will sweep them directly into the net. Empty the net’s contents into a pan filled with water.
Method 3: Net in standing water
Works best in: shallow standing water
You may be familiar with this technique as pond dipping. Use a net to scoop up sediments and plant matter from the bottom of a pond and empty it into a pan of water. Use tweezers to pick through the sample to find the aquatic macroinvertebrates that were hiding in the sediments and plant matter. You can place the macroinvertebrates you pick out into a separate small jar filled with water.
Identifying Aquatic Macroinvertebrates
There are many types of aquatic macroinvertebrates. Once you catch some macroinvertebrates, you will probably want to sort them into a few basic categories to begin with.
Aquatic macroinvertebrates include:
Aquatic insects:
Larvae/nymphs (e.g., EPT, dragonflies, dipterans)
Insects that are aquatic for their whole life cycle (e.g., water scorpions, water beetles)
Crayfish
Aquatic snails
Aquatic worms
Bivalves
Water mites
What do these ten animals have in common? They are all aquatic macroinvertebrates! 1. stonefly, 2. caddisfly, 3. mayfly, 4. aquatic beetle, 5. water strider, 6. freshwater snail, 7. freshwater mussel, 8. aquatic worm, 9. water mite, 10. crayfish.
Resources for Macroinvertebrate ID:
You have options when it comes to identifying macroinvertebrates. For beginners and younger learners, you may wish to sort macroinvertebrates into just a few basic categories (e.g., insects, worms, bivalves, etc.). Middle and high school classes often identify aquatic insects by order (e.g., mayflies, stoneflies, caddisflies, dipterans, etc.).
University-level classes and researchers sort macroinvertebrates down to the family, genus, or even species level. This level of ID typically requires a dissection microscope and a dichotomous key.
There are many resources for identifying aquatic macroinvertebrates and aquatic insects. Here are a few:
Troutnut is a fly fishing website with some wonderful photos of aquatic insects. It’s a great resource if you’re already pretty familiar with aquatic insects and ID at the genus/species level
This webpage from the University of New Hampshire has many aquatic insect photos and a stream key for advanced ID (genus/species level)
My Macroinvertebrates Unit has beginner-friendly materials for studying aquatic macroinvertebrates and identifying aquatic insects at the order level
My macroinvertebrates flashcards (these are found in the unit, but you can also purchase them separately here)
My three-part cards feature my drawings and are perfect for beginner-level aquatic macroinvertebrate ID!
Expanding on this Activity
Once you’ve learned how to catch aquatic macroinvertebrates, there are many ways that you can expand on this activity. Here are just a few ideas:
Compare two locations: compare the macroinvertebrates captured in flowing and standing water. Are they the same or different?
Life stages: bring a butterfly net and also capture flying insects in the area. Many aquatic insects like mayflies, stoneflies, caddisflies, dragonflies, and more are only aquatic until they reach maturity. Can you capture the flying adult forms of any aquatic macroinvertebrates around your pond or stream?
Sorting & counting: in ecology, “richness” refers to the number of different taxa (e.g., species, orders) found in a community. This is an important measure of biodiversity and one of many metrics that ecologists use to assess the health of an ecosystem. Introduce this concept to your students by having them create a list of the different types aquatic macroinvertebrates that they find during the field trip activity.
Teach Macroinvertebrates with Wild Earth Lab
Planning to teach this activity? Save time and support my blog when you purchase my Macroinvertebrates Unit, referenced throughout this post.
The unit includes everything you need to complete this activity: student handouts, worksheets, and readings, plus tons of other materials for learning all about macroinvertebrates!
Are you searching for an engaging and educational ecology activity to try with your students? Building your own food webs is a fantastic way to study the flow of energy between organisms – all while allowing kids to be creative! Best of all, this is an activity that you can complete outside, making it perfect for homeschool parents and teachers who enjoy having class outdoors! Get ready to inspire your students with this unique and interactive ecology project!
A special note for educators: are you planning to teach this food webs activity? If so, I’ve already created all the worksheets, printable materials, handouts, and directions that you will need. Find these materials in my complete Food Webs Unit – and you’ll support this blog with your purchase! 💚
A food web is a complex network of feeding relationships between organisms in an ecosystem. Energy flows from the organism being eaten to the organism doing the eating. We represent food webs using diagrams with arrows between the organisms. Food web diagrams map the many paths for the movement of energy between organisms.
I wrote a separate blog post in which you and your students can read more about food webs and food chains. It includes lots of diagrams and examples!
What types of organisms make a food web?
All the different lifeforms coexisting in an ecosystem form a community. The community is made of many individual, diverse lifeforms – like plants, animals, and fungi – called organisms.
When you build your food web model, it will include many different types of organisms. These organisms fall into three main categories, based on the roles they play in the food web. Knowing the difference between these roles will help you and your students build food webs.
In an ecosystem, you will find the following types of organisms:
1. Producer:
An organism that produces its own food through photosynthesis. Producers use sunlight, water, and carbon dioxide to make their own food. They also need soil nutrients.
Examples: trees and other plants, some plankton, moss, some microorganisms
2. Consumer:
An organism that eats other organisms as food. Consumers cannot make their own food. Consumers can be herbivores, omnivores, carnivores, and scavengers.
Examples: insects, birds, frogs, deer, other animals
3. Decomposer:
An organism that recycles nutrients back into the soil by eating and digesting decayed plant and animal matter and waste.
Examples: mushrooms, some worms, soil bacteria
Make your own food webs activity:
Gather your materials and follow these steps to create your own food webs with your students. You can all work on one big food web together, or each student can make their own mini-food web! There are many possibilities!
Materials
Flashcards or pictures of the organisms in an ecosystem (plants, animals, fungi, etc…)
Or, get a set for an ecosystem of interest (e.g., desert, arctic, forest, etc…)
You can also make your own set!
Sidewalk chalk
A large, paved area outdoors that is free of cars and heavy foot traffic
Step-by-Step Directions
Set-Up:
Sort the organism cards into 3 piles:
producers
consumers
decomposers
Look through your producers pile.
This pile represents the food sources for herbivores and omnivores (primary consumers) in your ecosystem.
Look through the consumers pile.
Sort these cards further or make a mental note of which organisms are likely to eat plants (herbivores and omnivores) and which organisms are likely to eat animals (carnivores and omnivores).
Research the diets of unfamiliar animals.
If students are unfamiliar with some of the animals and their diets, it may help to research the animals online. You can take notes on the backs of the cards if needed.
Note: if you’re using my food webs unit, a handout is provided with info on the diets of the included animals!
Build Your Food Web:
Choose your producers.
It is easiest to start with one to three producers.
Which consumers eat your producers? These are your primary consumers.
Place the primary consumers above your producers and draw arrows to represent the flow of energy from food to eater.
Which consumers eat your primary consumers? These are your secondary consumers.
Place the secondary consumers above your primary consumers and draw arrows to represent the flow of energy from food to eater.
Which consumers eat your secondary consumers? These are your tertiary consumers.
Place the tertiary consumers above your secondary consumers and draw arrows to represent the flow of energy from food to eater.
Repeat this process as needed, until your reach a consumer that is not eaten by anyone else – this is your top predator!
You can make your food web as big or small as you’d like! It could include dozens of organisms or just a few.
Add additional arrows as needed.
Food webs can be messy! Many any animals have multiple food sources and are preyed on by multiple predators.
Optional: place any decomposer cards underneath the food web. Decomposers recycle nutrients back into the soil to help producers like plants grow!
Example Food Webs:
An example of building your own food web!
Study Food Webs with Wild Earth Lab:
Of course, you can put together your own food web materials to complete this activity. Or, save time and support my blog when you purchase my food webs unit! The unit includes everything you need to complete this activity plus additional handouts, worksheets, and readings!
Are you in search of engaging ways to teach earth science in your homeschool or classroom? Hands-on activities help make complex concepts more memorable and enjoyable for students. Whether you’re building models of Earth’s layers, measuring stream flow, or exploring plate boundaries, these interactive lessons will bring earth science to life in your classroom!
In this post, you’ll find nine earth science activities that are perfect for homeschool parents and classroom teachers looking to inspire curiosity about the earth. Let’s get started!
1. Make a map of the continents and oceans
Teach students the names and locations of the oceans and continents. I’ve created a FREE printable worksheet for this activity. Simply print it out and color in the different continents and oceans with your students. Download the free worksheet here.
Earth science isn’t just about soils and rocks – water is an important part of our earth too! Hydrologists collect stream measurements to ensure we are not using our water resources too quickly or in unsustainable ways. With a few household items, you can collect river measurements too!
I’ve already written up the full directions for this activity online in my blog. Find the complete guide for this activity with materials and calculations at the end of this blog post about stream measurements! Or better yet, you can support my blog by purchasing the printable directions and handouts for this activity from my shop!
Porosity and permeability are important topics in both soil science and geology. Examining soil porosity and permeability is an easy lab experiment that you can complete with common household items. Compare the porosity and permeability of three sediments: gravel, sand, and clay/silt.
You can find the full written directions with materials and calculations for a porosity and permeability lab activity online in my porosity and permeability blog post! You can save time and support my blog with your purchase of the printable directions and handouts for this activity from my shop!
There are many ways to build a model of the Earth’s layers. You can model Earth’s three basic (compositional) layers: core, mantle, and crust. Or to make this activity more advanced, make a model of earth’s mechanical layers instead – lithosphere, asthenosphere, etc…
You can make your model of the Earth’s layers out of many different types of materials. A few options include:
Play dough or clay
Food, such as packing together different colors of rice cereal-marshmallow treats, and candy
Construction paper circles
Stacked nesting bowls
Printable templates, like these ones I created (for purchase in my shop)!
5. Build a model of the soil horizons snack-tivity!
Perhaps you have made a “cup of dirt” from pudding. But you can turn this simple snack into a tasty science activity by creating a soil horizons parfait!
The basic idea is this: you will make a parfait with 6 layers to represent the 6 horizons. This is an entertaining and tasty way to teach your students about soil horizons during a gardening, soil science, or agriculture unit in your classroom.
Minerals are the building blocks of rocks and an important topic in any geology or earth science class. You can teach your students how to identify common minerals by following a few simple steps.
These directions and handouts are available for purchase in my shop.
7. Build play dough landforms
Creating landforms out of play dough or clay is sure to be a memorable earth science lesson for students! All you need is enough play dough for each student. Students can build common landforms such as islands, hills, mesas, peninsulas, isthmuses, and more. Or try creating landforms specific to your area – do you live near volcanoes? Moraines? Caves? Canyons?
I recommend starting by sculpting the following 7 easy landforms:
Hill
Mountain
Island
Isthmus
Peninsula
Volcano
Mesa (flat-topped mountain)
This activity is pretty straightforward. But, if you’d like to elevate your landforms lesson with printable directions, landform flashcards, and more, you should check out my landforms unit, available in my shop.
If you need directions and printable materials for this play dough activity, find them within my complete landforms unit
8. Model tectonic plate boundaries with cookies!
Create a model of the three main tectonic plate boundary types using sandwich cookies. Remove the top layer of the sandwich cookie (lithosphere), break it in half, and place it back on top of the crème (asthenosphere), arranged as a boundary type.
Be sure to create the following three boundary types:
There’s no need to scramble to put together the perfect earth science unit – I’ve already created several for you! Choose from plate tectonics, rocks & minerals, landforms, water features, the water cycle, glaciers, and soil science! Each is packed with earth science activities, worksheets, readings, and more!
Wild Earth Lab is supported by readers like you. This post includes links to my own products and affiliate products. If you purchase through links on my site, I may earn a small commission at no additional cost to you.
Are you studying birds in your homeschool or classroom? Engaging your students with interactive bird activities can make learning about these unique animals memorable. Birds provide a great opportunity to explore animal biology concepts, from understanding bird adaptations and behaviors to investigating their diets and life cycles.
To support your bird study, I’ve curated eight fun and educational bird activity ideas that are perfect for homeschool parents and classroom teachers alike. Whether you’re teaching elementary science or simply looking for creative ways to bring nature into your lessons, these hands-on bird activities are sure to inspire!
Download this FREE bird anatomy worksheet that I created just for you! It features a heron and is perfect for learning about the different feathers and body parts of a bird. The set includes a labeled diagram and an unlabeled diagram for practice!
My newsletter subscribers can access my free resources page, where you’ll find this diagram and many other freebies.
It’s easy to observe wild birds in action when you set up a bird feeder. You can do this outside your classroom window or in another outdoor area. Bird feeders are a great way to observe the feeding habits of birds up close.
Before you set up your bird feeder, have students research the diets of common birds in your area, with a wildlife research project (free worksheets!). Birds eat a wide range of food – seeds, berries, insects, flower nectar, small animals, and more! Furthermore, they feed in different ways. Some crack nuts with strong beaks, while others drill into wood or catch flying insects from the air!
Since different birds have different diets and feeding habits, there are many different types of bird feeders to choose from. After researching the local birds and their feeding habits, students can help select the best type of bird feeder for your classroom. A few different bird feeder options include:
Tray feeders
Hummingbird feeders (e.g., these hand-made glass feeders)
Hopper feeders (e.g., this feeder made from recycled plastic!)
Nyjer feeders
Window feeder – great for seeing birds up close! (example)
DIY bird feeders – gather your own materials or get a kit (example)
3. Try a fun bird beaks lab
A bird beaks lab is a hilarious and hands-on way to experience competition between species and learn about natural selection and animal adaptations. Students will experience first-hand how specialized beaks can help birds quickly gather the most food and outcompete other types of birds.
In my blog, I’ve created a guide for completing your own bird beaks lab! Check out my directions for setting up your own bird beaks lab in this post!
Raptors, or birds of prey, are top predators that can be found in almost any type of habitat, from coastal areas to mountains, wetlands to deserts, grasslands to forests. Some of these incredible birds can even adapt to live alongside humans in urban areas!
Raptor centers provide homes for injured birds of prey that can no longer survive in the wild, as well as raptor outreach and education for their local communities. You can learn all about raptors from the experts at your local raptor center or wildlife sanctuary while seeing these amazing birds up close! Many Raptor centers offer tours to school groups and homeschoolers, and some have outreach programs that will come to your school.
You can also find more raptor activity ideas and raptor information in my blog posts:
Building or decorating a birdhouse is a wonderful activity to go along with studying bird life cycles. Learn about the nesting habits of birds and create a little bird home where you can watch the bird life cycle take place!
There are many birdhouse options to choose from. You can get a birdhouse kit where you assemble the parts yourself (example) or pre-made birdhouses ready for kids to decorate (example)!
Birds have lots of special adaptations, and the most obvious ones are their wings! However, bird wings are not one size fits all – bird wings come in many specialized forms that are serve different functions and fit different lifestyles. Read my blog post about bird wings to take a look at a few different types of wings and what they do!
Nothing beats seeing birds in their natural habitat! Birds can be found in all sorts of different environments, from forests to grasslands, wetlands to deserts, coasts to mountains! They can even be found adapting to live in urban areas alongside humans, in some cases!
Don’t forget to bring all the right equipment when you go bird watching. You’ll need:
There’s no need to scramble to put together the perfect bird lesson plan – I’ve already done the work for you! Choose from seabirds & shorebirds, waterfowl & waterbirds, and birds of prey! You’ll find even more activities, printable learning materials, worksheets, and more in my bird units!
In school, you usually learn that the three main layers of the Earth are the crust, mantle, and core. Geologists call these compositional layers because the layers are defined by the materials they are made of. However, geologists also think about how different layers of the Earth move: for example, do they flow easily? Are they rigid or soft? Are they solid or liquid? Because of this, geologists also classify Earth’s interior into five mechanical layers. The mechanical layers are based on movement and strength and include the lithosphere, asthenosphere, mesosphere, inner core, and outer core.
Before we dive in: If you’re an educator planning to teach the Earth’s layers, great activities are key to deepening understanding! I think you and your students will love my Earth’s Layers Model Activity, which you can also find within my complete Plate Tectonics Unit (plus you’ll support my blog with your purchase! ❤️)
Now, let’s learn more about both the compositional and mechanical layers of the Earth:
Earth’s compositional and mechanical layers. Diagram by WildEarthLab.
Compositional Layers of the Earth
If you could cut the Earth in half, you would find that the Earth is made of three main compositional layers – crust, mantle, and core. Each layer has a unique composition – that is, what it is made of. First, the crust is a very thin layer on the surface made of rock. Beneath the crust lies the mantle, a thick layer of denser rock. Although the mantle is made of rock, it moves and flows like a liquid, only very, very slowly. Finally, the core is located in the very center of the Earth and is made of metals.
You may ask – why does the Earth have compositional layers? These layers are separated based on their densities. Just as oil will settle on top of water when mixed, Earth’s inner materials separate into layers based on density. The core is made of metal, making it very dense – that’s why it is at the center. In contrast, the least dense layer is the crust. In a way, the atmosphere could also be considered a compositional layer of the Earth. The atmosphere is made of gases, so it is even less dense than the crust!
Earth has 5 mechanical layers. “Mechanical” means defined based on their movement. Together, the crust and topmost portion of the mantle create the lithosphere. The lithosphere is a rigid layer that is broken into tectonic plates. Under the lithosphere lies a more pliable portion of the mantle called the asthenosphere. The soft asthenosphere flows most easily, allowing the tectonic plates to move atop it. We call the remaining, lower part of the mantle the mesosphere. Next, the outer core is a flowing liquid layer that creates Earth’s magnetic field. In contrast, the inner core is solid.
Why study the Earth’s layers?
Things happening within Earth’s layers impact our lives. For example, our planet’s metallic core generates a magnetic field. The Earth’s magnetic field is pretty amazing – it allows us to navigate by compass, protects the Earth from cosmic radiation, and creates beautiful northern lights.
Additionally, movements in the lithosphere (upper mantle and crust) cause everything from the creation of certain landforms and rocks to volcanoes, earthquakes, and tsunamis! This is all tied to thetheory of plate tectonics. The theory of plate tectonics is important in the field of geology, and before we can study it, we must first understand the layers of the Earth.
Paper model of earth’s layers. Find printable templates and directions for this project in my shop.
Classroom Activity: Density Experiment & Earth’s compositional layers
As we learned, three compositional layers of the Earth (crust, mantle, and core) are separated based on density. In this activity, explore how differences in density lead to layering. Matter (liquids, solids, or gases) with different densities may float above or sink below one another to form layers.
In a tall glass or beaker, stack different liquids such as dish soap, water, vegetable oil, and rubbing alcohol.
Start by pouring in the most dense layer – the dish soap.
Add the water next. Add liquids by pouring gently: hold the beaker at a slight angle and pour slowly to minimize mixing and bubbles forming.
Add the oil next, pouring gently.
Add the alcohol, pouring gently.
As a bonus, you can drop small solid objects into the jar to see what level they sink to – for example, a piece of candle wax, a marble, and a small piece of Styrofoam.
More Ideas for Teaching Earth’s Layers
Students can build their own models of the Earth’s layers using play dough, construction paper, or printable templates.
Or, make a 3D model of the Earth’s layers by stacking nesting bowls representing each layer.
Try out Wild Earth Lab’s complete Plate Tectonics Unit. It includes all the activities, worksheets, and diagrams that you will need for a great Plate Tectonics unit with your class or homeschool.
Waterfowl and other waterbirds are some of the best wildlife to go view with kids in wetlands and other natural areas, regardless of your location. If you are planning a waterfowl field trip – or a whole waterfowl and waterbird unit – this waterbird & waterfowl activities list is the place to start!
In case you are wondering, waterfowl are ducks, geese, and swans – birds in the biological order Anseriformes. Meanwhile, “waterbirds” is a more general term. Waterbirds refers to a large group including waterfowl and other water-loving birds. This includes wading birds (e.g., herons, egrets, cranes), shore birds (e.g., sand pipers, plovers), as well as loons, grebes, coots, cormorants, and more!
Try out some of these waterbird and waterfowl activity ideas with your class!
1. Waterfowl Origami
Fold an origami crane, swan, or duck. Or all three! Here are a few helpful online tutorials:
The National Crane Foundation‘s instructions for folding Origami Cranes – with printable directions and a video!
Fold an Origami Swan – with this video from Origami Plus – Easy Origami Tutorials on YouTube!
Go on a birdwatching adventure at a local wetland or lake. Bonus: before you head out, print out a species checklist of local waterfowl and waterbirds!
Here are a few online resources to help you begin birdwatching like a pro!
Read a children’s book featuring waterfowl! Possibilities include “Make Way for Ducklings” by Robert McCloskey and “The Trumpet of the Swan” by E. B. White.
Here are some websites that put together lists of bird-related books:
Ten Birdy Children’s Books to Read With Your Fledglings, a August 2019 blog post on Audubon by T. Santora
Check out GoodReads list of books for bird lovers – including several books featuring geese and ducks!
Try a bird beak lab – use different “beaks” (e.g., chopsticks, tweezers, slotted spoon), to pick up different “food sources” (pasta, seeds, peas). See which beak is the best at “catching” each food.
There are lots of versions of Bird Beaks Labs around the web. Here are a few good ones:
Experience swimming like a swan (or duck, or grebe…)! Grab a pair of swimming flippers (aka snorkeling fins) and head to a local pool or swimming area.
Bonus: toss some diving rings and practice diving under the surface of the water like a diving duck to retrieve them!
8. Duck Masks & Art Projects
Do a waterbird art or writing project! Learn to draw or paint a waterbird from your area. Write a poem about your favorite waterbird! Decorate a duck mask! Write a short story. Sit by a wetland habitat as you sketch, draw, or nature-journal!
Volunteer to help clean up waterbird habitat in your local area. Research local conservation groups to find out about park and natural area clean-up days in your community.
Try out my Waterfowl and Waterbirds Unit in your classroom! It’s got lots of activities and all the worksheets, handouts, decorations, and guides you will need for a wonderous waterbirds unit in your classroom or homeschool!
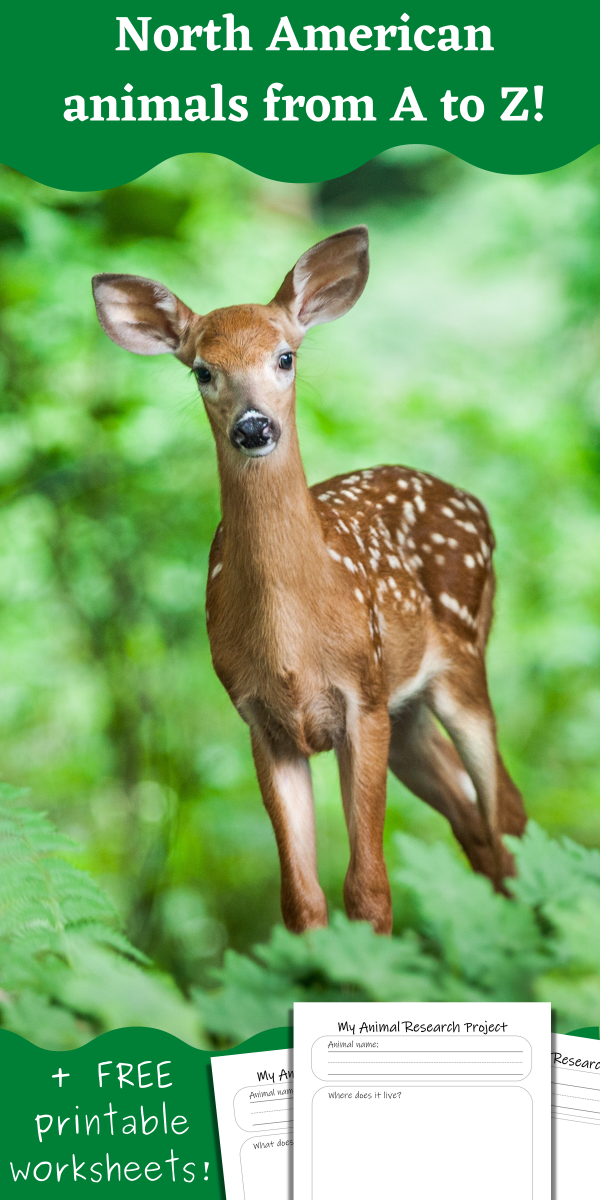
There’s a whole alphabet of animals out there in nature for you to discover!
For a recent project, I illustrated North American Animals from A to Z (you can find those illustrations here)! During this project, I reviewed many incredible critters that I studied while earning my degree in Wildlife Biology! I wanted to share more about these cool creatures with you! You may already know and love some of these animals, many of which have wide ranges in North America (and beyond) – like ants, crows, and frogs! Others are small, rare, or hard to spot – and might even be creatures you’ve never seen before! Which ones can you spot in your local habitats?
In this post, you’ll find a little more information about the featured alphabet animals (which you can also learn more about from my Alphabet in Nature Unit)! You’ll also find links to outside websites with more information about each animal! There’s also a free PDF worksheet for younger children or students to do a research project on their favorite animal from this unit!
I created this Alphabet Animals post to go along with one of my latest educational resource packs, the Alphabet in Nature Unit! It comes with flashcards, a poster, and indoor and outdoor activities for practicing the alphabet with an nature-themed twist! You can also find it in myNature Preschool Bundle! If you haven’t already, be sure to check it out 🙂
How to use this page:
Use the links on this page to learn about the alphabet animals of North America.
Ants are common insects! They can be spotted on every continent except Antarctica. They live in colonies where there are workers and a queen! There are many species of ants. These are some of the different types of ants:
Leafcutter Ants
Fire Ants
Carpenter Ants
Check out these websites to learn more about ants!
Bats are unusual because they’re a mammal but they can fly! Depending on the species of bat, they will eat a variety of foods, such as insects, flower nectar, and fruit! Some common North American bats include:
Little brown bats
Mexican Free-tailed bats
Fruit bats
Long-nosed bats
Check out these websites to learn more about bats!
Crows are incredibly intelligent birds found world wide. They’ve been observed using tools, and can recognize human faces! Check out these web resources about crows:
Earthworm photographed in the backyard of Valerie from Wild Earth Lab, in Northern Colorado!
Earthworms are annelids, the phylum of segmented and ring worms. Earthworms are beloved for their importance to agriculture. They are decomposers that move nutrients through soil by consuming and digesting waste and decaying matter. They also create large pores as they move through soil, which provide paths for water, gases, and plant roots to move through soil. You can see earthworms come to the surface of the soil to breathe during rainstorms in many habitats. Learn more about earthworms using these websites:
Foxes are omnivorous mammals. Grey foxes and kit foxes are found in the southern parts of North America. Red foxes are common in northern parts of North America. Arctic foxes are found near the arctic circle, in Canada and Alaska. Visit these web resources to learn more about foxes!
There are many species of geese world wide. Canada geese are commonly found in North America from northern Canada around the arctic circle to the the northern parts of Mexico. Many are migratory, spending their winters in warmer southern climates and their summers in far-north breeding grounds. Learn about Canada geese on these websites!
A red-tailed hawk in the care of a raptor center. Photo by Valerie (Wild Earth Lab) in Northern Colorado
Hawks are raptors, or “birds of prey”. They are carnivores and top predators found across a wide range of habitats. Here are some of the different types of hawks found in North America:
Red-tailed Hawk
Northern Goshawk
Cooper’s Hawk
Ferguson Hawk
Sharp-shinned Hawk
Check out these websites to learn more about hawks!
Inchworms devour leaves in West Virginia, photo by Valerie from Wild Earth Lab.
Inchworms or cankerworms are the larval stage of the geometer moth. They are known and named for the way they move, inching forward with the front of their body then their rear. Inchworms undergo complete metamorphosis, in which they have a pupa stage before becoming adult moths. Learn more about inchworms and geometer moths here:
There are many species of jellyfish found in multiple oceans and seas. There is also one unique species of freshwater jellyfish in North America. Jellyfish are not really fish at all! They are invertebrates in the phylum Cnidaria. There are different types of jellyfish found off the coast of North America:
Moon Jelly
Lion’s Mane Jelly
Bay Nettle
Portuguese Man-of-War
Check out these websites to learn more about jellyfish!
Kingfishers are small birds that can be spotted near estuaries, wetlands, lakes, and other bodies of water. There are a few species of kingfishers found in North America, including:
Belted Kingfisher
Great Kiskadee
Green Kingfisher
Ringed Kingfisher
Check out these websites to learn more about bats!
Lady beetles, also known as ladybugs, are not really bugs! Bugs are a specific type of insects that belong to the order Hemiptera, like box elder bugs and leaf hoppers. Lady beetles belong to the beetle order of insects, Coleoptera. Amusingly, while ladybugs are not bugs themselves, they do eat bugs – one of their favorite foods is aphids, a member of the order Hemiptera (true bugs). Learn more about lady beetles using the links below:
A sketch of a fathead minnow by Valerie from Wild Earth Lab
Minnow is a general term for many different species of small freshwater fish including chubs, shiners, and daces. Minnows provide an important food source for larger fish species higher up on the food chain and for waterfowl. Check out these websites to learn more about minnows!
Eastern spotted newt photographed by Valerie (Wild Earth Lab) in the eastern United States along the Appalachian Trail.
Newts are amphibians and a type of salamander. It’s never a good idea to pick up a newt because they have very delicate and absorbent skin – chemicals and oils on our hands can be very harmful to them! They come in many different colors – from green, to brown, to bright orange. Learn about newts on these websites:
Preying mantis photo in Northern Colorado by Valerie (Wild Earth Lab)
Preying mantises are insects that are voracious predators of other insects! Gardeners love them because they help keep away pesky crop-eating insects such as grasshoppers. Learn more about preying mantises on these websites:
Rabbits are common herbivorous mammals in the lagomorph order, which also includes hares and pika. They are sometimes mistaken as rodents. Humans have domesticated rabbits and they are beloved pets. Learn more about wild rabbits with these internet resources:
A box turtle hiding in its shell by Valerie (Wild Earth Lab), along the Appalachian Trail in the eastern United States.
Turtles are common shelled reptiles found world wide! They are found in many types of habitats, including ponds, salt water, islands, and even the desert! There are many species of turtles. Some common North American turtles include:
box turtles
sea turtles
snapping turtles
Check out these websites to learn more about turtles!
Sea urchins are found in salt water. If you live near a coast, you may spot them in tide pools! Although they might not seem like it, sea urchins are in fact animals, belonging to the phylum Echinodermata. Learn about sea urchins here:
Voles are rodents, like mice and rats. They are prey for a variety of predators, such as hawks, owls, and foxes. Check out these websites to learn more about voles!
Water striders are amazing insects that harness the power of surface tension to walk across water. They are common insects that can be seen at many lakes, ponds, wetlands, and even in the slow-flowing pools and eddies of streams and rivers. Learn more about water striders:
A sketch of a xeme (sabrine’s gull) by Valerie at Wild Earth Lab
Xemes, also called Sabrine’s gulls, are a migratory gulls. In the summer, they are found in their summer breeding range near the arctic circle in northern Canada and Alaska. They may be seen passing through off the west coasts of Canada and the United States as they make the long journey to their winter range in the Pacific Ocean off the coast of South America. Check out these websites to learn more about xemes!
Yellow jackets are a common type of wasp. They are omnivores and feed on a variety of foods including other insects and flower nectar. They can be pollinators – animals which move pollen between flowers, transferring plants’ genetic material which allows for the production of seeds and new plants. Learn more about yellow jackets:
Zebra swallowtail butterflies are a butterfly species found in the southeastern part of the United States. They undergo complete metamorphosis like all butterflies and moths. Learn about zebra swallowtail butterflies here: