Posted on Leave a comment

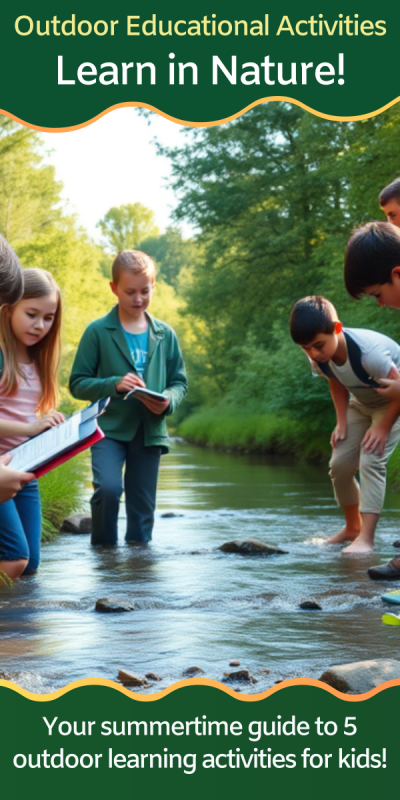
Learning in Nature: 5 outdoor educational activities to try this summer!

children with clipboards wading in a shallow river
text that says share this post

Are you a parent or educator looking for fun ways to take learning outside this summer? Whether you’re reviewing math and science concepts from the school year or looking for ways to connect with your local ecosystems, I’ve got you covered with these 5 outdoor educational activities!

In this post, you’ll find directions for nature activities for learning outside this summer! From catching aquatic macroinvertebrates to measuring the infiltration rates of soils, your students are sure to enjoy these fun outdoor learning activities!

Before we dive in:ย If youโ€™re an educator or parent looking for fun outdoor educational activities, great learning resources are key to deepening understanding! I think you and your students will love my Earth & environmental science units (plus youโ€™ll support my blog with your purchase! โค๏ธ)

Stream Measurements

painting showing three people taking measurements in a stream
Illustration of students measuring the width and depth of a stream!

For this activity, learn how to measure water flow with your students as a river field trip activity! With a few household items, you can collect river measurements. All you need are some simple measurement tools like a tape measure, yardstick, and stopwatch!

Water resource scientists, called hydrologists, collect stream measurements to ensure we are not using our water resources too quickly or in unsustainable ways. In this hands-on activity, students will not only practice math and measurements, but they’ll also learn about how scientists measure and study our rivers!

Catch Aquatic Macroinvertebrates

types of aquatic macroinvertebrates
A poster of the types of aquatic macroinvertebrates.
A cartoon of two people in a river using a net to catch aquatic insects
A diagram showing two students collecting aquatic macroinvertebrates in a stream using a net.

Catching aquatic macroinvertebrates is a memorable and educational field trip experience your students will love! Aquatic macroinvertebrates are little creatures like insect larvae and crayfish found at the bottoms of most ponds and streams. Just flip over a few river rocks or submerged logs near the shore of a pond and you’re likely to spot a macroinvertebrate underneath!

But here’s the cool part: macroinvertebrates are bioindicators – creatures that teach us a lot about the overall health of their ecosystems! That makes this outdoor activity a great way to review your classroom studies of biodiversity, bioindicators, entomology, or aquatic food webs. It’s also a great way to build connections with local ecosystems – almost any pond or small stream will work for this activity!

Measure the heights of trees using math!

A diagram showing how to find the height of a tree, with equations. Line 1: tree height above eye level equals distance times tan of angle. Second line: tree height equals eye level plus tree height above eye level.
This diagram shows how you can calculate the height of a tree using math!

Unless you are measuring a short seedling, you probably wonโ€™t be able to measure tree height directly because you canโ€™t reach the top. So how do you measure something so tall? Answer: use an inclinometer and trigonometry!

I donโ€™t know about you, but I think math is more interesting when we can apply it to real-world situations! If youโ€™re reviewing trigonometry, right triangles, or angles in your classroom or homeschool, you and your students will love this tree-height appliedย math activity! In this simple learning activity, students will learn how to make a homemade inclinometer โ€“ a device for measuring the angle of inclination. Then, they will take measurements and calculate the height of a tree in this outdoor educational activity.

Outdoor Experiment for Climate Change & Sea Ice

yellow arrows from the sun bouncing off of ice but not water
Sea ice is more reflective than ocean water.
two tubs of water, one covered in foil
Materials for a sea ice experiment.

A sunny summer day is the perfect time for this outdoor activity that’s all about heat, solar radiation, and reflection! For this activity, all you need is a warm sunny day, containers with cold water, foil, and a thermometer!

ย In this outdoor educational activity, students will create a model of sea ice and ocean water albedo using aluminum foil and two tubs of water. Students will track the temperature in a covered and uncovered tub on a sunny day. It’s a great way to learn about albedo and the impacts ofย positive feedback loopsย in climate change.

Measure Soil Infiltration Rates

sketches showing a tube being hammered into the soil then filled with water.
Steps for measuring soil infiltration rate

Summer is the perfect time to study soils! If you have a summer garden, you know the importance of healthy and permeable soil. Measuring soil infiltration rates is an activity that you can easily do in your garden with a few simple household items.

Why study soil infiltration? Infiltration rates of soils are important for many reasons. First, they are important in agriculture – different crops require soils that drain at different rates. Soil infiltration also plays a role in natural disasters like flooding and landslides. Finally, infiltration is an important part of the water cycle – when water seeps into the earth, it becomes part of the groundwater. Humans access groundwater with wells – an important source of water for drinking and growing plants!

Learn in Nature with Wild Earth Lab!

Thereโ€™s no need to scramble to put together the perfect materials for your outdoor educational activitiesโ€“ Iโ€™ve already created them for you! Check out my Earth and environmental science units, complete sets of printable learning materials with activities, posters, handouts, and more!


Are you interested in reading more posts with outdoor educational activities? Subscribe or follow Wild Earth Lab using the links below!


Subscribe, share, and comment:

Posted on Leave a comment

Teaching Climate Change: hands-on sea ice albedo experiment

Albedo lab materials - tubs with water and foil

Are you looking for a hands-on activity to teach climate change? In this lab, students will create a model of sea ice and ocean water albedo using aluminum foil and two tubs of water. Students will track the temperature in a covered and un-covered tub on a sunny day. Students will learn about albedo and the impacts of positive feedback loops in climate change.

Important: Iโ€™ve made the directions for this albedo lab activity available for free here in this post. If you would like printable directions and worksheets for this activity, you can purchase them in my Albedo Lab mini-study. These materials are also included within my complete Antarctica Unit and Polar Bundle.

Printable directions for the albedo lab activity are available in my mini-study.

Materials

Each lab group will need the following materials:

  • Two clear-bottomed shallow plastic tubs of equal size
  • Cold liquid water
  • A large piece of dark blue or black paper or cloth
  • Aluminum foil
  • 2 thermometers
  • Printed student handouts and worksheets
Student worksheets for the albedo lab activity.

Tips for Success

  • Complete this lab on a sunny, warm day close to mid-day when the sun is overhead. This lab may not work on cold or overcast days, or in the early morning or afternoon when the sun is at a lower angle in the sky.
  • Students should record the water temperature in the two tubs at a 5-minute interval. If the water is warming slowly, you can instruct students to switch to a 10-minute interval.
  • Once students see a clear trend or pattern, you may instruct them to stop taking measurements.
two tubs of water, one covered in foil

Activity Structure and Emphasizing Key Concepts

  • Before starting the lab, ask your students if they would feel cooler wearing a black or white shirt on a sunny day. Or, ask them if they would be more comfortable standing barefoot on blacktop or grass on a hot day.
  • During the lab, introduce the term โ€œalbedoโ€ to your students โ€“ the amount of solar radiation reflected by a surface. Relate this to the black vs white shirt example and the blacktop vs grass example.
  • After completing the lab procedure, ask your students what they think happens to ocean water at the poles when it is no longer covered in sea ice. Discuss how positive feedback loops work.
positive feedback loop diagram
I created this positive feedback loop diagram for you. It’s available in my shop, and you can support my blog with your purchase!

Step-by-Step Procedure

Head out to a sunny area, pass out the materials, then help your students work through the following steps:

  1. Fill the two clear plastic tubs with equal amounts of cold liquid water.
  2. Check the starting temperature of the water in both tubs. Record the temperatures on the worksheet. The starting temperature should be the same in both tubs.
  3. Fully cover one tub in aluminum foil. This tub represents ocean water covered in a layer of reflective sea ice. The other tub represents uncovered ocean water.
  4. Lay your dark fabric on the ground or table outside in direct sunlight. The dark fabric represents the dark color of ocean water.
  5. Position your tubs on top of the dark fabric in direct sunlight.
  6. Wait 5 minutes.
  7. Check the temperature in both tubs, by inserting the thermometer into the water at the center of the container. Poke a small hole through the foil to insert the thermometer when you check the temperature in the foil-covered tub. Record the temperatures on your worksheet.
  8. Continue to check and record the temperatures every 5 minutes.
  9. Which tub is warming faster? Discuss why.

Discussion Questions

After working through the lab procedure, have your students discuss the following questions in small groups or as a whole class.

  1. Which tub became warmer faster? Explain why.
  2. Which would get warm faster, ocean water covered in reflective sea ice or exposed ocean water? Explain why.
  3. What is albedo? *in your own words
  4. What is a positive feedback loop? *in your own words
  5. In your own words, describe a positive feedback loop involving melting sea ice and climate change.

Worksheets and Printable Directions

There’s no need to put together worksheets and handouts for this lab – I’ve already created them for you! You can purchase them in my Albedo Lab Mini Study. These materials are also found within my complete Antarctica Unit and Polar Bundle.

The albedo lab materials are also found within these products:

Explore more units from Wild Earth Lab:

If you enjoyed this post, I know you will love trying my other science and nature units in your classroom too!


Are you interested in reading more posts with science activity ideas? Subscribe or follow Wild Earth Lab using the links below!


Subscribe, share, and comment:

Posted on Leave a comment

Build Your Own Food Webs: a creative ecology activity your students will love!

a banner with a picture of animal and plant flashcards on the sidewalk with chalk arrows between them, with the text "science project: let's build a food web! Step-by-step activity directions!"
text that says share this post

Are you searching for an engaging and educational ecology activity to try with your students? Building your own food webs is a fantastic way to study the flow of energy between organisms – all while allowing kids to be creative! Best of all, this is an activity that you can complete outside, making it perfect for homeschool parents and teachers who enjoy having class outdoors! Get ready to inspire your students with this unique and interactive ecology project!

A special note for educators: are you planning to teach this food webs activity? If so, I’ve already created all the worksheets, printable materials, handouts, and directions that you will need. Find these materials in my complete Food Webs Unit โ€“ and you’ll support this blog with your purchase! ๐Ÿ’š

What is a food web?

A food web is a complex network of feeding relationships between organisms in an ecosystem. Energy flows from the organism being eaten to the organism doing the eating. We represent food webs using diagrams with arrows between the organisms. Food web diagrams map the many paths for the movement of energy between organisms.

I wrote a separate blog post in which you and your students can read more about food webs and food chains. It includes lots of diagrams and examples!

What types of organisms make a food web?

Flashcards of animals, plants, and fungi sorted into piles labeled consumers, producers, and decomposers

All the different lifeforms coexisting in an ecosystem form a community. The community is made of many individual, diverse lifeforms – like plants, animals, and fungi – called organisms.

When you build your food web model, it will include many different types of organisms. These organisms fall into three main categories, based on the roles they play in the food web. Knowing the difference between these roles will help you and your students build food webs.

In an ecosystem, you will find the following types of organisms:

1. Producer:

An organism that produces its own food through photosynthesis. Producers use sunlight, water, and carbon dioxide to make their own food. They also need soil nutrients.

Examples: trees and other plants, some plankton, moss, some microorganisms

2. Consumer:

An organism that eats other organisms as food. Consumers cannot make their own food. Consumers can be herbivores, omnivores, carnivores, and scavengers.

Examples: insects, birds, frogs, deer, other animals

3. Decomposer:

An organism that recycles nutrients back into the soil by eating and digesting decayed plant and animal matter and waste.

Examples: mushrooms, some worms, soil bacteria

Make your own food webs activity:

Gather your materials and follow these steps to create your own food webs with your students. You can all work on one big food web together, or each student can make their own mini-food web! There are many possibilities!

Materials

  • Flashcards or pictures of the organisms in an ecosystem (plants, animals, fungi, etc…)
    • Find an easy-to-use set in my food webs unit
    • Or, get a set for an ecosystem of interest (e.g., desert, arctic, forest, etc…)
    • You can also make your own set!
  • Sidewalk chalk
  • A large, paved area outdoors that is free of cars and heavy foot traffic

Step-by-Step Directions

Set-Up:
  1. Sort the organism cards into 3 piles:
    • producers
    • consumers
    • decomposers
  2. Look through your producers pile.
    • This pile represents the food sources for herbivores and omnivores (primary consumers) in your ecosystem.
  3. Look through the consumers pile.
    • Sort these cards further or make a mental note of which organisms are likely to eat plants (herbivores and omnivores) and which organisms are likely to eat animals (carnivores and omnivores).
  4. Research the diets of unfamiliar animals.
    • If students are unfamiliar with some of the animals and their diets, it may help to research the animals online. You can take notes on the backs of the cards if needed.
    • Note: if you’re using my food webs unit, a handout is provided with info on the diets of the included animals!
Build Your Food Web:
  1. Choose your producers.
    • It is easiest to start with one to three producers.
  2. Which consumers eat your producers? These are your primary consumers.
    • Place the primary consumers above your producers and draw arrows to represent the flow of energy from food to eater.
  3. Which consumers eat your primary consumers? These are your secondary consumers.
    • Place the secondary consumers above your primary consumers and draw arrows to represent the flow of energy from food to eater.
  4. Which consumers eat your secondary consumers? These are your tertiary consumers.
    • Place the tertiary consumers above your secondary consumers and draw arrows to represent the flow of energy from food to eater.
  5. Repeat this process as needed, until your reach a consumer that is not eaten by anyone else – this is your top predator!
    • You can make your food web as big or small as you’d like! It could include dozens of organisms or just a few.
  6. Add additional arrows as needed.
    • Food webs can be messy! Many any animals have multiple food sources and are preyed on by multiple predators.
  7. Optional: place any decomposer cards underneath the food web. Decomposers recycle nutrients back into the soil to help producers like plants grow!

Example Food Webs:

A food web made from printed pictures of animals and plants connected with arrows drawn with sidewalk chalk on a sidewalk
An example of building your own food web!

Study Food Webs with Wild Earth Lab:

Of course, you can put together your own food web materials to complete this activity. Or, save time and support my blog when you purchase my food webs unit! The unit includes everything you need to complete this activity plus additional handouts, worksheets, and readings!

Explore more lessons from Wild Earth Lab:

If you enjoyed this post, I know you will love using my other environmental science materials in your classroom!


Are you interested in reading more posts like this? Subscribe or follow Wild Earth Lab using the links below!

Subscribe, share, and comment: