Posted on — Leave a comment

Measuring Soil Infiltration Rates: A Science Classroom Activity

students observe a white cylinder inserted into the soil
text that says share this post

Are you teaching the water cycle or studying soil in your classroom or homeschool? Measuring infiltration rates in different types of soils is a hands-on activity that helps students explore how water interacts with the ground. This soil infiltration activity also ties in perfectly with studies of porosity and permeability. This engaging experiment works as a stand-alone lesson or as part of a broader unit on soil science or the water cycle.

Before we dive in: The activity from this post comes from my complete Water Cycle Unit. If youโ€™re an educator planning to teach infiltration and the water cycle, you’ll find printable directions, worksheets, and much more in the Water Cycle Unit (plus youโ€™ll support my blog with your purchase! โค๏ธ)

Materials

Gather the following materials to complete this activity:

  • Short tube or pipe with openings on both ends, something sturdy works best:
    • A short PVC pipe
    • Or potentially a sturdy can opened on both ends (file down any sharp edges before use)
  • Ruler
  • Permanent marker
  • Hammer or rubber mallet
  • Water
  • Stopwatch
  • Student worksheets & printable directions (available in my Water Cycle Unit!)
A photo showing classroom handouts for studying infiltration of water into soil

Measuring Soil Infiltration: Step-by-Step Directions

The basic idea of this soil infiltration activity is that you will hammer a tube shallowly into the soil, then pour water in, and observe the water level drop as the water seeps into the ground. Assist your students as they work through the following steps.

Pre-Lab

In this lab, students will compare the infiltration rate in at least three different locations with different types of soil. For example, they could compare a sandy soil, a clay soil, and a soil rich in organic matter.

Before starting the lab activity, ask your students to observe and handle the three different soils. Students should write a description of each soil’s observable properties (color, texture, moisture, particle size). Then, students should predict which soils will have the highest and lowest infiltration rates. Students should explain their reasoning for their predictions.

Part 1: Set Up Your Infiltrometer

First, you and your students will need to set up your “infiltrometer” (tube for measuring infiltration rates).

  1. Use a ruler and permanent marker to make measurement markings up the inside of the tube, starting from one end.
  2. Hammer the infiltrometer (tube) into the soil โ€“ the goal is to create a seal with the soil so that water wonโ€™t leak out under the tubeโ€™s rim. (An adult should complete this step for younger students.)
sketches showing a tube being hammered into the soil then filled with water.

Part 2: Measure Infiltration

Once you’ve set up the infiltrometer, you are ready to continue with the soil infiltration activity and collect your measurements.

  1. Pour water into the infiltrometer.
  2. Note the starting height of the water and start the stopwatch.
  3. Watch the water level in the infiltrometer lower as the water seeps into the soil.
  4. Repeatedly record the water level over time on the student worksheet.
  5. Repeat in different soils โ€“ compare a sandy soil, flowerbeds, mulch, gravel, sand, compost, etc.

Post-Lab

For an extra math challenge: Calculate the infiltration rate for each of the soils:

You may also wish to ask your students to reflect on their predictions. Were their predictions correct? Which soil had the highest infiltration rate? The lowest? What might cause this?

What’s Next?

Once you’ve measured infiltration, why not measure other water cycle processes? Be sure to check out my blog post explaining how to measure evaporation and my post on making a DIY rain gauge to measure precipitation with your students!

Materials for Teaching Infiltration and the Water Cycle

Save time preparing for this activity! My Water Cycle Unit includes printable directions and worksheets for this activity and two other water cycle activities. Plus flashcards, diagrams, and more. Check it out:

photo of at home science lab activity handouts and worksheets

Explore more lessons from Wild Earth Lab:

If you enjoyed this post, I know you will love trying my other printable science and nature units in your classroom too!


Are you interested in reading more posts with science activity ideas? Don’t forget to subscribe or follow Wild Earth Lab using the links below!


Subscribe, share, and comment:

Posted on — Leave a comment

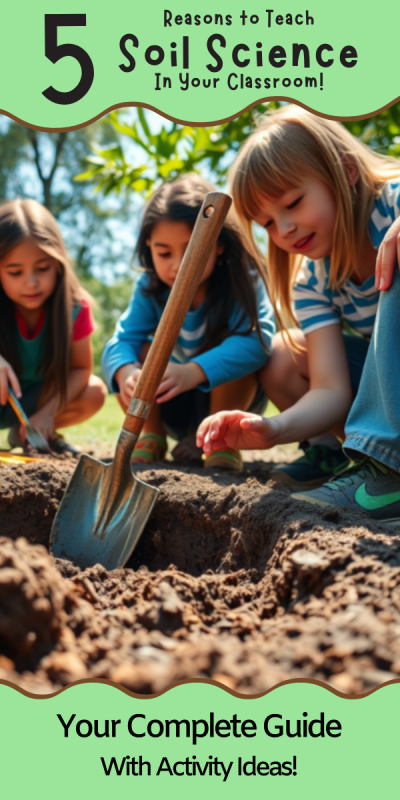
5 Reasons to Teach Soil Science in Your Classroom

Children gathered around a hole dug in the soil
text that says share this post

Soil is often overlooked as a classroom topic, yet itโ€™s a fascinating and practical area of science to explore with one’s students. Whether youโ€™re introducing elementary schoolers to the basics of earth science or tackling advanced environmental science concepts with high schoolers, soil science offers countless opportunities for hands-on learning with real-world applications. Here are five compelling reasons to incorporate soil science into your classroom curriculum.

But first: if you’re already on the hunt for great soil science teaching materials, I think you and your students will love my complete soil science unit. It includes directions for five soil lab activities, worksheets, readings, and engaging diagrams. Plus you’ll support this blog with your purchase!

1. Soil Science is an Interdisciplinary STEM Subject

One of the most exciting things about teaching soil science is its interdisciplinary nature. It bridges various STEM (Science, Technology, Engineering, and Math) fields, letting your students experience how scientific disciplines interconnect. For example, students will use math to calculate soil porosity and permeability and apply chemistry to analyze pH levels and organic matter content. Biology comes into play when learning about soil microorganisms! And even physics will come up when looking at how water moves through different soils.

Teaching soil science allows you to create lessons that naturally integrate multiple disciplines. For instance, you might try a lab where students add water to sandy and silty soils, calculate porosity, and graph their results. You can read my blog post about how to calculate porosity in your classroom! Activities like this, while simple, reinforce STEM skills!

a lab bench with a clipboard, some soil in dishes, and a bottle of liquid
A soil organic matter lab activity. Find directions online or printable versions.

2. Soils Impact Our Food, Water, Climate, and Ecosystems

Soil is so much more than just dirt! Soil is necessary for food production, water filtration, carbon storage, and ecosystem health. Teaching students about soil helps them understand the connections between soil and global challenges like food security and climate change.

For example, healthy soils are necessary to grow crops that feed Earth’s growing population. Soils also act as natural filters, purifying water as it percolates through its layers. Furthermore, soils tie into ecosystems and the climate, since they store carbon and other nutrients. Studying soil science is a great way to begin a discussion on sustainability and environmental conservation with your students.

3. Soil is Great for Hands-on Activities!

When you teach soil science, you’ll have the chance to try many hands-on learning activities with your students. For example, you could analyze soil textures – for example, by doing the soil textures “jar lab” I wrote previously about in my blog. The basic idea is this: students mix soil samples with water, shake them, and let the particles settle into layers of sand, silt, and clay. The larger, heavier particles settle out first, which lets your students observe the amount of sand, silt, and clay in the soil. This simple experiment visually demonstrates the concept of soil texture and allows students to connect theoretical knowledge with real-world observations.

Another activity is testing soils’ organic matter content. This activity relies on chemistry: when applied to soil, hydrogen peroxide reacts with organic matter, causing bubbling and fizzing. If you’d like to try this activity, you can find step-by-step directions in my blog post about detecting soil organic matter with hydrogen peroxide.

Truly, thereโ€™s no shortage of soil science experiments and activities to try. Additional options could include measuring soil pH levels and growing plants in different soil types to observe how soil composition impacts growth. These hands-on labs make lessons more interactive and also teach science skills like hypothesis testing and data collection.

a jar with soil and water and a stopwatch on a table next to handouts and worksheets
A soil textures jar lab. Find the directions online or printable versions.

4. Soil Knowledge is Useful in Many Career Paths

A little soil science knowledge goes a long way for students who dream of working outdoors or making a difference in the environment. Professions in agriculture, conservation, environmental science, land management, and urban planning all require a deep understanding of soil. Additionally, careers in engineering, hydrology, and ecology often intersect with soil science, offering even more opportunities for students with this foundational knowledge.

Introducing soil science in the classroom helps students see how their lessons could lead to fulfilling careers. You can highlight professionals who work in these fields, invite guest speakers, or assign projects where students explore soil-related careers. These activities provide opportunities to explore a variety of career paths for students who may not yet see how their classroom studies relate to their future goals.

corn plant on field
Soil knowledge is key in many careers, including agriculture. Photo by Flambo on Pexels.com

5. Soil Science Gets Students Outside

Another great reason to teach soil science is the opportunity to take your class outdoors. No matter where you live, thereโ€™s soil to explore! Outdoor activities like digging into a local soil horizon, observing soil erosion, or starting a classroom composting project can help students apply their classroom knowledge to real-world observations.

Fieldwork can be as simple or elaborate as you want it to be. You might organize a short walk around your school grounds to collect soil samples or partner with a local park for a more in-depth study. Outdoor experiences are sure to enrich your soil lessons. Plus, theyโ€™re a great way to encourage physical activity and break up the monotony of a traditional classroom setting.

Teaching Soil Science in Your Classroom

If youโ€™re an educator planning toย teach soil science, great learning resources are key to deepening understanding! I think you and your students will love my complete Soil Science Unit (plus youโ€™ll support my blog with your purchase!)

Explore more lessons from Wild Earth Lab:

If you enjoyed this post, I know you will love trying my other printable science and nature units in your classroom too!


Are you interested in reading more posts like this? Subscribe or follow Wild Earth Lab using the links below!

Subscribe, share, and comment:

Posted on — 1 Comment

Soil Science in Your Classroom: 5 educational activities to try

a graphic that has a picture of some soil and worksheets, with the text "5 soil science classroom activities"

Are you studying soil science with your homeschool or science class? Soil science is an exciting and interdisciplinary subject that integrates chemistry, physics, and environmental science. From testing soil organic matter to measuring porosity and permeability, hands-on lab activities will bring the real experience of being a soil scientist to your science classroom or homeschool. In this post, you’ll discover five educational soil science activities to try, including a soil texture jar test, modeling soil horizons, and more. These activities are perfect for helping your students explore the wonders of soil in a fun and interactive way!

1. Try the Jar Test for Soil Textures

Soil scientists need to evaluate the “textures” of soils: in other words, the proportion of sand, silt, and clay in the sediment part of the soil. But this can be a challenge. How do you separate and measure all those tiny grains?

This most basic method, the โ€œjar testโ€, is easy to do in a classroom setting. Shake up some soil and water in a jar. Then, watch the grains settle over time. Larger grains settle faster than smaller ones.

You can find the full activity directions for this science project in my blog! Or better yet, you can save time and support my blog when you purchase the printable worksheets and directions for this activity.

2. Build a Soil Horizons Parfait

Did you know soils have layers? Scientists call the layers โ€œsoil horizonsโ€. Each of the six soil horizons is given a letter: O, A, E, B, C, and R. The upper two horizons, O and A, are called topsoil. Each horizon has its own unique characteristics and function.

You can teach your students about layers in the soil by building a soil horizons parfait. Perhaps you have made a โ€œcup of dirtโ€ from pudding? With a few extra steps, you can turn this simple snack into a tasty science activity by creating a soil horizons parfait!

You can find the full activity directions for this “snack-tivity” in my blog! Or better yet, you can support my blog by purchasing my soil horizons mini study, which includes printable directions for this activity as well as soil horizon worksheets.

3. Measure Porosity and Permeability

If you’re studying soils, your students will need to know the difference between soil porosity and permeability. While these two properties are related, they are not the same! And what better way to understand the difference between porosity and permeability than a hands-on lab activity!?

Conveniently, soil porosity and permeability can be measured and observed using common household items. You can find the full activity write-up with directions for porosity and permeability in my blog! Or better yet, support my blog AND save time when you purchase the printable worksheets and directions for this lab activity.

worksheets for permeability studies
Worksheets for porosity

4. Test for Soil Organic Matter

If you’re studying soils with your students, you have probably learned that soil is a mixture of sediments and organic matter. But different soils have different amounts of these two ingredients. A soilโ€™s organic matter content is important, especially when considering a soilโ€™s ability to support plants.

To demonstrate this, you can do a cool classroom demo by mixing soil with hydrogen peroxide. The hydrogen peroxide reacts with organic matter in the soil to make gas (i.e., fizzing and bubbles!). More bubbles = more organic matter in the soil!

Find theย directions for a soil organic matter classroom demoย in my blog! Or better yet, you can support my blog by purchasing the worksheets and printable directions for this classroom activity.

dishes with soil on a lab bench next to liquid in a bottle and a clipboard

5. Learn About Decomposers

Decomposers are organisms with a very important job: they help recycle nutrients back into the soil. They help break down dead organic matter into the soil nutrients that help plants grow. There are many types of decomposers, including mushrooms and fungi, earthworms, and microbes.

You can print my free food web poster (including decomposers). To learn more about food webs and the important role of decomposers, check out my complete Food Webs Unit (for purchase).

If you are interested in studying mushrooms, I’ve also created some free mushroom anatomy printables. You can dive deeper into the world of fungi and mushrooms with my complete Mushroom Unit.

photo of mushroom anatomy diagrams
I made these mushroom anatomy diagrams for you! You can download them for FREE.

Study Soil Science with Wild Earth Lab

Many of the activities from this post come from my complete Soil Science Unit! Thereโ€™s no need to scramble to put together the perfect Soil Science Lesson โ€“ Iโ€™ve already created it for you! This set includes tons of activities and lab directions, teaching posters, handouts, and more!

Explore more units from Wild Earth Lab:

If you enjoyed this post, I know you will love using my other science units in your classroom!


Are you interested in more science activity ideas? Subscribe or follow Wild Earth Lab using the links below!


Subscribe, share, and comment:

Posted on — 1 Comment

9 Interactive Earth Science Activities for Homeschool and Classroom Learning

A banner for a blog post about 9 Earth Science Activities for hands-on learning in your classroom and homeschool with a photo of some landforms made of clay and the text "+Free map coloring activity" at the bottom of the banner.
text that says share this post

Are you in search of engaging ways to teach earth science in your homeschool or classroom? Hands-on activities help make complex concepts more memorable and enjoyable for students. Whether you’re building models of Earth’s layers, measuring stream flow, or exploring plate boundaries, these interactive lessons will bring earth science to life in your classroom!

In this post, you’ll find nine earth science activities that are perfect for homeschool parents and classroom teachers looking to inspire curiosity about the earth. Let’s get started!

1. Make a map of the continents and oceans

Teach students the names and locations of the oceans and continents. I’ve created a FREE printable worksheet for this activity. Simply print it out and color in the different continents and oceans with your students. Download the free worksheet here.

2. Measure stream flow

Earth science isn’t just about soils and rocks – water is an important part of our earth too! Hydrologists collect stream measurements to ensure we are not using our water resources too quickly or in unsustainable ways. With a few household items, you can collect river measurements too!

I’ve already written up the full directions for this activity online in my blog. Find the complete guide for this activity with materials and calculations at the end of this blog post about stream measurements! Or better yet, you can support my blog by purchasing the printable directions and handouts for this activity from my shop!

painting showing three people taking measurements in a stream

3. Examine porosity and permeability

Porosity and permeability are important topics in both soil science and geology. Examining soil porosity and permeability is an easy lab experiment that you can complete with common household items. Compare the porosity and permeability of three sediments: gravel, sand, and clay/silt.

You can find the full written directions with materials and calculations for a porosity and permeability lab activity online in my porosity and permeability blog post! You can save time and support my blog with your purchase of the printable directions and handouts for this activity from my shop!

person digging on soil using garden shovel

4. Build a model of the Earth’s layers

There are many ways to build a model of the Earth’s layers. You can model Earth’s three basic (compositional) layers: core, mantle, and crust. Or to make this activity more advanced, make a model of earth’s mechanical layers instead – lithosphere, asthenosphere, etc…

You can make your model of the Earth’s layers out of many different types of materials. A few options include:

  • Play dough or clay
  • Food, such as packing together different colors of rice cereal-marshmallow treats, and candy
  • Construction paper circles
  • Stacked nesting bowls
  • Printable templates, like these ones I created (for purchase in my shop)!
paper model of the layers of the earth
You can find my templates for creating this paper model of the Earth’s layers in my shop!

5. Build a model of the soil horizons snack-tivity!

Perhaps you have made a โ€œcup of dirtโ€ from pudding. But you can turn this simple snack into a tasty science activity by creating a soil horizons parfait!

The basic idea is this: you will make a parfait with 6 layers to represent the 6 horizons. This is an entertaining and tasty way to teach your students about soil horizons during a gardening, soil science, or agriculture unit in your classroom.

Best of all, you can find the online directions for this activity for free on my blog! Alternatively, you can save time and support my website when you purchase the printable directions and handouts for this activity in my shop!

a strawberry yogurt parfait in a cup
Photo by Farhad Ibrahimzade on Pexels.com

6. Identify common minerals

Minerals are the building blocks of rocks and an important topic in any geology or earth science class. You can teach your students how to identify common minerals by following a few simple steps.

I’ve written a whole blog post on how to set up a minerals lab in your classroom or homeschool. You can follow these online directions, or purchase printable directions and handouts from my shop.

Worksheets and classroom handouts
These directions and handouts are available for purchase in my shop.

7. Build play dough landforms

Creating landforms out of play dough or clay is sure to be a memorable earth science lesson for students! All you need is enough play dough for each student. Students can build common landforms such as islands, hills, mesas, peninsulas, isthmuses, and more. Or try creating landforms specific to your area – do you live near volcanoes? Moraines? Caves? Canyons?

I recommend starting by sculpting the following 7 easy landforms:

  • Hill
  • Mountain
  • Island
  • Isthmus
  • Peninsula
  • Volcano
  • Mesa (flat-topped mountain)

This activity is pretty straightforward. But, if you’d like to elevate your landforms lesson with printable directions, landform flashcards, and more, you should check out my landforms unit, available in my shop.

A photo showing classroom handouts for building your own landforms out of play dough
If you need directions and printable materials for this play dough activity, find them within my complete landforms unit

8. Model tectonic plate boundaries with cookies!

Create a model of the three main tectonic plate boundary types using sandwich cookies. Remove the top layer of the sandwich cookie (lithosphere), break it in half, and place it back on top of the crรจme (asthenosphere), arranged as a boundary type.

Be sure to create the following three boundary types:

  • Convergent
  • Divergent
  • Transform
black round cookies on white surface

9. Study earth science with Wild Earth Lab

There’s no need to scramble to put together the perfect earth science unit – I’ve already created several for you! Choose from plate tectonics, rocks & minerals, landforms, water features, the water cycle, glaciers, and soil science! Each is packed with earth science activities, worksheets, readings, and more!

Explore even more units from Wild Earth Lab:

If you enjoyed these earth science activities, I know you will love using my other environmental science materials in your classroom!


Are you interested in more hands-on classroom activity ideas? Subscribe or follow Wild Earth Lab using the links below!

Subscribe, Share, and Comment:

Posted on — Leave a comment

Science Snack Activity: make a soil horizons parfait!

A banner that says "science snack-tivity soil horizons parfait" with a drawing of a parfait cup

Perhaps you have made a “cup of dirt” from pudding. But you can turn this simple snack into a tasty science activity by creating a soil horizons parfait!

For this activity, you will make a parfait with 6 layers to represent the 6 horizons. This is an entertaining and tasty way to teach your students about soil horizons during a gardening, soil science, or agriculture unit in your classroom.

Background Information: Layers in Soils

Did you know soils have layers? If you viewed a vertical cross section of soil, you would see up to six main layers. Each layer looks different and is made of a unique mixture of sediments and organic matter.

We call the layers โ€œsoil horizonsโ€. Each of the six soil horizons is given a letter: O, A, E, B, C, and R. The upper two horizons, O and A, are called topsoil. Topsoil is rich in organic matter compared to the lower layers. Topsoil is where plants grow, so it is important in agriculture and ecology!  A healthy topsoil promotes healthy plant life.

What are the main soil horizons?

Here are the 6 main horizons, from top to bottom:

  • O Horizon: Decaying organic matter at the soilโ€™s surface
  • A Horizon: Soil rich in both organic matter and coarse sediments
  • E Horizon: Coarse soils, which lost their clay and soluble minerals to downward leaching
  • B Horizon: The โ€œsubsoilโ€; clay and dissolved minerals build up in this layer
  • C Horizon: โ€œParent materialโ€ of soil: pieces of partially weathered rock
  • R Horizon: Hard bedrock beneath the soil

Activity: create your own soil horizons parfait!

Materials
  • Tall, clear cups or glasses
  • Spoons
  • Graham crackers
  • Yogurt
  • Jam
  • Fresh Cut Fruit
  • Granola
  • Paper towels
Directions

Build your own model of soil horizons by making a parfait. Each layer represents a different horizon. Students should add these layers to a tall glass or clear plastic cup.

  1. R horizon:  pieces of whole graham cracker, to represent bedrock.
  2. C horizon:  crumbled gram crackers to represent the soilโ€™s parent material made from partially weathered rock in this horizon.
  3. B horizon:  yogurt, which is smooth and creamy like the fine-grained clay and soluble minerals found in this horizon.
  4. E horizon:  jam, because gritty seeds in jam represent the coarser sands and silts found in this horizon.
  5. A horizon:  fresh fruit, because this horizon is rich in organic matter.
  6. O horizon:  granola, to represent decomposing organic matter like crunchy leaves on the surface of the soil.

Soil Science with Wild Earth Lab

This soil horizons parfait activity comes from my complete Soil Science Unit. The unit is full of many activities like this one for teaching students all about soils.

Explore curriculum from Wild Earth Lab:

If you enjoyed this post, I know you will love using my environmental science materials in your classroom!


Are you interested in reading more posts like this? Subscribe or follow Wild Earth Lab using the links below!


Sharing options and discussion for this post:

Posted on — Leave a comment

Porosity & Permeability: science experiments to try in your classroom!

Banner that says "science activity: porosity vs permeability"

Are you teaching your students the difference between porosity and permeability? While these two properties of soils and rocks are related, they are not the same! And what better way to understand the difference between porosity and permeability than a hands-on lab activity!?

In this lab experiment, compare the porosity and permeability of three sediments: gravel, sand, and clay/silt. These activities are easy to complete with common household items.

You can download the printable directions and worksheets for these lab activities in my porosity & permeability mini study.

In this post, you will learn how to set up a porosity and permeability activity in your classroom. You can also get print-formatted versions of these directions, worksheets, handouts, and classroom posters to use during this lab in my Soil Science Unit!

Pre-lab Activity

Place a small amount of each sediment on three trays. Allow students to examine and touch the sediments. Ask students to consider:

  • Rub the material between your fingers. Describe how it feels. Coarse? Gritty? Fine? Sticky? Stiff? Loose?
  • Describe the material. Can you see individual grains? How large are they? What color(s) do you see?
  • Make a prediction: Which soil sill have the highest porosity? Which will have the lowest porosity?
  • Make a prediction: Which soil sill have the highest permeability? Which will have the lowest permeability?

Gather Your Materials

Gather the following materials for the demo. You will need:

Porosity Lab Activity Materials:
  • Dry gravel (~100 mL)
  • Dry sand (~100 mL)
  • Dry silt or clay (~100 mL)
  • 3 small containers of equal size (e.g., 150 mL beakers)
  • Extra beaker or liquid measuring cup
  • Water
  • Student lab handouts (1 set per student)
Permeability Lab Activity Materials:
  • Dry gravel (at least 100 mL)
  • Dry sand (at least 100 mL)
  • Dry silt or clay (at least 100 mL)
  • Graduated cylinder (200 mL or larger)
  • 400+ mL funnel to sit atop the graduated cylinder
  • 3 filter papers (e.g., pieces of coffee filters)
  • Scissors
  • Permanent marker
  • Beaker or liquid measuring cup
  • Water
  • Stopwatch
  • Student lab handouts (1 set per student)
Don’t forget to download the handouts and worksheets for this lab activity in my Porosity & Permeability mini study

Directions

Porosity Directions:
  1. Pass out the materials to the lab groups.
  2. Demonstrate the method with the gravel: Measure ~100 mL of gravel into a container and gently shake the container so that the surface of the gravel is flat.
  3. Record the total volume of the gravel on the lab worksheet.
  4. Fill a beaker with 100 mL of water.
  5. Slowly and gently, pour the water into the gravel, until the water level reaches the surface of the gravel.
  6. It may take some time for the water to โ€œsoak throughโ€ to the bottom of the beaker. You may need to pour a little water at a time and then wait before pouring some more.
  7. Record the volume of the pore space. This is equal to the volume of water you poured into the gravel.
  8. Students will repeat the procedure with the sand and the silt/clay.
  9. After students collect their measurements, show the students how to calculate the porosity:
Permeability Directions:
  1. Pass out the materials.
  2. Demonstrate the method with the gravel: Balance the funnel on top of the graduated cylinder and place a filter paper into the funnel to cover the stem hole.
  3. Fill the funnel approximately half way up with gravel. Do not fill the funnel all the way up to the top.
  4. Tap the funnel lightly to make the surface of the gravel flat.
  5. Use the marker to mark the level of the surface of the gravel on the funnel.
  6. Put 200 mL of water in the beaker or measuring cup.
  7. Start the stopwatch as you pour all 200 mL of water over the gravel.
  8. At regular intervals, record the time and the volume of water in the graduated cylinder.
  9. The water may pass through some sediments very rapidly. You may only have time to record a few volume measurements before the water is done passing through.
  10. After students finish the procedure with the gravel, they will repeat the procedure with the sand and the silt/clay. Fill the funnel to your previous mark with the other sediments.
  11. Look at the recorded data. Which sediment did the water pass through most quickly? This soil has the highest permeability.
Measure porosity and permeability with my set of lab activity materials.

Reflection Questions

  1. In your own words: what is the difference between porosity and permeability?
  2. What are some possible sources of error in the porosity lab?
  3. What are some possible sources of error in the permeability lab?
  4. During rain, water seeps down into the soil through its pores. Which soil will water pool on top of first: a soil with high permeability or a soil with low permeability. Which size grains would this soil likely have a lot of?
  5. You are potting a plant that needs a soil with high porosity. What size grains might help give a soil a high porosity?

This lab comes from my Soil Science Unit!

Your students will love the illustrated learning materials, plus you’ll support Wild Earth Lab with your curriculum purchase!

Explore more curriculum from Wild Earth Lab:

If you enjoyed this post, I know you will love using my environmental science materials in your classroom!


Are you interested in reading more posts like this? Subscribe or follow Wild Earth Lab using the links below!


Sharing options and discussion for this post:

Posted on — Leave a comment

Classroom Demo: Soil Organic Matter and Hydrogen Peroxide! Wow your students with this surprising reaction

A banner that says "classroom science demo: soil organic matter reaction" with a picture of some soil in dishes and a clipboard

Are you studying soil science, gardening, or agriculture with your students? If so, you have probably learned that soil is a mixture of sediments and organic matter. But different soils have different amounts of these two ingredients. A soil’s organic matter content is important, especially when considering a soil’s ability to support plants.

In this demo, qualitatively compare the organic matter content of two soils. You can test the soil samples for organic matter by putting hydrogen peroxide on the soils and watching for a reaction (bubbling). More bubbles = more organic matter!

In this post, you will learn how to set up a soil organic matter demo in your classroom. You can also get print-formatted versions of these directions, worksheets, handouts, and classroom posters to use during this lab in my Soil Science Unit!

Gather Your Materials

Gather the following materials for the demo. You will need:

  • ~2 Tbsp (15 mL) samples of 2 types of soil:
    • Soil A: compost
    • Soil B: a soil with less organic matter (look for a light-colored soil that has few plants growing in it).
  • 3 small beakers
  • Laboratory personal protective equipment (gloves, safety goggles, lab coats)
  • 6% hydrogen peroxide (available at pharmacies)
  • Eyedropper
  • Student lab handouts (1 set per student)
You will find worksheets, printable directions, and a materials list for this demo in my Soil Science Unit.

Safety Notes

  1. Read and comply with all safety information and warnings on the hydrogen peroxide bottle. Before starting this demo, ensure all participants are prepared to safely handle hydrogen peroxide.
  2. Ensure all participants and observers wear the appropriate personal protective equipment (gloves, lab coat, safety goggles).
  3. Adult supervision is required at all times during this activity.

Directions

  1. Do not tell students where soil samples A and B came from until after the lab. Explain that the two soil samples contain different amounts of organic matter. Hydrogen peroxide reacts with the organic matter in the soil, making bubbles or fizzing sounds.
  2. Place ~2 Tbsp (15 mL) of soil A into a beaker
  3. Place ~2 Tbsp (15 mL) of soil B into another beaker
  4. Pass around the soils. Students should observe each soil and describe it.
  5. Put on personal protective equipment.
  6. Ask your students to gather around and watch as you squeeze an eyedropper full of hydrogen peroxide onto soil A and watch/listen for bubbles and fizzing.
  7. Repeat the previous step with soil B. Which soil reacted more?
  8. Finally, reveal that one of these samples came from a compost pile. Can students guess which one?
In this classroom demo, observe how soil organic matter reacts with hydrogen peroxide.

Reflection Questions

  1. Describe soil A (color, texture, feel)
  2. Describe soil B (color, texture feel)
  3. What happened when your instructor added hydrogen peroxide to soil?
  4. Did one soil react more than the other? Which soil reacted the most?
  5. Hydrogen peroxide reacts with organic matter. What does this tell you about soils A and B?

This lab comes from my Soil Science Unit!

Your students will love the illustrated learning materials, plus you’ll support Wild Earth Lab with your curriculum purchase!

Explore more curriculum from Wild Earth Lab:

If you enjoyed this post, I know you will love using my environmental science materials in your classroom!


Are you interested in reading more posts like this? Subscribe or follow Wild Earth Lab using the links below!


Sharing options and discussion for this post:

Posted on — 2 Comments

Soil Textures Jar Lab: set up this easy science experiment in your classroom!

banner with text "classroom science experiment: soil texture jar test" and a picture of a bottle of soil and water

Are you studying soil science, gardening, or agriculture with your students? If so, there is nothing quite like a soil textures jar lab to learn about sand, silt, and clay in soils! In this lab activity, students observe the distribution of grain sizes in soil samples, then classify the soils using the soil textures triangle.

If a scientist wants to know a soilโ€™s texture, then they need to figure out the proportion of sand, silt, and clay in the sediment part of the soil. But this can be a challenge. How do you separate and measure all those tiny grains? Soil scientists use a few different methods for doing this.

This most basic method, the “jar test”, is easy to do in a classroom setting. Shake up soil and water in a jar. Then, watch the grains settle over time. Larger grains settle faster than smaller ones.

This jar test lab activity is perfect for teaching your students about soil textures.

In this post, you will learn how to set up a soil textures jar test lab in your classroom. You can also get print-formatted versions of these directions, worksheets, handouts, and classroom posters to use during this lab in my Soil Textures Mini Study!

Gather Your Materials

Gather the following materials for the lab. Each lab group will need:

  • 2 or 3 soil samples: collect different soils from 2 or 3 places. Avoid soils with a very high organic matter content, such as compost. Bring at least 300 mL of each soil per lab group so that you have some extra in case mistakes are made.
  • Sieve
  • Tray
  • 2 or 3 straight-sided, tall bottles (~ 500 mL)
  • Water
  • Dispersing agent: borax or dish detergent (optional)
  • Teaspoon
  • Permanent marker
  • Time keeping device (e.g., smartphone)
  • Ruler
  • 2 or 3 sticky notes
  • Student lab handouts (1 set per student)
Find all the materials for this science experiment in my Soil Textures Lab Activity mini study.

Set-Up

  1. This lab involves lots of waiting. You must collect certain measurements hours and days apart โ€“ make sure to plan accordingly.
  2. Before starting, it may help to sieve your soil samples to remove any large gravel, cobbles and roots. To do this, place the soil into a sieve. Select a sieve with openings no smaller than 2 mm. Gently shake the sieve over the tray. The soil will fall through while the larger gravel, cobbles, and roots will remain in the sieve. If you do not have a sieve, you can also spread the soil out on a tray and pick out any especially large gravel, cobbles, and roots by hand.
  3. Borax will help the clay settle. If you do not have any, dish detergent can be used as a substitute.
  4. Once students begin the procedure, the bottles should not be moved. Select an area for this lab where the bottles can sit undisturbed for a few days.
Lab procedure video for a soil textures science experiment for classrooms

Directions

  1. Pass out the materials.
  2. Demonstrate the method with the first soil. Fill a bottle about one third of the way with a soil sample.
  3. Gently tap or shake the bottle until the surface of the soil is flat. Then, use a permanent marker to mark the level of the soil on the outside of the bottle. Label the mark โ€œinitialโ€.
  4. Fill the rest of the bottle with water.
  5. Optional: add 1 tsp (5 mL) of the dispersing agent.
  6. Tightly cap the bottle.
  7. Shake the bottle vigorously for 5 minutes.
  8. The instant you stop shaking the bottle, set it on the counter and start a stopwatch. Do not move or disturb the bottle once the stopwatch starts.
  9. Sand takes about 1 minute to settle. After 1 minute, mark the top of the sand layer on the bottle with a marker. Label this mark โ€œsandโ€. Measure the thickness of the sand layer with the ruler and record it on the student handout.
  10. Silt takes 2 hours to settle and clay takes at least 48 hours to settle. Students should write the times these measurements should be taken on a sticky note and place it on the bottle. Depending on the length of your class period, you may need to measure and record the thickness of the silt layer for your students in 2 hours.
  11. Students should then set up their second (and third) bottle(s) with the other soil sample(s) by repeating all the above steps.
  12. Students will measure and record the thickness of the clay layer at least 48 hours later. The water may still look murky above the settled sediment. This is because a small amount of very fine clay is still in suspension. The final soil level may be somewhat less than the initial soil level. This is because shaking and settling changes a soilโ€™s structure and amount of pore space.
  13. Once students collect all  of the measurements, show the students how to calculate the percentages of sand, silt, and clay in each soil sample. For example:
Download my printable directions and worksheets for this soil textures lab activity

Reflection Questions

  1. Find each of your soil samples on the soil textures triangle (external link). What is the name of each of your soils?
  2. In your own words, define soil texture.
  3. A soil is made of 35% clay, 40% silt, an 25% sand. What type of soil is it?
  4. A soil is made of 10% clay, 5% silt, and 85% sand. What type of soil is it?
  5. You are selecting a soil to plant a cactus in. The cactus needs a fast-draining soil, so you are looking for a soil with plenty of coarse sediments. Which soil is a better choice: a sandy loam or a silt loam? Why? (See the soil texture triangle).
  6. You are choosing a place to dig a hole in your yard to build a fish pond. You do not want the water to drain out of the pond into the soil, so you are looking for a soil with plenty of fine sediments. The left side of your yard is a silty clay and the right side of your yard is a loamy sand. Where would you build the pond? Why? (See the soil texture triangle).
Public domain image courtesy of:
USDA Natural Resources Conservation Service

This lab comes from my Soil Science Unit!

Your students will love the illustrated learning materials, plus you’ll support Wild Earth Lab with your curriculum purchase!

Explore more curriculum from Wild Earth Lab:

If you enjoyed this post, I know you will love using my environmental science materials in your classroom!


Are you interested in reading more posts like this? Subscribe or follow Wild Earth Lab using the links below!


Sharing options and discussion for this post: