Posted on Leave a comment

5 Engaging Water Cycle Activities for Students

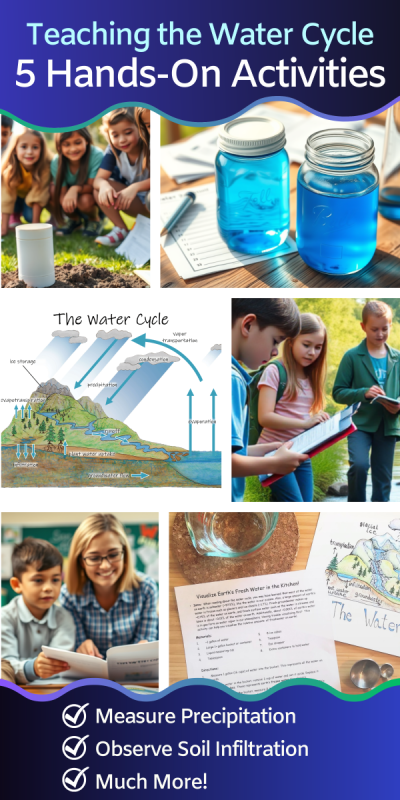
Grid of 6 pictures showing kids working on water cycle activities outside and in the classroom
text that says share this post

Are you teaching the water cycle in your classroom or homeschool? The water cycle is a complex process with many stages that all work together to provide the freshwater crucial to our survival. Hands-on water cycle activities are useful to demonstrate the different steps in the water cycle and can make your lessons memorable for students. From measuring infiltration to calculating runoff, these 5 water cycle activities will enrich your lessons and deepen understanding.

photo of a piece of paper with the water cycle diagram
Water Cycle Diagram

A Note For Teachers: The activities covered in this post come from three of my complete units: the Water Cycle Unit, Science on the River Unit, and Soil Science Unit. You can purchase these units to receive all the printable worksheets, handouts, and diagrams for teaching these activities and more (plus youโ€™ll support this blog with your purchase! โค๏ธ).

1. Collect Precipitation

images depicting cutting a bottle in half then using the top half to make a funnel into the bottom half
Steps for making a DIY rain gauge from a plastic bottle.

Precipitation happens when water falls to the Earth’s surface in liquid or solid form. This includes water in the form of snowflakes, hail, sleet, or liquid droplets (rain). Precipitation falls onto land or into bodies of water. A lot of precipitation falls directly into the oceans.

Building a DIY rain gauge from a plastic bottle is a fun, hands-on activity to explore this key water cycle process. You just need an empty plastic soda or water bottle plus a few other household items!

But remember, rain is far from the only type of precipitation. If you live somewhere that receives snow in the winter, you can also collect and measure snowfall!

2. Observe Evaporation

A photo showing classroom handouts for teaching evaporation lab activities

Evaporation is the process of water changing from a liquid to a gas, called water vapor. Evaporation may happen anywhere that there is water; water evaporates from oceans, lakes, streams, soils, and even from raindrops as they fall.

Measuring evaporation is an easy activity that brings the process to life for your students. The basic idea of this lab is that you will have two jars, one with a lid and one without. You will observe the change in the water level in the two jars over several days due to evaporation.

3. Measure Soil Infiltration

sketches showing a tube being hammered into the soil then filled with water.
Steps for measuring soil infiltration rates.

Infiltration is when water seeps from the landโ€™s surface down into the soil. This happens when rain falls onto the soil and seeps in. Water also infiltrates downwards through the bottoms of some lakes and streams. Conversely, groundwater may also flow upwards sometimes, into gaining streams and springs.

Measuring infiltration rates in different types of soils is a hands-on activity that helps students explore how water interacts with the ground. This soil infiltration activity also ties in perfectly with studies of porosity and permeability.

The general idea is that you’ll hammer a piece of tubing into the ground, so that the bottom forms a seal with the soil. Then, you’ll fill the tube with water, and time how long it takes the water to seep into the soil. The rate it seeps will vary between different types and textures of soil, so try this activity in a few different locations (e.g., sandy soil, loamy soil, organic-rich soil, etc…).

4. Calculate Run Off in Streams

painting showing three people taking measurements in a stream
Illustration showing students taking stream measurements for calculating stream cross-sectional area and discharge.

Runoff is when water flows downhill. This includes rivers, streams, and any water flowing over the Earth’s surface. Runoff happens thanks to gravity – surface water always flows from high to low elevation. You won’t see a stream flowing uphill. Little streams start high up in the mountains. They flow downhill, joining together to make big rivers. Rivers make their way to the ocean and mix with salt water.

You and your students can measure and calculate the rate of runoff in a small stream. More specifically, you can take simple measurements and use them to calculate the velocity of the flowing water. From there, you can calculate the stream’s discharge (e.g., gallons per minute). This stream measurements activity combines math, measurements, and science, making it a perfect addition to your classroom or homeschool.

5. Model Where Water is Stored

Water cycle diagram, measuring cups, free printable science activity guide for homeschooling, at-home-learning, or elementary school age children.
Printable activity directions and water cycle diagram from my free resources page

Itโ€™s hard to imagine just how little freshwater exists on Earth compared to saltwater. If you’re teaching the water cycle, your students might be amazed to learn that less than 3% of the Earthโ€™s water is freshwaterโ€”the rest is saltwater. Fortunately, you can do a hands-on freshwater learning activity that uses simple kitchen measurements to help your students visualize these proportions. This freshwater visualization activity is a powerful way to help students truly understand how rare freshwater is!

Subscribers to this blog can download free printable directions for this visualization activity on the free resources page of my website. The free resources page is a collection of dozens of printable science & nature learning resources designed by me – including printable activity directions, my hand-drawn water cycle diagram, and much more! To access the free resources page, subscribe to my email newsletter. It’s a monthly digest of new blog posts about science and science education like this one, as well as occasional updates when I release a new unit or throw a sale in my shop.

Study the Water Cycle with Wild Earth Lab!

Thereโ€™s no need to scramble to put together the perfect worksheets and handouts for these water cycle activities โ€“ Iโ€™ve already created them for you! The activities from this post come from these three printable units, available in my shop:

Explore more lessons from Wild Earth Lab:

If you enjoyed this post, I know you will love trying my other printable science and nature units in your classroom too!


Are you interested in reading more posts like this? Subscribe or follow Wild Earth Lab using the links below!


Subscribe, share, and comment:

Posted on Leave a comment

6 Exciting Earth & Environmental Science Topics to Teach this School Year!

grid of pictures of environmental science subjects: flower dissecting, metamorphosis diagrams, metamorphic rock, tectonic plate diagrams, soil lab activity, and climate change lab activity
text that says share this post

Looking for fresh ways to teach science? This post is packed with inspiration and resources to help you explore animal metamorphosis, climate change, rock identification, soil science, plate tectonics, and flower anatomy with your students. I’ve included links to my other posts with hands-on activities, background info, printables, and study materials. Below, you’ll find everything you need to make these topics engaging and accessible in your classroom or homeschool.

Before we dive in:ย If you plan toย teach earth & environmental science topics, great learning resources are key to deepening understanding! I think you and your students will love my complete Science Units. They’re packed with all the handouts, posters, worksheets, activity directions, and other printable materials you’ll need. Plus, youโ€™ll support my blog with your purchase! โค๏ธ

Animal Metamorphosis

salamander life cycle diagram
Salamander metamorphosis diagram

Metamorphosis is a process where an animalโ€™s body changes form at different stages of its life cycle. Many insects and amphibians go through metamorphosis, developing in two or more distinct stages, like a legless tadpole becoming a frog or a wingless caterpillar transforming into a butterfly.

Understanding metamorphosis helps students see how organisms grow, adapt, and utilize different resources in their habitats throughout their life cycle. You can study classic examples of metamorphosis like frogs and butterflies – but these are far from the only examples! For instance, studying aquatic insects like caddisflies and mayflies is another excellent way to learn about metamorphosis – plus these critters are bioindicators and very likely found in ponds and streams near you!

Arctic Sea Ice, Albedo, & Positive Feedback Loops

yellow arrows from the sun bouncing off of ice but not water

Are you searching for a science lesson that brings climate change to life in your classroom? Positive feedback loops are not just fascinatingโ€”theyโ€™re a powerful way to help students grasp the dynamics behind our warming planet. By teaching about positive feedback loops, like the relationship between sea ice, albedo, and temperature, youโ€™ll equip your students with a deeper understanding of one of the mechanisms fueling anthropogenic climate change.

A great way to demonstrate positive feedback loops is with a hands-on activity.  For this outdoor educational activity, students can create a model of sea ice and ocean water albedo using aluminum foil and two tubs of water. Students will track the temperature in a covered and uncovered tub on a sunny day.

Best of all, studying sea ice and climate change also ties in with studies of the Arctic and Antarctica. Learning about our poles and the animals that live there is a great way to tie climate science and ecology together in your lessons. If you’re looking for a complete set of printable classroom materials for studying the Arctic and Antarctic, you’ll want to check out my complete Polar Bundle.

Rock Identification & Formation

a box of rock samples
Identifying Rocks. The printable rock info cards (pictured here) are found within my complete Rocks and Minerals Unit

Rock identification is a wonderful way for students to connect classroom learning with the world around them. Learning rock ID is about more than just recognizing rock samples. Rather, learning about the different types of rocks means learning about how they formed and the underlying processes creating different rocks, like tectonic plate movement, weathering, and erosion!

You can do a rock identification lab activity. In this activity, students will sort common igneous, sedimentary, and metamorphic rock samples. But there are also other great ways to study and review rocks. Try the Rock ID bingo game or print these Rock ID flashcards. Finally, you may also check out my post about 7 Rock and Mineral Activities for the classroom!

Soil Science

a jar with soil and water and a stopwatch on a table next to handouts and worksheets
A soil texture jar lab. The printable handouts and worksheets pictured here are found within my complete Soil Science Unit

Soil is often overlooked as a classroom topic, yet itโ€™s a fascinating and practical area of science to explore with oneโ€™s students. Whether youโ€™re introducing elementary schoolers to the basics of earth science or tackling advanced environmental science concepts with high schoolers, soil science offers countless opportunities for hands-on learning with real-world applications. If you need further convincing, here are five compelling reasons to incorporate soil science into your classroom curriculum.

There are many hands-on activities you can do when studying soil. First, try a soil textures jar lab or examining the organic matter content of soils. For a delicious soil-related project, make soil horizons parfaits to learn about the different layers in soils! Finally, for printable directions, handouts, and worksheets for all of these activities and more, check out my complete Soil Science Unit!

Plate Tectonics

boundary type diagrams
Printable tectonic plate boundary diagrams. These are available as a stand-alone printable set but also come in my complete Plate Tectonics Unit.

The theory of plate tectonics is a scientific theory central to the field of geology. This theory explains that the surface of the Earth is broken into large plates that are slowly moving and interacting with one another at different plate boundary types.

Plate tectonics is an important concept for students to understand. First, to help you get started studying plate tectonics in your classroom, I’ve put together this list of eight engaging and hands-on plate tectonics activities and projects!

Additionally, if you want to dive into all things plate tectonics, I recommend checking out my complete Plate Tectonics Unit. It includes printable materials to learn about the theory of plate tectonics and related topics like volcanoes, earthquakes, and the Earth’s layers!

Flower Anatomy

A photo showing classroom handouts for studying flower anatomy
Flower anatomy printables – this is one of many activities found within my complete Flowers Unit!

Lastly, studying the parts of a flower is a great way to teach kids about the plant life cycle and pollination! Plus, you can learn about flower anatomy in a hands-on way by dissecting a flower! This is an easy way to observe the main parts of a flower: carpel, stamen, petals, and sepals! Best of all, students can observe how each of these parts is built for its own special function – from attracting pollinators with bright colors to distributing pollen.

I’ve created several flower anatomy printables (pictured above) for my free resources page. If you’re new around here and would like to access the free resources page, all you need to do is subscribe to this blog’s newsletter to receive the link (you can unsubscribe at any time). If you’re already an email subscriber, you can head to the free resources page to download the flower anatomy printables and more via the link you received in your welcome email!

For a more complete set of flower and botany materials, be sure to check out my complete Flowers Unit – it’s full of lots of handouts, worksheets, diagrams, activities, and more! Or, you can also find the Flower Unit within my Botany Collection. It is a discounted collection with three plant-related units: Flowers, Pollination, and Fruit!

Study Earth & Environmental with Wild Earth Lab!

Thereโ€™s no need to scramble to put together the perfect earth & environmental science teaching materials for these topics  โ€“ Iโ€™ve already created them for you! These sets include all the printable materials you need for studying these topics!

Explore more lessons from Wild Earth Lab:

If you enjoyed this post, I know you will love trying my other printable science and nature units in your classroom too!


Are you interested in reading more posts like this? Subscribe or follow Wild Earth Lab using the links below!


Subscribe, share, and comment:

Posted on Leave a comment

Learning in Nature: 5 outdoor educational activities to try this summer!

children with clipboards wading in a shallow river
text that says share this post

Are you a parent or educator looking for fun ways to take learning outside this summer? Whether you’re reviewing math and science concepts from the school year or looking for ways to connect with your local ecosystems, I’ve got you covered with these 5 outdoor educational activities!

In this post, you’ll find directions for nature activities for learning outside this summer! From catching aquatic macroinvertebrates to measuring the infiltration rates of soils, your students are sure to enjoy these fun outdoor learning activities!

Before we dive in:ย If youโ€™re an educator or parent looking for fun outdoor educational activities, great learning resources are key to deepening understanding! I think you and your students will love my Earth & environmental science units (plus youโ€™ll support my blog with your purchase! โค๏ธ)

Stream Measurements

painting showing three people taking measurements in a stream
Illustration of students measuring the width and depth of a stream!

For this activity, learn how to measure water flow with your students as a river field trip activity! With a few household items, you can collect river measurements. All you need are some simple measurement tools like a tape measure, yardstick, and stopwatch!

Water resource scientists, called hydrologists, collect stream measurements to ensure we are not using our water resources too quickly or in unsustainable ways. In this hands-on activity, students will not only practice math and measurements, but they’ll also learn about how scientists measure and study our rivers!

Catch Aquatic Macroinvertebrates

types of aquatic macroinvertebrates
A poster of the types of aquatic macroinvertebrates.
A cartoon of two people in a river using a net to catch aquatic insects
A diagram showing two students collecting aquatic macroinvertebrates in a stream using a net.

Catching aquatic macroinvertebrates is a memorable and educational field trip experience your students will love! Aquatic macroinvertebrates are little creatures like insect larvae and crayfish found at the bottoms of most ponds and streams. Just flip over a few river rocks or submerged logs near the shore of a pond and you’re likely to spot a macroinvertebrate underneath!

But here’s the cool part: macroinvertebrates are bioindicators – creatures that teach us a lot about the overall health of their ecosystems! That makes this outdoor activity a great way to review your classroom studies of biodiversity, bioindicators, entomology, or aquatic food webs. It’s also a great way to build connections with local ecosystems – almost any pond or small stream will work for this activity!

Measure the heights of trees using math!

A diagram showing how to find the height of a tree, with equations. Line 1: tree height above eye level equals distance times tan of angle. Second line: tree height equals eye level plus tree height above eye level.
This diagram shows how you can calculate the height of a tree using math!

Unless you are measuring a short seedling, you probably wonโ€™t be able to measure tree height directly because you canโ€™t reach the top. So how do you measure something so tall? Answer: use an inclinometer and trigonometry!

I donโ€™t know about you, but I think math is more interesting when we can apply it to real-world situations! If youโ€™re reviewing trigonometry, right triangles, or angles in your classroom or homeschool, you and your students will love this tree-height appliedย math activity! In this simple learning activity, students will learn how to make a homemade inclinometer โ€“ a device for measuring the angle of inclination. Then, they will take measurements and calculate the height of a tree in this outdoor educational activity.

Outdoor Experiment for Climate Change & Sea Ice

yellow arrows from the sun bouncing off of ice but not water
Sea ice is more reflective than ocean water.
two tubs of water, one covered in foil
Materials for a sea ice experiment.

A sunny summer day is the perfect time for this outdoor activity that’s all about heat, solar radiation, and reflection! For this activity, all you need is a warm sunny day, containers with cold water, foil, and a thermometer!

ย In this outdoor educational activity, students will create a model of sea ice and ocean water albedo using aluminum foil and two tubs of water. Students will track the temperature in a covered and uncovered tub on a sunny day. It’s a great way to learn about albedo and the impacts ofย positive feedback loopsย in climate change.

Measure Soil Infiltration Rates

sketches showing a tube being hammered into the soil then filled with water.
Steps for measuring soil infiltration rate

Summer is the perfect time to study soils! If you have a summer garden, you know the importance of healthy and permeable soil. Measuring soil infiltration rates is an activity that you can easily do in your garden with a few simple household items.

Why study soil infiltration? Infiltration rates of soils are important for many reasons. First, they are important in agriculture – different crops require soils that drain at different rates. Soil infiltration also plays a role in natural disasters like flooding and landslides. Finally, infiltration is an important part of the water cycle – when water seeps into the earth, it becomes part of the groundwater. Humans access groundwater with wells – an important source of water for drinking and growing plants!

Learn in Nature with Wild Earth Lab!

Thereโ€™s no need to scramble to put together the perfect materials for your outdoor educational activitiesโ€“ Iโ€™ve already created them for you! Check out my Earth and environmental science units, complete sets of printable learning materials with activities, posters, handouts, and more!


Are you interested in reading more posts with outdoor educational activities? Subscribe or follow Wild Earth Lab using the links below!


Subscribe, share, and comment:

Posted on Leave a comment

Fun Moon Phases Activity with Cookies

making the phases of the moon from cookies
text that says share this post

If you are teaching the phases of the moon, this popular snack activity with cookies is sure to be a crowd-pleaser! This yummy and fun activity is sure to make your lunar phases lesson a memorable one. In this post, you’ll find the materials list and directions for this activity, plus, I’ve created a free printable worksheet for this activity!

A note for teachers:ย If youโ€™re an educator planning toย teach the moon’s phases, great learning resources are key to deepening understanding! I think you and your students will love my printable Moon Mini Study, which you can also find within my complete Night Sky Unit (plus youโ€™ll support my blog with your purchase! โค๏ธ)

Moon Phases: background information

Earth has one big, bright moon โ€“ The Moon. Though it shines brightly at night, the Moon does not make its own light; it reflects light from the Sun. The Moon orbits Earth, just like Earth orbits the Sun. As it circles us, the Moonโ€™s shape seems to change. These changing shapes, called phases, make the Moon appear to grow and shrink each month. In reality, the Moon doesnโ€™t change size โ€“ we just donโ€™t see the part thatโ€™s not lit up by the Sun.

For this activity, your students will learn 8 phases of the moon. These phases are:

  • New Moon
  • Waxing Crescent
  • First Quarter
  • Waxing Gibbous
  • Full Moon
  • Waning Gibbous
  • Third Quarter
  • Waning Crescent

Every 29.5 days, the moon cycles through all of these phases.

Phases of the moon diagrams

Materials

For the phases of the moon cookie activity, each student needs:

  • 8 Chocolate & crรจme sandwich cookies (e.g., Oreos)*
  • Spoon and/or toothpick for scraping/removing crรจme
  • A printed copy of the worksheet – available on my free resources page

*To save on materials, it is possible to do this activity with 4 cookies per student if students use both halves of each cookie and carefully split the creme filling to create all phases.

Directions

  1. Open up a cookie so that the crรจme is all on one side.
  2. Scrape away and remove enough crรจme from the open cookie to
    create a phase of the moon.
  3. Repeat until youโ€™ve created all of the phases of the moon.
Chocolate creme-filled sandwich cookies making the phases of the moon set on a kids' worksheet
Making the phases of the moon from cookies!

Free printable worksheets for this activity

Current Email Subscribers: for your convenience, I made a printable version of the directions and a student worksheet for this activity. It’s available on the free resources page of my website (the link was in a welcome email sent when you subscribed – if you lost the link, follow the directions at the bottom of this page).

If you’re new here: consider joining my email community! My email subscribers:

  • Can access dozens of free science & nature printables on my free resources page! (including the worksheet for this activity!)
  • Receive a monthly email with a round-up of new activity ideas, projects, and teaching inspiration from the blog!
  • Get occasional updates about seasonal sales, new science units released in my shop, and new free resources!
  • Save on a purchase in my shop with a welcome discount code!
moon phases sandwich cookie (e.g., Oreo) activity worksheets

What’s Next?

Looking for another space-themed snack activity for the classroom? Try this constellation snack activity using pretzel sticks and mini marshmallows!

constellation flashcards and constellations made from pretzel sticks and marshmallows

Study the moon with Wild Earth Lab!

Thereโ€™s no need to scramble to put together the perfect set of moon lesson materials ย โ€“ Iโ€™ve already created it for you! My printable moon mini study includes diagrams, worksheets, and activities for learning all about the moon and its phases!

Or, find all the moon materials plus more materials on constellations, eclipses, and more in my complete Night Sky Unit!

Explore more lessons from Wild Earth Lab:

If you enjoyed this post, I know you will love trying my other printable science and nature units in your classroom too!


Are you interested in reading more posts like this? Subscribe or follow Wild Earth Lab using the links below!


Subscribe, share, and comment:

Posted on Leave a comment

How to Play Rock ID Bingo: directions for a review game!

rock id bingo cards
text that says share this post

Rock identification can be a challenging but fun subject to teach in any science classroom. If you’ve taught your students the basics of rock ID, but need a fun review game to end your unit or prepare for a test, I’ve got you covered! In this post, I’ll share the materials and directions for playing rock ID bingo in your classroom!

If you’re teaching rock identification, you are probably studying minerals too! If you’d like to review mineral ID as well, you can head over to my separate post about how to play mineral ID bingo!

Before we dive in:ย If you’re an educator planning to try this game with your students, you can save yourself the time of making your own bingo cards and calling cards. My printable rock ID bingo card set is available on TpT and Etsy. The set includes 25 unique bingo cards with illustrations of each rock, plus calling cards with each rock’s key traits and other hints (plus youโ€™ll support this blog with your purchase! โค๏ธ)

Prior Knowledge Required

To do this activity, your students must know the difference between rocks and minerals. They should have already practiced some rock ID and be familiar with common rocks such as:

  • Granite
  • Basalt
  • Pumice
  • Marble
  • Gneiss
  • Slate
  • Sandstone
  • Limestone
a box of rock samples

Furthermore, your class should be familiar with the following rock-related concepts:

You can brush up on rock ID by working through a rock identification lab activity with your class by following these directions. Or, read my list of fun rock & mineral activity ideas for other geology projects and lessons for your classroom.

Finally, you can get my most comprehensive rock and mineral teaching materials in the Rocks and Minerals Unit. It’s my complete set of printable materials for teaching rocks and minerals – with worksheets, activity directions, tons of diagrams, and much more. I know you will love it!

Materials

To play rock ID bingo, you will need the following materials

  • 25 unique bingo cards featuring different rocks (download & print mine here, featuring common rocks, or create your own with your rocks of choice)
  • Calling cards – a list of each rock’s traits (hints) on small pieces of paper or index cards (also included in my printable bingo set!)
  • A hat or bucket
  • Bingo chips or small items (pennies, candies) to place over the squares on the bingo cards

How to Play

Follow these steps to play rock ID bingo with your students:

  1. Each student gets one unique bingo card.
  2. Cut apart the calling cards with each rock’s properties/hints. Place your calling cards into a hat or bucket.
  3. Pull one calling card at a time and read it out loud to the class, sharing the hints and properties of the rock without revealing the name of the rock.
  4. Students should find the corresponding rock on their bingo cards and mark or cover it.
  5. The first student to get four rocks in a row gets โ€œbingoโ€ (across, diagonal, or vertical).
  6. Check the student’s card to ensure all rocks were identified correctly.

Helpful Hints

When reading out clues for a rock, start with the more obscure hints, and then progress to the more obvious clues.

Products Mentioned in this Post:

Thereโ€™s no need to scramble to put together the perfect printable materials for this activity ย โ€“ Iโ€™ve already created it for you! This bingo set includes all the printable materials you need for playing rock ID bingo.

For more rocks and minerals learning fun, try my Rocks & Minerals Unit – a complete set of printable classroom materials for teaching this subject:

Studying mineral ID too? Check out my mineral ID bingo review game as well:

Explore more lessons from Wild Earth Lab:

If you enjoyed this post, I know you will love trying my other printable science and nature units in your classroom too!


Are you interested in reading more posts like this? Subscribe or follow Wild Earth Lab using the links below!


Subscribe, share, and comment:

Posted on Leave a comment

Geology Review Game Idea: mineral ID bingo

mineral ID bingo cards
text that says share this post

Are you teaching rocks & minerals in your science classroom? If you’ve taught your students the basics of mineral ID, but need a fun review game to end your unit, look no further than mineral ID bingo. In this post, I’ll go over how to play mineral ID bingo in your classroom and the materials you will need to play!

Before we dive in:ย If you’re an educator planning to try this game with your students, you can save yourself the time of making your own bingo cards and calling cards. My printable mineral ID bingo card set is available on TpT and Etsy. The set includes 25 unique bingo cards with illustrations of each mineral, plus calling cards with a list of each mineral’s properties (plus youโ€™ll support this blog with your purchase! โค๏ธ)

Prior Knowledge Required

To do this activity, your students must know the difference between rocks and minerals. They should have already practiced some mineral ID and be familiar with common minerals such as:

  • Biotite
  • Calcite
  • Feldspar
  • Galena
  • Halite
  • Muscovite
  • Pyrite
  • Quartz

Furthermore, your class should be familiar with the physical properties of minerals, including:

You can brush up on mineral ID and mineral physical properties by reading my post about mineral physical properties. You could also try a mineral ID lab with your class, by following these directions or reading my list of fun rock & mineral activity ideas for the classroom.

Finally, you can get my most comprehensive rock and mineral teaching materials in the Rocks and Minerals Unit. It’s my complete set of printable materials for teaching rocks and minerals – with worksheets, activity directions, diagrams, and much more. I know you will love it!

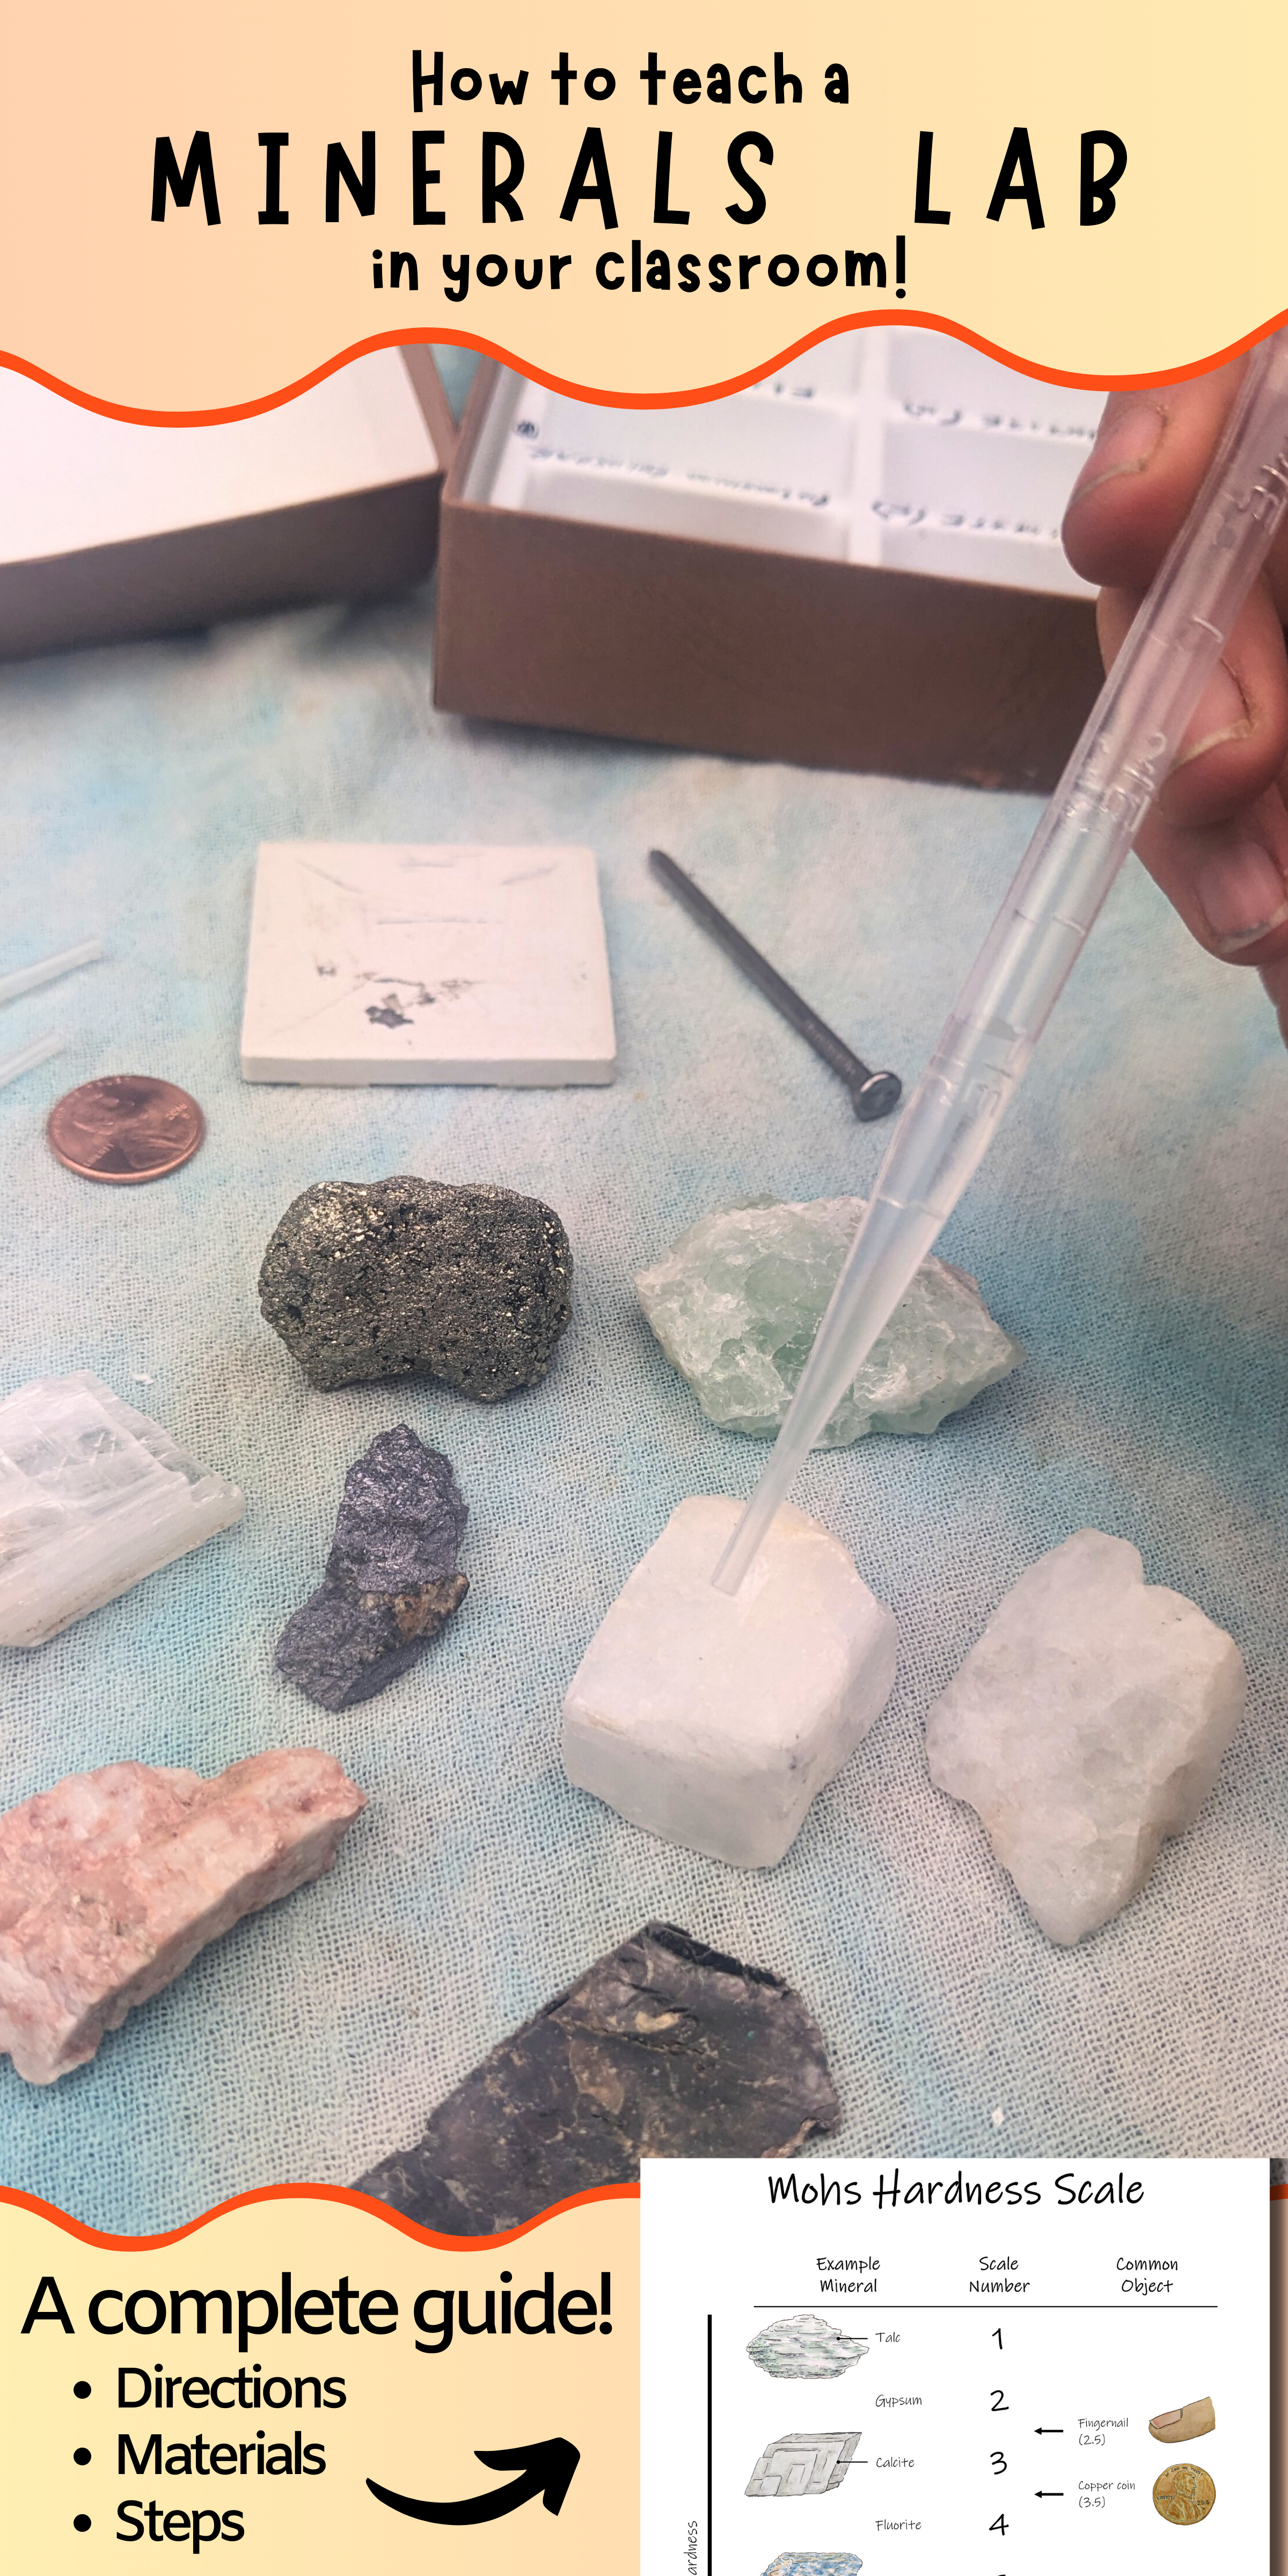
an eye dropper held above some mineral samples
Example of a Mineral ID lab activity

Materials

To play mineral ID bingo, you will need the following materials

  • 25 unique bingo cards featuring different minerals (download & print mine here, featuring common minerals, or create your own with your minerals of choice)
  • Calling cards – a list of each mineral’s physical properties (hints) on small pieces of paper or index cards (also included in my printable bingo set!)
  • A hat or bucket
  • Bingo chips or small items (pennies, candies) to place over the squares on the bingo cards

How to Play

Follow these steps to play mineral ID bingo with your students:

  1. Each student gets one unique bingo card.
  2. Cut apart the calling cards with each mineral’s physical properties. Place your calling cards into a hat or bucket.
  3. Pull one calling card at a time and read it out loud to the class, sharing the physical properties of the mineral without revealing the name of the mineral.
  4. Students should find the corresponding mineral on their bingo cards and mark or cover it.
  5. The first student to get four minerals in a row gets โ€œbingoโ€ (across, diagonal, or vertical).
  6. Check the student’s card to ensure all minerals were identified correctly.

Helpful Hints

When reading out clues for a mineral, start with the more obscure hints, and then progress to the more obvious clues.

Products Mentioned in this Post:

Thereโ€™s no need to scramble to put together the perfect printable materials for this activity ย โ€“ Iโ€™ve already created it for you! This bingo set includes all the printable materials you need for playing mineral ID bingo.

For more rocks and minerals learning fun, try my Rocks & Minerals Unit – a complete set of printable classroom materials for teaching this subject:

Studying Rock ID too? Check out my rock ID bingo review game as well:

Explore more lessons from Wild Earth Lab:

If you enjoyed this post, I know you will love trying my other printable science and nature units in your classroom too!


Are you interested in reading more posts like this? Subscribe or follow Wild Earth Lab using the links below!


Subscribe, share, and comment:

Posted on Leave a comment

5 Reasons to Teach Rivers and Streams in Your Classroom

students with clipboards kneeling next to a shallow stream
text that says share this post

Rivers and streams provide endless opportunities for scientific exploration and discovery – and chances are you can find one right in your community! From their chemistry and physics to their role in ecosystems and human communities, rivers and streams offer excellent opportunities to teach critical concepts in science and math in an applied way. Across many grade levels, incorporating rivers and streams into your curriculum is a fantastic way to spark curiosity and make learning meaningful. Here are five compelling reasons to study rivers and streams in your classroom this year.

Before we dive in:ย If youโ€™re an educator planning toย teach rivers and streams, great learning resources are key to deepening understanding! I think you and your students will love myย complete Science on the River Unit (plus youโ€™ll support my blog with your purchase! โค๏ธ)

1. Rivers and Streams Are an Interdisciplinary Subject

One of the most exciting aspects of studying rivers and streams is their interdisciplinary nature. Studying natural waterways relates to many fields of science, allowing students to apply knowledge across disciplines:

  • Chemistry: Investigate water quality by measuring pH levels, electrical conductivity, or analyzing dissolved oxygen.
  • Physics: Study fluid mechanics, such as how a stream’s velocity varies with depth, width, and around river bends.
  • Ecology: Explore river ecosystems, food webs, and macroinvertebrate populations that indicate water quality and river health.
  • Geology: Discuss rivers’ role in shaping landscapes and carving out canyons over time.
  • Environmental Science: discuss the challenges facing rivers today, including water conservation, changes in flow due to climate change, pollution from urban and agricultural runoff, and flooding.

By approaching rivers and streams as an interdisciplinary subject, you can help students see how different scientific fields work together to solve real-world problems.

2. Opportunities for Hands-On Learning Activities

Rivers and streams offer a wealth of hands-on learning opportunities that engage students in scientific investigation. Measuring stream flow is a simple yet effective activity that brings science concepts to life. By timing how long it takes for an object to travel a set distance downstream, students can calculate the velocity of a stream.

Other hands-on activities include collecting water samples, catching and identifying aquatic insect larvae, and identifying floodplains and high-water lines. Many of these activities can be conducted with minimal equipment, making them accessible even for classrooms with limited resources. Hands-on learning not only reinforces concepts but also encourages students to ask questions, explore their surroundings, and develop critical thinking skills.

painting showing three people taking measurements in a stream

3. A Perfect Example of Applied Math

Studying rivers and streams is an excellent way to integrate applied math into your science curriculum. Hydrologists and engineers rely on mathematics to analyze water flow, predict floods, and manage water resources. By engaging in similar calculations, students can see how math is used to solve real-world problems. Here are a few ways to apply math when studying rivers:

  • Geometry: students can estimate the cross-sectional area of a river using width and depth data.
  • Arithmetic: students can calculate river discharge using the formula Q=Aร—V, where Q is discharge, A is the cross-sectional area of the stream, and V is the velocity of the flowing water.
  • Probability: students can determine the likelihood of floods based on historical data.
  • Calculus: For more advanced learners, you can introduce calculus concepts like rating curves. Hydrologists use rating curves to estimate stream discharge based on water height.

These activities reinforce math skills and show students how math is a valuable tool for understanding the natural world.

A river cross section divided into multiple rectangles for approximating area

4. A Great Excuse to Take Learning Outside

Studying rivers and streams provides an opportunity to step outside the classroom and into nature. Field trips to local rivers, streams, or creeks allow students to apply textbook knowledge and observe concepts they’ve studied first-hand. They can look for signs of ecosystem health, observe different river features like goosenecks or riffles, and identify types of river channels.

Outdoor activities not only make lessons more memorable but also help students connect with their local environment. A river field trip can foster an appreciation for rivers and nature in general. Connecting with their local rivers on a field trip may even inspire your students to become involved in local conservation and habitat restoration efforts. If you visit a river with your class, spend 15 minutes picking up trash to leave it nicer than you found it.

Woman in waiters stands in a stream while using a hammer and level to adjust stream monitoring station equipment in a mountain valley. Grey smoke can be seen in the background, rising off of the mountainside.
Taking stream measurements.

5. Rivers and Streams Are Vital to Our Communities

Rivers and streams play a critical role in human communities, providing drinking water, supporting agriculture, and offering recreational opportunities. By studying these waterways, students can gain a deeper understanding of how rivers impact their daily lives.

Lessons can focus on the challenges of managing rivers sustainably or the impact of pollution and climate change on streams. For example, you can discuss how urban development affects stormwater runoff or how conservation efforts have improved water quality in a local river. Understanding the role of rivers and streams in our communities helps students see the relevance of their studies and fosters a sense of responsibility for protecting these vital resources.

Study this topic with Wild Earth Lab!

Thereโ€™s no need to scramble to put together the perfect rivers lesson ย โ€“ Iโ€™ve already created it for you! This set includes all the worksheets, project guides, and printable materials you need for studying rivers and streams.

Explore more lessons from Wild Earth Lab:

If you enjoyed this post, I know you will love trying my other printable science and nature units!


Are you interested in reading more posts about fascinating science topics? Subscribe or follow Wild Earth Lab using the links below!


Subscribe, share, and comment:

Posted on Leave a comment

Explore the Universe: 11 Hands-On Night Sky and Outer Space Activities

stargazer with telescope
text that says share this post

Wild Earth Lab is supported by readers like you. This post includes links to my own products and affiliate products. If you purchase through links on my site, I may earn a small commission at no additional cost to you.

Studying the night sky is a great way to spark curiosity and wonder about the universeโ€”and the best way to learn is by doing! Whether you’re teaching about constellations, the solar system, or space exploration, these hands-on activities will bring astronomy to life in your classroom or homeschool. From creative art projects and snack activities to real-world stargazing, this list has something for every young space enthusiast. Plus, I’ve included links to both free and paid ready-to-use materials to make your space lessons even more engaging. Get ready to explore the cosmos with your students with 11 hands-on space activities.

A Note For Teachers: If youโ€™re an educator planning to teach the night sky in your classroom, great activities & visuals are key to deepening understanding! Materials for many of the night sky and space activities in this post are included in my Night Sky Unit. It’s a bundle of printable classroom resources for learning all about the night sky and space (plus youโ€™ll support my blog with your purchase! โค๏ธ)

Constellation Snacks

Form different constellations using mini marshmallows as stars and pretzel sticks as the lines. Then eat them!

Constellation printable classroom materials – includes the printable directions and constellation image cards needed for this activity (purchase)

Online directions (free)

constellation flashcards and constellations made from pretzel sticks and marshmallows
A constellation snack activity!

Night Sky Scratch Art

Try scratch art; itโ€™s the perfect artistic medium for drawing objects in the night sky like stars, meteors, and planets!

Make your own scratch art boards guide (external link)

Purchase scratch art supplies (external link)

scratch art of an owl and the moon
Scratch art of the moon and stars.

Planetarium Field Trip

Plan a trip to a planetarium if thereโ€™s one in your area. At a planetarium, your program guide may show you how to identify stars and planets, tell you about constellation mythology, or teach you about deep-space objects.

Find a planetarium near you (external link)

Phases of the Moon Snack

Make the Moonโ€™s phases from crรจme-filled sandwich cookies. Remove the top cookie and part of the crรจme to create each lunar phase.

Printable worksheet and directions for this activity (Available to this blog’s newsletter subscribers on my Free Resources Page!)

Moon mini study printables (purchase)

moon phases sandwich cookie (e.g., Oreo) activity worksheets

Distance Model

Make a mini model of our solar system. Calculate each planetโ€™s relative distance from the Sun on a tape measure and mark it.

Distance model worksheets & printable directions (purchase)

Online directions (free)

Spot the International Space Station

If you know when and where to look, you can watch the International Space Station as it passes through the night sky above your area.

Track the International Space Station online (external link)

Star Charts

Find a star chart for your location and season. Head outside to a dark area at night and try to locate some constellations and stars. For recommended websites for online star charts, visit WildEarthLab.com/night-sky

Stellarium online star chart (external link)

Sky & Telescope online star chart (external link)

Constellation printable classroom materials (purchase)

Constellation printable classroom materials

Watch a Meteor Shower

Mark the dates of the next meteor shower on your calendar. Go to a dark area away from city lights and see how many shooting stars you can spot.

Find a meteor shower (external link)

meteoroid in the sky
A meteor seen over a house. Photo by Thirdman on Pexels.com

Eclipse Model

Model eclipses using two orbs on sticks and a flashlight. For a lunar eclipse: place the larger orb (Earth) between the light source and the smaller orb (Moon) to cast a shadow over the smaller orb. For a solar eclipse: place the smaller orb (Moon) between the light source and the larger orb (Earth).

Lunar eclipse mini study (purchase)

Solar eclipse mini study (purchase)

Read my blog posts all about solar eclipses and lunar eclipses (free)

eclipse worksheets and handouts

Become an Astrophotographer

Head outside to a dark area and capture pictures of the stars, Moon, planets, and more! Some smartphones have an astrophotography setting. A tripod will help keep the phone/camera still.

Lunar photography guide from NASA (external link)

A Guide to Smartphone Astrophotography; free online book from NASA (external link)

night sky
A photo of the Night sky. Photo by Neale LaSalle on Pexels.com

Moon Calendar

Print or create a calendar that shows the phase of the Moon on each day for the current month.

Free moon calendar (external link)

Printable moon activity pack (purchase)

Grab the complete set from Wild Earth Lab!

Thereโ€™s no need to scramble to pull together the perfect Night Sky lesson materials  โ€“ Iโ€™ve already created them for you! This set is a big bundle of many night sky printable materials and activities, many of which were linked in the blog post.

AND for even more outer space activities, try out my complete Sun and Stars Unit!

Explore more lessons from Wild Earth Lab:

If you enjoyed the space activities in this post, I know you will love trying my other printable science and nature units in your classroom too!


Are you interested in reading more posts like this? Subscribe or follow Wild Earth Lab using the links below!


Subscribe, share, and comment:

Posted on Leave a comment

Teach Astronomy with this Edible Constellations Activity

constellation flashcards and constellations made from pretzel sticks and marshmallows
text that says share this post

Are you teaching your students about the night sky and astronomy? If you’re looking for an activity to make your constellation and star lessons memorable, look no further than this snack activity. For this project, students will learn to recognize well-known constellations by creating edible constellations with pretzel sticks and mini marshmallows! This constellations activity is a delicious way to explore the night sky! In this post, you’ll learn how to set up this fun classroom “snack-tivity” and start creating your own celestial treats!

Before we dive in:ย If youโ€™re an educator planning toย teach this activity, great learning resources are key to deepening understanding! I think you and your students will love using myย constellation flashcards for this activity, which you can also find within my constellation mini study (plus youโ€™ll support my blog with your purchase! โค๏ธ)

An example of the constellation Cassiopeia for this activity! You can find the printable materials pictured here in my Constellations Mini Study!

Purpose

Learn about constellations with a tasty twist! Students will learn about constellations and recognize well-known constellations by creating constellations using marshmallows and pretzel sticks. This activity is perfect for homeschooling or classrooms during a star or astronomy unit. It’s also sure to be a crowd-pleaser among kids who love stargazing, ancient mythology, or outer space.

Materials:

  • Mini marshmallows
  • Pretzel sticks
  • Paper plates
  • Picture cards of the constellations
Constellation flashcards

Directions:

  1. Give each student a plate with ~20 mini marshmallows and ~20 pretzel sticks.
  2. Students should arrange the marshmallows and pretzel sticks into constellations, with the marshmallows representing stars and the pretzel sticks representing the imaginary lines connecting the stars.
  3. Students should use the picture cards as a guide when forming their constellations.
  4. Students can arrange and rearrange their marshmallows and pretzel sticks into as many constellations as they would like.
  5. Once students finish forming their constellations, they may eat their own marshmallows and pretzel sticks.

Study this topic with Wild Earth Lab!

You can support this blog and make lesson prep a breeze by purchasing my printable lesson materials:

  • The flashcards and printable directions for this activity are available in my Constellations Mini Study.
  • You can also purchase my individual flashcard sets separately (Common constellations cards for Northern Hemisphere stargazers).
  • For a larger collection of night sky materials, you can purchase my complete Night Sky Unit.

Explore more lessons from Wild Earth Lab:

If you enjoyed this post, I know you will love trying my other printable science and nature units in your classroom too!


Are you interested in reading more posts like this? Subscribe or follow Wild Earth Lab using the links below!


Subscribe, share, and comment:

Posted on Leave a comment

Teaching Landforms: sorting and compare & contrast activities

landform flashcards
text that says share this post

Teaching landforms in your classroom? If you’re searching for a quick and easy way to help students learn about landformsโ€”without needing lots of extra suppliesโ€”youโ€™ve come to the right place! This post shares simple sorting and compare/contrast activities perfect for introducing landforms. All youโ€™ll need are some landform flashcards or pictures, making this activity both fun and hassle-free!

Materials

All you need for this simple learning activity is some good landform flashcards or pictures. I recommend downloading and printing my landform three-part cards. Optionally, you can also purchase my water features three-part cards. You’ll receive high-quality illustrations of each landform on printable flashcards, plus you’ll support my blog with your purchase!

landforms flashcards

Or, if you’re looking for EVEN MORE landforms materials for your lessons, I recommend checking out my complete Landforms Unit. It includes the landforms flashcards, a printable version of the directions in this blog post, and additional activities and printable materials.

Step 1: Get to know the common landforms

Using your landform flashcards, work through the following steps with your students to introduce the common landforms.

  • Look through the whole-card flashcards together.
  • Read the definitions on the information cards and learn about how each common landform is formed.
  • Practice matching landform pictures to landform names with the picture-only and word-only flashcards.
  • Can you spot any of these landforms on the coastal and desert landscape posters?

Landform Sorting Activities

Arrange the flashcards into different groups:

  • Landforms that are surrounded by water and landforms that are not surrounded by water.
  • Landforms made of loose sand or soil and landforms made of solid rocks.
  • Landforms that stick up out of the earth and landforms that go down into the earth.

Which landforms…

Which landforms…

  • Are flat on top?
  • Are pointy?
  • Are steep?
  • Are gently sloping?
  • Are hollow inside?
  • Can be found in your local area?

Compare and Contrast

Look for some similarities and differences between each pair of landforms:

  • Island and peninsula
  • Peninsula and isthmus
  • Mountain and volcano
  • Mountain and hill
  • Hill and sand dune
  • Valley and canyon
  • Cave and volcano
  • Mesa and mountain
  • Cliff and canyon

How did it form? (advanced!)

  Find the cards for the landforms that are formed by:

  • Erosion
  • Deposition
  • Volcanic activity
  • Plate tectonics

(Hint: some landforms can form in more than one way and may fit into more than one category)

What’s Next?

Continue reading about the different types of landforms (complete with examples of each type!) You can also read my post about water features.

Study this topic with Wild Earth Lab!

Thereโ€™s no need to scramble to put together the perfect landforms lesson  โ€“ Iโ€™ve already created it for you! This set includes all the printable materials you need for studying landforms in your classroom or homeschool!

Explore more lessons from Wild Earth Lab:

If you enjoyed this post, I know you will love trying my other printable science and nature units in your classroom too!


Are you interested in reading more posts about educational activities? Subscribe or follow Wild Earth Lab using the links below!


Subscribe, share, and comment: