Are you teaching the water cycle or studying soil in your classroom or homeschool? Measuring infiltration rates in different types of soils is a hands-on activity that helps students explore how water interacts with the ground. This soil infiltration activity also ties in perfectly with studies of porosity and permeability. This engaging experiment works as a stand-alone lesson or as part of a broader unit on soil science or the water cycle.
Before we dive in: The activity from this post comes from my complete Water Cycle Unit. If you’re an educator planning to teach infiltration and the water cycle, you’ll find printable directions, worksheets, and much more in the Water Cycle Unit (plus you’ll support my blog with your purchase! ❤️)
The basic idea of this soil infiltration activity is that you will hammer a tube shallowly into the soil, then pour water in, and observe the water level drop as the water seeps into the ground. Assist your students as they work through the following steps.
Pre-Lab
In this lab, students will compare the infiltration rate in at least three different locations with different types of soil. For example, they could compare a sandy soil, a clay soil, and a soil rich in organic matter.
Before starting the lab activity, ask your students to observe and handle the three different soils. Students should write a description of each soil’s observable properties (color, texture, moisture, particle size). Then, students should predict which soils will have the highest and lowest infiltration rates. Students should explain their reasoning for their predictions.
Part 1: Set Up Your Infiltrometer
First, you and your students will need to set up your “infiltrometer” (tube for measuring infiltration rates).
Use a ruler and permanent marker to make measurement markings up the inside of the tube, starting from one end.
Hammer the infiltrometer (tube) into the soil – the goal is to create a seal with the soil so that water won’t leak out under the tube’s rim. (An adult should complete this step for younger students.)
Part 2: Measure Infiltration
Once you’ve set up the infiltrometer, you are ready to continue with the soil infiltration activity and collect your measurements.
Pour water into the infiltrometer.
Note the starting height of the water and start the stopwatch.
Watch the water level in the infiltrometer lower as the water seeps into the soil.
Repeatedly record the water level over time on the student worksheet.
Repeat in different soils – compare a sandy soil, flowerbeds, mulch, gravel, sand, compost, etc.
Post-Lab
For an extra math challenge: Calculate the infiltration rate for each of the soils:
You may also wish to ask your students to reflect on their predictions. Were their predictions correct? Which soil had the highest infiltration rate? The lowest? What might cause this?
What’s Next?
Once you’ve measured infiltration, why not measure other water cycle processes? Be sure to check out my blog post explaining how to measure evaporation and my post on making a DIY rain gauge to measure precipitation with your students!
Materials for Teaching Infiltration and the Water Cycle
Save time preparing for this activity! My Water Cycle Unit includes printable directions and worksheets for this activity and two other water cycle activities. Plus flashcards, diagrams, and more. Check it out:
Teaching your students about the water cycle? Building a DIY rain gauge from a plastic bottle is a fun, hands-on activity to explore a key water cycle process: precipitation. This simple project is perfect for your classroom or homeschool and can be a stand-alone lesson or part of a larger study of water cycle processes.
Before we dive in: The activity from this post comes from my complete Water Cycle Unit. If you’re an educator planning to teach precipitation and the water cycle, you’ll find printable directions, worksheets, and much more in the Water Cycle Unit (plus you’ll support my blog with your purchase! ❤️)
Gather the following materials to complete this activity:
2 empty plastic soda bottles of the same size
Scissors
Ruler
Permanent marker
Student worksheets & printable directions (available in my Water Cycle Unit!)
Measuring Precipitation: Step-by-Step Directions
The basic idea of this lab is that you will build your own rain gauges out of plastic soda bottles and then use them to collect and measure precipitation in two places. Assist your students as they work through the following steps.
Pre-Lab
In this lab, students will compare the precipitation measured in at least two different locations. For example, they could compare an area with trees and an area out in the open. Or they could give one rain gauge to a friend on the opposite side of town.
Before starting the lab activity, ask your students to make some predictions and explain their reasoning. Which location will receive more precipitation? Or will both locations receive the same amount? Explain your reasoning.
Part 1: Make Your Precipitation Gauge
You will need to build your precipitation gauges and then wait several days to collect your results. First, here’s how to make your own precipitation gauges from plastic bottles:
Cut the plastic soda bottles in half below the tapered necks (an adult should do this step for younger children).
Turn the bottlenecks upside down to make funnels.
Use a ruler and permanent marker to make measurement markings (e.g., centimeters or inches) up the side of the bottle, starting from the bottom.
Part 2: Measure Precipitation
Several days later, complete the experiment:
Place each precipitation gauge outside. You may wish to stack rocks around the gauges to keep them from tipping over.
Compare the precipitation in two locations. Try placing one precipitation gauge somewhere with trees and one out in the open. Or give one gauge to a friend or family member who lives nearby.
In winter, if you have snow, remove the funnel from the top of each gauge bottle to allow snow to fall directly into the base of the bottle. Bring the gauge inside to allow the collected snow to melt to measure snow water equivalent.
Post-Lab
For an extra math challenge: Measure the diameter (D) of the precipitation gauge and then calculate the volume of water that you collected in each rain gauge using the volume of a cylinder equation:
You may also wish to ask your students to reflect on their predictions. Were their predictions correct? Which location received more precipitation? What mechanism might have caused this?
What’s Next?
Once you’ve measured precipitation, why not measure other water cycle processes? Be sure to check out my blog post explaining how to measure stream flow with your students and how to measure evaporation!
Materials for Teaching Precipitation and the Water Cycle
Save time preparing for this activity! My Water Cycle Unit includes printable directions and worksheets for this activity and two other water cycle activities. Plus flashcards, diagrams, and more. Check it out:
Looking for a simple, hands-on way to teach the water cycle? Measuring evaporation is an easy activity that brings the process to life for your students. Perfect for classrooms or homeschools, this experiment makes learning about the water cycle engaging and interactive! You can measure evaporation as a stand-alone activity or as part of a larger exploration of water cycle processes.
Before we dive in: The activity from this post comes from my complete Water Cycle Unit. If you’re an educator planning to teach evaporation and the water cycle, you’ll find printable directions, worksheets, and much more in the Water Cycle Unit (plus you’ll support my blog with your purchase! ❤️)
Gather the following materials to complete this activity:
Two small see-through jars or cups
Liquid measuring cup (or graduated cylinder)
Water
Food coloring
Permanent marker
Student worksheets & printable directions (available in my Water Cycle Unit!)
Measuring Evaporation: Step-by-Step Directions
The basic idea of this lab is that you will have two jars, one with a lid and one without. You will observe the change in the water level in the two jars over several days due to evaporation. Assist your students as they work through the following steps.
Pre-Lab
Before starting the lab activity, ask your students to make some predictions and explain their reasoning.
Will the jar with the lid:
Loose water?
Gain water?
Remain the same?
Will the jar without a lid:
Loose water?
Gain water?
Remain the same?
Part 1: Set Up
You will need to set up the experiment and then wait several days to collect your results. On the first day, take the following steps:
Use a liquid measuring cup to measure equal amounts of water into two small glass jars.
Put a drop of food coloring in each jar.
Use the marker to mark the water level in each jar.
Leave one jar open. Put a lid on the other jar – this will be your control. Discuss with your classmates and/or instructor the purpose of a control in a science experiment.
Place the jars under a covered area so rain can’t fall into them. Wait several days or weeks. Evaporation may occur very slowly in humid climates.
Part 2: Measure Evaporation
Several days later, complete the experiment:
Once the water level is visibly lower in the open jar, use the graduated cylinder or liquid measuring cup to measure the amount of water in each jar. Record the volume on the student worksheet.
The difference between the two jars is the amount of water that evaporated.
Discuss whether water evaporated from each jar – why or why not?
Post-Lab
Ask your students to reflect on their predictions. Were their predictions correct? Why or why not? Which jar lost water? What caused it to lose water?
What’s Next?
Are your students up for a bigger challenge? Now that you’ve observed evaporation, why not measure some other water cycle processes? Be sure to check out my blog post explaining how to measure stream flow with your students and how to measure snow!
Materials for Teaching Evaporation and the Water Cycle
Save time preparing for this activity! My Water Cycle Unit includes printable directions and worksheets for this activity and two other water cycle activities. Plus flashcards, diagrams, and more. Check it out:
Looking for fun and educational ways to bring STEM learning into your homeschool or classroom this winter? These winter-themed activities are perfect for exploring science, technology, engineering, and math through hands-on projects that celebrate the season. From measuring snow and studying glaciers to investigating the science behind snowflakes and symmetry, these activities will keep students engaged all winter long. Grab your winter coat and get ready to dive into these exciting winter STEM activities!
Wild Earth Lab is supported by readers like you. This post includes links to my own products and affiliate products. If you purchase through links on my site, I may earn a small commission at no additional cost to you.
1. Measure snow like a scientist
If you live somewhere that gets snow in winter, you’ve likely measured the depth of snow before! But with a few extra steps, you can turn this simple task into an awesome, hands-on snow science activity.
Start by learning about snow water equivilent and how to calculate it. This can be a great way to start a conversation about snow in the water cycle, and the ways snow supplies our rivers and aquifers with an important input of water.
You can find the full activity directions for a snow measurements activity in my blog! Or better yet, you can save time and support my blog when you purchase theprintable worksheets and directionsfor this activity in my complete Science in the Snow Unit.
Measuring snow with your students? You can track the snow all winter long by placing a metal snow gaugein your yard or outdoor learning area. Whether you’re teaching in the classroom or at home, you can create an inspiring outdoor learning areafor studying snow, weather, and more.
Cardinal Snow Gauge: product and image from Soldarmetals on Etsy.Snow Gauge: product and image from Swenproductson Etsy.
2. Explore glaciers and climate science
Why study glaciers this winter? Glaciers tie in to many important science topics – not just geology and landforms, but also climate science, sea level rise, and water resources! Glaciers are an important reservoir of frozen freshwater on Earth. However, glaciers all over the world are receding and disappearing due to climate change, putting communities at risk of flooding and altering ecosystems.
Furthermore, glaciers teach scientists about our Earth’s past! Glacial ice is like a time capsule, holding important clues about the history of our Earth and its climate. By studying glaciers, students can learn about and discuss the past, present, AND future of our climate!
Ready to study glaciers? You can read more about the types of glaciers and how they form in my blog post! Or better yet, you can save time and support my blog when you purchase my Glaciers Unit – complete with classroom activities, worksheets, handouts and more.
If you’ve ever looked at a snowflake under a microscope or magnifying glass, you know that each snowflake is a unique, beautiful formation. But how do these amazing water crystal structures form? It all starts high in earth’s atmosphere, with a dust particle and water vapor. Since every snowflake takes a slightly different path to the ground, each snowflake runs into unique conditions along the way. These different experiences impact the way each snowflake forms.
Learning about the formation of snow ties in to studies of meterology and the three phases of water. Because of this, snowflake formation is an engaging winter science topic at many different levels.
When it comes to geometry, snowflakes provide a great tool for learning about symmetry with a winter-y twist! Cutting paper snowflakes from coffee filters or paper is a great hands-on way to study rotational symmetry, planes of symmetry, and more!
Paper snowflakes are an easy activity to DIY! But if you’re looking for a little guidance, I’ve got you covered. Activity directions and worksheets for a paper snowflakes & lines of symmetry lesson are also found in my Geometry in the Snow Unit.
5. Study the animals of the poles!
Winter is the perfect time to study the survival strategies of animals that live in the coldest places on earth! Topics could include survival strategies like migration, hibernation, and insulation or the food webs and ecosystems of the Arctic or Antarctic.
Studying and modeling arctic food webs is a fun, hands-on ecology activity that students love. You can learn how to build your own food webs in my blog post. Furthermore, you can learn all about arctic ecology and find materials for an arctic food webs lesson in my Arctic Unit.
There’s no need to scramble to put together the perfectwinter science lesson – I’ve already created some for you! The winter stem activities from this post come from my winter STEM units:
In this activity, students will become familiar with rocks’ physical properties and the basics of rock identification. Students will sort rocks into groups based on their observations and learn about the physical properties of rocks. At the end of the rock ID lab, students can try identifying rocks by type, subtype, and name.
No prior rock ID experience is needed for students to complete this lab activity. Part A especially is a great way for beginners to explore the physical properties of rocks! However, before beginning parts B and C of this activity, students should already be familiar with the rock cycle and the three main types of rocks (igneous, sedimentary, and metamorphic!) and their sub-types.
Save preparation time AND support my blog: purchase all the printable materials you need to complete a rock ID lab in my shop!
Modifications (optional)
To make this rock ID lab simpler, do parts B and C all together as a class.
As an alternative to parts B and C, you could tell students which rocks are igneous, sedimentary, and metamorphic and then ask students to find some similarities between the rocks within each group.
To simplify part C, tell your students which 10 rock samples they have, but do not tell them which is which. This allows students to use the process of elimination to identify the most difficult samples.
Safety Notes
Read and comply with any warnings on the packaging and safety information sheets of rock samples and test kit tools used to complete this lab.
Adult supervision is required at all times while completing this lab.
Directions
Part A: Examine the Rocks
Allow the students to familiarize themselves with the rock samples by picking them up, looking at them, etc…
Ask the students to take note of which rock samples…
Are light colored?
Are dark colored?
Have several different colors?
Are one solid color?
Are made of crystals? (use hand-lens or microscope)
Are made of sediment particles stuck together? (use hand-lens or microscope)
Are fine-grained?
Sparkle?
Are dull?
Are soft or break or crumble easily?
Are very solid and don’t break or crumble?
Have stripes or layers? (foliation)
React to an acid (lemon juice)?
Note for acid reactions: rocks with a very high calcium carbonate content (e.g., marble, limestone, and coquina) should react with a drop or two of acidic lemon juice. They will bubble and fizz. Rocks with a lower calcium carbonate content (e.g., some mudstones) may bubble and fizz slightly.
Need worksheets and handouts? Purchase my set of printable materials that complement this activity!
As you create your lists, introduce/review the following concepts: mafic vs felsic, igneous textures, grain sizes, and foliation. For this step, the teaching posters found in my product will be a helpful visual aid.
Students should write detailed descriptions of each rock sample, noting the following physical properties:
Texture (use a microscope or hand lens)
Composition
Luster
Color
Foliation (use hand lens if needed)
Acid reaction (strong reaction, weak reaction, no reaction)
Other properties
See if your students can correctly identify the type or subtype of any of the rock samples.
Start with rocks that can be most easily identified. For example, a rock with clear foliation can quickly be identified as a metamorphic foliated rock. A rock that is made of sediment particles cemented together can be quickly identified as a sedimentary clastic rock.
It is OK if there are some rocks that your students are unsure about. Discuss why they are unsure and if there are any types/sub-types they can rule out. It may not be possible to identify certain rocks in a classroom setting.
After this part of the lab is complete, reveal which rocks were sedimentary, igneous, and metamorphic. You may also lead a discussion on how the physical properties of rocks relate to how they formed. E.g., large crystals form deep underground, foliation forms under directional pressure, etc…
Teaching posters for this Rock ID activity(available for purchase)
For an added challenge: encourage students to only look at the front (info/text-only) side of the flashcards while making their IDs. The backs of the flashcards include pictures and names of the rocks.
The students should read the properties listed on each flashcard.
Students can compare the rock properties on the flashcards to their written descriptions of each sample.
Students should do their best to match each rock sample to its correct identity.
Rock ID is challenging: assist students if they become stuck.
End the lab by revealing the correct identity of each sample.
My Rock ID cards make identifying common rocks a breeze!
Study Rocks and Minerals with Wild Earth Lab!
Save time by purchasing all the printable materials you need for a rock ID lab! This set includes all the worksheets, teaching posters, flashcards, and handouts you need for completing this rock ID activity:
OR: you can also find all the above materials plus more in my full Rocks and Minerals Unit:
Are you studying soil science with your homeschool or science class? Soil science is an exciting and interdisciplinary subject that integrates chemistry, physics, and environmental science. From testing soil organic matter to measuring porosity and permeability, hands-on lab activities will bring the real experience of being a soil scientist to your science classroom or homeschool. In this post, you’ll discover five educational soil science activities to try, including a soil texture jar test, modeling soil horizons, and more. These activities are perfect for helping your students explore the wonders of soil in a fun and interactive way!
Soil scientists need to evaluate the “textures” of soils: in other words, the proportion of sand, silt, and clay in the sediment part of the soil. But this can be a challenge. How do you separate and measure all those tiny grains?
This most basic method, the “jar test”, is easy to do in a classroom setting. Shake up some soil and water in a jar. Then, watch the grains settle over time. Larger grains settle faster than smaller ones.
Did you know soils have layers? Scientists call the layers “soil horizons”. Each of the six soil horizons is given a letter: O, A, E, B, C, and R. The upper two horizons, O and A, are called topsoil. Each horizon has its own unique characteristics and function.
You can teach your students about layers in the soil by building a soil horizons parfait. Perhaps you have made a “cup of dirt” from pudding? With a few extra steps, you can turn this simple snack into a tasty science activity by creating a soil horizons parfait!
You can find the full activity directions for this “snack-tivity” in my blog! Or better yet, you can support my blog by purchasing my soil horizons mini study, which includes printable directions for this activity as well as soil horizon worksheets.
If you’re studying soils, your students will need to know the difference between soil porosity and permeability. While these two properties are related, they are not the same! And what better way to understand the difference between porosity and permeability than a hands-on lab activity!?
Conveniently, soil porosity and permeability can be measured and observed using common household items. You can find the full activity write-up withdirections for porosity and permeabilityin my blog! Or better yet, support my blog AND save time when you purchase the printable worksheets and directions for this lab activity.
If you’re studying soils with your students, you have probably learned that soil is a mixture of sediments and organic matter. But different soils have different amounts of these two ingredients. A soil’s organic matter content is important, especially when considering a soil’s ability to support plants.
To demonstrate this, you can do a cool classroom demo by mixing soil with hydrogen peroxide. The hydrogen peroxide reacts with organic matter in the soil to make gas (i.e., fizzing and bubbles!). More bubbles = more organic matter in the soil!
Find the directions for a soil organic matter classroom demo in my blog! Or better yet, you can support my blog by purchasing theworksheets and printable directions for this classroom activity.
Decomposers are organisms with a very important job: they help recycle nutrients back into the soil. They help break down dead organic matter into the soil nutrients that help plants grow. There are many types of decomposers, including mushrooms and fungi, earthworms, and microbes.
You can print my free food web poster(including decomposers). To learn more about food webs and the important role of decomposers, check out my complete Food Webs Unit (for purchase).
If you are interested in studying mushrooms, I’ve also created some free mushroom anatomy printables. You can dive deeper into the world of fungi and mushrooms with my complete Mushroom Unit.
I made these mushroom anatomy diagrams for you! You can download them for FREE.
Study Soil Science with Wild Earth Lab
Many of the activities from this post come from my complete Soil Science Unit! There’s no need to scramble to put together the perfect Soil Science Lesson – I’ve already created it for you! This set includes tons of activities and lab directions, teaching posters, handouts, and more!
Are you searching for an engaging and educational ecology activity to try with your students? Building your own food webs is a fantastic way to study the flow of energy between organisms – all while allowing kids to be creative! Best of all, this is an activity that you can complete outside, making it perfect for homeschool parents and teachers who enjoy having class outdoors! Get ready to inspire your students with this unique and interactive ecology project!
A special note for educators: are you planning to teach this food webs activity? If so, I’ve already created all the worksheets, printable materials, handouts, and directions that you will need. Find these materials in my complete Food Webs Unit – and you’ll support this blog with your purchase! 💚
A food web is a complex network of feeding relationships between organisms in an ecosystem. Energy flows from the organism being eaten to the organism doing the eating. We represent food webs using diagrams with arrows between the organisms. Food web diagrams map the many paths for the movement of energy between organisms.
I wrote a separate blog post in which you and your students can read more about food webs and food chains. It includes lots of diagrams and examples!
What types of organisms make a food web?
All the different lifeforms coexisting in an ecosystem form a community. The community is made of many individual, diverse lifeforms – like plants, animals, and fungi – called organisms.
When you build your food web model, it will include many different types of organisms. These organisms fall into three main categories, based on the roles they play in the food web. Knowing the difference between these roles will help you and your students build food webs.
In an ecosystem, you will find the following types of organisms:
1. Producer:
An organism that produces its own food through photosynthesis. Producers use sunlight, water, and carbon dioxide to make their own food. They also need soil nutrients.
Examples: trees and other plants, some plankton, moss, some microorganisms
2. Consumer:
An organism that eats other organisms as food. Consumers cannot make their own food. Consumers can be herbivores, omnivores, carnivores, and scavengers.
Examples: insects, birds, frogs, deer, other animals
3. Decomposer:
An organism that recycles nutrients back into the soil by eating and digesting decayed plant and animal matter and waste.
Examples: mushrooms, some worms, soil bacteria
Make your own food webs activity:
Gather your materials and follow these steps to create your own food webs with your students. You can all work on one big food web together, or each student can make their own mini-food web! There are many possibilities!
Materials
Flashcards or pictures of the organisms in an ecosystem (plants, animals, fungi, etc…)
Or, get a set for an ecosystem of interest (e.g., desert, arctic, forest, etc…)
You can also make your own set!
Sidewalk chalk
A large, paved area outdoors that is free of cars and heavy foot traffic
Step-by-Step Directions
Set-Up:
Sort the organism cards into 3 piles:
producers
consumers
decomposers
Look through your producers pile.
This pile represents the food sources for herbivores and omnivores (primary consumers) in your ecosystem.
Look through the consumers pile.
Sort these cards further or make a mental note of which organisms are likely to eat plants (herbivores and omnivores) and which organisms are likely to eat animals (carnivores and omnivores).
Research the diets of unfamiliar animals.
If students are unfamiliar with some of the animals and their diets, it may help to research the animals online. You can take notes on the backs of the cards if needed.
Note: if you’re using my food webs unit, a handout is provided with info on the diets of the included animals!
Build Your Food Web:
Choose your producers.
It is easiest to start with one to three producers.
Which consumers eat your producers? These are your primary consumers.
Place the primary consumers above your producers and draw arrows to represent the flow of energy from food to eater.
Which consumers eat your primary consumers? These are your secondary consumers.
Place the secondary consumers above your primary consumers and draw arrows to represent the flow of energy from food to eater.
Which consumers eat your secondary consumers? These are your tertiary consumers.
Place the tertiary consumers above your secondary consumers and draw arrows to represent the flow of energy from food to eater.
Repeat this process as needed, until your reach a consumer that is not eaten by anyone else – this is your top predator!
You can make your food web as big or small as you’d like! It could include dozens of organisms or just a few.
Add additional arrows as needed.
Food webs can be messy! Many any animals have multiple food sources and are preyed on by multiple predators.
Optional: place any decomposer cards underneath the food web. Decomposers recycle nutrients back into the soil to help producers like plants grow!
Example Food Webs:
An example of building your own food web!
Study Food Webs with Wild Earth Lab:
Of course, you can put together your own food web materials to complete this activity. Or, save time and support my blog when you purchase my food webs unit! The unit includes everything you need to complete this activity plus additional handouts, worksheets, and readings!
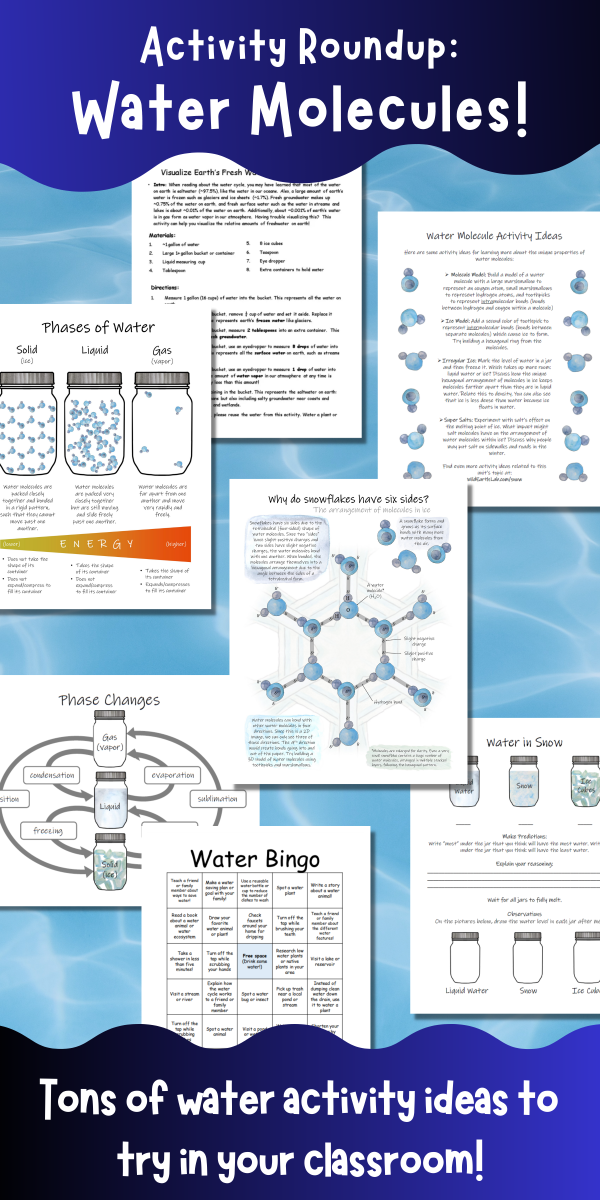
Water. It covers over 70% of the earth’s surface and even makes up about 60% of the human body. But did you know that water has some incredible properties that make it different from other liquids? This is due to water molecules’ unique molecular structure. If you are studying water in your classroom, here are a few fun water molecule activities to help your students “discover” some of water molecules’ weirder properties:
But first, here is a little background info on water molecules. We can think of water molecules as tetrahedral, meaning they behave like a 4-sided shape. Since two “sides” have slight positive charges and two sides have slight negative charges, the water molecules bond with one another. When bonded, the molecules arrange themselves into a hexagonal arrangement due to the angle between the sides of a tetrahedral form.
1. Build a water molecule activity
Build a model of a water molecule with a large marshmallow to represent an oxygen atom, small marshmallows to represent hydrogen atoms, and toothpicks to represent intramolecular bonds (bonds between hydrogen and oxygen within a molecule)
2. Molecular model of ice
After building a water molecule model (see above), continue on to build the hexagonal structure of ice! Add a second color of toothpick to represent intermolecular bonds (bonds between separate molecules) which cause ice to form. Try building a hexagonal ring from the molecules.
3. Volume change: ice vs water
Mark the level of water in a jar and then freeze it. Which takes up more room: liquid water or ice? Discuss how the unique hexagonal arrangement of molecules in ice keeps molecules farther apart than they are in liquid water. Relate this to density. You can also see that ice is less dense than water because ice floats in water.
4. Salt and water – melting point experiment
Experiment with salt’s effect on the melting point of ice. What impact might salt molecules have on the arrangement of water molecules within ice? Discuss why people may put salt on sidewalks and roads in the winter.
Salt impacts the melting and freezing points of water. Photo by Castorly Stock on Pexels.com
5. Study snow with Wild Earth Lab!
If you like these activity ideas, I think you’ll love my Science in the Snow Unit. It’s a complete set of interdisciplinary learning materials to help you teach a fantastic unit on the scientific study of snow and ice for your middle school or high school class. Students will learn about the molecular structure of ice, phase changes, snow water equivalent measurements, snow hydrology, weather stations, and more! Click the link below to learn more!
I don’t know about you, but I think math is more interesting when we can apply it to real-world situations! If you’re teaching trigonometry, right triangles, or angles in your classroom or homeschool, you and your students will love this tree-height applied math activity! In this simple learning activity, students will learn how to make a homemade inclinometer – a device for measuring the angle of inclination. Then, they will take measurements and calculate the height of a tree.
A note for educators: This tree height activity comes from my Math in the Forest Unit. If you’re an educator planning to try this activity, I recommend checking out the unit. It includes the necessary printable directions, diagrams, and worksheets for this activity—perfect for teachers and homeschoolers looking to bring applied math fun to the classroom! 💚
Unless you are measuring a short seedling, you probably won’t be able to measure tree height directly because you can’t reach the top. So how do you measure something so tall? Answer: Use an inclinometer and trigonometry!
How do you measure the height of something taller than you? Answer: use trigonometry!
An inclinometer is a device for measuring an angle of inclination above the horizontal. We can use an inclinometer to help us find the height of tall objects, such as trees! When you’re looking up at the top of a tree, you can use the angle of inclination and your distance from the tree to calculate the tree height. This is possible thanks to trigonometry – a branch of mathematics dealing with angles and the sides of triangles.
So how do we do this? In this blog post, I’ll walk you through all the steps to calculate tree height with your students. The first step is to make your own inclinometer out of common household objects…
Part 1: Make an inclinometer
Follow these steps to make your own inclinometer from common household items. You’ll use the inclinometer to find an angle of inclination, which you’ll use to calculate tree height.
Tape the straw across the center of the protractor at 90̊.
Use the scissors to shorten the straw (as needed).
Cut a short piece of thread or dental floss.
Tie the small weight to the end of the floss.
Tie the other end of the floss to the straw.
Check that the thread hangs over the 0̊ mark when holding the inclinometer with the straw parallel to the ground. Adjust the position of the thread on the straw as needed.
1. Tape the straw across the center of the protractor at 90̊.
2. Use the scissors to shorten the straw (as needed).
3. Cut a short piece of thread or dental floss.
4. Tie the small weight to the end of the floss.
5. Tie the other end of the floss to the straw.
6. Check that the thread hangs over the 0̊ mark when holding the inclinometer with the straw parallel to the ground. Adjust the position of the thread on the straw as needed.
Part 2: Using your homemade inclinometer
Use your homemade inclinometer to measure the angle of inclination when looking up at the top of the tree. The homemade inclinometer requires two people to operate – one person to look through the inclinometer and one person to read the angle off of the side.
Materials
Homemade inclinometer
Tape measure
A friend
Directions
Stand a short distance away from the tree, far enough away that you can see the top of the tree. This works best if you are on flat ground – not uphill or downhill from the tree. Measure your distance from the tree.
Look through the straw with the curved edge of the protractor facing your eyeball. Do not touch the straw to your eyeball.
As you look through the straw, tip the inclinometer upwards until you can see the top of the tree through the straw.
Hold still and have a friend look at the side of the inclinometer. Have them read the angle where the thread crosses.
Measure the height to your eye level.
Measure your distance from the tree
Look through the straw with the curved edge of the protractor facing your eyeball. Do not touch the straw to your eyeball.
As you look through the straw, tip the inclinometer upwards until you can see the top of the tree through the straw. Have a friend read the angle on the side of the inclinometer where the thread crosses.
Part 3: Calculate tree height
You can use trigonometry to calculate the tree height from the measurements you took with the tape measure and inclinometer. The imaginary horizontal line at eye level, the imaginary line from your eyes to the top of the tree, and the tree itself create a right triangle (see figure below).
There is a relationship between the angles in a right triangle and the lengths of its sides. If you know two angles and the length of one side, you can calculate the length of the other sides of the triangle. Look at the diagram and then check out the example calculation below.
Question: I want to know the height of a tree in my backyard. When I was standing 15 feet away from the tree and looking up at its top, I used my inclinometer to find an angle of 20̊. The height to my eye level is 5.2 feet.
distance x TAN(angle) = tree height above eye level
15 feet * TAN (20̊) = 5.5 feet
tree height above eye level + eye level = tree height
5.5 feet + 5.2 feet = 10.7 feet
Answer: The tree is about 10.7 feet tall!
Printable Directions & Worksheets
Trying this activity in your classroom? You can find worksheets and printable directionsfor measuring tree height in my Math in the Forest Unit:
There’s a whole alphabet of animals out there in nature for you to discover!
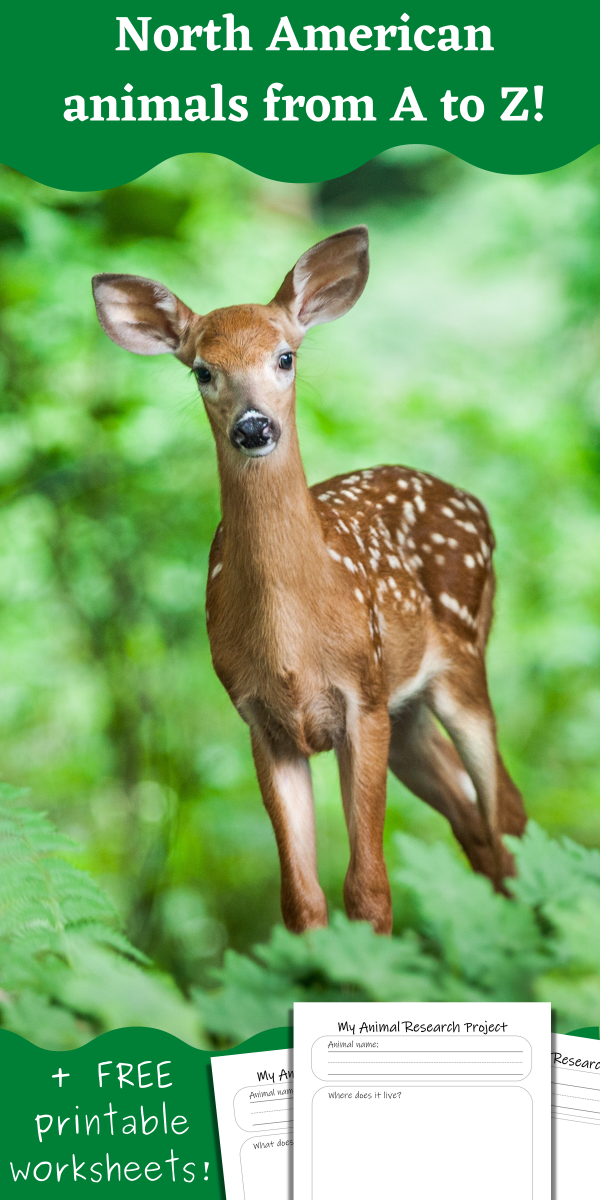
For a recent project, I illustrated North American Animals from A to Z (you can find those illustrations here)! During this project, I reviewed many incredible critters that I studied while earning my degree in Wildlife Biology! I wanted to share more about these cool creatures with you! You may already know and love some of these animals, many of which have wide ranges in North America (and beyond) – like ants, crows, and frogs! Others are small, rare, or hard to spot – and might even be creatures you’ve never seen before! Which ones can you spot in your local habitats?
In this post, you’ll find a little more information about the featured alphabet animals (which you can also learn more about from my Alphabet in Nature Unit)! You’ll also find links to outside websites with more information about each animal! There’s also a free PDF worksheet for younger children or students to do a research project on their favorite animal from this unit!
I created this Alphabet Animals post to go along with one of my latest educational resource packs, the Alphabet in Nature Unit! It comes with flashcards, a poster, and indoor and outdoor activities for practicing the alphabet with an nature-themed twist! You can also find it in myNature Preschool Bundle! If you haven’t already, be sure to check it out 🙂
How to use this page:
Use the links on this page to learn about the alphabet animals of North America.
Ants are common insects! They can be spotted on every continent except Antarctica. They live in colonies where there are workers and a queen! There are many species of ants. These are some of the different types of ants:
Leafcutter Ants
Fire Ants
Carpenter Ants
Check out these websites to learn more about ants!
Bats are unusual because they’re a mammal but they can fly! Depending on the species of bat, they will eat a variety of foods, such as insects, flower nectar, and fruit! Some common North American bats include:
Little brown bats
Mexican Free-tailed bats
Fruit bats
Long-nosed bats
Check out these websites to learn more about bats!
Crows are incredibly intelligent birds found world wide. They’ve been observed using tools, and can recognize human faces! Check out these web resources about crows:
Earthworm photographed in the backyard of Valerie from Wild Earth Lab, in Northern Colorado!
Earthworms are annelids, the phylum of segmented and ring worms. Earthworms are beloved for their importance to agriculture. They are decomposers that move nutrients through soil by consuming and digesting waste and decaying matter. They also create large pores as they move through soil, which provide paths for water, gases, and plant roots to move through soil. You can see earthworms come to the surface of the soil to breathe during rainstorms in many habitats. Learn more about earthworms using these websites:
Foxes are omnivorous mammals. Grey foxes and kit foxes are found in the southern parts of North America. Red foxes are common in northern parts of North America. Arctic foxes are found near the arctic circle, in Canada and Alaska. Visit these web resources to learn more about foxes!
There are many species of geese world wide. Canada geese are commonly found in North America from northern Canada around the arctic circle to the the northern parts of Mexico. Many are migratory, spending their winters in warmer southern climates and their summers in far-north breeding grounds. Learn about Canada geese on these websites!
A red-tailed hawk in the care of a raptor center. Photo by Valerie (Wild Earth Lab) in Northern Colorado
Hawks are raptors, or “birds of prey”. They are carnivores and top predators found across a wide range of habitats. Here are some of the different types of hawks found in North America:
Red-tailed Hawk
Northern Goshawk
Cooper’s Hawk
Ferguson Hawk
Sharp-shinned Hawk
Check out these websites to learn more about hawks!
Inchworms devour leaves in West Virginia, photo by Valerie from Wild Earth Lab.
Inchworms or cankerworms are the larval stage of the geometer moth. They are known and named for the way they move, inching forward with the front of their body then their rear. Inchworms undergo complete metamorphosis, in which they have a pupa stage before becoming adult moths. Learn more about inchworms and geometer moths here:
There are many species of jellyfish found in multiple oceans and seas. There is also one unique species of freshwater jellyfish in North America. Jellyfish are not really fish at all! They are invertebrates in the phylum Cnidaria. There are different types of jellyfish found off the coast of North America:
Moon Jelly
Lion’s Mane Jelly
Bay Nettle
Portuguese Man-of-War
Check out these websites to learn more about jellyfish!
Kingfishers are small birds that can be spotted near estuaries, wetlands, lakes, and other bodies of water. There are a few species of kingfishers found in North America, including:
Belted Kingfisher
Great Kiskadee
Green Kingfisher
Ringed Kingfisher
Check out these websites to learn more about bats!
Lady beetles, also known as ladybugs, are not really bugs! Bugs are a specific type of insects that belong to the order Hemiptera, like box elder bugs and leaf hoppers. Lady beetles belong to the beetle order of insects, Coleoptera. Amusingly, while ladybugs are not bugs themselves, they do eat bugs – one of their favorite foods is aphids, a member of the order Hemiptera (true bugs). Learn more about lady beetles using the links below:
A sketch of a fathead minnow by Valerie from Wild Earth Lab
Minnow is a general term for many different species of small freshwater fish including chubs, shiners, and daces. Minnows provide an important food source for larger fish species higher up on the food chain and for waterfowl. Check out these websites to learn more about minnows!
Eastern spotted newt photographed by Valerie (Wild Earth Lab) in the eastern United States along the Appalachian Trail.
Newts are amphibians and a type of salamander. It’s never a good idea to pick up a newt because they have very delicate and absorbent skin – chemicals and oils on our hands can be very harmful to them! They come in many different colors – from green, to brown, to bright orange. Learn about newts on these websites:
Preying mantis photo in Northern Colorado by Valerie (Wild Earth Lab)
Preying mantises are insects that are voracious predators of other insects! Gardeners love them because they help keep away pesky crop-eating insects such as grasshoppers. Learn more about preying mantises on these websites:
Rabbits are common herbivorous mammals in the lagomorph order, which also includes hares and pika. They are sometimes mistaken as rodents. Humans have domesticated rabbits and they are beloved pets. Learn more about wild rabbits with these internet resources:
A box turtle hiding in its shell by Valerie (Wild Earth Lab), along the Appalachian Trail in the eastern United States.
Turtles are common shelled reptiles found world wide! They are found in many types of habitats, including ponds, salt water, islands, and even the desert! There are many species of turtles. Some common North American turtles include:
box turtles
sea turtles
snapping turtles
Check out these websites to learn more about turtles!
Sea urchins are found in salt water. If you live near a coast, you may spot them in tide pools! Although they might not seem like it, sea urchins are in fact animals, belonging to the phylum Echinodermata. Learn about sea urchins here:
Voles are rodents, like mice and rats. They are prey for a variety of predators, such as hawks, owls, and foxes. Check out these websites to learn more about voles!
Water striders are amazing insects that harness the power of surface tension to walk across water. They are common insects that can be seen at many lakes, ponds, wetlands, and even in the slow-flowing pools and eddies of streams and rivers. Learn more about water striders:
A sketch of a xeme (sabrine’s gull) by Valerie at Wild Earth Lab
Xemes, also called Sabrine’s gulls, are a migratory gulls. In the summer, they are found in their summer breeding range near the arctic circle in northern Canada and Alaska. They may be seen passing through off the west coasts of Canada and the United States as they make the long journey to their winter range in the Pacific Ocean off the coast of South America. Check out these websites to learn more about xemes!
Yellow jackets are a common type of wasp. They are omnivores and feed on a variety of foods including other insects and flower nectar. They can be pollinators – animals which move pollen between flowers, transferring plants’ genetic material which allows for the production of seeds and new plants. Learn more about yellow jackets:
Zebra swallowtail butterflies are a butterfly species found in the southeastern part of the United States. They undergo complete metamorphosis like all butterflies and moths. Learn about zebra swallowtail butterflies here: