Posted on Leave a comment

Geology Review Game Idea: mineral ID bingo

mineral ID bingo cards
text that says share this post

Are you teaching rocks & minerals in your science classroom? If you’ve taught your students the basics of mineral ID, but need a fun review game to end your unit, look no further than mineral ID bingo. In this post, I’ll go over how to play mineral ID bingo in your classroom and the materials you will need to play!

Before we dive in:ย If you’re an educator planning to try this game with your students, you can save yourself the time of making your own bingo cards and calling cards. My printable mineral ID bingo card set is available on TpT and Etsy. The set includes 25 unique bingo cards with illustrations of each mineral, plus calling cards with a list of each mineral’s properties (plus youโ€™ll support this blog with your purchase! โค๏ธ)

Prior Knowledge Required

To do this activity, your students must know the difference between rocks and minerals. They should have already practiced some mineral ID and be familiar with common minerals such as:

  • Biotite
  • Calcite
  • Feldspar
  • Galena
  • Halite
  • Muscovite
  • Pyrite
  • Quartz

Furthermore, your class should be familiar with the physical properties of minerals, including:

You can brush up on mineral ID and mineral physical properties by reading my post about mineral physical properties. You could also try a mineral ID lab with your class, by following these directions or reading my list of fun rock & mineral activity ideas for the classroom.

Finally, you can get my most comprehensive rock and mineral teaching materials in the Rocks and Minerals Unit. It’s my complete set of printable materials for teaching rocks and minerals – with worksheets, activity directions, diagrams, and much more. I know you will love it!

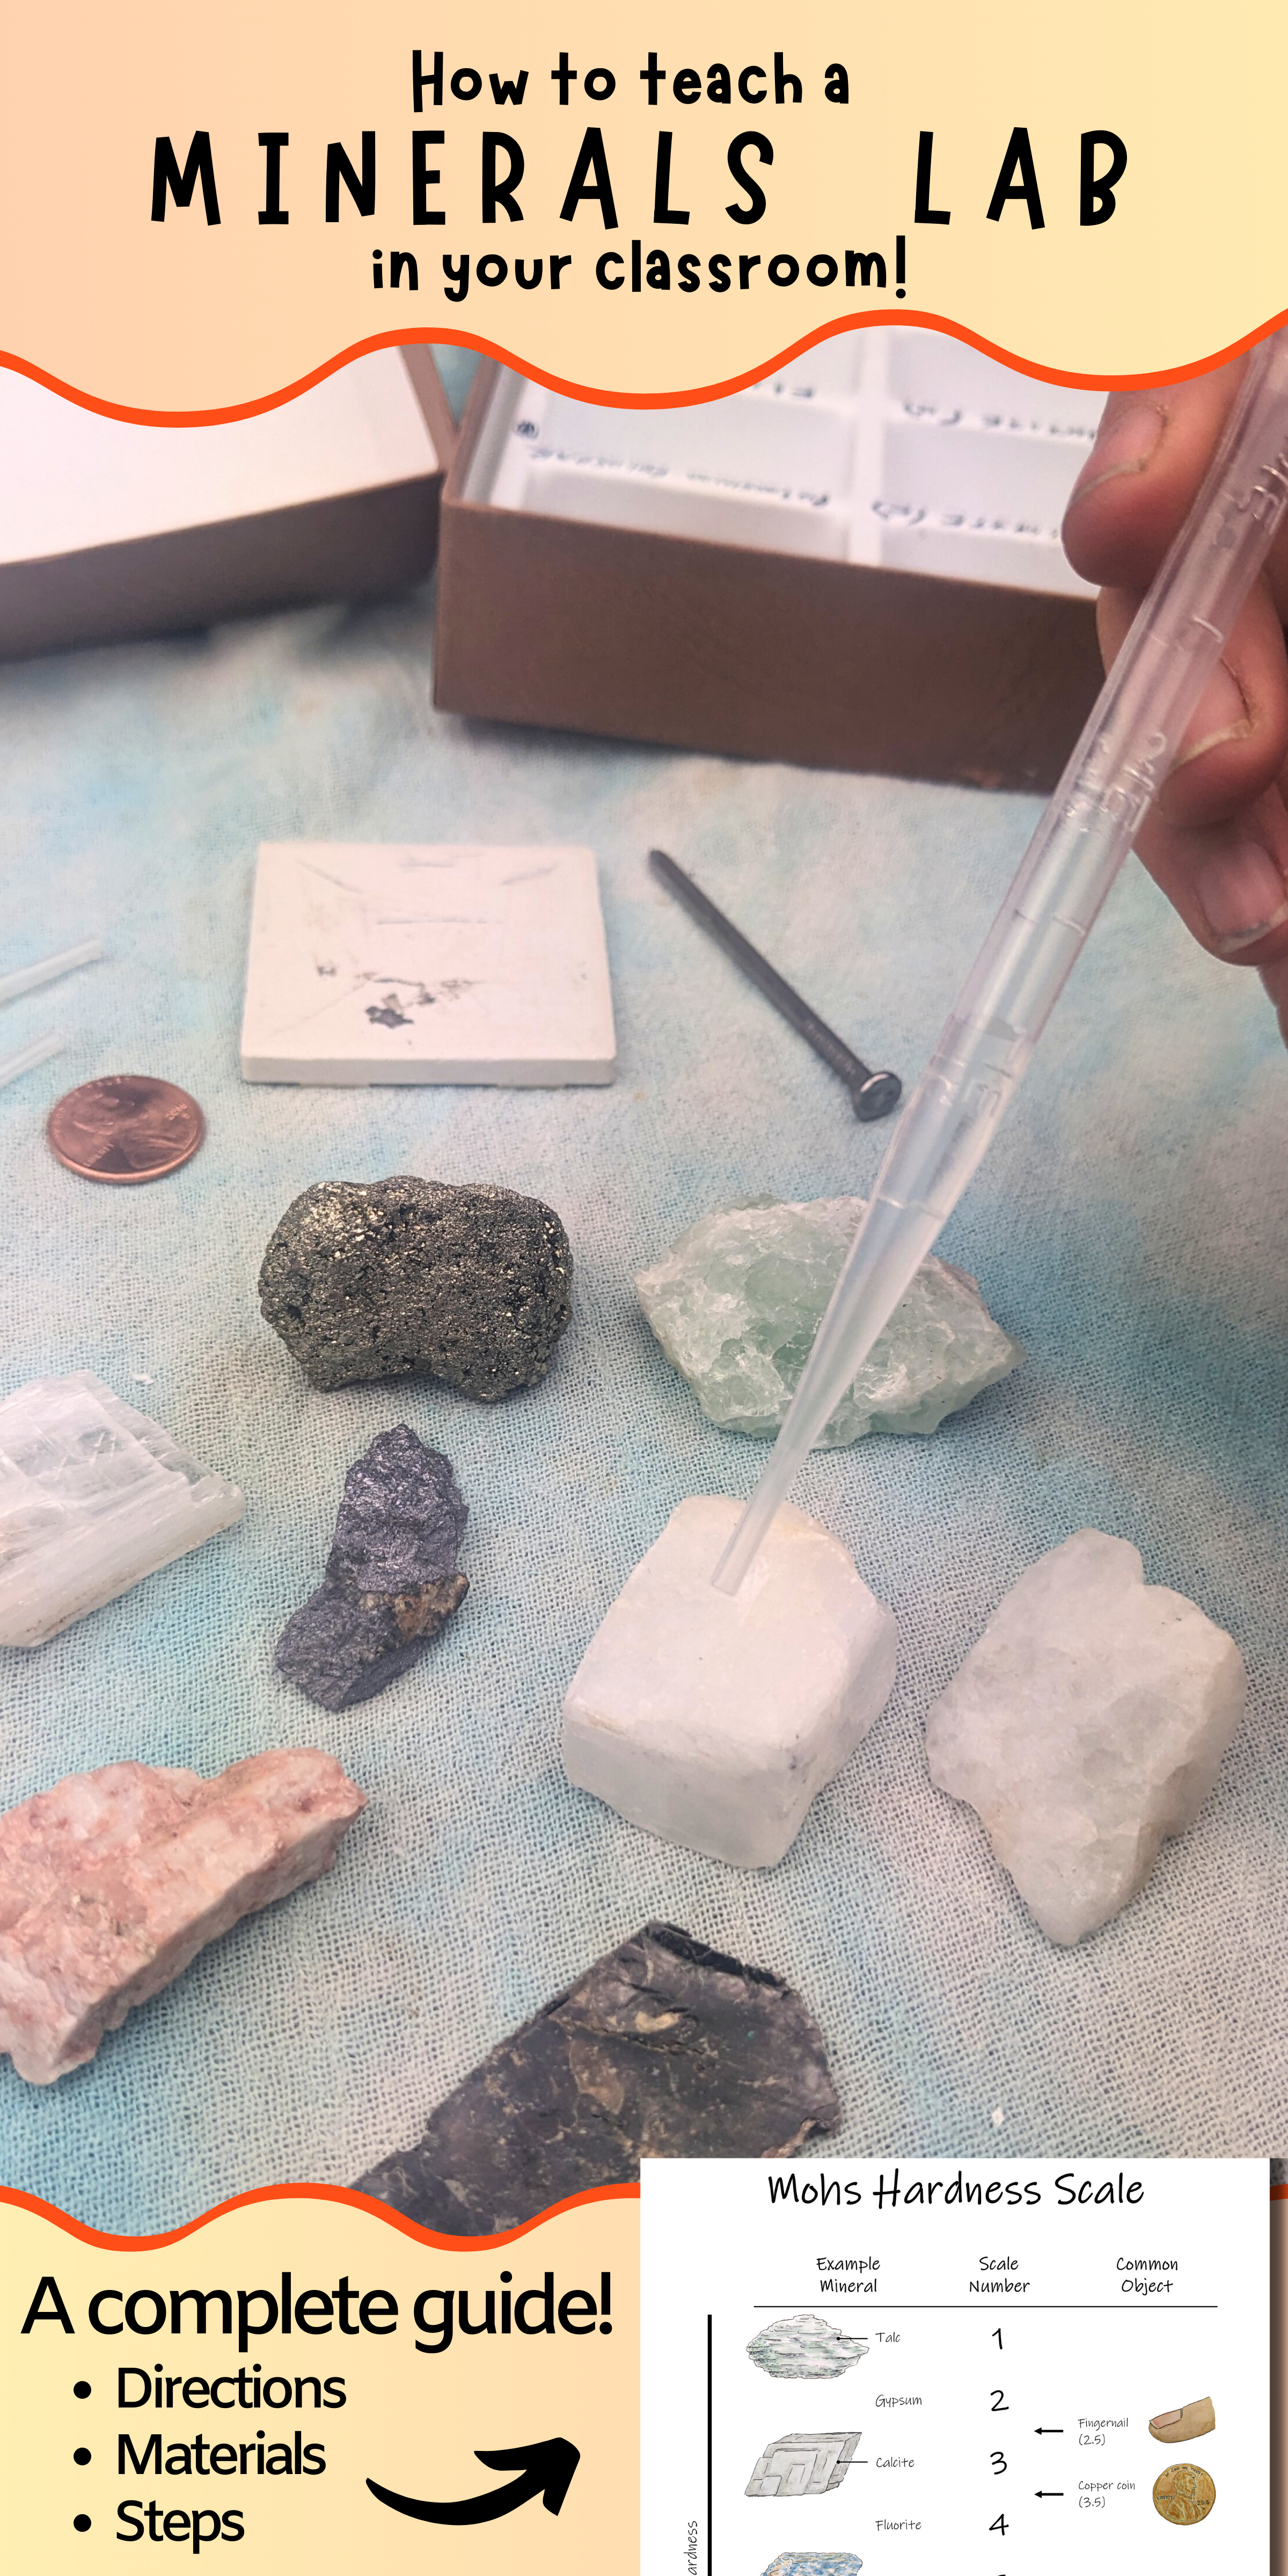
an eye dropper held above some mineral samples
Example of a Mineral ID lab activity

Materials

To play mineral ID bingo, you will need the following materials

  • 25 unique bingo cards featuring different minerals (download & print mine here, featuring common minerals, or create your own with your minerals of choice)
  • Calling cards – a list of each mineral’s physical properties (hints) on small pieces of paper or index cards (also included in my printable bingo set!)
  • A hat or bucket
  • Bingo chips or small items (pennies, candies) to place over the squares on the bingo cards

How to Play

Follow these steps to play mineral ID bingo with your students:

  1. Each student gets one unique bingo card.
  2. Cut apart the calling cards with each mineral’s physical properties. Place your calling cards into a hat or bucket.
  3. Pull one calling card at a time and read it out loud to the class, sharing the physical properties of the mineral without revealing the name of the mineral.
  4. Students should find the corresponding mineral on their bingo cards and mark or cover it.
  5. The first student to get four minerals in a row gets โ€œbingoโ€ (across, diagonal, or vertical).
  6. Check the student’s card to ensure all minerals were identified correctly.

Helpful Hints

When reading out clues for a mineral, start with the more obscure hints, and then progress to the more obvious clues.

Products Mentioned in this Post:

Thereโ€™s no need to scramble to put together the perfect printable materials for this activity ย โ€“ Iโ€™ve already created it for you! This bingo set includes all the printable materials you need for playing mineral ID bingo.

For more rocks and minerals learning fun, try my Rocks & Minerals Unit – a complete set of printable classroom materials for teaching this subject:

Studying Rock ID too? Check out my rock ID bingo review game as well:

Explore more lessons from Wild Earth Lab:

If you enjoyed this post, I know you will love trying my other printable science and nature units in your classroom too!


Are you interested in reading more posts like this? Subscribe or follow Wild Earth Lab using the links below!


Subscribe, share, and comment:

Posted on 1 Comment

9 Interactive Earth Science Activities for Homeschool and Classroom Learning

A banner for a blog post about 9 Earth Science Activities for hands-on learning in your classroom and homeschool with a photo of some landforms made of clay and the text "+Free map coloring activity" at the bottom of the banner.
text that says share this post

Are you in search of engaging ways to teach earth science in your homeschool or classroom? Hands-on activities help make complex concepts more memorable and enjoyable for students. Whether you’re building models of Earth’s layers, measuring stream flow, or exploring plate boundaries, these interactive lessons will bring earth science to life in your classroom!

In this post, you’ll find nine earth science activities that are perfect for homeschool parents and classroom teachers looking to inspire curiosity about the earth. Let’s get started!

1. Make a map of the continents and oceans

Teach students the names and locations of the oceans and continents. I’ve created a FREE printable worksheet for this activity. Simply print it out and color in the different continents and oceans with your students. Download the free worksheet here.

2. Measure stream flow

Earth science isn’t just about soils and rocks – water is an important part of our earth too! Hydrologists collect stream measurements to ensure we are not using our water resources too quickly or in unsustainable ways. With a few household items, you can collect river measurements too!

I’ve already written up the full directions for this activity online in my blog. Find the complete guide for this activity with materials and calculations at the end of this blog post about stream measurements! Or better yet, you can support my blog by purchasing the printable directions and handouts for this activity from my shop!

painting showing three people taking measurements in a stream

3. Examine porosity and permeability

Porosity and permeability are important topics in both soil science and geology. Examining soil porosity and permeability is an easy lab experiment that you can complete with common household items. Compare the porosity and permeability of three sediments: gravel, sand, and clay/silt.

You can find the full written directions with materials and calculations for a porosity and permeability lab activity online in my porosity and permeability blog post! You can save time and support my blog with your purchase of the printable directions and handouts for this activity from my shop!

person digging on soil using garden shovel

4. Build a model of the Earth’s layers

There are many ways to build a model of the Earth’s layers. You can model Earth’s three basic (compositional) layers: core, mantle, and crust. Or to make this activity more advanced, make a model of earth’s mechanical layers instead – lithosphere, asthenosphere, etc…

You can make your model of the Earth’s layers out of many different types of materials. A few options include:

  • Play dough or clay
  • Food, such as packing together different colors of rice cereal-marshmallow treats, and candy
  • Construction paper circles
  • Stacked nesting bowls
  • Printable templates, like these ones I created (for purchase in my shop)!
paper model of the layers of the earth
You can find my templates for creating this paper model of the Earth’s layers in my shop!

5. Build a model of the soil horizons snack-tivity!

Perhaps you have made a โ€œcup of dirtโ€ from pudding. But you can turn this simple snack into a tasty science activity by creating a soil horizons parfait!

The basic idea is this: you will make a parfait with 6 layers to represent the 6 horizons. This is an entertaining and tasty way to teach your students about soil horizons during a gardening, soil science, or agriculture unit in your classroom.

Best of all, you can find the online directions for this activity for free on my blog! Alternatively, you can save time and support my website when you purchase the printable directions and handouts for this activity in my shop!

a strawberry yogurt parfait in a cup
Photo by Farhad Ibrahimzade on Pexels.com

6. Identify common minerals

Minerals are the building blocks of rocks and an important topic in any geology or earth science class. You can teach your students how to identify common minerals by following a few simple steps.

I’ve written a whole blog post on how to set up a minerals lab in your classroom or homeschool. You can follow these online directions, or purchase printable directions and handouts from my shop.

Worksheets and classroom handouts
These directions and handouts are available for purchase in my shop.

7. Build play dough landforms

Creating landforms out of play dough or clay is sure to be a memorable earth science lesson for students! All you need is enough play dough for each student. Students can build common landforms such as islands, hills, mesas, peninsulas, isthmuses, and more. Or try creating landforms specific to your area – do you live near volcanoes? Moraines? Caves? Canyons?

I recommend starting by sculpting the following 7 easy landforms:

  • Hill
  • Mountain
  • Island
  • Isthmus
  • Peninsula
  • Volcano
  • Mesa (flat-topped mountain)

This activity is pretty straightforward. But, if you’d like to elevate your landforms lesson with printable directions, landform flashcards, and more, you should check out my landforms unit, available in my shop.

A photo showing classroom handouts for building your own landforms out of play dough
If you need directions and printable materials for this play dough activity, find them within my complete landforms unit

8. Model tectonic plate boundaries with cookies!

Create a model of the three main tectonic plate boundary types using sandwich cookies. Remove the top layer of the sandwich cookie (lithosphere), break it in half, and place it back on top of the crรจme (asthenosphere), arranged as a boundary type.

Be sure to create the following three boundary types:

  • Convergent
  • Divergent
  • Transform
black round cookies on white surface

9. Study earth science with Wild Earth Lab

There’s no need to scramble to put together the perfect earth science unit – I’ve already created several for you! Choose from plate tectonics, rocks & minerals, landforms, water features, the water cycle, glaciers, and soil science! Each is packed with earth science activities, worksheets, readings, and more!

Explore even more units from Wild Earth Lab:

If you enjoyed these earth science activities, I know you will love using my other environmental science materials in your classroom!


Are you interested in more hands-on classroom activity ideas? Subscribe or follow Wild Earth Lab using the links below!

Subscribe, Share, and Comment:

Posted on Leave a comment

7 Rocks & Minerals Activity Ideas: learning activities to try in your classroom!

child's hand holding a model of a fossil and paintbrush

Wild Earth Lab is supported by readers like you. This post includes links to my own products and affiliate products. If you purchase through links on my site, I may earn a small commission at no additional cost to you.

Rocks and minerals are an important topic in the field of geology. Learning about rocks and minerals can be so fun for both kids and adults. Here are 7 hands-on rocks and minerals activity ideas to try out in your classroom or homeschool.

A note for teachers: if you’re planning to teach rocks & minerals, great learning resources are key to deepening understanding. That’s why I created my complete Rocks & Minerals Unit. It’s packed with hands-on lab activities, thoughtfully crafted visuals, and all the worksheets and handouts you need to study rocks and minerals. Plus, every purchase helps support this blog! โค๏ธ

1. Rock Cycle Model

Try making a model of the rock cycle. This is a popular rock and mineral activity for the classroom! There are many ways to do this – with chocolate, marshmallows, Starburst candies, crayons – the list goes on.

The basic concept is this:

  • Sedimentary Rocks: big solid chunks lightly compacted until they stick together. This can be done by cutting up the material into pieces and then squeezing the pieces together in your hands until they stick together.
  • Metamorphic Rocks: warped under heat and/or pressure, but not enough to fully melt. This is done by briefly warming your material to a moderate temperature in an oven and then applying pressure.
  • Igneous Rocks: fully melted, the re-solidified material. This can be done by fully melting your material in an oven and then allowing it to cool at room temperature.
melted chocolate in white bowl
You can use chocolate to model the rock cycle! Melted chocolate symbolizes molten rock! Photo by Monstera Production on Pexels.com

This activity is great for teaching the basics of the rock cycle before continuing on with the other rocks and minerals activity ideas.

2. Mineral Lab

Minerals are the building blocks of rocks. Geologists can examine minerals for their physical properties and then identify them. A minerals lab is super fun because it involves testing minerals for magnetism, acid reaction, and other unique physical properties! To test for these properties, you will need to make or buy a mineral test kit, such as this test kit (external link).

With a little practice, you and your students can identify common minerals too. Read my separate post here about how to set up your own minerals lab in your classroom. You can also download my Minerals Mini Study, which includes all of the worksheets, handouts, and directions that you’ll need for an awesome mineral lab in your classroom!

The activities in the blog post come from my Minerals Mini Study. Download the mini study with worksheets, handouts, directions, and more.

3. Guided Geology Hike

Are there any national parks or state parks in your area? Some have rangers who will put on guided nature hikes covering many topics, including local geology.

If not, you could also reach out to a local geology expert to join your class or homeschool group on a hike to learn about geology. When I was a graduate student, a homeschool group reached out to me to lead a geology hike like this. We hiked a short way through a canyon and talked about how plate tectonics and flowing water helped shape the area.

4. Make Rock Candy

This is a tasty way to learn about mineral precipitates, which you may know form some of our sedimentary rocks, such as limestone. This activity takes several days, during which you will watch crystals form! You can follow a rock candy recipe, such as this recipe (external link).

5. Rock Identification

Rock ID can be challenging, but it is so rewarding to be able to identify common rocks in your area. Learn about foliation, grain size, rock compositions, textures, and more! If you are looking for a good place to get started with Rock ID, I think you’ll love my Rocks Mini Study. It includes all the printable handouts, worksheets, and directions you will need for an awesome Rocks Lab! Another fun activity to try is Rock ID Bingo – more on this below!

If you are looking to learn how to identify rocks, try out my Rocks Mini Study. It includes all the handouts, worksheets, and directions for a rock ID activity!

6. Play Rock or Mineral Bingo

These are great review games for practicing rock and mineral identification. Each student gets a bingo card with different rocks or minerals. The teacher then reads out the properties of a mystery rock or mineral. The students must figure out which rock or mineral it is, then mark it on the bingo card!

I’ve created these mineral bingo and rock bingo sets (complete with calling cards!) to help you play this game in your classroom:

7. DIY Fossils

Unlike living things, which come and go, rocks stick around for incredibly long periods. This allows rocks to act as time capsules, preserving clues about our planet’s past – fossils! Learn about how fossils form by creating your own fossils (external link).

Bonus: see real fossils up close for inspiration! Look for a geology museum in your area to see collections of amazing and rare gems, minerals, rocks, fossils, and much more! You can also look for gem and mineral show events in your area (external link).

paper dyeing with brown dried leaves
Photo by Paul Seling on Pexels.com
white dinosaur skeleton displayed on a wooden table in a museum
Photo by Ansbert Bignon on Pexels.com

Study Rocks and Minerals with Wild Earth Lab

Many of the rock and mineral activity ideas from this post are found in or go great with my complete Rocks and Minerals Unit! It is a complete set of printable materials including worksheets, handouts, classroom posters, lab activities, and much more!

Explore curriculum from Wild Earth Lab:

If you enjoyed the rocks and minerals activity ideas in this post, I know you will love using my environmental science materials in your classroom!


Are you interested in reading more posts with learning activity ideas? Subscribe or follow Wild Earth Lab using the links below!


Sharing options and discussion for this post: