Posted on Leave a comment

How Does Insect Pollination Work?

A butterfly sips nectar from a flower, brushing up against the stamens and carpels.
text that says share this post

In this post, you will learn about pollination: the process of pollen transfer between flower parts. Then, you will read about the important role that insect pollinators like honeybees play in this process.

Before we dive in: If youโ€™re an educator planning to teach pollinators and pollination, great learning resources are key to deepening understanding! You can download a printable handout version of this article with a vocab list and review activity! Or, you can also find these materials within my complete Insects Unit (plus youโ€™ll support my blog with your purchase! โค๏ธ)

You can download this article as a printable classroom handout – complete with a vocab list and reading comprehension activity

What is Pollination?

Pollination is the movement of pollen from one flower part to another. Specifically, pollen is moved from the stamen (male flower part) to the carpel (female flower part) of a flower. After a flower is pollinated, a fruit begins to grow. Fruits contain seeds, which will grow into new plants.

A diagram showing a flower, with the stalks in the middle labeled as stamen and carpel. Graphics by Wild Earth Lab
The stamen and carpel of a flower. Pollen moves from the stamen to the carpel during pollination.

What are Pollinators?

Plants cannot move. So how do they get their pollen from the stamen of one flower to the carpel of another? Many plants rely on animals called pollinators to help with pollination. Pollinators are animals that carry pollen from flower to flower. Many pollinators are insects, such as bees. However, birds, mammals, and other animals can also be pollinators!

Pollinators visit flowers to feed on flower nectar or pollen. When they do this, they help carry pollen from one plant to another. Pollen from the stamen attaches to the body of a pollinator. As the pollinator visits other flowers, some of the pollen rubs off onto their carpels.

Image of a butterfly inserting its proboscis mouthpart into a flower to sip nectar - brushing against the pollen-bearing stamen and pollen-receiving carpel.
When this butterfly drinks nectar, it brushes against flowersโ€™ stamens and carpels. As it flies from flower to flower, it carries pollen from one plant to another.

Working Together: Pollinators and Plants

Plants and pollinators have a symbiotic relationship โ€“ a close relationship between two living things. Both the plant and pollinator benefit from this close relationship. The pollinator gets a tasty meal of nectar. The plant gets pollinated so it can make seeds and reproduce. Itโ€™s a win-win!

Pollinators are very important in their ecosystems because they help plants make fruits and reproduce. Many pollinated plants produce fruits, seeds, and leaves that other animals eat. Pollinators also help humans because they pollinate many of our food crops. For example, a tomato could not form from a tomato plantโ€™s flower without being pollinated by a bee!

Download this Article As a Printable Handout

Includes a vocab list and review activity worksheets – ideal for classroom use!

You can download this article as a printable classroom handout – complete with a vocab list and reading comprehension activity

Or: Find these materials within my complete Insects Unit

Thereโ€™s no need to scramble to put together the perfect insects lesson โ€“ Iโ€™ve already created it for you! This set includes all the printable materials you need for studying insects.

Key Vocab from this Post:

  • Carpel โ€“ The female flower part that receives pollen and later develops into a fruit with seeds.
  • Nectar โ€“ A sweet liquid made by flowers that attracts pollinators.
  • Pollen โ€“ Tiny grains made by the stamen that help plants make seeds and grow new plants.
  • Pollination โ€“ The movement of pollen from the stamen to the carpel of a flower.
  • Pollinator โ€“ An animal that carries pollen from flower to flower.
  • Stamen โ€“ The male flower part that makes pollen.
  • Symbiotic relationship โ€“ A close relationship between two living things.

Explore more lessons from Wild Earth Lab:

If you enjoyed this post, I know you will love trying my other printable science and nature units in your classroom too!


Are you interested in reading more posts like this? Subscribe or follow Wild Earth Lab using the links below!


Subscribe, share, and comment:

Posted on Leave a comment

5 Engaging Water Cycle Activities for Students

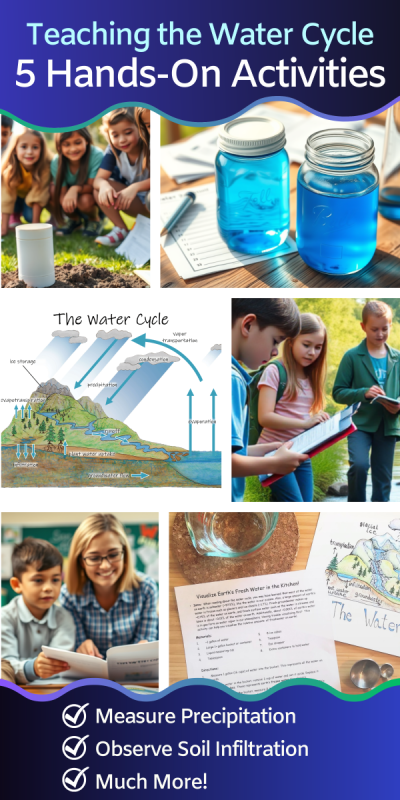
Grid of 6 pictures showing kids working on water cycle activities outside and in the classroom
text that says share this post

Are you teaching the water cycle in your classroom or homeschool? The water cycle is a complex process with many stages that all work together to provide the freshwater crucial to our survival. Hands-on water cycle activities are useful to demonstrate the different steps in the water cycle and can make your lessons memorable for students. From measuring infiltration to calculating runoff, these 5 water cycle activities will enrich your lessons and deepen understanding.

photo of a piece of paper with the water cycle diagram
Water Cycle Diagram

A Note For Teachers: The activities covered in this post come from three of my complete units: the Water Cycle Unit, Science on the River Unit, and Soil Science Unit. You can purchase these units to receive all the printable worksheets, handouts, and diagrams for teaching these activities and more (plus youโ€™ll support this blog with your purchase! โค๏ธ).

1. Collect Precipitation

images depicting cutting a bottle in half then using the top half to make a funnel into the bottom half
Steps for making a DIY rain gauge from a plastic bottle.

Precipitation happens when water falls to the Earth’s surface in liquid or solid form. This includes water in the form of snowflakes, hail, sleet, or liquid droplets (rain). Precipitation falls onto land or into bodies of water. A lot of precipitation falls directly into the oceans.

Building a DIY rain gauge from a plastic bottle is a fun, hands-on activity to explore this key water cycle process. You just need an empty plastic soda or water bottle plus a few other household items!

But remember, rain is far from the only type of precipitation. If you live somewhere that receives snow in the winter, you can also collect and measure snowfall!

2. Observe Evaporation

A photo showing classroom handouts for teaching evaporation lab activities

Evaporation is the process of water changing from a liquid to a gas, called water vapor. Evaporation may happen anywhere that there is water; water evaporates from oceans, lakes, streams, soils, and even from raindrops as they fall.

Measuring evaporation is an easy activity that brings the process to life for your students. The basic idea of this lab is that you will have two jars, one with a lid and one without. You will observe the change in the water level in the two jars over several days due to evaporation.

3. Measure Soil Infiltration

sketches showing a tube being hammered into the soil then filled with water.
Steps for measuring soil infiltration rates.

Infiltration is when water seeps from the landโ€™s surface down into the soil. This happens when rain falls onto the soil and seeps in. Water also infiltrates downwards through the bottoms of some lakes and streams. Conversely, groundwater may also flow upwards sometimes, into gaining streams and springs.

Measuring infiltration rates in different types of soils is a hands-on activity that helps students explore how water interacts with the ground. This soil infiltration activity also ties in perfectly with studies of porosity and permeability.

The general idea is that you’ll hammer a piece of tubing into the ground, so that the bottom forms a seal with the soil. Then, you’ll fill the tube with water, and time how long it takes the water to seep into the soil. The rate it seeps will vary between different types and textures of soil, so try this activity in a few different locations (e.g., sandy soil, loamy soil, organic-rich soil, etc…).

4. Calculate Run Off in Streams

painting showing three people taking measurements in a stream
Illustration showing students taking stream measurements for calculating stream cross-sectional area and discharge.

Runoff is when water flows downhill. This includes rivers, streams, and any water flowing over the Earth’s surface. Runoff happens thanks to gravity – surface water always flows from high to low elevation. You won’t see a stream flowing uphill. Little streams start high up in the mountains. They flow downhill, joining together to make big rivers. Rivers make their way to the ocean and mix with salt water.

You and your students can measure and calculate the rate of runoff in a small stream. More specifically, you can take simple measurements and use them to calculate the velocity of the flowing water. From there, you can calculate the stream’s discharge (e.g., gallons per minute). This stream measurements activity combines math, measurements, and science, making it a perfect addition to your classroom or homeschool.

5. Model Where Water is Stored

Water cycle diagram, measuring cups, free printable science activity guide for homeschooling, at-home-learning, or elementary school age children.
Printable activity directions and water cycle diagram from my free resources page

Itโ€™s hard to imagine just how little freshwater exists on Earth compared to saltwater. If you’re teaching the water cycle, your students might be amazed to learn that less than 3% of the Earthโ€™s water is freshwaterโ€”the rest is saltwater. Fortunately, you can do a hands-on freshwater learning activity that uses simple kitchen measurements to help your students visualize these proportions. This freshwater visualization activity is a powerful way to help students truly understand how rare freshwater is!

Subscribers to this blog can download free printable directions for this visualization activity on the free resources page of my website. The free resources page is a collection of dozens of printable science & nature learning resources designed by me – including printable activity directions, my hand-drawn water cycle diagram, and much more! To access the free resources page, subscribe to my email newsletter. It’s a monthly digest of new blog posts about science and science education like this one, as well as occasional updates when I release a new unit or throw a sale in my shop.

Study the Water Cycle with Wild Earth Lab!

Thereโ€™s no need to scramble to put together the perfect worksheets and handouts for these water cycle activities โ€“ Iโ€™ve already created them for you! The activities from this post come from these three printable units, available in my shop:

Explore more lessons from Wild Earth Lab:

If you enjoyed this post, I know you will love trying my other printable science and nature units in your classroom too!


Are you interested in reading more posts like this? Subscribe or follow Wild Earth Lab using the links below!


Subscribe, share, and comment:

Posted on Leave a comment

6 Exciting Earth & Environmental Science Topics to Teach this School Year!

grid of pictures of environmental science subjects: flower dissecting, metamorphosis diagrams, metamorphic rock, tectonic plate diagrams, soil lab activity, and climate change lab activity
text that says share this post

Looking for fresh ways to teach science? This post is packed with inspiration and resources to help you explore animal metamorphosis, climate change, rock identification, soil science, plate tectonics, and flower anatomy with your students. I’ve included links to my other posts with hands-on activities, background info, printables, and study materials. Below, you’ll find everything you need to make these topics engaging and accessible in your classroom or homeschool.

Before we dive in:ย If you plan toย teach earth & environmental science topics, great learning resources are key to deepening understanding! I think you and your students will love my complete Science Units. They’re packed with all the handouts, posters, worksheets, activity directions, and other printable materials you’ll need. Plus, youโ€™ll support my blog with your purchase! โค๏ธ

Animal Metamorphosis

salamander life cycle diagram
Salamander metamorphosis diagram

Metamorphosis is a process where an animalโ€™s body changes form at different stages of its life cycle. Many insects and amphibians go through metamorphosis, developing in two or more distinct stages, like a legless tadpole becoming a frog or a wingless caterpillar transforming into a butterfly.

Understanding metamorphosis helps students see how organisms grow, adapt, and utilize different resources in their habitats throughout their life cycle. You can study classic examples of metamorphosis like frogs and butterflies – but these are far from the only examples! For instance, studying aquatic insects like caddisflies and mayflies is another excellent way to learn about metamorphosis – plus these critters are bioindicators and very likely found in ponds and streams near you!

Arctic Sea Ice, Albedo, & Positive Feedback Loops

yellow arrows from the sun bouncing off of ice but not water

Are you searching for a science lesson that brings climate change to life in your classroom? Positive feedback loops are not just fascinatingโ€”theyโ€™re a powerful way to help students grasp the dynamics behind our warming planet. By teaching about positive feedback loops, like the relationship between sea ice, albedo, and temperature, youโ€™ll equip your students with a deeper understanding of one of the mechanisms fueling anthropogenic climate change.

A great way to demonstrate positive feedback loops is with a hands-on activity.  For this outdoor educational activity, students can create a model of sea ice and ocean water albedo using aluminum foil and two tubs of water. Students will track the temperature in a covered and uncovered tub on a sunny day.

Best of all, studying sea ice and climate change also ties in with studies of the Arctic and Antarctica. Learning about our poles and the animals that live there is a great way to tie climate science and ecology together in your lessons. If you’re looking for a complete set of printable classroom materials for studying the Arctic and Antarctic, you’ll want to check out my complete Polar Bundle.

Rock Identification & Formation

a box of rock samples
Identifying Rocks. The printable rock info cards (pictured here) are found within my complete Rocks and Minerals Unit

Rock identification is a wonderful way for students to connect classroom learning with the world around them. Learning rock ID is about more than just recognizing rock samples. Rather, learning about the different types of rocks means learning about how they formed and the underlying processes creating different rocks, like tectonic plate movement, weathering, and erosion!

You can do a rock identification lab activity. In this activity, students will sort common igneous, sedimentary, and metamorphic rock samples. But there are also other great ways to study and review rocks. Try the Rock ID bingo game or print these Rock ID flashcards. Finally, you may also check out my post about 7 Rock and Mineral Activities for the classroom!

Soil Science

a jar with soil and water and a stopwatch on a table next to handouts and worksheets
A soil texture jar lab. The printable handouts and worksheets pictured here are found within my complete Soil Science Unit

Soil is often overlooked as a classroom topic, yet itโ€™s a fascinating and practical area of science to explore with oneโ€™s students. Whether youโ€™re introducing elementary schoolers to the basics of earth science or tackling advanced environmental science concepts with high schoolers, soil science offers countless opportunities for hands-on learning with real-world applications. If you need further convincing, here are five compelling reasons to incorporate soil science into your classroom curriculum.

There are many hands-on activities you can do when studying soil. First, try a soil textures jar lab or examining the organic matter content of soils. For a delicious soil-related project, make soil horizons parfaits to learn about the different layers in soils! Finally, for printable directions, handouts, and worksheets for all of these activities and more, check out my complete Soil Science Unit!

Plate Tectonics

boundary type diagrams
Printable tectonic plate boundary diagrams. These are available as a stand-alone printable set but also come in my complete Plate Tectonics Unit.

The theory of plate tectonics is a scientific theory central to the field of geology. This theory explains that the surface of the Earth is broken into large plates that are slowly moving and interacting with one another at different plate boundary types.

Plate tectonics is an important concept for students to understand. First, to help you get started studying plate tectonics in your classroom, I’ve put together this list of eight engaging and hands-on plate tectonics activities and projects!

Additionally, if you want to dive into all things plate tectonics, I recommend checking out my complete Plate Tectonics Unit. It includes printable materials to learn about the theory of plate tectonics and related topics like volcanoes, earthquakes, and the Earth’s layers!

Flower Anatomy

A photo showing classroom handouts for studying flower anatomy
Flower anatomy printables – this is one of many activities found within my complete Flowers Unit!

Lastly, studying the parts of a flower is a great way to teach kids about the plant life cycle and pollination! Plus, you can learn about flower anatomy in a hands-on way by dissecting a flower! This is an easy way to observe the main parts of a flower: carpel, stamen, petals, and sepals! Best of all, students can observe how each of these parts is built for its own special function – from attracting pollinators with bright colors to distributing pollen.

I’ve created several flower anatomy printables (pictured above) for my free resources page. If you’re new around here and would like to access the free resources page, all you need to do is subscribe to this blog’s newsletter to receive the link (you can unsubscribe at any time). If you’re already an email subscriber, you can head to the free resources page to download the flower anatomy printables and more via the link you received in your welcome email!

For a more complete set of flower and botany materials, be sure to check out my complete Flowers Unit – it’s full of lots of handouts, worksheets, diagrams, activities, and more! Or, you can also find the Flower Unit within my Botany Collection. It is a discounted collection with three plant-related units: Flowers, Pollination, and Fruit!

Study Earth & Environmental with Wild Earth Lab!

Thereโ€™s no need to scramble to put together the perfect earth & environmental science teaching materials for these topics  โ€“ Iโ€™ve already created them for you! These sets include all the printable materials you need for studying these topics!

Explore more lessons from Wild Earth Lab:

If you enjoyed this post, I know you will love trying my other printable science and nature units in your classroom too!


Are you interested in reading more posts like this? Subscribe or follow Wild Earth Lab using the links below!


Subscribe, share, and comment:

Posted on Leave a comment

Learning in Nature: 5 outdoor educational activities to try this summer!

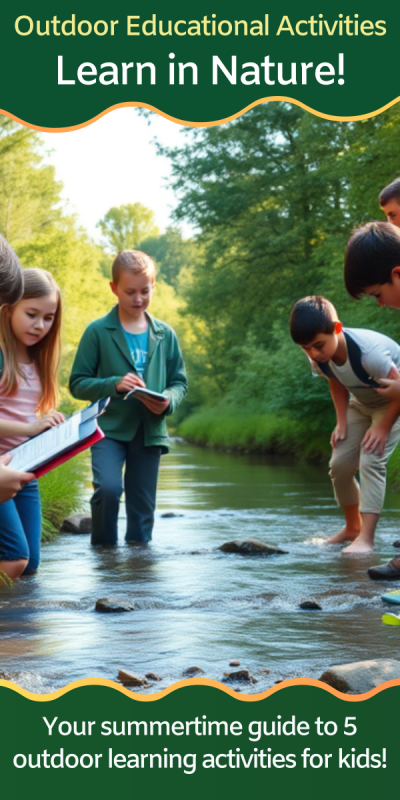
children with clipboards wading in a shallow river
text that says share this post

Are you a parent or educator looking for fun ways to take learning outside this summer? Whether you’re reviewing math and science concepts from the school year or looking for ways to connect with your local ecosystems, I’ve got you covered with these 5 outdoor educational activities!

In this post, you’ll find directions for nature activities for learning outside this summer! From catching aquatic macroinvertebrates to measuring the infiltration rates of soils, your students are sure to enjoy these fun outdoor learning activities!

Before we dive in:ย If youโ€™re an educator or parent looking for fun outdoor educational activities, great learning resources are key to deepening understanding! I think you and your students will love my Earth & environmental science units (plus youโ€™ll support my blog with your purchase! โค๏ธ)

Stream Measurements

painting showing three people taking measurements in a stream
Illustration of students measuring the width and depth of a stream!

For this activity, learn how to measure water flow with your students as a river field trip activity! With a few household items, you can collect river measurements. All you need are some simple measurement tools like a tape measure, yardstick, and stopwatch!

Water resource scientists, called hydrologists, collect stream measurements to ensure we are not using our water resources too quickly or in unsustainable ways. In this hands-on activity, students will not only practice math and measurements, but they’ll also learn about how scientists measure and study our rivers!

Catch Aquatic Macroinvertebrates

types of aquatic macroinvertebrates
A poster of the types of aquatic macroinvertebrates.
A cartoon of two people in a river using a net to catch aquatic insects
A diagram showing two students collecting aquatic macroinvertebrates in a stream using a net.

Catching aquatic macroinvertebrates is a memorable and educational field trip experience your students will love! Aquatic macroinvertebrates are little creatures like insect larvae and crayfish found at the bottoms of most ponds and streams. Just flip over a few river rocks or submerged logs near the shore of a pond and you’re likely to spot a macroinvertebrate underneath!

But here’s the cool part: macroinvertebrates are bioindicators – creatures that teach us a lot about the overall health of their ecosystems! That makes this outdoor activity a great way to review your classroom studies of biodiversity, bioindicators, entomology, or aquatic food webs. It’s also a great way to build connections with local ecosystems – almost any pond or small stream will work for this activity!

Measure the heights of trees using math!

A diagram showing how to find the height of a tree, with equations. Line 1: tree height above eye level equals distance times tan of angle. Second line: tree height equals eye level plus tree height above eye level.
This diagram shows how you can calculate the height of a tree using math!

Unless you are measuring a short seedling, you probably wonโ€™t be able to measure tree height directly because you canโ€™t reach the top. So how do you measure something so tall? Answer: use an inclinometer and trigonometry!

I donโ€™t know about you, but I think math is more interesting when we can apply it to real-world situations! If youโ€™re reviewing trigonometry, right triangles, or angles in your classroom or homeschool, you and your students will love this tree-height appliedย math activity! In this simple learning activity, students will learn how to make a homemade inclinometer โ€“ a device for measuring the angle of inclination. Then, they will take measurements and calculate the height of a tree in this outdoor educational activity.

Outdoor Experiment for Climate Change & Sea Ice

yellow arrows from the sun bouncing off of ice but not water
Sea ice is more reflective than ocean water.
two tubs of water, one covered in foil
Materials for a sea ice experiment.

A sunny summer day is the perfect time for this outdoor activity that’s all about heat, solar radiation, and reflection! For this activity, all you need is a warm sunny day, containers with cold water, foil, and a thermometer!

ย In this outdoor educational activity, students will create a model of sea ice and ocean water albedo using aluminum foil and two tubs of water. Students will track the temperature in a covered and uncovered tub on a sunny day. It’s a great way to learn about albedo and the impacts ofย positive feedback loopsย in climate change.

Measure Soil Infiltration Rates

sketches showing a tube being hammered into the soil then filled with water.
Steps for measuring soil infiltration rate

Summer is the perfect time to study soils! If you have a summer garden, you know the importance of healthy and permeable soil. Measuring soil infiltration rates is an activity that you can easily do in your garden with a few simple household items.

Why study soil infiltration? Infiltration rates of soils are important for many reasons. First, they are important in agriculture – different crops require soils that drain at different rates. Soil infiltration also plays a role in natural disasters like flooding and landslides. Finally, infiltration is an important part of the water cycle – when water seeps into the earth, it becomes part of the groundwater. Humans access groundwater with wells – an important source of water for drinking and growing plants!

Learn in Nature with Wild Earth Lab!

Thereโ€™s no need to scramble to put together the perfect materials for your outdoor educational activitiesโ€“ Iโ€™ve already created them for you! Check out my Earth and environmental science units, complete sets of printable learning materials with activities, posters, handouts, and more!


Are you interested in reading more posts with outdoor educational activities? Subscribe or follow Wild Earth Lab using the links below!


Subscribe, share, and comment:

Posted on Leave a comment

5 Reasons to Teach Rivers and Streams in Your Classroom

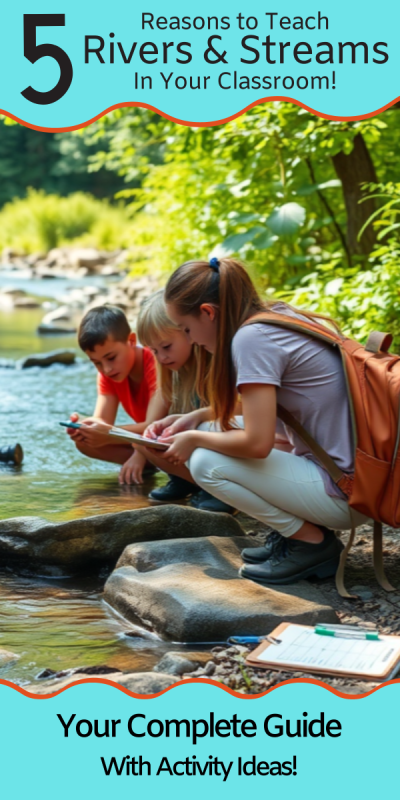
students with clipboards kneeling next to a shallow stream
text that says share this post

Rivers and streams provide endless opportunities for scientific exploration and discovery – and chances are you can find one right in your community! From their chemistry and physics to their role in ecosystems and human communities, rivers and streams offer excellent opportunities to teach critical concepts in science and math in an applied way. Across many grade levels, incorporating rivers and streams into your curriculum is a fantastic way to spark curiosity and make learning meaningful. Here are five compelling reasons to study rivers and streams in your classroom this year.

Before we dive in:ย If youโ€™re an educator planning toย teach rivers and streams, great learning resources are key to deepening understanding! I think you and your students will love myย complete Science on the River Unit (plus youโ€™ll support my blog with your purchase! โค๏ธ)

1. Rivers and Streams Are an Interdisciplinary Subject

One of the most exciting aspects of studying rivers and streams is their interdisciplinary nature. Studying natural waterways relates to many fields of science, allowing students to apply knowledge across disciplines:

  • Chemistry: Investigate water quality by measuring pH levels, electrical conductivity, or analyzing dissolved oxygen.
  • Physics: Study fluid mechanics, such as how a stream’s velocity varies with depth, width, and around river bends.
  • Ecology: Explore river ecosystems, food webs, and macroinvertebrate populations that indicate water quality and river health.
  • Geology: Discuss rivers’ role in shaping landscapes and carving out canyons over time.
  • Environmental Science: discuss the challenges facing rivers today, including water conservation, changes in flow due to climate change, pollution from urban and agricultural runoff, and flooding.

By approaching rivers and streams as an interdisciplinary subject, you can help students see how different scientific fields work together to solve real-world problems.

2. Opportunities for Hands-On Learning Activities

Rivers and streams offer a wealth of hands-on learning opportunities that engage students in scientific investigation. Measuring stream flow is a simple yet effective activity that brings science concepts to life. By timing how long it takes for an object to travel a set distance downstream, students can calculate the velocity of a stream.

Other hands-on activities include collecting water samples, catching and identifying aquatic insect larvae, and identifying floodplains and high-water lines. Many of these activities can be conducted with minimal equipment, making them accessible even for classrooms with limited resources. Hands-on learning not only reinforces concepts but also encourages students to ask questions, explore their surroundings, and develop critical thinking skills.

painting showing three people taking measurements in a stream

3. A Perfect Example of Applied Math

Studying rivers and streams is an excellent way to integrate applied math into your science curriculum. Hydrologists and engineers rely on mathematics to analyze water flow, predict floods, and manage water resources. By engaging in similar calculations, students can see how math is used to solve real-world problems. Here are a few ways to apply math when studying rivers:

  • Geometry: students can estimate the cross-sectional area of a river using width and depth data.
  • Arithmetic: students can calculate river discharge using the formula Q=Aร—V, where Q is discharge, A is the cross-sectional area of the stream, and V is the velocity of the flowing water.
  • Probability: students can determine the likelihood of floods based on historical data.
  • Calculus: For more advanced learners, you can introduce calculus concepts like rating curves. Hydrologists use rating curves to estimate stream discharge based on water height.

These activities reinforce math skills and show students how math is a valuable tool for understanding the natural world.

A river cross section divided into multiple rectangles for approximating area

4. A Great Excuse to Take Learning Outside

Studying rivers and streams provides an opportunity to step outside the classroom and into nature. Field trips to local rivers, streams, or creeks allow students to apply textbook knowledge and observe concepts they’ve studied first-hand. They can look for signs of ecosystem health, observe different river features like goosenecks or riffles, and identify types of river channels.

Outdoor activities not only make lessons more memorable but also help students connect with their local environment. A river field trip can foster an appreciation for rivers and nature in general. Connecting with their local rivers on a field trip may even inspire your students to become involved in local conservation and habitat restoration efforts. If you visit a river with your class, spend 15 minutes picking up trash to leave it nicer than you found it.

Woman in waiters stands in a stream while using a hammer and level to adjust stream monitoring station equipment in a mountain valley. Grey smoke can be seen in the background, rising off of the mountainside.
Taking stream measurements.

5. Rivers and Streams Are Vital to Our Communities

Rivers and streams play a critical role in human communities, providing drinking water, supporting agriculture, and offering recreational opportunities. By studying these waterways, students can gain a deeper understanding of how rivers impact their daily lives.

Lessons can focus on the challenges of managing rivers sustainably or the impact of pollution and climate change on streams. For example, you can discuss how urban development affects stormwater runoff or how conservation efforts have improved water quality in a local river. Understanding the role of rivers and streams in our communities helps students see the relevance of their studies and fosters a sense of responsibility for protecting these vital resources.

Study this topic with Wild Earth Lab!

Thereโ€™s no need to scramble to put together the perfect rivers lesson ย โ€“ Iโ€™ve already created it for you! This set includes all the worksheets, project guides, and printable materials you need for studying rivers and streams.

Explore more lessons from Wild Earth Lab:

If you enjoyed this post, I know you will love trying my other printable science and nature units!


Are you interested in reading more posts about fascinating science topics? Subscribe or follow Wild Earth Lab using the links below!


Subscribe, share, and comment:

Posted on Leave a comment

Explaining The Water Cycle in 10 Stages

a water cycle diagram and a teacher and student looking at a book
text that says share this post

The water cycle is the process that keeps our planet’s water in constant motion. From evaporation to groundwater flow, each step plays a vital role in shaping our environment and life on our planet. In this post, we’ll explore 10 key processes in the water cycle, breaking down how each one works.

For teachers:ย If youโ€™re an educator planning toย teach the water cycle, great learning resources are key to deepening understanding! I think you and your students will love myย complete Water Cycle Unit (plus youโ€™ll support my blog with your purchase! โค๏ธ)

Evaporation

The sun is like the engine driving the water cycle. That’s because the sun provides energy for water to evaporate. Evaporation is the process of water changing from a liquid to a gas, called water vapor. Evaporation may happen anywhere that there is water; water evaporates from oceans, lakes, streams, soils, and even from raindrops as they fall.

You can observe and measure evaporation in your classroom. It’s an easy, hands-on science experiment. To try it, find the directions in my blog post about measuring evaporation.

Vapor Transportation

When you think of water moving, you may think of rivers and streams. But water also moves around in our atmosphere. Even though we cannot see it, air currents move huge amounts of water in the form of vapor across continents. This is why water that evaporates over an ocean can fall as rain over land.

Condensation

Condensation is the opposite of evaporation. It is the process of water vapor becoming liquid water. Condensation happens in our atmosphere all the time. It happens because as vapor rises in the atmosphere, it cools, making it difficult to stay in the vapor form. This causes little liquid water droplets to form.

If you look up at the sky and see a cloud, you are seeing condensation in action! That’s right: when water condenses in our atmosphere, it creates clouds. Once the water condenses into droplets, they start to fall towards the Earth. If the droplets make it all the way to the ground without re-evaporation, we get rain (or snow or hail if they freeze!).

You can learn more about condensation and the role it plays in forming deserts in my post about the rain shadow effect!

Precipitation

Precipitation happens when water falls to the Earth’s surface in liquid or solid form. This includes water in the form of snowflakes, hail, sleet, or liquid droplets (rain). Precipitation falls onto land or into bodies of water. A lot of precipitation falls directly into the oceans.

When precipitation falls on land, freshwater is formed! When water evaporates from the ocean, the salts are left behind. If the water falls on land, we get freshwater. That freshwater will start slowly making its way back to the ocean in streams and seeping into groundwater, or get stored in lakes and glacial ice.

You can make your own precipitation gauge and measure precipitation with a plastic bottle and a few other household items. Try it out in my blog post on how to measure precipitation with a DIY rain gauge!

Runoff

Runoff is when water flows downhill. This includes rivers, streams, and any water flowing over the Earth’s surface. Runoff happens thanks to gravity – surface water always flows from high to low elevation. You won’t see a stream flowing uphill. Little streams start high up in the mountains. They flow downhill and across the plains, joining together to make big rivers. Rivers make their way to the coasts, where the freshwater is returned to the ocean and mixed with saltwater.

You can learn how to measure the water flowing through a stream in my blog post about stream measurements. It’s a simple activity that can be completed with a few household items and some math skills!

Ice Storage

Not all the water in the water cycle is on the move! Some water becomes trapped for long periods as snow and ice. In cold places like tall mountains and around the poles, frozen water doesn’t thaw, even in summer. In these places, water is stored as ice for centuries or longer! Examples include ice caps, ice sheets, valley glaciers, snowfields, and sea ice.

If you’re interested in learning more about snow and ice, read my blog posts about snow water equivalent and snow hydrology.

Infiltration

Infiltration is when water seeps from the landโ€™s surface down into the soil. This happens when rain falls onto the soil and seeps in. Water also infiltrates downwards through the bottoms of some lakes and streams. Conversely, groundwater may also flow upwards sometimes – into gaining streams and springs.

If you’re interested in learning more about soil infiltration, try measuring it yourself! You can find directions in my blog post on measuring soil infiltration rates.

Plant Water Uptake

Did you know that plants play a role in the water cycle? All plants take up water from the soil through their roots. A single tree may seep up hundreds of gallons of water each year. Now imagine all the trees in a forest doing this – that’s a lot of water!

Transpiration

The water taken up by plant roots doesn’t just disappear. Some of the water is used in a chemical reaction called photosynthesis, in which it is combined with carbon dioxide gas to form oxygen and sugar.

The rest of the water evaporates out of the plant’s leaves in a process called transpiration. Plants have tiny pores in their leaves called stomata that open to release water vapor – similar to how you have pores on your skin that release sweat. The water vapor from the stomata is released into the atmosphere.

Groundwater Flow

Some of the water in the soil gets taken up by plant roots near the ground’s surface. But plenty of water continues to seep down into deeper sediments and rocks. The water fills the tiny gaps in the sediments and rocks known as pore spaces. Water in pore spaces is moving and flowing, just like water on the surface. But groundwater typically moves much, much more slowly than rivers and streams. Some groundwater eventually makes its way back to the surface, for example, into springs.

Teaching the Water Cycle

Thereโ€™s no need to scramble to put together the perfect materials for a Water Cycle lesson  โ€“ Iโ€™ve already created them for you! This set includes all the printable materials you need for studying the Water Cycle.

What’s Next?

Continue reading about human impacts on the water cycle. Or, find classroom activities for water cycle processes in my posts outlining classroom activities for evaporation, precipitation, infiltration, and stream flow!

I also created a few water cycle-related free printables and activities, which are available to my email subscribers on my free resources page. These free materials include my original hand-drawn water cycle diagram, water bingo, and printable directions for a freshwater visualization activity.

Find your next science topic from Wild Earth Lab:

If you enjoyed this post, I know you will love trying my other science and nature units in your classroom or homeschool too!


Are you interested in reading more posts like this? Subscribe or follow Wild Earth Lab using the links below!


Subscribe, share, and comment:

Posted on Leave a comment

5 Reasons to Teach Soil Science in Your Classroom

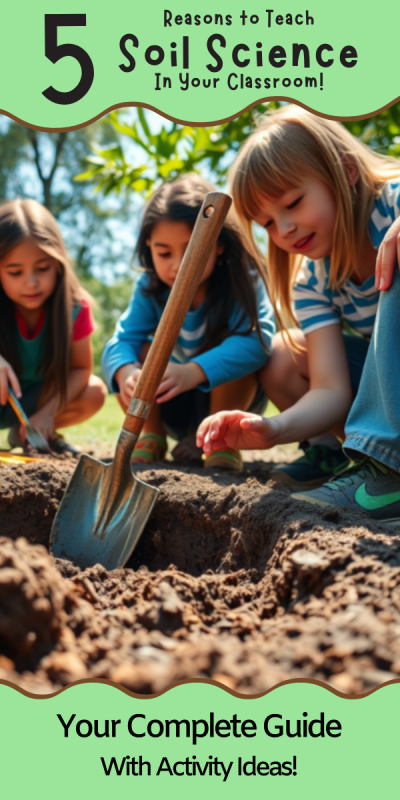
Children gathered around a hole dug in the soil
text that says share this post

Soil is often overlooked as a classroom topic, yet itโ€™s a fascinating and practical area of science to explore with one’s students. Whether youโ€™re introducing elementary schoolers to the basics of earth science or tackling advanced environmental science concepts with high schoolers, soil science offers countless opportunities for hands-on learning with real-world applications. Here are five compelling reasons to incorporate soil science into your classroom curriculum.

But first: if you’re already on the hunt for great soil science teaching materials, I think you and your students will love my complete soil science unit. It includes directions for five soil lab activities, worksheets, readings, and engaging diagrams. Plus you’ll support this blog with your purchase!

1. Soil Science is an Interdisciplinary STEM Subject

One of the most exciting things about teaching soil science is its interdisciplinary nature. It bridges various STEM (Science, Technology, Engineering, and Math) fields, letting your students experience how scientific disciplines interconnect. For example, students will use math to calculate soil porosity and permeability and apply chemistry to analyze pH levels and organic matter content. Biology comes into play when learning about soil microorganisms! And even physics will come up when looking at how water moves through different soils.

Teaching soil science allows you to create lessons that naturally integrate multiple disciplines. For instance, you might try a lab where students add water to sandy and silty soils, calculate porosity, and graph their results. You can read my blog post about how to calculate porosity in your classroom! Activities like this, while simple, reinforce STEM skills!

a lab bench with a clipboard, some soil in dishes, and a bottle of liquid
A soil organic matter lab activity. Find directions online or printable versions.

2. Soils Impact Our Food, Water, Climate, and Ecosystems

Soil is so much more than just dirt! Soil is necessary for food production, water filtration, carbon storage, and ecosystem health. Teaching students about soil helps them understand the connections between soil and global challenges like food security and climate change.

For example, healthy soils are necessary to grow crops that feed Earth’s growing population. Soils also act as natural filters, purifying water as it percolates through its layers. Furthermore, soils tie into ecosystems and the climate, since they store carbon and other nutrients. Studying soil science is a great way to begin a discussion on sustainability and environmental conservation with your students.

3. Soil is Great for Hands-on Activities!

When you teach soil science, you’ll have the chance to try many hands-on learning activities with your students. For example, you could analyze soil textures – for example, by doing the soil textures “jar lab” I wrote previously about in my blog. The basic idea is this: students mix soil samples with water, shake them, and let the particles settle into layers of sand, silt, and clay. The larger, heavier particles settle out first, which lets your students observe the amount of sand, silt, and clay in the soil. This simple experiment visually demonstrates the concept of soil texture and allows students to connect theoretical knowledge with real-world observations.

Another activity is testing soils’ organic matter content. This activity relies on chemistry: when applied to soil, hydrogen peroxide reacts with organic matter, causing bubbling and fizzing. If you’d like to try this activity, you can find step-by-step directions in my blog post about detecting soil organic matter with hydrogen peroxide.

Truly, thereโ€™s no shortage of soil science experiments and activities to try. Additional options could include measuring soil pH levels and growing plants in different soil types to observe how soil composition impacts growth. These hands-on labs make lessons more interactive and also teach science skills like hypothesis testing and data collection.

a jar with soil and water and a stopwatch on a table next to handouts and worksheets
A soil textures jar lab. Find the directions online or printable versions.

4. Soil Knowledge is Useful in Many Career Paths

A little soil science knowledge goes a long way for students who dream of working outdoors or making a difference in the environment. Professions in agriculture, conservation, environmental science, land management, and urban planning all require a deep understanding of soil. Additionally, careers in engineering, hydrology, and ecology often intersect with soil science, offering even more opportunities for students with this foundational knowledge.

Introducing soil science in the classroom helps students see how their lessons could lead to fulfilling careers. You can highlight professionals who work in these fields, invite guest speakers, or assign projects where students explore soil-related careers. These activities provide opportunities to explore a variety of career paths for students who may not yet see how their classroom studies relate to their future goals.

corn plant on field
Soil knowledge is key in many careers, including agriculture. Photo by Flambo on Pexels.com

5. Soil Science Gets Students Outside

Another great reason to teach soil science is the opportunity to take your class outdoors. No matter where you live, thereโ€™s soil to explore! Outdoor activities like digging into a local soil horizon, observing soil erosion, or starting a classroom composting project can help students apply their classroom knowledge to real-world observations.

Fieldwork can be as simple or elaborate as you want it to be. You might organize a short walk around your school grounds to collect soil samples or partner with a local park for a more in-depth study. Outdoor experiences are sure to enrich your soil lessons. Plus, theyโ€™re a great way to encourage physical activity and break up the monotony of a traditional classroom setting.

Teaching Soil Science in Your Classroom

If youโ€™re an educator planning toย teach soil science, great learning resources are key to deepening understanding! I think you and your students will love my complete Soil Science Unit (plus youโ€™ll support my blog with your purchase!)

Explore more lessons from Wild Earth Lab:

If you enjoyed this post, I know you will love trying my other printable science and nature units in your classroom too!


Are you interested in reading more posts like this? Subscribe or follow Wild Earth Lab using the links below!


Subscribe, share, and comment:

Posted on Leave a comment

Teaching Climate Change: Positive Feedback Loops & Sea Ice

positive feedback loop diagram

Are you searching for a science lesson that brings climate change to life in your classroom? Positive feedback loops are not just fascinatingโ€”theyโ€™re a powerful way to help students grasp the dynamics behind our warming planet. By teaching about positive feedback loops, like the relationship between sea ice, albedo, and temperature, youโ€™ll equip your students with a deeper understanding of one of the mechanisms fueling anthropogenic climate change. Letโ€™s explore this complex topic so you can plan an impactful and accessible lesson for your learners!

Before we dive in: If youโ€™re an educator planning to teach positive feedback loops in climate change, having great visuals to deepen understanding is key! I think you and your students will love my positive feedback loop diagram (plus you’ll support my blog with your purchase! โค๏ธ)

positive feedback loop diagram

What is a Positive Feedback Loop?

In science, a positive feedback loop is a cycle that keeps reinforcing or amplifying itself. A simple example is when laughter spreads. If your friend starts laughing, it might make you laugh too, which then makes your friend laugh even harder. This cycle continues, making everyone laugh more.

A positive feedback loop is called โ€œpositiveโ€, because each part of the cycle strengthens the next, not because it is necessarily a good thing. For example, a forest fire can create a positive feedback loop. As more trees catch fire, the fire gets bigger and hotter, which makes it easier for the flames to spread to even more trees.

What is Albedo?

Have you ever noticed that a black T-shirt feels hotter than a white one on a sunny day? This is because of something called albedo. When sunlight hits a surface, some energy reflects off while the rest is absorbed, making the surface warmer. Albedo is a measure of how much sunlight a surface reflects. Light-colored or shiny surfaces have a high albedo, meaning they reflect more sunlight. Dark surfaces, like a black T-shirt, have a lower albedo, so they absorb more energy from the sun and feel warmer.

Side note: if you’re a teacher planning a lesson on albedo, read my blog post with a step-by-step guide to an albedo and sea ice experiment for the classroom!

Positive feedback loops play a role in climate change, and it begins with albedo. Sea ice in polar regions is light-colored and reflective, so it has a higher albedo than dark ocean water. When sea ice melts because of anthropogenic (human-caused) climate change and rising temperatures, the reflective ice is replaced by dark ocean water. The dark ocean absorbs more heat from the sun without the reflective ice to protect it. This causes the ocean to warm more and faster, which increases temperatures and speeds up climate change. As more sea ice melts, it creates a cycle that leads to even more melting.

iceberg

A Positive Feedback Loop and Climate Change

Let’s break down a positive feedback loop step-by-step:

1. Temperatures Rise

Average global temperatures are rising. This is one of the main effects of climate change.

2. Sea Ice Melts

Ice melts at 32ยฐF (0ยฐC). When the average global temperatures rise, more sea ice melts.

3. Ocean’s Surface Becomes Exposed

As sea ice melts, the ocean surface is uncovered. Large areas that were once covered by light-colored ice are now dark ocean water.

4. Albedo Decreases

Light-colored sea ice reflects more sunlight than dark ocean water. When the ice melts, the ocean reflects less sunlight.

5. Ocean Water Warms

Without reflective sea ice, the oceanโ€™s water absorbs energy from the sun. This causes the ocean to warm up. And the cycle begins again.

Why it Matters

Why should you care about ice melting in faraway places like the poles? Polar ice melting is a problem for several reasons. First, as ice melts, it raises sea levels around the world. This leads to flooding along coastlines, putting coastal and island communities at risk of disappearing underwater and displacing the people living there. Another issue is the loss of important habitats for animals in the Arctic and Antarctica.

Additionally, as polar regions warm, permafrost (frozen ground) also thaws, releasing greenhouse gases and contributing to further climate change. This is a second example of a positive feedback loop in climate change because more warming causes more gases released, which causes more warming.

Teach Positive Feedback Loops and Climate Change:

Thereโ€™s no need to scramble to pull together materials for a positive feedback loop lessonย โ€“ Iโ€™ve already created them for you! Support this blog when you purchase my Positive Feedback Loop Diagrams and my Albedo Lab Activity materials:

Upgrade Option: both of these sets are also found within my complete Antarctica Unit:

Explore lessons from Wild Earth Lab:

If you enjoyed this post, I know you will love trying my other science and nature units in your classroom too!


Are you interested in reading more posts about fascinating science topics to teach in your classroom? Subscribe or follow Wild Earth Lab using the links below!

Subscribe, share, and comment:

Posted on Leave a comment

Teaching Climate Change: hands-on sea ice albedo experiment

Albedo lab materials - tubs with water and foil

Are you looking for a hands-on activity to teach climate change? In this lab, students will create a model of sea ice and ocean water albedo using aluminum foil and two tubs of water. Students will track the temperature in a covered and un-covered tub on a sunny day. Students will learn about albedo and the impacts of positive feedback loops in climate change.

Important: Iโ€™ve made the directions for this albedo lab activity available for free here in this post. If you would like printable directions and worksheets for this activity, you can purchase them in my Albedo Lab mini-study. These materials are also included within my complete Antarctica Unit and Polar Bundle.

Printable directions for the albedo lab activity are available in my mini-study.

Materials

Each lab group will need the following materials:

  • Two clear-bottomed shallow plastic tubs of equal size
  • Cold liquid water
  • A large piece of dark blue or black paper or cloth
  • Aluminum foil
  • 2 thermometers
  • Printed student handouts and worksheets
Student worksheets for the albedo lab activity.

Tips for Success

  • Complete this lab on a sunny, warm day close to mid-day when the sun is overhead. This lab may not work on cold or overcast days, or in the early morning or afternoon when the sun is at a lower angle in the sky.
  • Students should record the water temperature in the two tubs at a 5-minute interval. If the water is warming slowly, you can instruct students to switch to a 10-minute interval.
  • Once students see a clear trend or pattern, you may instruct them to stop taking measurements.
two tubs of water, one covered in foil

Activity Structure and Emphasizing Key Concepts

  • Before starting the lab, ask your students if they would feel cooler wearing a black or white shirt on a sunny day. Or, ask them if they would be more comfortable standing barefoot on blacktop or grass on a hot day.
  • During the lab, introduce the term โ€œalbedoโ€ to your students โ€“ the amount of solar radiation reflected by a surface. Relate this to the black vs white shirt example and the blacktop vs grass example.
  • After completing the lab procedure, ask your students what they think happens to ocean water at the poles when it is no longer covered in sea ice. Discuss how positive feedback loops work.
positive feedback loop diagram
I created this positive feedback loop diagram for you. It’s available in my shop, and you can support my blog with your purchase!

Step-by-Step Procedure

Head out to a sunny area, pass out the materials, then help your students work through the following steps:

  1. Fill the two clear plastic tubs with equal amounts of cold liquid water.
  2. Check the starting temperature of the water in both tubs. Record the temperatures on the worksheet. The starting temperature should be the same in both tubs.
  3. Fully cover one tub in aluminum foil. This tub represents ocean water covered in a layer of reflective sea ice. The other tub represents uncovered ocean water.
  4. Lay your dark fabric on the ground or table outside in direct sunlight. The dark fabric represents the dark color of ocean water.
  5. Position your tubs on top of the dark fabric in direct sunlight.
  6. Wait 5 minutes.
  7. Check the temperature in both tubs, by inserting the thermometer into the water at the center of the container. Poke a small hole through the foil to insert the thermometer when you check the temperature in the foil-covered tub. Record the temperatures on your worksheet.
  8. Continue to check and record the temperatures every 5 minutes.
  9. Which tub is warming faster? Discuss why.

Discussion Questions

After working through the lab procedure, have your students discuss the following questions in small groups or as a whole class.

  1. Which tub became warmer faster? Explain why.
  2. Which would get warm faster, ocean water covered in reflective sea ice or exposed ocean water? Explain why.
  3. What is albedo? *in your own words
  4. What is a positive feedback loop? *in your own words
  5. In your own words, describe a positive feedback loop involving melting sea ice and climate change.

Worksheets and Printable Directions

There’s no need to put together worksheets and handouts for this lab – I’ve already created them for you! You can purchase them in my Albedo Lab Mini Study. These materials are also found within my complete Antarctica Unit and Polar Bundle.

The albedo lab materials are also found within these products:

Explore more units from Wild Earth Lab:

If you enjoyed this post, I know you will love trying my other science and nature units in your classroom too!


Are you interested in reading more posts with science activity ideas? Subscribe or follow Wild Earth Lab using the links below!


Subscribe, share, and comment:

Posted on 1 Comment

Soil Science in Your Classroom: 5 educational activities to try

a graphic that has a picture of some soil and worksheets, with the text "5 soil science classroom activities"

Are you studying soil science with your homeschool or science class? Soil science is an exciting and interdisciplinary subject that integrates chemistry, physics, and environmental science. From testing soil organic matter to measuring porosity and permeability, hands-on lab activities will bring the real experience of being a soil scientist to your science classroom or homeschool. In this post, you’ll discover five educational soil science activities to try, including a soil texture jar test, modeling soil horizons, and more. These activities are perfect for helping your students explore the wonders of soil in a fun and interactive way!

1. Try the Jar Test for Soil Textures

Soil scientists need to evaluate the “textures” of soils: in other words, the proportion of sand, silt, and clay in the sediment part of the soil. But this can be a challenge. How do you separate and measure all those tiny grains?

This most basic method, the โ€œjar testโ€, is easy to do in a classroom setting. Shake up some soil and water in a jar. Then, watch the grains settle over time. Larger grains settle faster than smaller ones.

You can find the full activity directions for this science project in my blog! Or better yet, you can save time and support my blog when you purchase the printable worksheets and directions for this activity.

2. Build a Soil Horizons Parfait

Did you know soils have layers? Scientists call the layers โ€œsoil horizonsโ€. Each of the six soil horizons is given a letter: O, A, E, B, C, and R. The upper two horizons, O and A, are called topsoil. Each horizon has its own unique characteristics and function.

You can teach your students about layers in the soil by building a soil horizons parfait. Perhaps you have made a โ€œcup of dirtโ€ from pudding? With a few extra steps, you can turn this simple snack into a tasty science activity by creating a soil horizons parfait!

You can find the full activity directions for this “snack-tivity” in my blog! Or better yet, you can support my blog by purchasing my soil horizons mini study, which includes printable directions for this activity as well as soil horizon worksheets.

3. Measure Porosity and Permeability

If you’re studying soils, your students will need to know the difference between soil porosity and permeability. While these two properties are related, they are not the same! And what better way to understand the difference between porosity and permeability than a hands-on lab activity!?

Conveniently, soil porosity and permeability can be measured and observed using common household items. You can find the full activity write-up with directions for porosity and permeability in my blog! Or better yet, support my blog AND save time when you purchase the printable worksheets and directions for this lab activity.

worksheets for permeability studies
Worksheets for porosity

4. Test for Soil Organic Matter

If you’re studying soils with your students, you have probably learned that soil is a mixture of sediments and organic matter. But different soils have different amounts of these two ingredients. A soilโ€™s organic matter content is important, especially when considering a soilโ€™s ability to support plants.

To demonstrate this, you can do a cool classroom demo by mixing soil with hydrogen peroxide. The hydrogen peroxide reacts with organic matter in the soil to make gas (i.e., fizzing and bubbles!). More bubbles = more organic matter in the soil!

Find theย directions for a soil organic matter classroom demoย in my blog! Or better yet, you can support my blog by purchasing the worksheets and printable directions for this classroom activity.

dishes with soil on a lab bench next to liquid in a bottle and a clipboard

5. Learn About Decomposers

Decomposers are organisms with a very important job: they help recycle nutrients back into the soil. They help break down dead organic matter into the soil nutrients that help plants grow. There are many types of decomposers, including mushrooms and fungi, earthworms, and microbes.

You can print my free food web poster (including decomposers). To learn more about food webs and the important role of decomposers, check out my complete Food Webs Unit (for purchase).

If you are interested in studying mushrooms, I’ve also created some free mushroom anatomy printables. You can dive deeper into the world of fungi and mushrooms with my complete Mushroom Unit.

photo of mushroom anatomy diagrams
I made these mushroom anatomy diagrams for you! You can download them for FREE.

Study Soil Science with Wild Earth Lab

Many of the activities from this post come from my complete Soil Science Unit! Thereโ€™s no need to scramble to put together the perfect Soil Science Lesson โ€“ Iโ€™ve already created it for you! This set includes tons of activities and lab directions, teaching posters, handouts, and more!

Explore more units from Wild Earth Lab:

If you enjoyed this post, I know you will love using my other science units in your classroom!


Are you interested in more science activity ideas? Subscribe or follow Wild Earth Lab using the links below!


Subscribe, share, and comment: