Posted on 1 Comment

Stargazing Guide: Plan a Night Sky Field Trip for Kids

three children pointing at the night sky
text that says share this post

There’s nothing quite like stepping outside on a clear night and gazing up at the stars. A night sky field trip is a fantastic way to bring hands-on science and astronomy into your homeschool or learning groupโ€”no expensive equipment is required! With just a little planning, you can explore the wonders of the universe, from identifying constellations to spotting planets, meteor showers, and more. In this guide, you’ll find simple steps to help you prepare, along with tips for making your stargazing adventure a success. Grab a blanket, check the night sky forecast, and get ready for an unforgettable learning experience under the stars!

A Note for Teachers:ย If youโ€™re an educator planning toย teach the night sky, great learning resources are key to deepening understanding! I think you and your students will love myย complete printable Night Sky Unit (plus youโ€™ll support my blog with your purchase! โค๏ธ)

Purpose

The purpose of this field trip is to observe some of the night sky phenomena that your class studied during your space & night sky unit. Students can practice identifying night sky objects, including lunar phases, constellations, planets, and more.

Suggested Materials

  • Constellation information cards – printable cards are included in my night sky unit and also sold as individual printable sets for Zodiac and Northern Hemisphere constellations
  • Compass
  • A star chart
  • Flashlight
  • Warm layers
  • Binoculars (optional)
  • Telescope (optional)
  • Student worksheets – available in my night sky unit

Preparations

  • To find constellations, I recommend finding a star chart for your location and season in advance. For example, you can find online star charts from websites like Stellarium Web or Sky and Telescope (external links).
  • In advance, look up any night sky phenomena you expect to observe. Here are a few helpful web links for staying in the know about what’s happening in the night sky (external links):

Directions

  1. Go to a dark, open area away from city lights and tall trees/buildings that block the view of the sky.
  2. Find the Moon and identify the phase.
  3. Use the compass to orient yourself. This will help you interpret the star chart.
  4. Use the star chart to identify constellations in your area.
  5. Northern Hemisphere only: use the constellation Ursa Minor to locate the North Star (Polaris). The North Star never moves in the sky, while the rest of the stars and constellations rotate around it over time. This makes the North Star useful for navigation.
  6. If itโ€™s dark enough, find the Milky Way. The Milky Way looks like a grayish band across the night sky.
  7. Locate any planets currently visible in the night sky. Once you locate a planet, view it through your binoculars or telescope, if possible. Does it look different from the stars?
  8. Take note of any other night sky phenomena, which may vary depending on your location and the time of year. E.g., meteor showers, satellites, lunar eclipse, polar lights, etc…

Related Activities

Looking for more ways to explore outer space in your classroom or homeschool? Try this solar system distances lab or this constellations snack activity. You can also check out this list of 11 outer space activity ideas and this guide to 9 sun and star activities!

Everything you need to learn about the night sky:

Trying to plan the perfect Night Sky lesson for your classroom or homeschool to go along with your night sky field trip? Iโ€™ve already created it for you! This set includes all the printable materials you need for studying night sky objects and outer space!

Explore more lessons from Wild Earth Lab:

If you enjoyed this post, I know you will love trying my other printable science and nature units in your classroom too!


Are you interested in reading more posts like this? Subscribe or follow Wild Earth Lab using the links below!


Subscribe, share, and comment:

Posted on Leave a comment

Stargazing for Beginners: 9 Incredible Objects to Spot in the Night Sky

illustrations of planets, satellites, and meteors
text that says share this post

The night sky is full of incredible sightsโ€”you just need to know what to look for! Whether you’re gazing up from your backyard or planning a stargazing lesson, there’s so much to discover beyond just stars. From planets and galaxies to satellites and shooting stars, this guide will introduce nine fascinating night sky objects you can spot with the naked eye or a simple pair of binoculars. Grab a cozy blanket, head outside, and get ready to explore the wonders of the night sky!

A Note for Teachers: If youโ€™re an educator planning to teach the night sky, great learning resources are key to deepening understanding! I think you and your students will love my complete printable Night Sky Unit (plus youโ€™ll support my blog with your purchase! โค๏ธ)

The Moon

The Moon is the largest and brightest object in the night sky. It is about one-quarter the diameter of Earth and shines because it reflects light from the Sun. The Moon goes through all its phases once every 29.5 days.

If you are lucky, you might even be able to watch a lunar eclipse! Read about lunar eclipses and find the dates of upcoming eclipses.

photo of moon on a dark sky
A crescent moon in the night sky. Photo by Rok Romih on Pexels.com

Planets

Planets in our solar system can be seen from Earth. To the naked eye, they look like stars, but some appear larger and brighter because they are closer to Earth or reflect more sunlight. Venus and Jupiter are two of the brightest planets in the night sky!

To see the details of a planet, you will need a good telescope. Even though planets are large, they are so far away that they look like dots of light to the naked eye. To grasp the massive scale of our solar system, try out this solar system distance lab activity.

Crescent Jupiter with the Great Red Spot
Jupiter (telescope). Crescent Jupiter with the Great Red Spot by NASA’s Marshall Space Flight Center is licensed under CC-BY-NC 2.0

Stars

Stars are huge balls of hot gases held together by gravity. Our Sun is a star, but there are many others in our galaxy. Stars shine brightly or faintly depending on how much light they produce and how far away they are.

Constellations are patterns that people see in the stars.  With a little imagination, you can see people, animals, mythical beasts, and other images in the skyโ€™s stars! Today, the International Astronomical Union recognizes 88 modern constellations. You can learn more about constellations in this blog: read about the Zodiac Constellations and easy-to-find constellations for beginner stargazers in the Northern Hemisphere.

silhouette of trees and mountain under blue starry sky
The starry night sky. Photo by Sindre Fs on Pexels.com

Comets

Comets are icy chunks of space rock that orbit the Sun. Unlike planets, their orbits are long and stretched out. Comets are visible only when they travel close to the Sun, appearing as a speck of light with a faint, glowing tail.

star flying through the sky
Photo by Scott Lord on Pexels.com

Meteors/Shooting Stars

Shooting stars happen when tiny space rocks burn up while entering Earthโ€™s atmosphere. They appear as quick, bright streaks of light across the night sky.

Lots of meteors can be seen during meteor showers when Earth passes through a cometโ€™s debris trail. Different meteor showers take place at different times. You can look up the dates of meteor showers here (external link).

meteoroid in the sky
A shooting star over a house. Photo by Thirdman on Pexels.com

Galaxies

Galaxies are massive groups of stars, gas, dust, and dark matter held together by gravity. They come in different shapes, like spirals and ellipses. The Andromeda Galaxy, our closest neighboring galaxy, can be seen without a telescope in very dark skies.

gray and black galaxy wallpaper
A spiral-shaped galaxy. Photo by Pixabay on Pexels.com

Our Galaxy: The Milky Way

The Milky Way is our galaxy. When we see it in the night sky, we are viewing it from the inside! From Earth, it looks like a cloudy, gray streak across the sky, but from the outside, it would look like a giant spiral.

night sky
The milky way (and a shooting star). Photo by Neale LaSalle on Pexels.com

Aurora (Polar Lights)

The aurora is seen near the poles in winter. These glowing lights look like swirling ribbons or curtains and happen when charged particles from the Sun meet Earthโ€™s magnetic field.

aurora borealis
The aurora in the night sky. Photo by Visit Greenland on Pexels.com

Human-made Objects

Human-made objects, like satellites, can also be seen in the night sky. Satellites move steadily across the sky and donโ€™t blink like airplanes. They help with communication, navigation, and more.

You can even see the International Space Station pass through the night sky if you know when to look. Track the International Space Station here (external link).

electric lamp over black background
Satellite, photographed from space. Photo by Pixabay on Pexels.com

What’s Next?

Ready to learn more about the night sky or outer space? Read my posts about lunar eclipses and solar eclipses! You can also read more about the life cycle of a star. If you’re an educator, try out these 11 outer space activity ideas for kids or these 9 sun and star classroom activities!

Study this night sky with Wild Earth Lab!

Trying to plan the perfect Night Sky lesson for your classroom or homeschool? Iโ€™ve already created it for you! This set includes all the printable materials you need for studying night sky objects and outer space!

Explore more lessons from Wild Earth Lab:

If you enjoyed this post, I know you will love trying my other printable science and nature units in your classroom too!


Are you interested in reading more posts like this? Subscribe or follow Wild Earth Lab using the links below!


Subscribe, share, and comment:

Posted on Leave a comment

7 Easy-to-Find Constellations for Beginner Stargazers

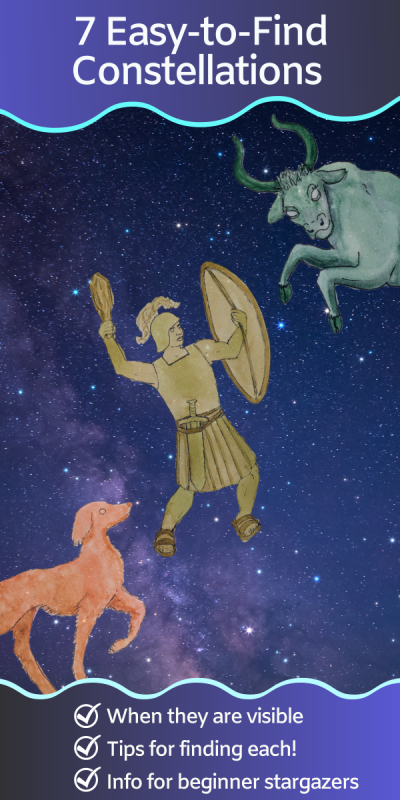
drawings of a dog, hunter, and bull overlaid on the night sky
text that says share this post

Stargazing is a magical way to connect with the cosmos, and learning to recognize constellations is a great place to start! Some star patterns are trickier to find, but others are bright, distinct, and easy to spotโ€”even for beginners. In this guide, we’ll introduce seven easy-to-find constellations to find in the Northern Hemisphere, along with tips for locating them, their mythology, and what makes them special. Whether you’re stargazing from your backyard or planning a field trip to a planetarium, these easy-to-find constellations are the perfect starting point for your journey into astronomy!

A Note For Teachers: If youโ€™re an educator planning to teach the night sky or constellations, great learning resources are key to deepening understanding! I think you and your students will love my Constellations Mini Study, which you can also find within my complete Night Sky Unit (plus youโ€™ll support my blog with your purchase! โค๏ธ)

What are constellations?

Constellations are patterns that people see in the stars.  With a little imagination, you can see people, animals, mythical beasts, and other images in the skyโ€™s stars! Different ancient cultures imagined different pictures in the stars and told unique stories and myths about them. Today, the International Astronomical Union recognizes 88 modern constellations.

Which constellations can I see?

The constellations you see change depending on the time, date, and location. For example, if you were to watch the sky all night, the constellations would appear to move across the sky, spinning around a central point. In reality, itโ€™s the Earth that is moving, not the constellations. Earth rotates fully on its axis every day.

The Earth isnโ€™t just rotating โ€“ it also orbits around the Sun every year.  Because of this, some constellations are on the side of Earth facing the Sun during part of the year, so we can’t see them. Consequently, these constellations appear and disappear with the seasons, for example, the Zodiac constellations.

Depending on where you live, you may find that some constellations do not disappear seasonally. For example, the constellations located directly above and below Earth are never hidden by the Sun, no matter where Earth is in its orbit. These constellations are called circumpolar constellations. However, circumpolar constellations canโ€™t be seen everywhere on Earth. The constellations above Earth are visible only in the Northern Hemisphere, while the constellations below Earth can be seen only in the Southern Hemisphere.

Tips for Viewing Easy-to-Find Constellations

To view constellations, it must be nighttime. For this reason, winter can be a great time for stargazing, because the sun sets earlier. To see constellations, a dark, unobstructed sky is key. First, head out to a dark area away from city lights and tall buildings for the best chances of spotting some constellations.

It may also help to have a star chart for your area and season. As you know, not all constellations are visible at all times. A star chart will help you figure out which constellations are visible and where they are located in the sky. For example, you can find online star charts from websites like Stellarium Web or Sky and Telescope (external links).

Ursa Major

The Great Bear

Hemisphere: Northern (circumpolar)

Best Seen: in spring

Mythology: several ancient cultures interpreted this collection of stars as a bear or other animal. In one Greek myth, the three stars behind the bear represent its tail, which got stretched out when the bear was thrown into the sky.

Distinguishing Features: Ursa Major is the third largest of all constellations. The distinctive big dipper is made of 7 bright stars found in the rear and tail of Ursa Major.

Ursa Minor

The Little Bear

Hemisphere: Northern (circumpolar)

Best Seen: in summer

Mythology: in Greek mythology, Ursa Minor was Zeusโ€™s son, who got turned into a bear along with his mother, Ursa Major.

Distinguishing Features: Ursa Minor is also known as the little dipper. Polaris, the north star, is found at the tip of the bearโ€™s tail. Polaris is used in Northern Hemisphere navigation because it is always located in the same place in the sky.

Ursa Minor can be found using its neighboring constellation. First, find the big dipper (Ursa Major). Draw an imaginary line across the front of the big dipper, then extend that line upwards. The line will point to the north star.

Cassiopeia

The Seated Queen

Hemisphere: Northern (circumpolar)

Best Seen: in fall

Mythology: in Greek mythology, Cassiopeia was a vain queen, obsessed with her own beauty. She was the wife of Cepheus and mother of Andromeda.

Distinguishing Features: Cassiopeia appears as an โ€œMโ€ or โ€œWโ€ in the sky, made of bright stars. The Milky Way runs through Cassiopeia.

Orion

The Hunter

Hemisphere: Northern

Best Seen: in winter

Mythology: many ancient cultures interpreted this collection of stars as human form, often a hunter or warrior. In Greek mythology, Orion was a skilled hunter.

Distinguishing Features: to locate Orion, look for his belt โ€“ three distinct and bright stars arranged in a line.

Canis Major

The Great Dog

Hemisphere: primarily Southern, but it is also sometimes visible in the Northern Hemisphere

Best Seen: in winter in the Northern Hemisphere

Mythology: in Greek mythology, Canis Major is one of Orionโ€™s hunting dogs.

Distinguishing Features: Sirius, the brightest star in the sky, is found in the dogโ€™s chest. A loyal companion, Canis Major appears to follow behind Orion.

Cygnus

The Swan

Hemisphere: Northern

Best Seen: in late summer and early fall

Mythology: in Greek mythology, Cygnus is said to be Zeus in disguise.

Distinguishing Features: due to its shape, Cygnus is also known as the Northern Cross. The Milky Way passes directly through the center of the distinctive cross shape.

The Pleiades and Taurus

Seven Sisters and The Bull

Pleiades Night Stars

Hemisphere: Northern

Best Seen: in winter

Mythology: The pleiades or “seven sisters” are found within the constellation Taurus the bull (a Zodiac constellation). In Greek Mythology, the seven sisters are the daughters of Atlas.

Distinguishing Features: The pleiades isn’t a constellation, but rather a cluster of many stars. To find it, look for a dense group of several stars. Those with excellent eye sight can make out at least seven stars. Once you find the pleiades, you can find Taurus the bull.

You can also find Taurus by drawing an imaginary line through the three stars of Orion’s belt then extending that line. The bull appears to be charging towards Orion.

Explore Constellations with Wild Earth Lab:

If you enjoyed my constellation artwork and info in this post, I think you will love my Constellations Mini Study or my complete Night Sky Unit. They feature my high-quality watercolor images from this post on flashcards, posters, and other kids’ learning materials. Perfect for stargazing with kids!

Explore more lessons from Wild Earth Lab:

If you enjoyed this post, I know you will love trying my other science and nature units for your classroom too!


Are you interested in reading more posts like this? Subscribe or follow Wild Earth Lab using the links below!


References and Further Reading

  1. Constellation Guide (n.d.). Constellations by Month. Available: https://www.constellation-guide.com/constellations-by-month/
  2. Constellations Guide (n.d.). Zodiac Constellations. Available: https://www.constellation-guide.com/constellation-map/zodiac-constellations/
  3. Ford, D. (n.d.). List of the Constellations. In-The-Sky.org. Available: https://in-the-sky.org/data/constellation.php?id=19
  4. Fraknoi, A., Morrison, D., Wolff, S. C., (2016). Astronomy. OpenStax. Available: https://openstax.org/books/astronomy/pages/1-6-a-tour-of-the-universe
  5. GoAstronomy (n.d.). Constellations of the Night Sky. Available: https://www.go-astronomy.com/constellations.htm
  6. Horvatin, S. (n.d.). Constellations. Michigan State University. Abrams Planetarium. Available: https://web.pa.msu.edu/people/horvatin/Astronomy_Facts/constellations.html
  7. International Astronomical Union (n.d.). The Constellations. Available: https://www.iau.org/public/themes/constellations/

Subscribe, share, and comment:

Posted on 1 Comment

What are the Zodiac constellations and what makes them special?

zodiac constellation art overlaid on the night sky
text that says share this post

The night sky is full of fascinating stories, and the Zodiac constellations are some of the most famous star patterns to explore! These 12 constellations have been used for ages to track the seasons, navigate the skies, and inspire myths from cultures around the world. In this guide, weโ€™ll dive into what makes the Zodiac constellations special, share fun facts about each one, and offer tips for spotting them in the night sky. Whether you’re stargazing at home or planning a field trip to a planetarium, get ready to journey through the constellations that have captivated stargazers for thousands of years!

A Note For Teachers: If youโ€™re an educator planning to teach the night sky or constellations, great learning resources are key to deepening understanding! I think you and your students will love my Constellations Mini Study, which you can also find within my complete Night Sky Unit (plus youโ€™ll support my blog with your purchase! โค๏ธ)

What are constellations?

Constellations are patterns that people see in the stars.  With a little imagination, you can see people, animals, mythical beasts, and other images in the skyโ€™s stars! Different ancient cultures imagined different pictures in the stars and told unique stories and myths about them. Today, the International Astronomical Union recognizes 88 modern constellations, including the Zodiac constellations.

What are the Zodiac constellations?

The Zodiac is a set of constellations seen in the night sky from Earth. They each represent a different animal, person, creature, or other object. Many of them are very old constellations that have been recognized by human cultures for thousands of years. They are: Aries, Taurus, Gemini, Cancer, Leo, Virgo, Libra, Scorpius, Sagittarius, Capricornus, Aquarius, and Pisces. Each of these constellations appears and disappears seasonally from the night sky.

What makes the Zodiac constellations special?

The Zodiac constellations are special because they appear to line up along the ecliptic, the path the Sun seems to follow across the sky over the course of a year. The ecliptic is actually an imaginary plane that represents Earth’s orbit around the Sun. From our perspective on Earth, these constellations seem to trace the Sunโ€™s journey through the sky, making them key markers in astronomy.

Because of their positions along the ecliptic, each Zodiac constellation becomes visible at specific times of the year. This happens because, at certain times, the Sun appears in front of a particular constellation, making it impossible to see in the night sky. Rememberโ€”constellations are only visible at night! As Earth orbits the Sun, different constellations shift to the ‘nighttime side’ of the sky, meaning we can only see the ones that arenโ€™t obscured by daylight during each season.

Aries

The Ram

Hemisphere: Northern

Best Seen: in fall and early winter

Mythology: in Greek mythology, Aries represented a ram with golden fleece. But this collection of stars was interpreted as a ram even earlier, during the Babylonian Empire.

Distinguishing Features: the ram appears like a crooked line of relatively faint stars, fairly close to the Pleiades star cluster.

Taurus

The Bull

Hemisphere: Northern

Best Seen: in winter

Mythology: the bull is one of the oldest known constellations, with mythology dating back to the Bronze Age.

Distinguishing Features: the bullโ€™s head contains the bright star Aldebaran. Taurus appears to be charging toward Orion in the sky.

Gemini

The Twins

Hemisphere: primarily Southern, but it is also sometimes visible from the Northern Hemisphere

Best Seen: in winter in the Northern Hemisphere

Mythology: the Gemini are the mythical twins Castor and Pollux (for whom the two brightest stars in Gemini are named).

Distinguishing Features: Castor and Pollux, the two brightest stars in this constellation,  represent the twinsโ€™ heads.

Cancer

The Crab

Hemisphere: Northern

Best Seen: in late winter and early spring

Mythology: Cancer the crab bit Hercules in Greek Mythology. However, Cancerโ€™s mythology predates ancient Greece, like many Zodiac constellations.

Distinguishing Features: Cancer can be challenging to spot due to its relatively faint stars. Find it by drawing a line between the heads of the Gemini twins and Regulus, Leoโ€™s brightest star.

Leo

The Lion

Hemisphere: Northern

Best Seen: in spring

Mythology: legends of Leo the Lion date back to ancient times. Leo is known as a lion killed by Hercules in Greek mythology.

Distinguishing Features: Leoโ€™s brightest stars are found in the lionโ€™s head and mane, forming a shape like a backward question mark. Its brightest star, Regulus is in the lionโ€™s chest.

Virgo

The Maiden

Hemisphere: primarily Southern, but it is also sometimes visible from the Northern Hemisphere

Best Seen: in spring in the Northern Hemisphere

Mythology: tales of Virgo vary across ancient cultures; she sometimes represents a goddess.

Distinguishing Features: Virgoโ€™s brightest star is Spica, a blue giant. Spica can be located by extending an imaginary arc from the handle of the big dipper across the sky.

Libra

The Scales

Hemisphere: primarily Southern, but it is also sometimes visible from the Northern Hemisphere

Best Seen: in late spring and early summer in the Northern Hemisphere

Mythology: Libra represents scales; however, some ancient cultures considered Libra part of Scorpius, rather than a separate constellation.

Distinguishing Features: Libra, a relatively faint constellation, can be located by first finding its neighbors on either side, Virgo and Scorpius.

Scorpius

The Scorpion

Hemisphere: primarily Southern, but it is also sometimes visible from the Northern Hemisphere

Best Seen: in summer in the Northern Hemisphere

Mythology: in the tale of Orion, Scorpius stung and killed the hunter.

Distinguishing Features: Scorpius has a distinctive J-shape and has a bright, twinkling red supergiant star near its heart.

Sagittarius

The Archer

Hemisphere: primarily Southern, but it is also sometimes visible from the Northern Hemisphere

Best Seen: in summer in the Northern Hemisphere

Mythology: in legends, Sagittarius was a mythical beast called a centaur: half man, half horse.

Distinguishing Features: Sagittarius contains a close grouping of stars forming a teapot shape.

Capricornus

The Sea Goat

Hemisphere: primarily Southern, but it is also sometimes visible from the Northern Hemisphere

Best Seen: in late summer and early fall in the Northern Hemisphere

Mythology: Capricornus is a mythical creature: with the head of a goat and the tail of a fish.

Distinguishing Features: Capricornus is found close to the Milky Way. It is a fairly faint constellation but has a recognizable kite-like shape.

Aquarius

The Water Bearer

Hemisphere: primarily Southern, but it is also sometimes visible from the Northern Hemisphere

Best Seen: in fall in the Northern Hemisphere

Mythology: Aquarius was a waiter who served Zeus and the other Greek gods, filling their cups.

Distinguishing Features: what Aquarius lacks in bright stars it makes up for in size โ€“ this is the 10th largest constellation.

Pisces

The Fish

Hemisphere: Northern

Best Seen: in fall

Mythology: for thousands of years, Pisces has represented two fish connected at the tail, though the details of its story varied across time and cultures.

Distinguishing Features: this constellation is very faint but can be found in dark skies using its proximity to the great square of Pegasus.

Explore Constellations with Wild Earth Lab:

If you enjoyed my Zodiac constellation artwork and info in this post, I think you will love my Zodiac constellation printable flashcards. They feature my high-quality watercolor images and are perfect for amateur stargazers and studying the night sky with kids! These cards are also in my Constellations Mini Study.

OR: you can bundle and save on even more astronomy and space worksheets, activities, and posters with my complete Night Sky Unit!

Explore more lessons from Wild Earth Lab:

If you enjoyed this post, I know you will love trying my other printable science and nature units in your classroom too!


Are you interested in reading more posts like this? Subscribe or follow Wild Earth Lab using the links below!


References and Further Reading

  1. Constellation Guide (n.d.). Constellations by Month. Available:ย https://www.constellation-guide.com/constellations-by-month/
  2. Constellations Guide (n.d.). Zodiac Constellations. Available:ย https://www.constellation-guide.com/constellation-map/zodiac-constellations/
  3. Ford, D. (n.d.). List of the Constellations. In-The-Sky.org. Available:ย https://in-the-sky.org/data/constellation.php?id=19
  4. Fraknoi, A., Morrison, D., Wolff, S. C., (2016). Astronomy. OpenStax. Available:ย https://openstax.org/books/astronomy/pages/1-6-a-tour-of-the-universe
  5. GoAstronomy (n.d.). Constellations of the Night Sky. Available:ย https://www.go-astronomy.com/constellations.htm
  6. Horvatin, S. (n.d.). Constellations. Michigan State University. Abrams Planetarium. Available:ย https://web.pa.msu.edu/people/horvatin/Astronomy_Facts/constellations.html
  7. International Astronomical Union (n.d.). The Constellations. Available:ย https://www.iau.org/public/themes/constellations/
  8. Rao, J (2008). How the Ecliptic and the Zodiac Work. Space.com. Available: https://www.space.com/5417-ecliptic-zodiac-work.html

Subscribe, share, and comment:

Posted on Leave a comment

Fun Moon Phases Activity with Cookies

making the phases of the moon from cookies
text that says share this post

If you are teaching the phases of the moon, this popular snack activity with cookies is sure to be a crowd-pleaser! This yummy and fun activity is sure to make your lunar phases lesson a memorable one. In this post, you’ll find the materials list and directions for this activity, plus, I’ve created a free printable worksheet for this activity!

A note for teachers:ย If youโ€™re an educator planning toย teach the moon’s phases, great learning resources are key to deepening understanding! I think you and your students will love my printable Moon Mini Study, which you can also find within my complete Night Sky Unit (plus youโ€™ll support my blog with your purchase! โค๏ธ)

Moon Phases: background information

Earth has one big, bright moon โ€“ The Moon. Though it shines brightly at night, the Moon does not make its own light; it reflects light from the Sun. The Moon orbits Earth, just like Earth orbits the Sun. As it circles us, the Moonโ€™s shape seems to change. These changing shapes, called phases, make the Moon appear to grow and shrink each month. In reality, the Moon doesnโ€™t change size โ€“ we just donโ€™t see the part thatโ€™s not lit up by the Sun.

For this activity, your students will learn 8 phases of the moon. These phases are:

  • New Moon
  • Waxing Crescent
  • First Quarter
  • Waxing Gibbous
  • Full Moon
  • Waning Gibbous
  • Third Quarter
  • Waning Crescent

Every 29.5 days, the moon cycles through all of these phases.

Phases of the moon diagrams

Materials

For the phases of the moon cookie activity, each student needs:

  • 8 Chocolate & crรจme sandwich cookies (e.g., Oreos)*
  • Spoon and/or toothpick for scraping/removing crรจme
  • A printed copy of the worksheet – available on my free resources page

*To save on materials, it is possible to do this activity with 4 cookies per student if students use both halves of each cookie and carefully split the creme filling to create all phases.

Directions

  1. Open up a cookie so that the crรจme is all on one side.
  2. Scrape away and remove enough crรจme from the open cookie to
    create a phase of the moon.
  3. Repeat until youโ€™ve created all of the phases of the moon.
Chocolate creme-filled sandwich cookies making the phases of the moon set on a kids' worksheet
Making the phases of the moon from cookies!

Free printable worksheets for this activity

Current Email Subscribers: for your convenience, I made a printable version of the directions and a student worksheet for this activity. It’s available on the free resources page of my website (the link was in a welcome email sent when you subscribed – if you lost the link, follow the directions at the bottom of this page).

If you’re new here: consider joining my email community! My email subscribers:

  • Can access dozens of free science & nature printables on my free resources page! (including the worksheet for this activity!)
  • Receive a monthly email with a round-up of new activity ideas, projects, and teaching inspiration from the blog!
  • Get occasional updates about seasonal sales, new science units released in my shop, and new free resources!
  • Save on a purchase in my shop with a welcome discount code!
moon phases sandwich cookie (e.g., Oreo) activity worksheets

What’s Next?

Looking for another space-themed snack activity for the classroom? Try this constellation snack activity using pretzel sticks and mini marshmallows!

constellation flashcards and constellations made from pretzel sticks and marshmallows

Study the moon with Wild Earth Lab!

Thereโ€™s no need to scramble to put together the perfect set of moon lesson materials ย โ€“ Iโ€™ve already created it for you! My printable moon mini study includes diagrams, worksheets, and activities for learning all about the moon and its phases!

Or, find all the moon materials plus more materials on constellations, eclipses, and more in my complete Night Sky Unit!

Explore more lessons from Wild Earth Lab:

If you enjoyed this post, I know you will love trying my other printable science and nature units in your classroom too!


Are you interested in reading more posts like this? Subscribe or follow Wild Earth Lab using the links below!


Subscribe, share, and comment:

Posted on Leave a comment

Teach Astronomy with this Edible Constellations Activity

constellation flashcards and constellations made from pretzel sticks and marshmallows
text that says share this post

Are you teaching your students about the night sky and astronomy? If you’re looking for an activity to make your constellation and star lessons memorable, look no further than this snack activity. For this project, students will learn to recognize well-known constellations by creating edible constellations with pretzel sticks and mini marshmallows! This constellations activity is a delicious way to explore the night sky! In this post, you’ll learn how to set up this fun classroom “snack-tivity” and start creating your own celestial treats!

Before we dive in:ย If youโ€™re an educator planning toย teach this activity, great learning resources are key to deepening understanding! I think you and your students will love using myย constellation flashcards for this activity, which you can also find within my constellation mini study (plus youโ€™ll support my blog with your purchase! โค๏ธ)

An example of the constellation Cassiopeia for this activity! You can find the printable materials pictured here in my Constellations Mini Study!

Purpose

Learn about constellations with a tasty twist! Students will learn about constellations and recognize well-known constellations by creating constellations using marshmallows and pretzel sticks. This activity is perfect for homeschooling or classrooms during a star or astronomy unit. It’s also sure to be a crowd-pleaser among kids who love stargazing, ancient mythology, or outer space.

Materials:

  • Mini marshmallows
  • Pretzel sticks
  • Paper plates
  • Picture cards of the constellations
Constellation flashcards

Directions:

  1. Give each student a plate with ~20 mini marshmallows and ~20 pretzel sticks.
  2. Students should arrange the marshmallows and pretzel sticks into constellations, with the marshmallows representing stars and the pretzel sticks representing the imaginary lines connecting the stars.
  3. Students should use the picture cards as a guide when forming their constellations.
  4. Students can arrange and rearrange their marshmallows and pretzel sticks into as many constellations as they would like.
  5. Once students finish forming their constellations, they may eat their own marshmallows and pretzel sticks.

Study this topic with Wild Earth Lab!

You can support this blog and make lesson prep a breeze by purchasing my printable lesson materials:

  • The flashcards and printable directions for this activity are available in my Constellations Mini Study.
  • You can also purchase my individual flashcard sets separately (Common constellations cards for Northern Hemisphere stargazers).
  • For a larger collection of night sky materials, you can purchase my complete Night Sky Unit.

Explore more lessons from Wild Earth Lab:

If you enjoyed this post, I know you will love trying my other printable science and nature units in your classroom too!


Are you interested in reading more posts like this? Subscribe or follow Wild Earth Lab using the links below!


Subscribe, share, and comment:

Posted on Leave a comment

Stages of a Lunar Eclipse: what to expect while viewing a lunar eclipse

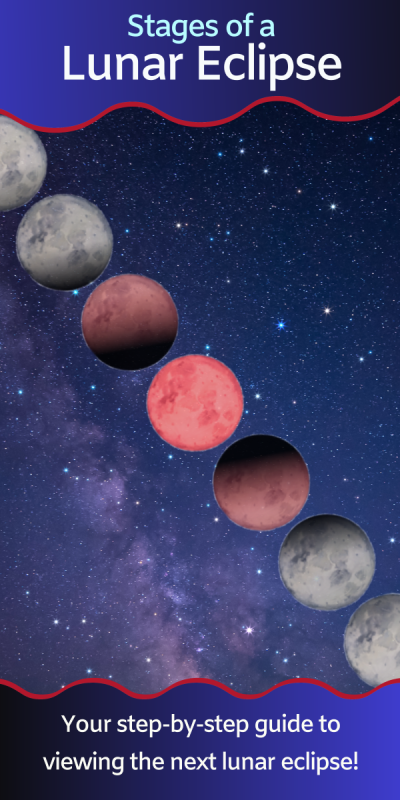
illustrations of a lunar eclipse across the night sky
text that says share this post

A lunar eclipse is more than just a breathtaking sightโ€”itโ€™s a celestial event with distinct phases, each offering something unique to observe. As the Moon moves through Earthโ€™s shadow, youโ€™ll see subtle changes unfold, from the first faint dimming to the dramatic moment of totality. In this guide, weโ€™ll walk through each stage of a lunar eclipse, so you know exactly what to watch for when the eclipse happens later this month (March 2025)! Get ready to experience the night sky like never before!

A Note For Teachers:ย If youโ€™re an educator planning toย teach the stages of a lunar eclipse, great learning resources are key to deepening understanding! I think you and your students will love my printable lunar eclipse mini study, which you can also find within my complete Night Sky Unit (plus youโ€™ll support my blog with your purchase! โค๏ธ)

What is a lunar eclipse?

A lunar eclipse happens when the Moon passes through the Earthโ€™s shadow. From Earth, this can look like the Moon goes through all of its phases in a single night, over several hours.

To understand the stages of a lunar eclipse, you need to understand shadows. Earthโ€™s shadow has two parts: the penumbra (a partial shadow) and the umbra (a total shadow). When the Moon is in the penumbra, it looks only a little dimmer. But when itโ€™s in the umbra, the Moon darkens and may turn a spooky red!

Want more background information on eclipses? You can read more about how lunar eclipses work in this blog post.

timelapse photography of moon
A total lunar eclipse. Photo by Samer Daboul on Pexels.com

Before the Lunar Eclipse

Before the eclipse begins, the moon will be a regular full moon. Lunar eclipses only happen during a full moon when the Moon is directly opposite the Sun on the other side of Earth. But why donโ€™t we have a lunar eclipse with every full moon? Itโ€™s because the Moonโ€™s orbit is slightly tilted, so most of the time, it passes just above or below Earthโ€™s shadow. On rare occasions, when the Sun, Earth, and Moon line up perfectly, the Moon passes right through Earthโ€™s shadow, creating a lunar eclipse. Once the eclipse begins, the Earth’s shadow will start covering the Moon.

First Contact

First contact is the official beginning of a (penumbral) lunar eclipse. First contact is when the Earth’s penumbra (partial shadow) touches the edge of the Moon. You may not notice much at the time of first contact. Following first contact, the Moon may start appearing very slightly darker as it becomes shaded by the penumbra. Total darkness won’t start spreading across the surface of the Moon until it enters Earth’s umbra (total shadow)

Second Contact

The second contact is when the Earth’s umbra first touches the Moon’s edge. This officially marks the beginning of a partial lunar eclipse. Following the second contact, a much more noticeable darkness will start gradually spreading across the face of the Moon. The Moon may appear to be waning (relatively) rapidly, over an hour or so.

Third Contact

The third contact is when the Moon becomes fully shaded by the Earthโ€™s umbra. This is when the total lunar eclipse begins. Depending on the eclipse, the totality phase may last minutes or over an hour. During this stage, you can see the moon but it looks very unusual.

When the Moon is centered in the Earthโ€™s shadow, it will appear dark and reddish. Why? Itโ€™s because Earthโ€™s atmosphere bends sunlight, scattering blue light and bending red and orange light to reach the Moon. This same phenomenon is why sunsets appear reddish.

Fourth Contact

The fourth contact is when the Moon exits the Earth’s umbra, ending the total lunar eclipse. After the fourth contact, you will see a growing white-ish crescent of the Moon. The Moon will appear to wax (relatively) rapidly, over an hour or so.

Fifth Contact

At the fifth contact, the Moon leaves the Earthโ€™s umbra and the partial eclipse ends. At this point, the Moon will appear full again, though slightly darker than normal because the Moon is still shaded by the Earth’s penumbra.

Sixth Contact

The sixth contact happens when the Moon fully leaves the Earth’s penumbra. This is the end of the eclipse. The moon appears like a regular full moon again.

Study this topic with Wild Earth Lab!

Hey teachers! Thereโ€™s no need to scramble to put together the perfect lunar eclipse lesson ย โ€“ Iโ€™ve already created it for you! This set includes all the printable materials you need for studying the stages of a lunar eclipse!

Or – you’ll also find all the same lunar eclipse materials plus tons more in my complete Night Sky Unit. Check it out:

Explore more lessons from Wild Earth Lab:

If you enjoyed this post, I know you will love trying my other printable science and nature units in your classroom too!


Are you interested in reading more posts like this? Subscribe or follow Wild Earth Lab using the links below!


References and Further Reading

  1. Fraknoi, A., Morrison, D., Wolff, S. C., (2016). Astronomy. OpenStax. Available: https://openstax.org/books/astronomy/pages/1-6-a-tour-of-the-universe
  2. NASA (n.d.). The Moon and Eclipses. Available: https://science.nasa.gov/moon/eclipses/
  3. Oโ€™Callaghan, J. (n.d.). Lunar eclipse guide: what they are, when to see them and where. Natural History Museum. Available: https://www.nhm.ac.uk/discover/lunar-eclipse-guide-what-they-are-when-to-see-them-and-where.html
  4. Time and Date (n.d.). Solar and Lunar Eclipses Worldwide โ€“ Next 10 Years. Available: https://www.timeanddate.com/eclipse/list.html
  5. Time and Date (n.d.). March 13โ€“14, 2025 Total Lunar Eclipse (Blood Moon)
    . Available: https://www.timeanddate.com/eclipse/lunar/2025-march-14

Subscribe, share, and comment:

Posted on 2 Comments

Stages of a Total Solar Eclipse: a step-by-step guide with diagrams

banner with the text "the 5 main stages seen during a total solar eclipse" and a picture of an eclipse
Photo by Drew Rae on Pexels.com

As you know, the Earth is orbiting the Sun, and the Moon is orbiting the Earth. Every once and a while, the Sun, Moon, and Earth all line up and something very special happens. A solar eclipse happens when the Moon passes between the Earth and the Sun. During a solar eclipse, the Moon totally or partially blocks out the Sun during the daytime.

Stages of a total solar eclipse. Diagram by WildEarthLab.

During a total solar eclipse, the Moon passes directly between the Earth and the Sun and blocks the Sun from our view on the ground. Totality is the phase of the eclipse when the Moon fully covers the Sun. When this happens, part of the Earth is totally in the moonโ€™s shadow. If you are in the shadow, it becomes dark during the daytime. The Sunโ€™s corona is seen behind the Moon during totality.

Stages of a total solar eclipse diagram and worksheet for studying the eclipse. Find them here.

Total Solar Eclipse Stages

Here are the main stages you will observe (through your protective eclipse glasses or homemade eclipse viewer box!) during a total solar eclipse:

First Contact

The leading edge of the Moon begins to cover the side of the Sun. A partial eclipse begins.

Second Contact

The leading edge of the Moon reaches the opposite side of the Sun. The Sun is fully covered. The total eclipse begins.

Totality

Totality is a period during a total solar eclipse in which the Moon completely covers the Sun. However, the Sunโ€™s corona is visible during totality.

Third Contact

The trailing edge of the Moon reaches the side of the Sun. The Sun is no longer fully covered. The total eclipse ends.

Fourth Contact

The trailing edge of the Moon reaches the opposite side of the Sun. The partial eclipse ends.

Solar eclipse print materials

If you enjoyed this post, I know you will love these print materials for learning about the solar eclipse with your students!

Download these solar eclipse classroom handouts and diagrams!

Explore curriculum from Wild Earth Lab:

If you enjoyed this post, I know you will love using my environmental science materials in your classroom!


Are you interested in reading more posts like this? Subscribe or follow Wild Earth Lab using the links below!


References and Further Reading

  1. Lea, R. (2023). The 5 main stages of Octoberโ€™s annular solar eclipse explained. Space.com. Available: https://www.space.com/annular-solar-eclipse-2023-main-stages-explained
  2. NASA (n.d.). Types of Solar Eclipses. Available: https://science.nasa.gov/eclipses/types/
  3. NCAR & UCAR Science Education (2017). 2017 Great North American Eclipse and the HAO Connection (video). Available:ย https://www.youtube.com/watch?v=rBxymVkpMl8

Sharing options and discussion for this post:

Posted on

Solar System Distances Lab: Try this hands-on math activity to model the solar system!

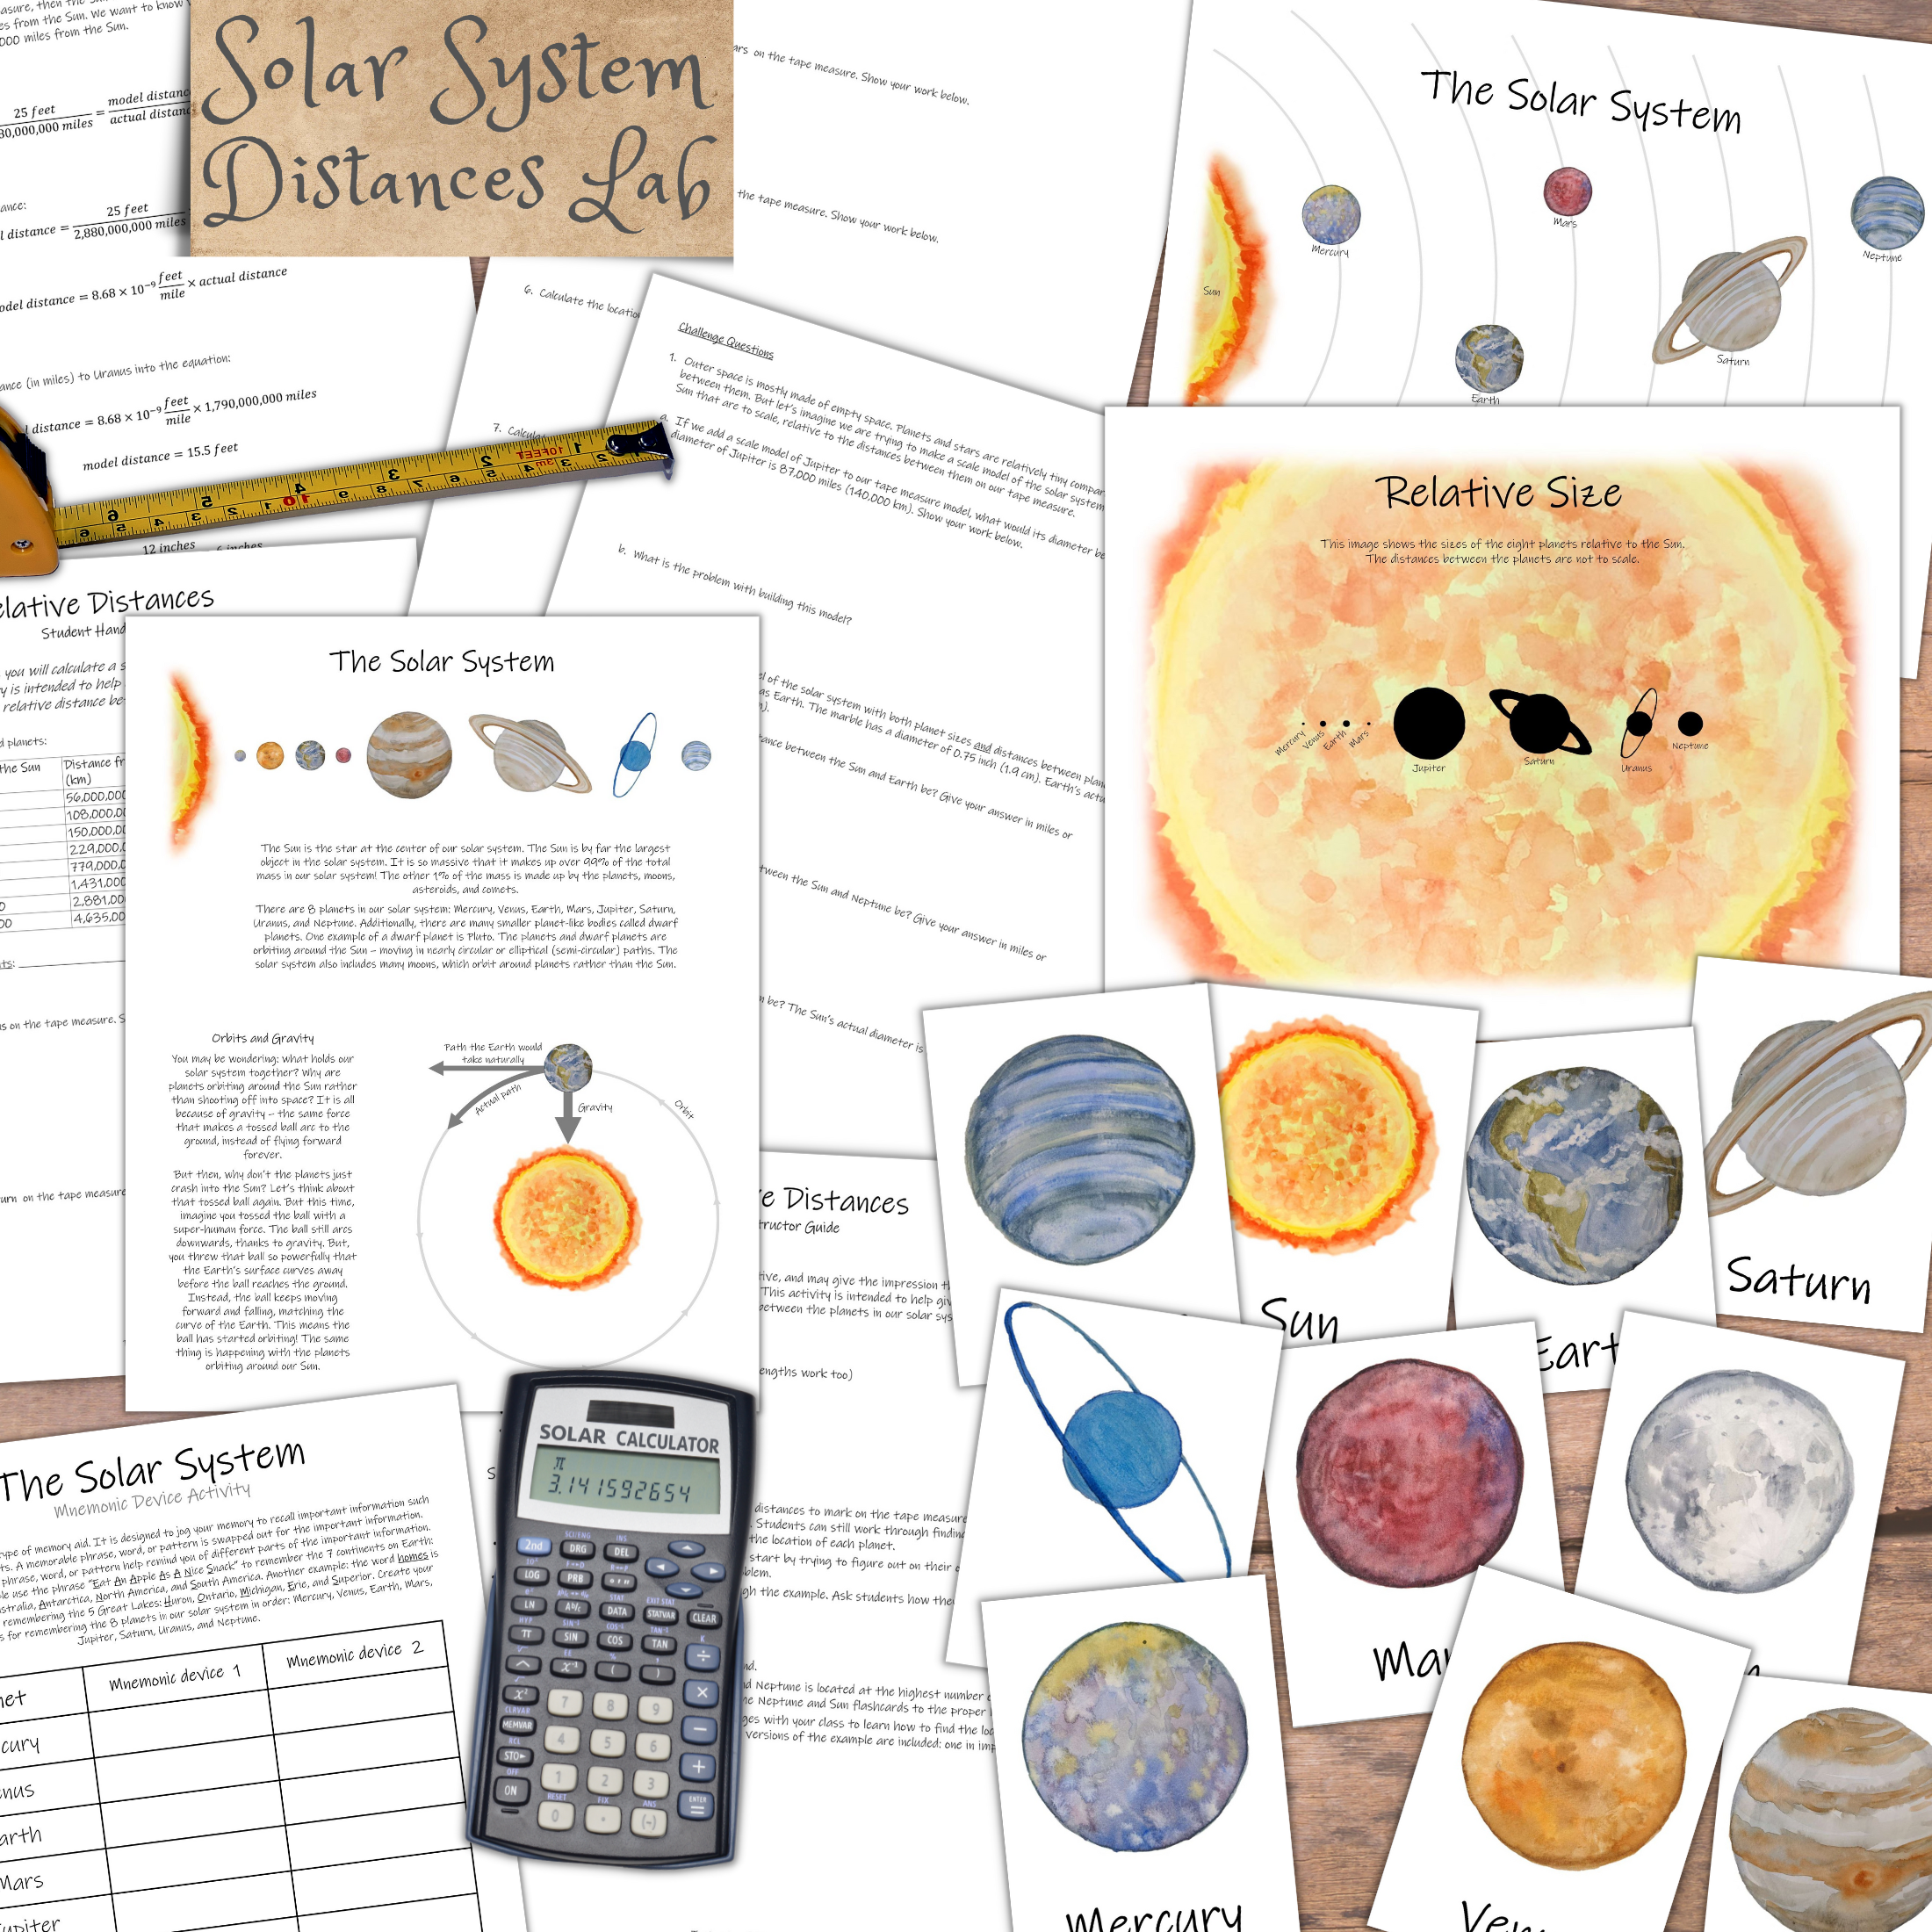
A banner that says "solar system distances model lab activity" with a picture of worksheets and a measuring tape

In this post, you will learn how to set up your own relative distances lab to teach the relative distances between objects in our solar system! In this fun lab, your students will learn about the vastness of space and the spacing of planets in a hands-on way. To do this, they will perform calculations and mark the locations of planets on a measuring tape. This post includes a materials list and directions for this fun, hands-on math and measurements activity!

During this lab, it may surprise students to see that the planets of the solar system are not evenly spaced out at all, as they are often shown in solar system diagrams. In fact, the inner four planets are grouped much more closely than the outer gas giants. Students will also calculate just how teeny-tiny scale models of planets would need to be if included in the model.

A note for educators: The activity in this post comes from my complete Sun and Stars Unit. You can find the printable directions and worksheets for this activity in my Solar System Relative Distances Lab or in the full Sun and Stars Unit – plus all the other printable handouts, worksheets, and diagrams you need to teach the solar system, the sun, and stars. Plus, every purchase helps support this blog! ๐Ÿ’š

You can also find the relevant worksheets and handouts for this activity in my Solar System Distances Lab!

Gather Your Materials

Gather the following materials for the solar system distances lab:

Other Materials:

Set Up

  1. Stretch out a tape measure along the ground.
  2. Tell students that the Sun is located at 0 and Neptune is located at the highest number on the tape measure.
  3. Use a clothespin to attach the Neptune and Sun flashcards to the proper locations.
  4. Go through the example below with your class to learn how to find the locations of the other planets. Find the actual distances from the Sun to each planet in the table below.
  5. Finally, ask students to calculate the model locations of the other planets on the tape measure in small groups.
Approximate distances between the Sun and planets. A printable version of this table and worksheets are included in my Solar System Distances Lab mini study.

Example Calculation

If you have a 5-meter tape measure, then the Sun is at 0 meters, and Neptune is at 5 meters. In reality, Neptune is 4,635,000,000 km from the Sun. We want to know where to mark Uranus on the tape measure. Uranus is 2,881,000,000 km from the Sun.

  1. Set up the equation:

2. Solve for model distance:

3. Put the actual distance (in kilometers) to Uranus into the equation:

4. Find and mark the calculated location on the tape measure.

5. Repeat these steps with the other planets in the solar system.

Download worksheets and handouts for the solar system distances lab activity

Other Suggestions

  • To make this activity simpler, calculate the distances to mark on the tape measure before the lab and provide these numbers to the students. Students can still work through finding the correct locations on the tape measure and marking the location of each planet.
  • For more advanced groups, ask students to start by trying to figure out on their own how they would set up the equation to solve this problem.
  • Pay attention to units while working through the example. Ask students how they know which units to use for their answers.

Problem Questions

  1. Outer space is mostly made of empty space. Planets and stars are relatively tiny compared to the distances between them. But letโ€™s imagine we are trying to make a scale model of the solar system with planets and a Sun that are to scale, relative to the distances between them on our tape measure.
    • If we add a scale model of Jupiter to our tape measure model, what would its diameter be? The actual diameter of Jupiter is 87,000 miles (140,000 km). Show your work below.
    • What is the problem with building this model?
  2. Letโ€™s say we want to build a model of the solar system with both planet sizes and distances between planets to scale. We want to use a marble as Earth. The marble has a diameter of 0.75 inches (1.9 cm). Earthโ€™s actual diameter is 7,900 miles (13,000 km).
    • For this model, what would the distance between the Sun and Earth be? Give your answer in miles or kilometers.
    • For this model, what would the distance between the Sun and Neptune be? Give your answer in miles or kilometers.
    • For this model, what would the diameter of the Sun be? The Sunโ€™s actual diameter is 865,000 miles (1,390,000 km).

Reflection Questions

  1. What is one thing that surprised you during this activity?
  2. Describe the spacing of the planets in our solar system. Are they evenly spaced or not?
  3. Do most images/diagrams of our solar system do a good job representing relative sizes and distances between objects? Why or why not?

This activity comes from my Sun Unit!

Your students will love the illustrated learning materials, plus you’ll support Wild Earth Lab with your curriculum purchase!

Explore more units from Wild Earth Lab:

If you enjoyed this post, I know you will love using my environmental science materials in your classroom!


Are you interested in reading more posts like this? Subscribe or follow Wild Earth Lab using the links below!


Sharing options and discussion for this post: