Posted on — 1 Comment

Camouflage Lab: try this simple science activity in your classroom to learn about animal adaptations!

A banner that says "study natural selection and adaptation! Camouflage Lab!"

Are you studying animal adaptations with your class? If so, there is nothing quite like a camouflage lab to learn first-hand how concealing coloration can help animals avoid being eaten by predators! This lab activity is very simple and effective for showing students how natural selection favors animals that can hide from predators.

This lab is entertaining because students get to be the “predators” by hunting for different “prey” (black and white beans) in a “habitat” made of white rice. Which prey will they capture most easily? Which prey will survive? Try this lab activity to find out!

Find these worksheets and handouts in my camouflage lab mini study!

In this post, you will learn how to set up a camouflage lab in your classroom. You can also get printable versions of these directions, worksheets, handouts, and classroom posters to use during this lab in my Camouflage Lab Mini Study!

If you are looking for even more ways to study animal adaptations, I think you will also like my bird beaks lab – read the separate post about the bird beaks lab.

This bird beak adaptations lab is another great way to study animal adaptations!

Gather Your Materials

Gather the following materials for the camouflage lab. Each lab group will need:

  • Dry white rice
  • Dry black beans
  • Dry white beans
  • Tweezers
  • Pie tin or shallow bowl
  • Paper cup
  • Stopwatch
  • Student lab handouts (1 set per student)

Set-Up & Directions

  1. Pour some rice into each bowl. The rice will be the background or habitat.
  2. Mix equal numbers of black beans and white beans into each bowl. The black beans are the regular animals. The white beans are the camouflaged animals.
  3. In each lab group, one student will be the predator and another student will be the timer. Students can take turns in these different roles.
  4. The predator will use the tweezers or โ€œbeakโ€ to catch as many beans as possible in 30 seconds and place them in the paper cup or โ€œstomachโ€.
  5. After 30 seconds, count how many beans of each color were captured, and how many beans of each color survived.
  6. Repeat as needed so all students have a turn being the predator.
  7. Check with your students: which โ€œanimalโ€ was eaten the most? Which avoided the predators the most?
  8. After the activity, discuss the benefits of concealing coloration with your students.
  9. Students should complete the reflection questions.
Don’t forget to download the worksheets and printable directions for this camouflage lab activity!

Reflection Questions

  1. Did more black beans or white beans survive?
  2. Which beans were easiest to spot in the rice?
  3. How does camouflage help animals?
  4. Would the results of the lab activity be different if you used black rice as the background? How so?
  5. Would the results of the lab activity be different if you used gray rice as the background? How so?
  6. Which would get eaten more in a forest with lots of leaves and moss: a green lizard or a yellow lizard?
  7. Which would get eaten more in a desert with lots of sand, rocks, and dry plants: a greenish blue snake or a tan and gray snake?

Expand on this Activity

Try these ways to expand on your camouflage lab:

1. Natural selection over several generations:

Expand on this activity to learn about natural and adaptations.  Repeat the activity a few times to represent successive generations. Use the proportion of beans of each color after predation to determine the proportion of beans of each color in the next generation.

For example, if you started with 50 total beans (25 black beans and 25 white beans), and 5 black beans and 20 white beans remained after predation, then you should start the next generation with 10 black beans and 40 white beans.

Have students perform these calculations to add math to this lab.  Afterwards, discuss which coloration thrived in the long run. Did either coloration disappear from the population after several generations?

2. Mimicry:

Did you know that some harmless animals mimic dangerous animals? A good example of this is the harmless viceroy butterfly, which looks very similar to the poisonous monarch butterfly. Another example is a non-venomous milk snake, which has nearly the same red and black stripes (called “warning coloration“) as a venomous coral snake! This type of disguise is called “mimicry“, and it is a type of camouflage.

Expand on your camouflage lab by adding in a mimicry lab activity. The purpose of a mimicry activity is to show how pretending to be dangerous benefits prey animals. There are many versions of a mimicry lab, such as the activity shown in this candy camouflage YouTube Video from Science Buddies.

This lab comes from my Reptiles Unit!

Your students will love the illustrated learning materials, plus you’ll support Wild Earth Lab with your curriculum purchase!

Explore more curriculum from Wild Earth Lab:

If you enjoyed this post, I know you will love using my environmental science materials in your classroom!


Are you interested in reading more posts like this? Subscribe or follow Wild Earth Lab using the links below!

Sharing options and discussion for this post:

Posted on — 4 Comments

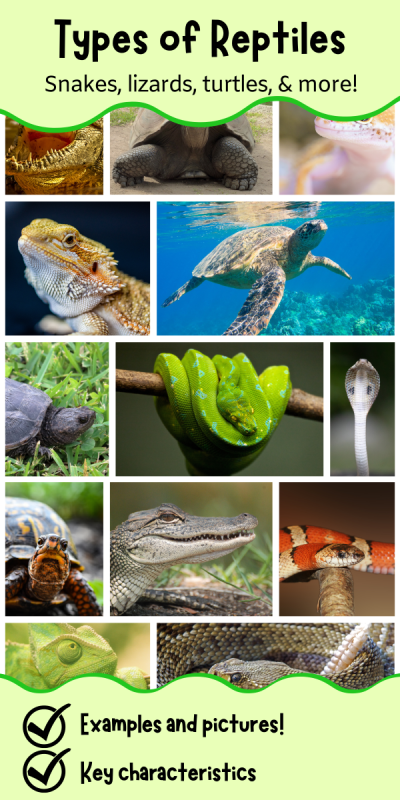
Types of Reptiles: snakes, lizards, turtles, and more!

A banner with pictures of reptiles and the text "types of reptiles: snakes, lizards, turtles, and more!"

Reptiles are a cool group of critters โ€“ and not just because they are cold-blooded! In this post, you will read about the different types of reptiles: snakes, lizards, turtles, tuataras, and crocodilians. Each of these groups has its own unique characteristics but also has several key traits shared with all reptiles.

A note for teachers: Are you an educator planning a reptiles lesson? I think you’ll love my Reptiles Unit, which can also be found within my even more comprehensive Vertebrates Bundle. The information and some of the artwork in this post come from the reptile unit. The unit also includes hands-on activities, thoughtfully crafted diagrams and visuals, handouts, worksheets, and everything you need to teach reptilesโ€“plus you will support this blog with your purchase! ๐Ÿ’š

Reptiles are part of a bigger category of animals called vertebrates, which means they all have a backbone. There are seven different groups, or classes, of vertebrates on Earth. These include amphibians, birds, mammals, reptiles, and three kinds of fish.

These are the main classes of vertebrates.

Reptiles are not always the easiest group to define. There is a lot of diversity within this group. From legless snakes to shelled turtles and armored crocodiles, the reptile group has some incredible creatures. Unlike other classes of vertebrates, scientists now know that the group we call reptiles is not an isolated evolutionary lineage. This means that some members of the reptile group are not quite as closely related as we once thought they were.

What counts as a reptile?

Some reptiles might seem very different from one another, but all types of reptiles share a few special traits. You can use these traits to help you identify reptiles:

  • A backbone
  • Breathe air with at least 1 functional lung
  • Scales or scutes
  • Ectothermic

From the cute gecko to the venomous rattlesnake, and everything in between, there are so many unique creatures to discover in the world of reptiles! The main types of reptiles covered in this post are: lizards & snakes, tuataras, turtles, and crocodilians.

1. Lizards

close up of lizard on yellow surface
Photo by Oleksandr Pidvalnyi on Pexels.com

Order:

  • Squamata
  • Note: snakes and lizards belong to the same order
Key traits:
  • Usually (but not always) four limbs
  • Long tail
  • External ear holes
  • Scales
Fun Facts:

Some species of lizards can drop their own tails when they feel threatened. This is a great defense because a predator will be distracted by the tail while the lizard escapes. The tail later regrows.

Examples:

Skink, gecko, iguana, chameleon, anole

2. Snakes

watercolor and pen diamondback rattlesnake
Drawing of a rattlesnake – by Wild Earth Lab.
Order:
  • Squamata
  • Snakes belong to the suborder Serpentes
Key traits:
  • No limbs
  • Long, slender body
  • Forked tongue
  • No ear holes
  • Scales
Fun Facts:

Snakes have nostrils for breathing but smell using their tongues.

There are about 600 venomous snake species in the world, but only a few poisonous snake species.

Examples:

Cobra, python, rattlesnake, boa, garter snake

3. Tuatara

tuatara in watercolor
Drawing of a tuatara – by Wild Earth Lab.
Order:
  • Rhynchocephalia
Key traits:
  • Four limbs
  • Long tails
  • Spiny back
  • No ear holes
  • Scales
Fun Facts:

The tuatara is only found in New Zealand. Despite its lizard-like looks, the tuatara is not a lizard. Lizards and snakes are in the order Squamata, but the tuatara belongs in its own order, Rhynchocephalia. All animals in this order except for the tuatara are extinct today.

4. Turtles

watercolor and pen loggerhead sea turtle
Sea turtle illustration by Wild Earth Lab.
Order:
  • Testudines
Key traits:
  • Four limbs
  • Short tail
  • Bony shell with scutes
  • No ear holes
  • Scales
Fun Facts:

Turtles and tortoises can live to be very old. The Galapagos giant tortoise can live for over 150 years. Even small turtles can live for decades. Many people do not realize a pet turtle can be a lifelong responsibility!

Examples:

Snapping turtle, sea turtle, desert tortoise, box turtle

5. Crocodilians

crocodile
Photo by Frans van Heerden on Pexels.com
Order:
  • Crocodilia
Key traits:
  • Four limbs
  • Long tails
  • Semi-aquatic
  • Covered in scutes
  • Large predators with powerful jaws
Fun Facts:

Crocodilians are some of the closest living relatives of the dinosaurs.

The saltwater crocodile, the largest crocodilian, can reach a length of over 20 feet (6 meters)!

Examples:

Alligator, crocodile, caiman

Study Reptiles in Your Classroom:

Are you teaching about reptiles in your classroom or homeschool? There’s no need to scramble to create the perfect set of materials for a reptile unit – I’ve already done it for you! You and your students will love studying reptiles with my complete Reptiles Unit!

Explore more units from Wild Earth Lab:

If you enjoyed this post, I know you will love using my environmental science learning materials in your classroom!


Are you interested in reading more posts like this? Subscribe or follow Wild Earth Lab using the links below!


References and Further Reading

  1. Discovery UK (2019). What On Earth Is A Tuatara? | Modern Dinosaurs (YouTube Video). Available: https://www.youtube.com/watch?v=44JUXPzEI2U
  2. Greater Cleveland Aquarium (2019). EXPLORING SIMILARITIES, CELEBRATING DIFFERENCES: AMPHIBIANS AND REPTILES. Available: https://www.greaterclevelandaquarium.com/exploring-similarities-celebrating-differences-amphibians-and-reptiles/
  3. Uetz, P. (1996). General Information (and โ€œFAQโ€). The Reptile Database. Available: http://www.reptile-database.org/db-info/introduction.html

Sharing options and discussion for this post:

Posted on — 1 Comment

Build Your Own Solar Eclipse Viewer Box: a step by step guide!

a banner that says "how to build your own solar eclipse viewer box" with a picture of an eclipse and a diagram of a viewer box

If a solar eclipse is happening where you live, make this simple solar eclipse viewer from household materials. You cannot look directly at the Sun because it will damage your eyes. However, you can view a solar eclipse using a homemade eclipse viewer box. You can use this viewer box to watch a partial or annular solar eclipse, or track the progress of a total solar eclipse before and after totality.

Photo by Drew Rae on Pexels.com

Before we begin, you may ask: what is happening during an eclipse?

As you know, the Earth is orbiting the Sun, and the Moon is orbiting the Earth. Every once and a while, the Sun, Moon, and Earth all line up and something very special happens. A solar eclipse happens when the Moon passes between the Earth and the Sun. During a solar eclipse, the Moon totally or partially blocks out the Sun during the daytime.

Try my Solar Eclipse Mini Study – with worksheets, activity guides and more.

Materials

  • Cardboard box (tip: longer box = larger projected image!)
  • Sheet of white printer paper
  • Box cutter
  • Tape
  • Aluminum foil
  • Scissors
  • Pin
Download a print out version of these directions to build your own solar eclipse viewer box.

Set Up

Download my printable version of these directions to build a solar eclipse viewer box.

  1. Have an adult cut a head-sized hole into the bottom of the cardboard box.
  2. Use tape to attach a white sheet of paper to one side of the box.
  3. In the opposite side, towards the top of the box, have an adult cut a small rectangular opening.
  4. Cut a piece of aluminum foil that is slightly larger than the rectangular opening you cut.
  5. Keeping the foil completely flat, tape the foil over the rectangular opening.
  6. Use the pin to make a tiny hole in the center of the aluminum foil.
  7. Close the top of the box and tape it shut.

Using Your Eclipse Viewer Box

  1. Stand with your back to the Sun. Never look directly at the Sun and never face the Sun while using the viewer. Do not look at the Sun through the pinhole.
  2. Hold the box with the head hole facing towards the ground. The aluminum foil should face the Sun.
  3. Facing the piece of paper, place the top of your head up into the head hole. Do not put your whole head all the way up into the box, as this will block the incoming light.
  4. Look up at the white sheet of paper.
  5. With the help of a friend, adjust your position until you see the projection of the solar eclipse on the paper.

Study Solar Eclipses with Wild Earth Lab!

You’ll find the printable directions for this activity, solar eclipse diagrams, and worksheets in my Solar Eclipse Mini Study:

Try my Solar Eclipse Mini Study – with worksheets, activity guides and more.

Explore curriculum from Wild Earth Lab:

If you enjoyed this post, I know you will love using my environmental science materials in your classroom!


Are you interested in reading more posts like this? Subscribe or follow Wild Earth Lab using the links below!


Sharing options and discussion for this post:

Posted on — 2 Comments

Stages of a Total Solar Eclipse: a step-by-step guide with diagrams

banner with the text "the 5 main stages seen during a total solar eclipse" and a picture of an eclipse
Photo by Drew Rae on Pexels.com

As you know, the Earth is orbiting the Sun, and the Moon is orbiting the Earth. Every once and a while, the Sun, Moon, and Earth all line up and something very special happens. A solar eclipse happens when the Moon passes between the Earth and the Sun. During a solar eclipse, the Moon totally or partially blocks out the Sun during the daytime.

Stages of a total solar eclipse. Diagram by WildEarthLab.

During a total solar eclipse, the Moon passes directly between the Earth and the Sun and blocks the Sun from our view on the ground. Totality is the phase of the eclipse when the Moon fully covers the Sun. When this happens, part of the Earth is totally in the moonโ€™s shadow. If you are in the shadow, it becomes dark during the daytime. The Sunโ€™s corona is seen behind the Moon during totality.

Stages of a total solar eclipse diagram and worksheet for studying the eclipse. Find them here.

Total Solar Eclipse Stages

Here are the main stages you will observe (through your protective eclipse glasses or homemade eclipse viewer box!) during a total solar eclipse:

First Contact

The leading edge of the Moon begins to cover the side of the Sun. A partial eclipse begins.

Second Contact

The leading edge of the Moon reaches the opposite side of the Sun. The Sun is fully covered. The total eclipse begins.

Totality

Totality is a period during a total solar eclipse in which the Moon completely covers the Sun. However, the Sunโ€™s corona is visible during totality.

Third Contact

The trailing edge of the Moon reaches the side of the Sun. The Sun is no longer fully covered. The total eclipse ends.

Fourth Contact

The trailing edge of the Moon reaches the opposite side of the Sun. The partial eclipse ends.

Solar eclipse print materials

If you enjoyed this post, I know you will love these print materials for learning about the solar eclipse with your students!

Download these solar eclipse classroom handouts and diagrams!

Explore curriculum from Wild Earth Lab:

If you enjoyed this post, I know you will love using my environmental science materials in your classroom!


Are you interested in reading more posts like this? Subscribe or follow Wild Earth Lab using the links below!


References and Further Reading

  1. Lea, R. (2023). The 5 main stages of Octoberโ€™s annular solar eclipse explained. Space.com. Available: https://www.space.com/annular-solar-eclipse-2023-main-stages-explained
  2. NASA (n.d.). Types of Solar Eclipses. Available: https://science.nasa.gov/eclipses/types/
  3. NCAR & UCAR Science Education (2017). 2017 Great North American Eclipse and the HAO Connection (video). Available:ย https://www.youtube.com/watch?v=rBxymVkpMl8

Sharing options and discussion for this post:

Posted on

Solar System Distances Lab: Try this hands-on math activity to model the solar system!

A banner that says "solar system distances model lab activity" with a picture of worksheets and a measuring tape

In this post, you will learn how to set up your own relative distances lab to teach the relative distances between objects in our solar system! In this fun lab, your students will learn about the vastness of space and the spacing of planets in a hands-on way. To do this, they will perform calculations and mark the locations of planets on a measuring tape. This post includes a materials list and directions for this fun, hands-on math and measurements activity!

During this lab, it may surprise students to see that the planets of the solar system are not evenly spaced out at all, as they are often shown in solar system diagrams. In fact, the inner four planets are grouped much more closely than the outer gas giants. Students will also calculate just how teeny-tiny scale models of planets would need to be if included in the model.

A note for educators: The activity in this post comes from my complete Sun and Stars Unit. You can find the printable directions and worksheets for this activity in my Solar System Relative Distances Lab or in the full Sun and Stars Unit – plus all the other printable handouts, worksheets, and diagrams you need to teach the solar system, the sun, and stars. Plus, every purchase helps support this blog! ๐Ÿ’š

You can also find the relevant worksheets and handouts for this activity in my Solar System Distances Lab!

Gather Your Materials

Gather the following materials for the solar system distances lab:

Other Materials:

Set Up

  1. Stretch out a tape measure along the ground.
  2. Tell students that the Sun is located at 0 and Neptune is located at the highest number on the tape measure.
  3. Use a clothespin to attach the Neptune and Sun flashcards to the proper locations.
  4. Go through the example below with your class to learn how to find the locations of the other planets. Find the actual distances from the Sun to each planet in the table below.
  5. Finally, ask students to calculate the model locations of the other planets on the tape measure in small groups.
Approximate distances between the Sun and planets. A printable version of this table and worksheets are included in my Solar System Distances Lab mini study.

Example Calculation

If you have a 5-meter tape measure, then the Sun is at 0 meters, and Neptune is at 5 meters. In reality, Neptune is 4,635,000,000 km from the Sun. We want to know where to mark Uranus on the tape measure. Uranus is 2,881,000,000 km from the Sun.

  1. Set up the equation:

2. Solve for model distance:

3. Put the actual distance (in kilometers) to Uranus into the equation:

4. Find and mark the calculated location on the tape measure.

5. Repeat these steps with the other planets in the solar system.

Download worksheets and handouts for the solar system distances lab activity

Other Suggestions

  • To make this activity simpler, calculate the distances to mark on the tape measure before the lab and provide these numbers to the students. Students can still work through finding the correct locations on the tape measure and marking the location of each planet.
  • For more advanced groups, ask students to start by trying to figure out on their own how they would set up the equation to solve this problem.
  • Pay attention to units while working through the example. Ask students how they know which units to use for their answers.

Problem Questions

  1. Outer space is mostly made of empty space. Planets and stars are relatively tiny compared to the distances between them. But letโ€™s imagine we are trying to make a scale model of the solar system with planets and a Sun that are to scale, relative to the distances between them on our tape measure.
    • If we add a scale model of Jupiter to our tape measure model, what would its diameter be? The actual diameter of Jupiter is 87,000 miles (140,000 km). Show your work below.
    • What is the problem with building this model?
  2. Letโ€™s say we want to build a model of the solar system with both planet sizes and distances between planets to scale. We want to use a marble as Earth. The marble has a diameter of 0.75 inches (1.9 cm). Earthโ€™s actual diameter is 7,900 miles (13,000 km).
    • For this model, what would the distance between the Sun and Earth be? Give your answer in miles or kilometers.
    • For this model, what would the distance between the Sun and Neptune be? Give your answer in miles or kilometers.
    • For this model, what would the diameter of the Sun be? The Sunโ€™s actual diameter is 865,000 miles (1,390,000 km).

Reflection Questions

  1. What is one thing that surprised you during this activity?
  2. Describe the spacing of the planets in our solar system. Are they evenly spaced or not?
  3. Do most images/diagrams of our solar system do a good job representing relative sizes and distances between objects? Why or why not?

This activity comes from my Sun Unit!

Your students will love the illustrated learning materials, plus you’ll support Wild Earth Lab with your curriculum purchase!

Explore more units from Wild Earth Lab:

If you enjoyed this post, I know you will love using my environmental science materials in your classroom!


Are you interested in reading more posts like this? Subscribe or follow Wild Earth Lab using the links below!


Sharing options and discussion for this post:

Posted on — 1 Comment

Phases of Water: phase changes and classroom activity!

diagram of phases of water on a clipboard

There are three phases of water. Water can transition between these phases via six different phase changes. In this post, learn about each one, then try out the phases of water classroom activity at the end!

A note for teachers: you’ll find lessons on the phases of water, phase changes, water molecule properties, snow-water equivalent calculations, and much more in my Science in the Snow Unit. It’s an applied STEM unit with a wintery theme and packed with hands-on activities. Plus, every purchase helps support this blog!

Ice (solid)

Water molecules are packed closely together and bonded in a rigid pattern, such that they cannot move past one another. Like other solids, ice:

  • Does not take the shape of its container
  • Does not expand/compress to fill its container

Liquid Water

Water molecules are packed very closely together but are still moving and slide freely past one another. Like other liquids, liquid water:

  • Takes the shape of its container
  • Does not expand/compress to fill its container

Water Vapor

Water molecules are far apart from one another and move very rapidly and freely. Like other gases, water vapor:

  • Takes the shape of its container
  • Expands/compresses to fill its container

Phase Changes

This phase change diagram is included in my science in the snow unit

Solid โ†’ Liquid

Melting โ€“ the process of changing from a solid to a liquid, due to an addition of energy (heat).

Solid โ†’ Gas

Sublimation โ€“ the process of changing from a solid to a gas, without passing through the liquid phase, due to an addition of energy (heat).

Liquidโ†’ Solid

Freezing โ€“ the process of changing from a liquid to a solid, due to a loss of energy (heat).

Liquidโ†’ Gas

Evaporation โ€“ the process of changing from a liquid to a gas, due to an addition of energy (heat).

Gasโ†’ Liquid

Condensation โ€“ the process of changing from a gas to a liquid, due to a loss of energy (heat).

Gasโ†’ Solid

Deposition โ€“ the process of changing from a gas to a solid without passing through the liquid phase, due to a loss of energy (heat).

Get this phase change diagram plus a blank copy in my science in the snow unit.

Phases of Water Venn Diagram Activity

For this activity, students will use a Venn Diagram with three circles to compare ice, water, and vapor.

  1. Label the three sides of the diagram: ice, liquid water, and vapor.
  2. Students should read the descriptions below, then decide where each description belongs on the Venn diagram:
    • Takes the shape of its container
    • Does not take the shape of its container
    • Its volume expands to fill up its container
    • Does not expand to fill its container
    • Compressible
    • Nearly incompressible
    • Flows
    • Does not flow
    • Forces between molecules keep them in an organized pattern
    • Molecules can move past each other
    • Molecules sliding very closely past one another
    • Molecules are very far apart
    • Made of hydrogen and oxygen
    • The densest of the 3 phases (Hint 1: when are the molecules closest together? Hint 2: think about what sinks vs. floats.)
    • Think of a few of your own to add!
  3. You can find the worksheets for this activity, an answer key, phase change diagrams and more in my Phases of Water Mini Study:
This phases of water Venn diagram activity is found in my science in the snow applied STEM unit!

Study Water and Ice with Wild Earth Lab:

The information and activities in this post come from my complete Science in the Snow Unit. Grab the full unit from my shop:

Explore curriculum from Wild Earth Lab:

If you enjoyed this post, I know you will love using my environmental science materials in your classroom!


Are you interested in reading more posts like this? Subscribe or follow Wild Earth Lab using the links below!


Sharing options and discussion for this post:

Posted on — Leave a comment

Measuring Snow: hands-on classroom activity to learn about snow hydrology and the water cycle!

banner with a picture of classroom handouts and the text "study snow hydrology and the water cycle - snow measurements lab"

If you live somewhere that gets snow in winter, you’ve likely measured the depth of snow before! But with a few extra steps, you can turn this simple task into an awesome, hands-on snow measurements lab activity for your classroom.

Find these worksheets and handouts in my snow hydrology lab mini study!

By measuring snow and performing calculations, we can determine snow water equivalent, stored water, and snow-to-liquid ratios! These are all important measurements for snow hydrologists and tell us a lot about water resources and the water cycle.

In this post, you will learn how to set up your own snow measurements lab to try out in your classroom! You can also get printable versions of these directions plus worksheets, handouts, and classroom posters to go along with this lab in my Bird Beak Adaptations Lab Mini Study!

Find these worksheets and handouts in my snow hydrology lab mini study!

Gather Your Materials

Gather the following materials for the snow measurements lab:

Part 1: Water in Snow

  • Printed copies of the โ€œWater in Snowโ€ worksheets (1 set per student)
  • 3 identical jars with lids
  • Water
  • Freshly fallen snow (not โ€œslushโ€ or partially melted snow)
  • Ice cubes

Part 2: Snow Water Equivalent

Set Up and Directions

Part 1: Water in Snow

  1. Fill one jar with liquid water, one jar with snow, and one jar with ice cubes. Fill all jars to the same level.
  2. Place a lid on each jar to prevent evaporative water loss.
  3. Put the jars somewhere indoors to melt.
  4. Ask students to make predictions about the water levels in each jar. Which jar will hold the most water at the end of the experiment? Which will hold the least?
  5. Encourage students to discuss their reasoning. They may notice that the jar with the ice cubes visibly contains a lot of air. For this reason, some students may expect that the ice cube jar will have the lowest water level at the end of the experiment.
  6. You may also ask students to draw a line on each jar to show where they think the water level will be.
  7. Once everything melts, ask students to check if their predictions were correct. Which jar holds the most water now? Which jar holds the least water now?
  8. Discuss how different types of snow (e.g., a fluffy, dry snow and a heavier, wet snow) will have different proportions of water and air in them. Share with students that snow hydrologists are often interested in the โ€œSnow Water Equivalentโ€, or in other words, the amount of water in snow.

Part 2: Snow Water Equivalent

  1. Start by sharing with students that precipitation (e.g., snow, rain) is measured as a depth.
  2. We can measure this depth by setting an open container outside to collect precipitation as it falls.
  3. Help students use the rulers to draw and label measurement markings up the side of the container, starting at the bottom.
  4. Ask students to set these containers outside before it snows. If it is windy, students may need to place rocks or other heavy items around the containers to hold them in place. When the snow stops, students should record the depth, bring the container indoors, then wait for the snow to melt in the container.
  5. Once students determine the Snow Water Equivalent (i.e., the depth of meltwater in the container), help them calculate a snow-to-liquid ratio (SLR). You may wish to work through the example on the student handout as a class.

Other Suggestions

  • The snow and ice cubes may melt slowly. If you donโ€™t have a long class period, set up this activity at the end of class one day, then finish the activity at the start of class the next day.
  • Donโ€™t pack down the snow in the jar, since this may impact the snowโ€™s density.

Reflection Questions

  1. Water only makes up a small part of snowโ€™s volume. What could make up the rest of the snow? (What else is in the jar?).
  2. Imagine you have one jar with a fluffy, fresh snow, and one jar with a heavy, dense snow that was on the ground for a few days. After melting, which jar would have more liquid water? Why?
  3. Which would be more water: an inch of rain or an inch of snowfall? Why?
  4. If 21 inches of snow falls, and the snow-to-liquid ratio is 7 : 1, what is the snow water equivalent?
  5. Could snow water equivalent ever be a larger number than snow depth? Why or why not?

This activity comes from my Science in the Snow Unit!

Your students will love the illustrated learning materials, plus you’ll support Wild Earth Lab with your curriculum purchase!

Explore more curriculum from Wild Earth Lab:

If you enjoyed this post, I know you will love using my environmental science materials in your classroom!


Are you interested in reading more posts like this? Subscribe or follow Wild Earth Lab using the links below!


Sharing options and discussion for this post:

Posted on — 2 Comments

Earth’s Layers: crust, mantle, core, & more. Plus a layers of the Earth-inspired density activity!

The text "study earth science! layers of the earth!" with A picture of a paper model of the layers of the earth
text that says share this post

In school, you usually learn that the three main layers of the Earth are the crust, mantle, and core. Geologists call these compositional layers because the layers are defined by the materials they are made of. However, geologists also think about how different layers of the Earth move: for example, do they flow easily? Are they rigid or soft? Are they solid or liquid? Because of this, geologists also classify Earthโ€™s interior into five mechanical layers. The mechanical layers are based on movement and strength and include the lithosphere, asthenosphere, mesosphere, inner core, and outer core.

Before we dive in: If youโ€™re an educator planning to teach the Earth’s layers, great activities are key to deepening understanding! I think you and your students will love my Earth’s Layers Model Activity, which you can also find within my complete Plate Tectonics Unit (plus youโ€™ll support my blog with your purchase! โค๏ธ)

Paper model of earth’s layers. Find printable templates and directions for this project here.

Now, let’s learn more about both the compositional and mechanical layers of the Earth:

A diagram of Earth's compositional and mechanical layers. Compositional layers are shown on the left. From outside to inside: crust, mantle, and core. The Mechanical layers are on the right. From outside to inside: lithosphere, asthenosphere, mesosphere, outer core, and inner core. Diagram by WildEarthLab.
Earth’s compositional and mechanical layers. Diagram by WildEarthLab.

Compositional Layers of the Earth

If you could cut the Earth in half, you would find that the Earth is made of three main compositional layers – crust, mantle, and core. Each layer has a unique composition โ€“ that is, what it is made of. First, the crust is a very thin layer on the surface made of rock. Beneath the crust lies the mantle, a thick layer of denser rock. Although the mantle is made of rock, it moves and flows like a liquid, only very, very slowly. Finally, the core is located in the very center of the Earth and is made of metals.

You may ask – why does the Earth have compositional layers? These layers are separated based on their densities. Just as oil will settle on top of water when mixed, Earth’s inner materials separate into layers based on density. The core is made of metal, making it very dense – that’s why it is at the center. In contrast, the least dense layer is the crust. In a way, the atmosphere could also be considered a compositional layer of the Earth. The atmosphere is made of gases, so it is even less dense than the crust!

Mechanical Layers of the Earth

Earth has 5 mechanical layers. “Mechanical” means defined based on their movement. Together, the crust and topmost portion of the mantle create the lithosphere. The lithosphere is a rigid layer that is broken into tectonic plates. Under the lithosphere lies a more pliable portion of the mantle called the asthenosphere. The soft asthenosphere flows most easily, allowing the tectonic plates to move atop it. We call the remaining, lower part of the mantle the mesosphere. Next, the outer core is a flowing liquid layer that creates Earthโ€™s magnetic field. In contrast, the inner core is solid.

Why study the Earth’s layers?

Things happening within Earth’s layers impact our lives. For example, our planetโ€™s metallic core generates a magnetic field. The Earthโ€™s magnetic field is pretty amazing โ€“ it allows us to navigate by compass, protects the Earth from cosmic radiation, and creates beautiful northern lights.

Additionally, movements in the lithosphere (upper mantle and crust) cause everything from the creation of certain landforms and rocks to volcanoes, earthquakes, and tsunamis! This is all tied to the theory of plate tectonics. The theory of plate tectonics is important in the field of geology, and before we can study it, we must first understand the layers of the Earth.

Paper model of earth’s layers. Find printable templates and directions for this project in my shop.

Classroom Activity: Density Experiment & Earth’s compositional layers

colorful liquids in laboratory glasswares
Photo by Kindel Media on Pexels.com

As we learned, three compositional layers of the Earth (crust, mantle, and core) are separated based on density. In this activity, explore how differences in density lead to layering. Matter (liquids, solids, or gases) with different densities may float above or sink below one another to form layers.

  1. In a tall glass or beaker, stack different liquids such as dish soap, water, vegetable oil, and rubbing alcohol. 
  2. Start by pouring in the most dense layer – the dish soap.
  3. Add the water next. Add liquids by pouring gently: hold the beaker at a slight angle and pour slowly to minimize mixing and bubbles forming.
  4. Add the oil next, pouring gently.
  5. Add the alcohol, pouring gently.
  6. As a bonus, you can drop small solid objects into the jar to see what level they sink to โ€“ for example, a piece of candle wax, a marble, and a small piece of Styrofoam.

More Ideas for Teaching Earth’s Layers

  • Students can build their own models of the Earth’s layers using play dough, construction paper, or printable templates.
  • Or, make a 3D model of the Earth’s layers by stacking nesting bowls representing each layer.
  • Try out Wild Earth Lab’s complete Plate Tectonics Unit. It includes all the activities, worksheets, and diagrams that you will need for a great Plate Tectonics unit with your class or homeschool.

Explore more units from Wild Earth Lab:

If you enjoyed this post, I know you will love using my environmental science materials in your classroom!


Are you interested in reading more posts like this? Subscribe or follow Wild Earth Lab using the links below!


References and Further Reading

  1. C.C. Plummer, D.H. Carlson, and L. Hammersley (2019). Physical Geology. McGraw-Hill Education. (Chapter 1)
  2. Dobrijevic, D (2023). Earthโ€™s layers: Exploring our planet inside and out. Spage.com. Available: https://www.space.com/17777-what-is-earth-made-of.html
  3. PBS Digital Studios (2016). Why does the earth have layers? Available: https://www.pbs.org/video/its-okay-be-smart-layers/
  4. ScienceBuddies.org (n.d.). Stacking Liquids. Available: https://www.sciencebuddies.org/stem-activities/liquid-stacking-density
  5. Super Experiment (2017). Amazing 7 Layer Liquid Stacking! (How To) Denser Than You Think. YouTube. Available: https://www.youtube.com/watch?v=qKHUNvMsF6U
  6. U.S. Geological Survey (1999). Inside the Earth.  Available:  https://pubs.usgs.gov/gip/dynamic/inside.html .

Sharing options and discussion for this post:

Posted on — 1 Comment

Bird Beaks Lab: try this hands-on classroom activity to learn about adaptations and natural selection!

materials for a bird beaks lab activity for studying natural selection and animal adaptations
text that says share this post

Maybe you have already heard of a bird beaks lab. But if not, the basic idea is this: students use different โ€œbeaksโ€ (e.g., chopsticks, tweezers), to pick up different โ€œfood sourcesโ€ (pasta, seeds, peas). Throughout this process, students figure out which beak is the best for โ€œcatchingโ€ each food.

This is a hilarious and hands-on way to experience competition between species and learn about natural selection and animal adaptations. Students will experience first-hand how specialized beaks can help birds quickly gather the most food and outcompete other types of birds.

In this post, you will learn how to set up your bird beaks lab in your classroom!

Get the most out of this activity: If youโ€™re an educator planning to teach this activity, you’ll find all the worksheets, printable directions, and visual aids you need in my Bird Beaks Lab Mini Study and also within my complete Waterbirds and Waterfowl Unit (plus youโ€™ll support my blog with your purchase! โค๏ธ)

Gather Your Materials

Gather the following materials for the bird beaks lab:

Beaks:

  • Binder clip or chip clip
  • Tweezers
  • Fork
  • Slotted spoon or small strainer (holes should be smaller than a pea)
  • Chopsticks
  • Eyedropper

Food Sources:

  • Gummy candies (20+)
  • Sunflower seeds or grains of uncooked rice (20+)
  • Marshmallows (20+)
  • Peas (20+)
  • Cooked pasta such as bowties or spirals (20+ pieces)
  • Skinny container filled with water and food coloring (for use with eyedropper)

Other Materials:

  • Liquid measuring cup
  • 2 large bowls filled with water
  • 6 Paper cups or other containers
  • Paper plates
  • Food coloring
  • Permanent marker
  • Timer/watch
  • Towel for cleaning up spills
  • Lab worksheets (1 set per student)
Find these worksheets and handouts in my bird beak adaptations lab mini-study!

Set-Up

  1. Start by setting up six โ€œfood sourceโ€ stations:
    • Place 20  gummy candies on a plate. Label the plate โ€œinsectsโ€.
    • Place 20 grains of rice or seeds on a plate. Label the plate โ€œseedsโ€.
    • Place 20 marshmallows on a plate. Label the plate โ€œrodentsโ€.
    • Place ~20 tsp (~100 mL)of food-colored water in a skinny container. Label the container โ€œflower nectarโ€. Place a liquid measuring cup next to the container for students to deposit the water into.
    • Place 20 peas in a large bowl of water. Label the bowl โ€œaquatic plantsโ€.
    • Place 20 pieces of pasta in another large bowl of water. Label the bowl โ€œfishโ€.
  2. Write โ€œstomachโ€ on each paper cup.
  3. Give each student a โ€œstomachโ€ and one of the 6 โ€œbeaksโ€. You can have each student use just one beak, then share answers with students who used other beaks afterward. Or, if you have a small group (and lots of time), you may wish to have each student try out each beak.

Lab Activity

  1. Have students rotate through the food source stations with their beaks.
  2. Instruct students to use their beaks to pick up as much food as they can in 20-60 seconds, placing food into the โ€œstomachโ€ containers. Start the timer and say โ€œgo!โ€ (Longer periods may be necessary for very young groups).
  3. After 20-60 seconds, say โ€œstop!โ€. Students should use the lab datasheets to record the number of pieces of food they picked up (or the volume of liquid at the flower nectar station).
  4. Instruct students to empty their โ€œstomachโ€ cups and put the station back the way it was before moving to the next station.
  5. Once finished with all stations, ask each student to share their beakโ€™s results with the class. Determine which beak(s) worked best for each food source.
  6. Ask students to complete the graphing activity. Students will make a graph for each food source comparing the amount caught by each of the 6 beaks.
  7. Have students work through the reflection questions in groups or individually.

Other Suggestions

  • For groups larger than 6 students, create multiple copies of each station. Or, have groups of 6 take turns rotating through the stations for this lab while the rest of the class completes other work.
  • After or during this lab, discuss adaptations and natural selection. Explain how in nature, animals compete for the same food sources. Birds that can quickly and easily gather lots of food have the best chances of surviving and raising offspring. Ask students to consider what happens when two birds with different beaks compete for the same food source. Discuss how the availability of different food sources may affect the shape of birdsโ€™ beaks over time.

Reflection Questions

  1. Which beak(s) worked best for each food source?
  2. Imagine a habitat where two groups of waterbirds compete for aquatic plants to eat. One group of birds has a filtering beak (like the slotted spoon), and one group of birds has a short, grasping beak (like the clip). What do you think would happen to each group of birds over time?
  3. Imagine a bird species with a large, pointy beak (like the chopsticks) that eats seeds. Imagine that one year a few birds are born with shorter, more precise beaks (like the tweezers). Do you think the birds with the new beak type will thrive? What could happen to this bird species over time?

Printables for this Activity:

Find the printable materials for this activity in my Bird Beaks Mini Study. These same materials are also found within my complete Waterbirds and Waterfowl Unit:

Explore more units from Wild Earth Lab:

If you enjoyed this post, I know you will love using my environmental science materials in your classroom!


Are you interested in reading more posts with science activity ideas? Subscribe or follow Wild Earth Lab using the links below!


Sharing options and discussion for this post:

Posted on — 2 Comments

Tree Anatomy: the parts of trees and their functions

a banner with pictures of trees that says "Let's learn about tree anatomy"

In this post, we will examine overall tree anatomy and the key parts of a tree. Then, we will peek inside the tree to examine the layers of a tree’s trunk and their functions.

A special note for educators: Are you planning to teach your students about trees? I offer a complete Trees Unit as well as a Forest Ecology Unit. And they are both found within my discounted Forest Bundle. I know your students will love the beautiful diagrams and hands-on activities โ€“ and you’ll support this blog with your purchase! โค๏ธ

Recommended products

Overall Tree Anatomy

We can think of trees as having three main parts. Let’s take a look at each.

  1. Roots are the underground parts of a tree that take up water and dissolved minerals. They also help anchor the tree to the soil.
  2. The trunk is the main woody stalk of a tree which supports all other branches.
  3. The crown is the top portion of a tree. It includes the branches and leaves or needles extending from the main trunk. The crown of a tree will look quite different in different types of trees. Picture the crown of a deciduous tree, conifer tree, or palm tree. Let’s take a closer look at the parts of the crown:
    • A branch is any woody stalk extending from the main trunk.
    • The leavesย  are parts of a tree that produce the treeโ€™s food through photosynthesis. In deciduous trees, leaves are broad and flat, and fall off the tree at the end of each growing season.
    • The needles are the leaves of a coniferous tree, which produce the treeโ€™s food through photosynthesis. Needles do the same job as broad, flat leaves but stay attached to the tree throughout the entire year.

Tree Trunk Anatomy

Inside a human body, you will find different organs: a heart, intestines, lungs, kidneys, etc. Just like humans, trees have different organs inside their trunks too. The trunk of a tree is made up of several layers, each performing a different function. Let’s take a look.

The anatomy of a tree trunk coloring activity for kids to learn about tree science
brown tree log
Photo by Pixabay on Pexels.com
  1. Barkย is the rough, protective outer coating. Bark helps protect the tree from insect and fungi invaders.
  2. The phloem underlies the bark. The phloemโ€™s function is to transport sugars. Sugars form in the leaves during photosynthesis, and the phloem moves the sugars to other parts of the plant where they are needed for growth.
  3. The cambium is a thin layer of dividing cells between the xylem and phloem. This is where secondary (outward) growth occurs. In temperate climates, the most growth happens during the summer. This is why tree rings form.
  4. Theย sapwoodย underlies the cambium. The sapwood is the living part of theย xylem,ย which actively moves water upwards through the tree. Water is drawn up through the ground via the treeโ€™s roots. Water leaves the tree through tiny pores called stomata in the leaves, in a process called transpiration. The xylem grows from the cambium – we can see tree rings in the xylem.
  5. The heartwood is old, inactive xylem tissue. Heartwood no longer has living cells and does not move water. Heartwood provides structural support. Both living and dead xylem parts (sapwood and heartwood) contain tree rings that formed each year as the tree grew inwards from the cambium.
  6. The pith is at the very center of the tree trunk and plays a role in the movement of nutrients. In older trees the pith is often very tiny or diminished, relative to the size of the heartwood.

Free Tree Anatomy Materials:

My email newsletter subscribers can access my full collection of free learning resources. Sign up today to access all the freebies, including these:

  1. Tree Trunk Anatomy Coloring Activity:

2. Print this free tree anatomy poster.

Wild Earth Lab’s Tree Teaching Materials

If you enjoyed this post and the freebies, I know you will love the Tree Unit and my other units too!

Explore more units from Wild Earth Lab:

I know you will love using my environmental science materials in your classroom!


Are you interested in reading more posts like this? Subscribe or follow Wild Earth Lab using the links below!


Sharing options and discussion for this post: