Posted on — Leave a comment

5 Winter-Themed STEM Activities: snowflakes, glaciers, and more!

Winter classroom STEM activities

Looking for fun and educational ways to bring STEM learning into your homeschool or classroom this winter? These winter-themed activities are perfect for exploring science, technology, engineering, and math through hands-on projects that celebrate the season. From measuring snow and studying glaciers to investigating the science behind snowflakes and symmetry, these activities will keep students engaged all winter long. Grab your winter coat and get ready to dive into these exciting winter STEM activities!

Wild Earth Lab is supported by readers like you. This post includes links to my own products and affiliate products. If you purchase through links on my site, I may earn a small commission at no additional cost to you.

1. Measure snow like a scientist

If you live somewhere that gets snow in winter, youโ€™ve likely measured the depth of snow before! But with a few extra steps, you can turn this simple task into an awesome, hands-on snow science activity.

Start by learning about snow water equivilent and how to calculate it. This can be a great way to start a conversation about snow in the water cycle, and the ways snow supplies our rivers and aquifers with an important input of water.

You can find the full activity directions for a snow measurements activity in my blog! Or better yet, you can save time and support my blog when you purchase the printable worksheets and directions for this activity in my complete Science in the Snow Unit.

โ˜ž Upgrade your outdoor learning:

Measuring snow with your students? You can track the snow all winter long by placing a metal snow gauge in your yard or outdoor learning area. Whether you’re teaching in the classroom or at home, you can create an inspiring outdoor learning area for studying snow, weather, and more.

Cardinal Snow Gauge: product and image from Soldarmetals on Etsy.
Snow Gauge: product and image from Swenproducts on Etsy.

2. Explore glaciers and climate science

Why study glaciers this winter? Glaciers tie in to many important science topics – not just geology and landforms, but also climate science, sea level rise, and water resources! Glaciers are an important reservoir of frozen freshwater on Earth. However, glaciers all over the world are receding and disappearing due to climate change, putting communities at risk of flooding and altering ecosystems.

Furthermore, glaciers teach scientists about our Earth’s past! Glacial ice is like a time capsule, holding important clues about the history of our Earth and its climate. By studying glaciers, students can learn about and discuss the past, present, AND future of our climate!

Ready to study glaciers? You can read more about the types of glaciers and how they form in my blog post! Or better yet, you can save time and support my blog when you purchase my Glaciers Unit – complete with classroom activities, worksheets, handouts and more.

valley glacier diagram

3. Read about how snowflakes form

If you’ve ever looked at a snowflake under a microscope or magnifying glass, you know that each snowflake is a unique, beautiful formation. But how do these amazing water crystal structures form? It all starts high in earth’s atmosphere, with a dust particle and water vapor. Since every snowflake takes a slightly different path to the ground, each snowflake runs into unique conditions along the way. These different experiences impact the way each snowflake forms.

Learning about the formation of snow ties in to studies of meterology and the three phases of water. Because of this, snowflake formation is an engaging winter science topic at many different levels.

Need materials for studying snowflakes? Read a step-by-step description of how snowflakes form in my blog post! Or, find printable snowflake formation materials in my Snowflake Mini Study or in my complete Geometry in the Snow Unit.

formation of a snowflake diagram

4. Learn about symmetry with paper snowflakes

When it comes to geometry, snowflakes provide a great tool for learning about symmetry with a winter-y twist! Cutting paper snowflakes from coffee filters or paper is a great hands-on way to study rotational symmetry, planes of symmetry, and more!

Paper snowflakes are an easy activity to DIY! But if you’re looking for a little guidance, I’ve got you covered. Activity directions and worksheets for a paper snowflakes & lines of symmetry lesson are also found in my Geometry in the Snow Unit.

lines of symmetry classroom handouts

5. Study the animals of the poles!

Winter is the perfect time to study the survival strategies of animals that live in the coldest places on earth! Topics could include survival strategies like migration, hibernation, and insulation or the food webs and ecosystems of the Arctic or Antarctic.

Studying and modeling arctic food webs is a fun, hands-on ecology activity that students love. You can learn how to build your own food webs in my blog post. Furthermore, you can learn all about arctic ecology and find materials for an arctic food webs lesson in my Arctic Unit.

handouts and classroom printables

Winter studies with Wild Earth Lab!

Thereโ€™s no need to scramble to put together the perfect winter science lesson  โ€“ Iโ€™ve already created some for you! The winter stem activities from this post come from my winter STEM units:

Explore more lessons from Wild Earth Lab:

If you enjoyed these winter stem activities, I know you will love trying my other science and nature units in your classroom too!


Are you interested in reading more posts with STEM activity ideas? Subscribe or follow Wild Earth Lab using the links below!

Subscribe, share, and comment:

Posted on — 1 Comment

Mushroom Dissection + Spore Prints: Try this fun mycology activity in your classroom!

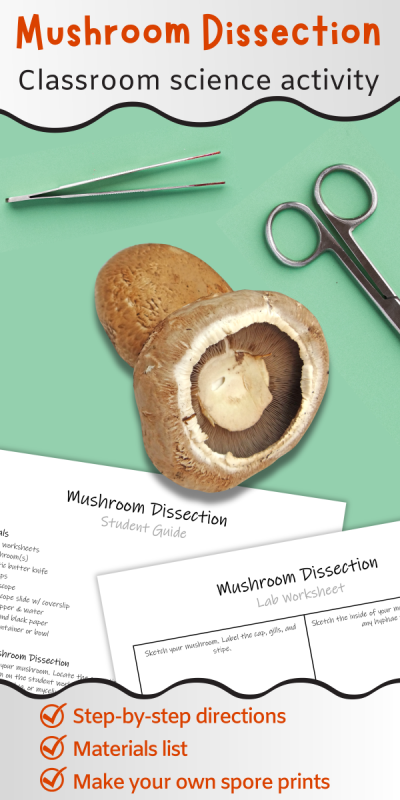
mushrooms, metal instruments, and worksheets

Studying the parts of a mushroom is a fun biology activity for students at many levels. One of the best, hands-on ways to learn mushroom anatomy is by dissecting one. In this mushroom dissection activity, students will observe the internal and external parts of a mushroom. Students will operate a microscope to observe spores and mushroom gill anatomy. Finally, students will create their own spore prints by allowing mushrooms to release their spores onto paper.

Please Note: I’ve made the directions for this mushroom dissection activity available for free here in this post. If you would like printable directions and worksheets for this activity, you can purchase them in my shop. You can find these materials and more mushroom learning materials in my complete Mushrooms Unit!

Materials

  • Printed copies of the Mushroom Dissection Student Guide (1 per student)
  • Printed copies of the Mushroom Dissection Lab Worksheet (1 per student)
  • Printed copies of the Mushroom Anatomy Diagram (1 per lab bench)
  • Fresh, mature mushrooms like portabella, shitake, etc… (a few of each variety per lab bench)
  • Plastic butter knives (1 per lab bench)
  • Forceps (1 per lab bench)
  • Microscopes (1 per lab bench)
  • Microscope slides w/ coverslips (1 per lab bench)
  • Eyedroppers & water (1 per lab bench)
  • Sheets of white and black paper (1 of each per lab bench)
  • Small containers or bowls (1 per lab bench)

Safety Notes and Suggestions

  • Do not eat the mushrooms handled during this lab.
  • Use caution and always supervise your students when handling sharp instruments including forceps, butter knives, and glass microscope slides.
  • You will have a better chance of observing spores using fresh, mature mushrooms (i.e., the gills are visible) rather than immature button mushrooms.
  • If you do not have a microscope skip steps 6-8 in Part 1.
brown mushrooms on beige surface
Photo by Laker on Pexels.com

Directions

Part 1: Mushroom Dissection

A mushroom is the fruiting body of certain fungi. By dissecting a mushroom, you can see the parts of a mushroom up close. These parts help the fungi produce and release spores to create more fungi.

  1. Examine your mushroom. Locate the cap, stipe, and gills (or veil covering the gills). Sketch your mushroom on the student worksheet, labeling the cap, stipe, gills, and other parts you see such as an annulus, volva, or mycelium still attached.
  2. Using fingers or forceps, gently peel away and remove any veil covering the gills (if needed).
  3. Remove the stipe from the cap by gently pulling or twisting on the stipe.
  4. Break or cut the stipe in half length-wise.
  5. Do you see any long, thin filaments or strings on the inside of the stipe? These are hyphae. Sketch the inside of the stipe on the student worksheet, labeling any hyphae.
  6. Remove one gill from the mushroom. Use the forceps to grasp and gently pull away one gill.
  7. Place the gill on a microscope slide. Add a drop of water and a coverslip.
  8. Examine your gill under the microscope and sketch what you see. Basidia are tiny knobs on the gill that make spores. Label the basidia and any spores you see attached to them in your sketch.
  9. If you have a second type of mushroom, repeat steps 1-8 with the second mushroom.
  10. Once finished, discard all mushroom parts EXCEPT for the cap(s) and clean your microscope slide.

Part 2:  Spore Prints

Spores are released from mushrooms as part of the life cycle of a fungus. You can make unique artwork by allowing mushroom caps to drop their spores onto paper.

  1. You can use the mushroom cap(s) from part 1 to make a spore print. Ask your instructor for additional mushrooms to make additional prints.
  2. With any new mushrooms: remove the stipes and peel away any veils covering the gills.
  3. Spores may be light or dark-colored. Try using both black and white paper for your spore prints to ensure the spores are visible.
  4. Place the mushroom caps with the gills facing down on top of the papers.
  5. Place an upside-down container or bowl over the mushroom caps to protect them.
  6. Leave the caps alone overnight. During this time, the gills will release spores which will fall onto the paper.
  7. The next day: remove the containers and mushroom caps to reveal the spore prints.

Study Mushrooms with Wild Earth Lab!

Thereโ€™s no need to create your own mushroom dissection worksheets and print directions – I’ve already made them for you! You can save time and support my blog with your purchase from my shop.

Explore more lessons from Wild Earth Lab:

If you enjoyed this post, I know you will love trying my other science and nature units in your classroom too!


Are you interested in reading more posts with directions for science activities? Subscribe or follow Wild Earth Lab using the links below!

Subscribe, share, and comment:

Posted on — 1 Comment

Soil Science in Your Classroom: 5 educational activities to try

a graphic that has a picture of some soil and worksheets, with the text "5 soil science classroom activities"

Are you studying soil science with your homeschool or science class? Soil science is an exciting and interdisciplinary subject that integrates chemistry, physics, and environmental science. From testing soil organic matter to measuring porosity and permeability, hands-on lab activities will bring the real experience of being a soil scientist to your science classroom or homeschool. In this post, you’ll discover five educational soil science activities to try, including a soil texture jar test, modeling soil horizons, and more. These activities are perfect for helping your students explore the wonders of soil in a fun and interactive way!

1. Try the Jar Test for Soil Textures

Soil scientists need to evaluate the “textures” of soils: in other words, the proportion of sand, silt, and clay in the sediment part of the soil. But this can be a challenge. How do you separate and measure all those tiny grains?

This most basic method, the โ€œjar testโ€, is easy to do in a classroom setting. Shake up some soil and water in a jar. Then, watch the grains settle over time. Larger grains settle faster than smaller ones.

You can find the full activity directions for this science project in my blog! Or better yet, you can save time and support my blog when you purchase the printable worksheets and directions for this activity.

2. Build a Soil Horizons Parfait

Did you know soils have layers? Scientists call the layers โ€œsoil horizonsโ€. Each of the six soil horizons is given a letter: O, A, E, B, C, and R. The upper two horizons, O and A, are called topsoil. Each horizon has its own unique characteristics and function.

You can teach your students about layers in the soil by building a soil horizons parfait. Perhaps you have made a โ€œcup of dirtโ€ from pudding? With a few extra steps, you can turn this simple snack into a tasty science activity by creating a soil horizons parfait!

You can find the full activity directions for this “snack-tivity” in my blog! Or better yet, you can support my blog by purchasing my soil horizons mini study, which includes printable directions for this activity as well as soil horizon worksheets.

3. Measure Porosity and Permeability

If you’re studying soils, your students will need to know the difference between soil porosity and permeability. While these two properties are related, they are not the same! And what better way to understand the difference between porosity and permeability than a hands-on lab activity!?

Conveniently, soil porosity and permeability can be measured and observed using common household items. You can find the full activity write-up with directions for porosity and permeability in my blog! Or better yet, support my blog AND save time when you purchase the printable worksheets and directions for this lab activity.

worksheets for permeability studies
Worksheets for porosity

4. Test for Soil Organic Matter

If you’re studying soils with your students, you have probably learned that soil is a mixture of sediments and organic matter. But different soils have different amounts of these two ingredients. A soilโ€™s organic matter content is important, especially when considering a soilโ€™s ability to support plants.

To demonstrate this, you can do a cool classroom demo by mixing soil with hydrogen peroxide. The hydrogen peroxide reacts with organic matter in the soil to make gas (i.e., fizzing and bubbles!). More bubbles = more organic matter in the soil!

Find theย directions for a soil organic matter classroom demoย in my blog! Or better yet, you can support my blog by purchasing the worksheets and printable directions for this classroom activity.

dishes with soil on a lab bench next to liquid in a bottle and a clipboard

5. Learn About Decomposers

Decomposers are organisms with a very important job: they help recycle nutrients back into the soil. They help break down dead organic matter into the soil nutrients that help plants grow. There are many types of decomposers, including mushrooms and fungi, earthworms, and microbes.

You can print my free food web poster (including decomposers). To learn more about food webs and the important role of decomposers, check out my complete Food Webs Unit (for purchase).

If you are interested in studying mushrooms, I’ve also created some free mushroom anatomy printables. You can dive deeper into the world of fungi and mushrooms with my complete Mushroom Unit.

photo of mushroom anatomy diagrams
I made these mushroom anatomy diagrams for you! You can download them for FREE.

Study Soil Science with Wild Earth Lab

Many of the activities from this post come from my complete Soil Science Unit! Thereโ€™s no need to scramble to put together the perfect Soil Science Lesson โ€“ Iโ€™ve already created it for you! This set includes tons of activities and lab directions, teaching posters, handouts, and more!

Explore more units from Wild Earth Lab:

If you enjoyed this post, I know you will love using my other science units in your classroom!


Are you interested in more science activity ideas? Subscribe or follow Wild Earth Lab using the links below!


Subscribe, share, and comment:

Posted on — Leave a comment

The Life Cycle of a Star: learn about nebulae, supernovas, black holes and more!

The night sky with various stars and nebulae, overlaid with the text "let's learn about star life cycles a step-by-step guide to the life cycles of sun-like and massive stars!"

Studying the star life cycle offers valuable insights into the beginnings of our solar system and the creation of elements. By learning about the life cycles of both sun-like and massive stars, students can explore the fascinating processes that shape our universe. In this post, we’ll guide you through the stages of star evolution, from the birth of a star in a nebula to the dramatic end of a massive star in a supernova. Letโ€™s dive into the cosmic journey of star formation!

Before we dive in:ย If youโ€™re an educator planning toย teach the Star Life Cycle, great activities and visuals are key to deepening understanding! I think you and your students will love my Star Life Cycle Materials, which you can also find within my complete Sun and Stars Unit (plus youโ€™ll support my blog with your purchase! โค๏ธ)

Are you an educator planning a sun or star lesson plan? I think you’ll love my Star Life Cycle materials, available in my shop!

Sun-like Star Life Cycle

Stellar Nebula

You can think of a stellar nebula as a star nursery. It is a place where new stars form. In reality, it is a gigantic cloud of gases and dust in space. Over time, the gases are pulled towards the center of the cloud by gravity. As more and more gases move closer and closer together, lots of heat and pressure build up. In fact, the atoms of gases get so close that they start fusing together in a process called nuclear fusion. When nuclear fusion starts, a new star is born!

Sun-like Star

A Sun-like star is also sometimes called an average star. They are smaller than massive stars. All stars make a lot of heat โ€“ but they are not really โ€œburningโ€ in the way that a log burns in a campfire.  What actually heats a star is a process called nuclear fusion. In a Sun-like star, hydrogen atoms are fusing to create helium atoms. Nuclear fusion happens within the core of the star and releases a lot of energy. This energy helps heat the outer layers of the star.

Red Giant

Over time, a Sun-like star uses up the fuel at its core. The hydrogen gets used up as it is fused into helium through nuclear fusion. Helium is denser and takes up less space than hydrogen. Because of this, the core shrinks as more helium is made. As this happens, the outer layers of the star swell, which allows the outermost parts to  become cooler.  As a result, the Sun-like star becomes larger and redder โ€“ a red giant!

White Dwarf

A white dwarf forms at the end of a Sun-like starโ€™s life cycle. The white dwarf is the remaining hot, dense material from the starโ€™s core. The outer layers of the star expand into a huge, loose cloud of gases. The shrunken core does not have enough gravity to keep a hold on its outer layers. The core, or white dwarf, is still very hot. Once it cools completely, it is called a black dwarf.

Planetary Nebula

As a dying starโ€™s core becomes a white dwarf, the outer layers become a planetary nebula. The planetary nebula is a huge, loose cloud of gases in space. Planetary nebulas do not really have anything to do with planets. They are named for their round-shape. A planetary nebula forms when a dying starโ€™s core no longer has enough gravity to keep a hold on the outer layers. The gases in the planetary nebula gradually drift off into space and may eventually get recycled into new stars!

Massive Star Life Cycle

Stellar Nebula

Just like a sun-like star, the massive star life cycle begins in a stellar nebula – the place where new stars form. In reality, it is a gigantic cloud of gases and dust in space. Over time, the gases are pulled towards the center of the cloud by gravity. As more and more gases move closer and closer together, lots of heat and pressure build up. In fact, the atoms of gases get so close that they start fusing together in a process called nuclear fusion. When nuclear fusion starts, a new star is born!

Massive Star

A massive star is at least 8-10 times the mass of our Sun. Because of this, it burns faster and hotter than a Sun-like star. Like Sun-like stars, massive star fuse hydrogen into helium within their cores. However, massive stars are so powerful that they eventually start fusing helium atoms into even heavier elements! Through fusion, massive stars create heavier elements like carbon, oxygen, silicon, and even iron. These heavier elements form during the later stages of a massive starโ€™s lifetime.

Red Super Giant

Over time, a massive star fuses all the hydrogen at its core into helium. But the massive star does not stop there โ€“ it keeps fusing elements into heavier and heavier ones until a very dense ball of iron forms at its core. As heavier elements replace lighter ones, the core shrinks. At the same time, the outer layers of the star swell, which allows the outermost parts to  become cooler.  As a result, the massive star becomes larger and redder โ€“ a red super giant!

Supernova

A supernova is a big explosion at the end of a massive starโ€™s life. This happens when a red super giantโ€™s core collapses. As the core collapses, the starโ€™s outer layers rapidly blow up in a huge explosion. The explosion scatters the matter from the star out into space โ€“ including all those different elements made through nuclear fusion. The matter may eventually become parts of new stars and planets. You even have atoms within your body that were once in a supernova!

Black Hole

During the death of an exceptionally large massive star (more than ~20 times the mass of our Sun), something special happens. When the starโ€™s core collapses in a supernova, it forms a single point of infinite density. In other words, you have a huge amount of mass in an infinitely tiny point. Because of its great mass, a black hole has a lot of gravity that pulls on all things nearby. There is a boundary around the black hole where nothing can escape the pull, even light! This boundary is called an event horizon.

Neutron Star

Smaller massive stars (~9-20 time the mass of our Sun) do not form black holes. Instead, during the supernova, the starโ€™s core collapses and becomes a neutron star. A neutron star is very small, relative to the original star, but incredibly dense. Scientists believe neutron stars are made mostly of neutrons. Apart from black holes, neutron stars have the highest densities in the known universe.

Study Star Life Cycles with Wild Earth Lab

1. Sun and Star Activity Ideas

Check out my blog post with 13 fun sun and star activity ideas! These activities include everything from crafts to math lessons, and are perfect for science classrooms and homeschooling.

2. Star Life Cycle Worksheets & Handouts

There’s no need to scramble to put together the perfect star life cycle lesson – I’ve already created it for you! This set includes labeled and unlabeled diagrams for practice, informational cards, handouts, and teaching posters.

3. A Complete Sun Unit

Or, if you want even more star and sun materials, you can get the Star Mini Study plus many more lessons in my huge Sun Unit!

classroom handouts and flashcards

Explore more lessons from Wild Earth Lab:

If you enjoyed this post, I know you will love using my environmental science materials in your classroom!


Are you interested in reading more posts about space and earth science? Subscribe or follow Wild Earth Lab using the links below!


References and Further Reading

  1. Harvard & Smithsonian Center for Astrophysics (n.d.). Planetary Nebulas. Available: https://www.cfa.harvard.edu/research/topic/planetary-nebulas
  2. Khan Academy (n.d.). Lesson 1: Life and death of stars. Cosmology and Astronomy Course. Accessed December 19, 2023. Available: https://www.khanacademy.org/science/cosmology-and-astronomy/stellar-life-topic/stellar-life-death-tutorial/v/birth-of-stars
  3. Las Cumbres Observatory (n.d.) SpaceBook (online resource). Chapter 4. Available: https://lco.global/spacebook/
  4. Lippincott, K. (1994). Astronomy: Eyewitness Science. DK Publishing.
  5. Moskowitz, C. (2019). Neutron Stars: Natureโ€™s Weirdest Form of Matter. Scientific American. Available: https://www.scientificamerican.com/article/neutron-stars-natures-weirdest-form-of-matter/

Subscribe, share, and comment:

Posted on — Leave a comment

Build Your Own Food Webs: a creative ecology activity your students will love!

a banner with a picture of animal and plant flashcards on the sidewalk with chalk arrows between them, with the text "science project: let's build a food web! Step-by-step activity directions!"
text that says share this post

Are you searching for an engaging and educational ecology activity to try with your students? Building your own food webs is a fantastic way to study the flow of energy between organisms – all while allowing kids to be creative! Best of all, this is an activity that you can complete outside, making it perfect for homeschool parents and teachers who enjoy having class outdoors! Get ready to inspire your students with this unique and interactive ecology project!

A special note for educators: are you planning to teach this food webs activity? If so, I’ve already created all the worksheets, printable materials, handouts, and directions that you will need. Find these materials in my complete Food Webs Unit โ€“ and you’ll support this blog with your purchase! ๐Ÿ’š

What is a food web?

A food web is a complex network of feeding relationships between organisms in an ecosystem. Energy flows from the organism being eaten to the organism doing the eating. We represent food webs using diagrams with arrows between the organisms. Food web diagrams map the many paths for the movement of energy between organisms.

I wrote a separate blog post in which you and your students can read more about food webs and food chains. It includes lots of diagrams and examples!

What types of organisms make a food web?

Flashcards of animals, plants, and fungi sorted into piles labeled consumers, producers, and decomposers

All the different lifeforms coexisting in an ecosystem form a community. The community is made of many individual, diverse lifeforms – like plants, animals, and fungi – called organisms.

When you build your food web model, it will include many different types of organisms. These organisms fall into three main categories, based on the roles they play in the food web. Knowing the difference between these roles will help you and your students build food webs.

In an ecosystem, you will find the following types of organisms:

1. Producer:

An organism that produces its own food through photosynthesis. Producers use sunlight, water, and carbon dioxide to make their own food. They also need soil nutrients.

Examples: trees and other plants, some plankton, moss, some microorganisms

2. Consumer:

An organism that eats other organisms as food. Consumers cannot make their own food. Consumers can be herbivores, omnivores, carnivores, and scavengers.

Examples: insects, birds, frogs, deer, other animals

3. Decomposer:

An organism that recycles nutrients back into the soil by eating and digesting decayed plant and animal matter and waste.

Examples: mushrooms, some worms, soil bacteria

Make your own food webs activity:

Gather your materials and follow these steps to create your own food webs with your students. You can all work on one big food web together, or each student can make their own mini-food web! There are many possibilities!

Materials

  • Flashcards or pictures of the organisms in an ecosystem (plants, animals, fungi, etc…)
    • Find an easy-to-use set in my food webs unit
    • Or, get a set for an ecosystem of interest (e.g., desert, arctic, forest, etc…)
    • You can also make your own set!
  • Sidewalk chalk
  • A large, paved area outdoors that is free of cars and heavy foot traffic

Step-by-Step Directions

Set-Up:
  1. Sort the organism cards into 3 piles:
    • producers
    • consumers
    • decomposers
  2. Look through your producers pile.
    • This pile represents the food sources for herbivores and omnivores (primary consumers) in your ecosystem.
  3. Look through the consumers pile.
    • Sort these cards further or make a mental note of which organisms are likely to eat plants (herbivores and omnivores) and which organisms are likely to eat animals (carnivores and omnivores).
  4. Research the diets of unfamiliar animals.
    • If students are unfamiliar with some of the animals and their diets, it may help to research the animals online. You can take notes on the backs of the cards if needed.
    • Note: if you’re using my food webs unit, a handout is provided with info on the diets of the included animals!
Build Your Food Web:
  1. Choose your producers.
    • It is easiest to start with one to three producers.
  2. Which consumers eat your producers? These are your primary consumers.
    • Place the primary consumers above your producers and draw arrows to represent the flow of energy from food to eater.
  3. Which consumers eat your primary consumers? These are your secondary consumers.
    • Place the secondary consumers above your primary consumers and draw arrows to represent the flow of energy from food to eater.
  4. Which consumers eat your secondary consumers? These are your tertiary consumers.
    • Place the tertiary consumers above your secondary consumers and draw arrows to represent the flow of energy from food to eater.
  5. Repeat this process as needed, until your reach a consumer that is not eaten by anyone else – this is your top predator!
    • You can make your food web as big or small as you’d like! It could include dozens of organisms or just a few.
  6. Add additional arrows as needed.
    • Food webs can be messy! Many any animals have multiple food sources and are preyed on by multiple predators.
  7. Optional: place any decomposer cards underneath the food web. Decomposers recycle nutrients back into the soil to help producers like plants grow!

Example Food Webs:

A food web made from printed pictures of animals and plants connected with arrows drawn with sidewalk chalk on a sidewalk
An example of building your own food web!

Study Food Webs with Wild Earth Lab:

Of course, you can put together your own food web materials to complete this activity. Or, save time and support my blog when you purchase my food webs unit! The unit includes everything you need to complete this activity plus additional handouts, worksheets, and readings!

Explore more lessons from Wild Earth Lab:

If you enjoyed this post, I know you will love using my other environmental science materials in your classroom!


Are you interested in reading more posts like this? Subscribe or follow Wild Earth Lab using the links below!

Subscribe, share, and comment:

Posted on — Leave a comment

7 Rocks & Minerals Activity Ideas: learning activities to try in your classroom!

child's hand holding a model of a fossil and paintbrush

Wild Earth Lab is supported by readers like you. This post includes links to my own products and affiliate products. If you purchase through links on my site, I may earn a small commission at no additional cost to you.

Rocks and minerals are an important topic in the field of geology. Learning about rocks and minerals can be so fun for both kids and adults. Here are 7 hands-on rocks and minerals activity ideas to try out in your classroom or homeschool.

A note for teachers: if you’re planning to teach rocks & minerals, great learning resources are key to deepening understanding. That’s why I created my complete Rocks & Minerals Unit. It’s packed with hands-on lab activities, thoughtfully crafted visuals, and all the worksheets and handouts you need to study rocks and minerals. Plus, every purchase helps support this blog! โค๏ธ

1. Rock Cycle Model

Try making a model of the rock cycle. This is a popular rock and mineral activity for the classroom! There are many ways to do this – with chocolate, marshmallows, Starburst candies, crayons – the list goes on.

The basic concept is this:

  • Sedimentary Rocks: big solid chunks lightly compacted until they stick together. This can be done by cutting up the material into pieces and then squeezing the pieces together in your hands until they stick together.
  • Metamorphic Rocks: warped under heat and/or pressure, but not enough to fully melt. This is done by briefly warming your material to a moderate temperature in an oven and then applying pressure.
  • Igneous Rocks: fully melted, the re-solidified material. This can be done by fully melting your material in an oven and then allowing it to cool at room temperature.
melted chocolate in white bowl
You can use chocolate to model the rock cycle! Melted chocolate symbolizes molten rock! Photo by Monstera Production on Pexels.com

This activity is great for teaching the basics of the rock cycle before continuing on with the other rocks and minerals activity ideas.

2. Mineral Lab

Minerals are the building blocks of rocks. Geologists can examine minerals for their physical properties and then identify them. A minerals lab is super fun because it involves testing minerals for magnetism, acid reaction, and other unique physical properties! To test for these properties, you will need to make or buy a mineral test kit, such as this test kit (external link).

With a little practice, you and your students can identify common minerals too. Read my separate post here about how to set up your own minerals lab in your classroom. You can also download my Minerals Mini Study, which includes all of the worksheets, handouts, and directions that you’ll need for an awesome mineral lab in your classroom!

The activities in the blog post come from my Minerals Mini Study. Download the mini study with worksheets, handouts, directions, and more.

3. Guided Geology Hike

Are there any national parks or state parks in your area? Some have rangers who will put on guided nature hikes covering many topics, including local geology.

If not, you could also reach out to a local geology expert to join your class or homeschool group on a hike to learn about geology. When I was a graduate student, a homeschool group reached out to me to lead a geology hike like this. We hiked a short way through a canyon and talked about how plate tectonics and flowing water helped shape the area.

4. Make Rock Candy

This is a tasty way to learn about mineral precipitates, which you may know form some of our sedimentary rocks, such as limestone. This activity takes several days, during which you will watch crystals form! You can follow a rock candy recipe, such as this recipe (external link).

5. Rock Identification

Rock ID can be challenging, but it is so rewarding to be able to identify common rocks in your area. Learn about foliation, grain size, rock compositions, textures, and more! If you are looking for a good place to get started with Rock ID, I think you’ll love my Rocks Mini Study. It includes all the printable handouts, worksheets, and directions you will need for an awesome Rocks Lab! Another fun activity to try is Rock ID Bingo – more on this below!

If you are looking to learn how to identify rocks, try out my Rocks Mini Study. It includes all the handouts, worksheets, and directions for a rock ID activity!

6. Play Rock or Mineral Bingo

These are great review games for practicing rock and mineral identification. Each student gets a bingo card with different rocks or minerals. The teacher then reads out the properties of a mystery rock or mineral. The students must figure out which rock or mineral it is, then mark it on the bingo card!

I’ve created these mineral bingo and rock bingo sets (complete with calling cards!) to help you play this game in your classroom:

7. DIY Fossils

Unlike living things, which come and go, rocks stick around for incredibly long periods. This allows rocks to act as time capsules, preserving clues about our planet’s past – fossils! Learn about how fossils form by creating your own fossils (external link).

Bonus: see real fossils up close for inspiration! Look for a geology museum in your area to see collections of amazing and rare gems, minerals, rocks, fossils, and much more! You can also look for gem and mineral show events in your area (external link).

paper dyeing with brown dried leaves
Photo by Paul Seling on Pexels.com
white dinosaur skeleton displayed on a wooden table in a museum
Photo by Ansbert Bignon on Pexels.com

Study Rocks and Minerals with Wild Earth Lab

Many of the rock and mineral activity ideas from this post are found in or go great with my complete Rocks and Minerals Unit! It is a complete set of printable materials including worksheets, handouts, classroom posters, lab activities, and much more!

Explore curriculum from Wild Earth Lab:

If you enjoyed the rocks and minerals activity ideas in this post, I know you will love using my environmental science materials in your classroom!


Are you interested in reading more posts with learning activity ideas? Subscribe or follow Wild Earth Lab using the links below!


Sharing options and discussion for this post:

Posted on — Leave a comment

Science Snack Activity: make a soil horizons parfait!

A banner that says "science snack-tivity soil horizons parfait" with a drawing of a parfait cup

Perhaps you have made a “cup of dirt” from pudding. But you can turn this simple snack into a tasty science activity by creating a soil horizons parfait!

For this activity, you will make a parfait with 6 layers to represent the 6 horizons. This is an entertaining and tasty way to teach your students about soil horizons during a gardening, soil science, or agriculture unit in your classroom.

Background Information: Layers in Soils

Did you know soils have layers? If you viewed a vertical cross section of soil, you would see up to six main layers. Each layer looks different and is made of a unique mixture of sediments and organic matter.

We call the layers โ€œsoil horizonsโ€. Each of the six soil horizons is given a letter: O, A, E, B, C, and R. The upper two horizons, O and A, are called topsoil. Topsoil is rich in organic matter compared to the lower layers. Topsoil is where plants grow, so it is important in agriculture and ecology!  A healthy topsoil promotes healthy plant life.

What are the main soil horizons?

Here are the 6 main horizons, from top to bottom:

  • O Horizon: Decaying organic matter at the soilโ€™s surface
  • A Horizon: Soil rich in both organic matter and coarse sediments
  • E Horizon: Coarse soils, which lost their clay and soluble minerals to downward leaching
  • B Horizon: The โ€œsubsoilโ€; clay and dissolved minerals build up in this layer
  • C Horizon: โ€œParent materialโ€ of soil: pieces of partially weathered rock
  • R Horizon: Hard bedrock beneath the soil

Activity: create your own soil horizons parfait!

Materials
  • Tall, clear cups or glasses
  • Spoons
  • Graham crackers
  • Yogurt
  • Jam
  • Fresh Cut Fruit
  • Granola
  • Paper towels
Directions

Build your own model of soil horizons by making a parfait. Each layer represents a different horizon. Students should add these layers to a tall glass or clear plastic cup.

  1. R horizon:  pieces of whole graham cracker, to represent bedrock.
  2. C horizon:  crumbled gram crackers to represent the soilโ€™s parent material made from partially weathered rock in this horizon.
  3. B horizon:  yogurt, which is smooth and creamy like the fine-grained clay and soluble minerals found in this horizon.
  4. E horizon:  jam, because gritty seeds in jam represent the coarser sands and silts found in this horizon.
  5. A horizon:  fresh fruit, because this horizon is rich in organic matter.
  6. O horizon:  granola, to represent decomposing organic matter like crunchy leaves on the surface of the soil.

Soil Science with Wild Earth Lab

This soil horizons parfait activity comes from my complete Soil Science Unit. The unit is full of many activities like this one for teaching students all about soils.

Explore curriculum from Wild Earth Lab:

If you enjoyed this post, I know you will love using my environmental science materials in your classroom!


Are you interested in reading more posts like this? Subscribe or follow Wild Earth Lab using the links below!


Sharing options and discussion for this post:

Posted on — Leave a comment

Porosity & Permeability: science experiments to try in your classroom!

Banner that says "science activity: porosity vs permeability"

Are you teaching your students the difference between porosity and permeability? While these two properties of soils and rocks are related, they are not the same! And what better way to understand the difference between porosity and permeability than a hands-on lab activity!?

In this lab experiment, compare the porosity and permeability of three sediments: gravel, sand, and clay/silt. These activities are easy to complete with common household items.

You can download the printable directions and worksheets for these lab activities in my porosity & permeability mini study.

In this post, you will learn how to set up a porosity and permeability activity in your classroom. You can also get print-formatted versions of these directions, worksheets, handouts, and classroom posters to use during this lab in my Soil Science Unit!

Pre-lab Activity

Place a small amount of each sediment on three trays. Allow students to examine and touch the sediments. Ask students to consider:

  • Rub the material between your fingers. Describe how it feels. Coarse? Gritty? Fine? Sticky? Stiff? Loose?
  • Describe the material. Can you see individual grains? How large are they? What color(s) do you see?
  • Make a prediction: Which soil sill have the highest porosity? Which will have the lowest porosity?
  • Make a prediction: Which soil sill have the highest permeability? Which will have the lowest permeability?

Gather Your Materials

Gather the following materials for the demo. You will need:

Porosity Lab Activity Materials:
  • Dry gravel (~100 mL)
  • Dry sand (~100 mL)
  • Dry silt or clay (~100 mL)
  • 3 small containers of equal size (e.g., 150 mL beakers)
  • Extra beaker or liquid measuring cup
  • Water
  • Student lab handouts (1 set per student)
Permeability Lab Activity Materials:
  • Dry gravel (at least 100 mL)
  • Dry sand (at least 100 mL)
  • Dry silt or clay (at least 100 mL)
  • Graduated cylinder (200 mL or larger)
  • 400+ mL funnel to sit atop the graduated cylinder
  • 3 filter papers (e.g., pieces of coffee filters)
  • Scissors
  • Permanent marker
  • Beaker or liquid measuring cup
  • Water
  • Stopwatch
  • Student lab handouts (1 set per student)
Don’t forget to download the handouts and worksheets for this lab activity in my Porosity & Permeability mini study

Directions

Porosity Directions:
  1. Pass out the materials to the lab groups.
  2. Demonstrate the method with the gravel: Measure ~100 mL of gravel into a container and gently shake the container so that the surface of the gravel is flat.
  3. Record the total volume of the gravel on the lab worksheet.
  4. Fill a beaker with 100 mL of water.
  5. Slowly and gently, pour the water into the gravel, until the water level reaches the surface of the gravel.
  6. It may take some time for the water to โ€œsoak throughโ€ to the bottom of the beaker. You may need to pour a little water at a time and then wait before pouring some more.
  7. Record the volume of the pore space. This is equal to the volume of water you poured into the gravel.
  8. Students will repeat the procedure with the sand and the silt/clay.
  9. After students collect their measurements, show the students how to calculate the porosity:
Permeability Directions:
  1. Pass out the materials.
  2. Demonstrate the method with the gravel: Balance the funnel on top of the graduated cylinder and place a filter paper into the funnel to cover the stem hole.
  3. Fill the funnel approximately half way up with gravel. Do not fill the funnel all the way up to the top.
  4. Tap the funnel lightly to make the surface of the gravel flat.
  5. Use the marker to mark the level of the surface of the gravel on the funnel.
  6. Put 200 mL of water in the beaker or measuring cup.
  7. Start the stopwatch as you pour all 200 mL of water over the gravel.
  8. At regular intervals, record the time and the volume of water in the graduated cylinder.
  9. The water may pass through some sediments very rapidly. You may only have time to record a few volume measurements before the water is done passing through.
  10. After students finish the procedure with the gravel, they will repeat the procedure with the sand and the silt/clay. Fill the funnel to your previous mark with the other sediments.
  11. Look at the recorded data. Which sediment did the water pass through most quickly? This soil has the highest permeability.
Measure porosity and permeability with my set of lab activity materials.

Reflection Questions

  1. In your own words: what is the difference between porosity and permeability?
  2. What are some possible sources of error in the porosity lab?
  3. What are some possible sources of error in the permeability lab?
  4. During rain, water seeps down into the soil through its pores. Which soil will water pool on top of first: a soil with high permeability or a soil with low permeability. Which size grains would this soil likely have a lot of?
  5. You are potting a plant that needs a soil with high porosity. What size grains might help give a soil a high porosity?

This lab comes from my Soil Science Unit!

Your students will love the illustrated learning materials, plus you’ll support Wild Earth Lab with your curriculum purchase!

Explore more curriculum from Wild Earth Lab:

If you enjoyed this post, I know you will love using my environmental science materials in your classroom!


Are you interested in reading more posts like this? Subscribe or follow Wild Earth Lab using the links below!


Sharing options and discussion for this post:

Posted on — Leave a comment

Classroom Demo: Soil Organic Matter and Hydrogen Peroxide! Wow your students with this surprising reaction

A banner that says "classroom science demo: soil organic matter reaction" with a picture of some soil in dishes and a clipboard

Are you studying soil science, gardening, or agriculture with your students? If so, you have probably learned that soil is a mixture of sediments and organic matter. But different soils have different amounts of these two ingredients. A soil’s organic matter content is important, especially when considering a soil’s ability to support plants.

In this demo, qualitatively compare the organic matter content of two soils. You can test the soil samples for organic matter by putting hydrogen peroxide on the soils and watching for a reaction (bubbling). More bubbles = more organic matter!

In this post, you will learn how to set up a soil organic matter demo in your classroom. You can also get print-formatted versions of these directions, worksheets, handouts, and classroom posters to use during this lab in my Soil Science Unit!

Gather Your Materials

Gather the following materials for the demo. You will need:

  • ~2 Tbsp (15 mL) samples of 2 types of soil:
    • Soil A: compost
    • Soil B: a soil with less organic matter (look for a light-colored soil that has few plants growing in it).
  • 3 small beakers
  • Laboratory personal protective equipment (gloves, safety goggles, lab coats)
  • 6% hydrogen peroxide (available at pharmacies)
  • Eyedropper
  • Student lab handouts (1 set per student)
You will find worksheets, printable directions, and a materials list for this demo in my Soil Science Unit.

Safety Notes

  1. Read and comply with all safety information and warnings on the hydrogen peroxide bottle. Before starting this demo, ensure all participants are prepared to safely handle hydrogen peroxide.
  2. Ensure all participants and observers wear the appropriate personal protective equipment (gloves, lab coat, safety goggles).
  3. Adult supervision is required at all times during this activity.

Directions

  1. Do not tell students where soil samples A and B came from until after the lab. Explain that the two soil samples contain different amounts of organic matter. Hydrogen peroxide reacts with the organic matter in the soil, making bubbles or fizzing sounds.
  2. Place ~2 Tbsp (15 mL) of soil A into a beaker
  3. Place ~2 Tbsp (15 mL) of soil B into another beaker
  4. Pass around the soils. Students should observe each soil and describe it.
  5. Put on personal protective equipment.
  6. Ask your students to gather around and watch as you squeeze an eyedropper full of hydrogen peroxide onto soil A and watch/listen for bubbles and fizzing.
  7. Repeat the previous step with soil B. Which soil reacted more?
  8. Finally, reveal that one of these samples came from a compost pile. Can students guess which one?
In this classroom demo, observe how soil organic matter reacts with hydrogen peroxide.

Reflection Questions

  1. Describe soil A (color, texture, feel)
  2. Describe soil B (color, texture feel)
  3. What happened when your instructor added hydrogen peroxide to soil?
  4. Did one soil react more than the other? Which soil reacted the most?
  5. Hydrogen peroxide reacts with organic matter. What does this tell you about soils A and B?

This lab comes from my Soil Science Unit!

Your students will love the illustrated learning materials, plus you’ll support Wild Earth Lab with your curriculum purchase!

Explore more curriculum from Wild Earth Lab:

If you enjoyed this post, I know you will love using my environmental science materials in your classroom!


Are you interested in reading more posts like this? Subscribe or follow Wild Earth Lab using the links below!


Sharing options and discussion for this post:

Posted on — 2 Comments

Soil Textures Jar Lab: set up this easy science experiment in your classroom!

banner with text "classroom science experiment: soil texture jar test" and a picture of a bottle of soil and water

Are you studying soil science, gardening, or agriculture with your students? If so, there is nothing quite like a soil textures jar lab to learn about sand, silt, and clay in soils! In this lab activity, students observe the distribution of grain sizes in soil samples, then classify the soils using the soil textures triangle.

If a scientist wants to know a soilโ€™s texture, then they need to figure out the proportion of sand, silt, and clay in the sediment part of the soil. But this can be a challenge. How do you separate and measure all those tiny grains? Soil scientists use a few different methods for doing this.

This most basic method, the “jar test”, is easy to do in a classroom setting. Shake up soil and water in a jar. Then, watch the grains settle over time. Larger grains settle faster than smaller ones.

This jar test lab activity is perfect for teaching your students about soil textures.

In this post, you will learn how to set up a soil textures jar test lab in your classroom. You can also get print-formatted versions of these directions, worksheets, handouts, and classroom posters to use during this lab in my Soil Textures Mini Study!

Gather Your Materials

Gather the following materials for the lab. Each lab group will need:

  • 2 or 3 soil samples: collect different soils from 2 or 3 places. Avoid soils with a very high organic matter content, such as compost. Bring at least 300 mL of each soil per lab group so that you have some extra in case mistakes are made.
  • Sieve
  • Tray
  • 2 or 3 straight-sided, tall bottles (~ 500 mL)
  • Water
  • Dispersing agent: borax or dish detergent (optional)
  • Teaspoon
  • Permanent marker
  • Time keeping device (e.g., smartphone)
  • Ruler
  • 2 or 3 sticky notes
  • Student lab handouts (1 set per student)
Find all the materials for this science experiment in my Soil Textures Lab Activity mini study.

Set-Up

  1. This lab involves lots of waiting. You must collect certain measurements hours and days apart โ€“ make sure to plan accordingly.
  2. Before starting, it may help to sieve your soil samples to remove any large gravel, cobbles and roots. To do this, place the soil into a sieve. Select a sieve with openings no smaller than 2 mm. Gently shake the sieve over the tray. The soil will fall through while the larger gravel, cobbles, and roots will remain in the sieve. If you do not have a sieve, you can also spread the soil out on a tray and pick out any especially large gravel, cobbles, and roots by hand.
  3. Borax will help the clay settle. If you do not have any, dish detergent can be used as a substitute.
  4. Once students begin the procedure, the bottles should not be moved. Select an area for this lab where the bottles can sit undisturbed for a few days.
Lab procedure video for a soil textures science experiment for classrooms

Directions

  1. Pass out the materials.
  2. Demonstrate the method with the first soil. Fill a bottle about one third of the way with a soil sample.
  3. Gently tap or shake the bottle until the surface of the soil is flat. Then, use a permanent marker to mark the level of the soil on the outside of the bottle. Label the mark โ€œinitialโ€.
  4. Fill the rest of the bottle with water.
  5. Optional: add 1 tsp (5 mL) of the dispersing agent.
  6. Tightly cap the bottle.
  7. Shake the bottle vigorously for 5 minutes.
  8. The instant you stop shaking the bottle, set it on the counter and start a stopwatch. Do not move or disturb the bottle once the stopwatch starts.
  9. Sand takes about 1 minute to settle. After 1 minute, mark the top of the sand layer on the bottle with a marker. Label this mark โ€œsandโ€. Measure the thickness of the sand layer with the ruler and record it on the student handout.
  10. Silt takes 2 hours to settle and clay takes at least 48 hours to settle. Students should write the times these measurements should be taken on a sticky note and place it on the bottle. Depending on the length of your class period, you may need to measure and record the thickness of the silt layer for your students in 2 hours.
  11. Students should then set up their second (and third) bottle(s) with the other soil sample(s) by repeating all the above steps.
  12. Students will measure and record the thickness of the clay layer at least 48 hours later. The water may still look murky above the settled sediment. This is because a small amount of very fine clay is still in suspension. The final soil level may be somewhat less than the initial soil level. This is because shaking and settling changes a soilโ€™s structure and amount of pore space.
  13. Once students collect all  of the measurements, show the students how to calculate the percentages of sand, silt, and clay in each soil sample. For example:
Download my printable directions and worksheets for this soil textures lab activity

Reflection Questions

  1. Find each of your soil samples on the soil textures triangle (external link). What is the name of each of your soils?
  2. In your own words, define soil texture.
  3. A soil is made of 35% clay, 40% silt, an 25% sand. What type of soil is it?
  4. A soil is made of 10% clay, 5% silt, and 85% sand. What type of soil is it?
  5. You are selecting a soil to plant a cactus in. The cactus needs a fast-draining soil, so you are looking for a soil with plenty of coarse sediments. Which soil is a better choice: a sandy loam or a silt loam? Why? (See the soil texture triangle).
  6. You are choosing a place to dig a hole in your yard to build a fish pond. You do not want the water to drain out of the pond into the soil, so you are looking for a soil with plenty of fine sediments. The left side of your yard is a silty clay and the right side of your yard is a loamy sand. Where would you build the pond? Why? (See the soil texture triangle).
Public domain image courtesy of:
USDA Natural Resources Conservation Service

This lab comes from my Soil Science Unit!

Your students will love the illustrated learning materials, plus you’ll support Wild Earth Lab with your curriculum purchase!

Explore more curriculum from Wild Earth Lab:

If you enjoyed this post, I know you will love using my environmental science materials in your classroom!


Are you interested in reading more posts like this? Subscribe or follow Wild Earth Lab using the links below!


Sharing options and discussion for this post: