Posted on — Leave a comment

Fun Moon Phases Activity with Cookies

making the phases of the moon from cookies
text that says share this post

If you are teaching the phases of the moon, this popular snack activity with cookies is sure to be a crowd-pleaser! This yummy and fun activity is sure to make your lunar phases lesson a memorable one. In this post, you’ll find the materials list and directions for this activity, plus, I’ve created a free printable worksheet for this activity!

A note for teachers:ย If youโ€™re an educator planning toย teach the moon’s phases, great learning resources are key to deepening understanding! I think you and your students will love my printable Moon Mini Study, which you can also find within my complete Night Sky Unit (plus youโ€™ll support my blog with your purchase! โค๏ธ)

Moon Phases: background information

Earth has one big, bright moon โ€“ The Moon. Though it shines brightly at night, the Moon does not make its own light; it reflects light from the Sun. The Moon orbits Earth, just like Earth orbits the Sun. As it circles us, the Moonโ€™s shape seems to change. These changing shapes, called phases, make the Moon appear to grow and shrink each month. In reality, the Moon doesnโ€™t change size โ€“ we just donโ€™t see the part thatโ€™s not lit up by the Sun.

For this activity, your students will learn 8 phases of the moon. These phases are:

  • New Moon
  • Waxing Crescent
  • First Quarter
  • Waxing Gibbous
  • Full Moon
  • Waning Gibbous
  • Third Quarter
  • Waning Crescent

Every 29.5 days, the moon cycles through all of these phases.

Phases of the moon diagrams

Materials

For the phases of the moon cookie activity, each student needs:

  • 8 Chocolate & crรจme sandwich cookies (e.g., Oreos)*
  • Spoon and/or toothpick for scraping/removing crรจme
  • A printed copy of the worksheet – available on my free resources page

*To save on materials, it is possible to do this activity with 4 cookies per student if students use both halves of each cookie and carefully split the creme filling to create all phases.

Directions

  1. Open up a cookie so that the crรจme is all on one side.
  2. Scrape away and remove enough crรจme from the open cookie to
    create a phase of the moon.
  3. Repeat until youโ€™ve created all of the phases of the moon.
Chocolate creme-filled sandwich cookies making the phases of the moon set on a kids' worksheet
Making the phases of the moon from cookies!

Free printable worksheets for this activity

Current Email Subscribers: for your convenience, I made a printable version of the directions and a student worksheet for this activity. It’s available on the free resources page of my website (the link was in a welcome email sent when you subscribed – if you lost the link, follow the directions at the bottom of this page).

If you’re new here: consider joining my email community! My email subscribers:

  • Can access dozens of free science & nature printables on my free resources page! (including the worksheet for this activity!)
  • Receive a monthly email with a round-up of new activity ideas, projects, and teaching inspiration from the blog!
  • Get occasional updates about seasonal sales, new science units released in my shop, and new free resources!
  • Save on a purchase in my shop with a welcome discount code!
moon phases sandwich cookie (e.g., Oreo) activity worksheets

What’s Next?

Looking for another space-themed snack activity for the classroom? Try this constellation snack activity using pretzel sticks and mini marshmallows!

constellation flashcards and constellations made from pretzel sticks and marshmallows

Study the moon with Wild Earth Lab!

Thereโ€™s no need to scramble to put together the perfect set of moon lesson materials ย โ€“ Iโ€™ve already created it for you! My printable moon mini study includes diagrams, worksheets, and activities for learning all about the moon and its phases!

Or, find all the moon materials plus more materials on constellations, eclipses, and more in my complete Night Sky Unit!

Explore more lessons from Wild Earth Lab:

If you enjoyed this post, I know you will love trying my other printable science and nature units in your classroom too!


Are you interested in reading more posts like this? Subscribe or follow Wild Earth Lab using the links below!


Subscribe, share, and comment:

Posted on — 1 Comment

Build Your Own Solar Eclipse Viewer Box: a step by step guide!

a banner that says "how to build your own solar eclipse viewer box" with a picture of an eclipse and a diagram of a viewer box

If a solar eclipse is happening where you live, make this simple solar eclipse viewer from household materials. You cannot look directly at the Sun because it will damage your eyes. However, you can view a solar eclipse using a homemade eclipse viewer box. You can use this viewer box to watch a partial or annular solar eclipse, or track the progress of a total solar eclipse before and after totality.

Photo by Drew Rae on Pexels.com

Before we begin, you may ask: what is happening during an eclipse?

As you know, the Earth is orbiting the Sun, and the Moon is orbiting the Earth. Every once and a while, the Sun, Moon, and Earth all line up and something very special happens. A solar eclipse happens when the Moon passes between the Earth and the Sun. During a solar eclipse, the Moon totally or partially blocks out the Sun during the daytime.

Try my Solar Eclipse Mini Study – with worksheets, activity guides and more.

Materials

  • Cardboard box (tip: longer box = larger projected image!)
  • Sheet of white printer paper
  • Box cutter
  • Tape
  • Aluminum foil
  • Scissors
  • Pin
Download a print out version of these directions to build your own solar eclipse viewer box.

Set Up

Download my printable version of these directions to build a solar eclipse viewer box.

  1. Have an adult cut a head-sized hole into the bottom of the cardboard box.
  2. Use tape to attach a white sheet of paper to one side of the box.
  3. In the opposite side, towards the top of the box, have an adult cut a small rectangular opening.
  4. Cut a piece of aluminum foil that is slightly larger than the rectangular opening you cut.
  5. Keeping the foil completely flat, tape the foil over the rectangular opening.
  6. Use the pin to make a tiny hole in the center of the aluminum foil.
  7. Close the top of the box and tape it shut.

Using Your Eclipse Viewer Box

  1. Stand with your back to the Sun. Never look directly at the Sun and never face the Sun while using the viewer. Do not look at the Sun through the pinhole.
  2. Hold the box with the head hole facing towards the ground. The aluminum foil should face the Sun.
  3. Facing the piece of paper, place the top of your head up into the head hole. Do not put your whole head all the way up into the box, as this will block the incoming light.
  4. Look up at the white sheet of paper.
  5. With the help of a friend, adjust your position until you see the projection of the solar eclipse on the paper.

Study Solar Eclipses with Wild Earth Lab!

You’ll find the printable directions for this activity, solar eclipse diagrams, and worksheets in my Solar Eclipse Mini Study:

Try my Solar Eclipse Mini Study – with worksheets, activity guides and more.

Explore curriculum from Wild Earth Lab:

If you enjoyed this post, I know you will love using my environmental science materials in your classroom!


Are you interested in reading more posts like this? Subscribe or follow Wild Earth Lab using the links below!


Sharing options and discussion for this post:

Posted on — 1 Comment

8 Plate Tectonics Activities – try these project ideas in your classroom!

Plate tectonics classroom learning materials
text that says share this post

Plate tectonics is an important concept for students to understand. To help you get started studying plate tectonics in your classroom, I’ve put together this list of eight engaging and hands-on plate tectonics activities and projects to try out in your classroom this year!

Before we dive into these fun tectonic plate activities, let’s review the basics. The theory of plate tectonics is a scientific theory central to the field of geology. This theory explains that the surface of the Earth is broken into large plates that are slowly moving. These plates slide past and over one another. Their motion gradually changes the appearance of Earthโ€™s landmasses and oceans over time. Plate movement also causes earthquakes and volcanic eruptions along plate boundaries. All types of geological phenomena can be tied back to plate tectonic motion!

A note for educators:ย If youโ€™re an educator planning toย teach plate tectonics, try my complete Plate Tectonics Unit! It includes all the printable worksheets, templates, and visual aids you’ll need for studying plate tectonics (plus youโ€™ll support my blog with your purchase! โค๏ธ)

Try building this paper model of Earth’s interior, from my Plate Tectonics Unit.

1. Edible layers of the Earth

Make a model of the layers of the Earth using food! Build an edible core, mantle, and crust! There are many possibilities for foods to use. For example, you could use pancakes, fruit, or frosting to create 2D circles to form the core, mantle, and crust.

For a non-edible alternative, try out my layers of the earth printable model templates in my Plate Tectonics Unit.

2. Pangea puzzle

Print out a world map and cut out the continents. Try to figure out how the continents might roughly fit together to form the supercontinent of Pangea.

You can also find an oceans and continents printable coloring page on my free resources page. My email newsletter subscribers can access my full free resources collection.

oceans and continents coloring printable - an outline of a map of the world with boxes underneath to create a legend

3. Plate boundaries with sandwich cookies

black round cookies on white surface
Photo by Anshuman Mohapatra on Pexels.com

Create a model of the three main boundary types using sandwich cookies. Remove the top layer of the sandwich cookie (lithosphere), break it in half, and place it back on top of the crรจme (asthenosphere), arranged as a boundary type. This is a popular classroom activity, and there are many free online guides for this activity (e.g., this one from GeographyEducation.org – external link)

4. Identify plate boundaries

Students can plot locations of earthquakes and volcanic activity using a list of coordinates and a map of Earth. This can help them locate plate boundaries, especially along the Ring of Fire. First, read a blog post about different types of tectonic plate boundaries. You may also wish to print out plate tectonics boundary diagrams, such as the ones found in my Plate Tectonics Unit.

boundary type diagrams
Find these plate boundary diagrams and more in my complete Plate Tectonics Unit.

5. Volcano model

volcano diagrams and classroom handouts
Learning about volcanoes? You’ll love the volcano printables within my complete Plate Tectonics Unit.

Build a model of a volcano and create an eruption using baking soda and vinegar. Discuss the tectonic plate boundary types where volcanoes are typically found (e.g., along convergent boundaries with subduction). Expand your volcano learning by reading about the different types of volcanoes in a blog post.

6. Seafloor age

Read about how scientists determine the age of the seafloor using its magnetic properties (external link; Earth Observatory of Singapore). Then obtain a map showing the seafloor age (e.g., from the National Oceanic and Atmospheric Administration website – external link). See if students can use it to determine the locations of divergent boundaries โ€“ i.e., where new oceanic crust is forming by looking at the map.

7. Earthquake engineering challenge

Use toothpicks and marshmallows to design structures. Then simulate an earthquake by placing the structures on a jiggling surface. Try different structures to determine which designs hold up best in simulated earthquakes.

8. Study plate tectonics with Wild Earth Lab

Take your learning to the next level with my complete Plate Tectonics Unit – it has everything you need to teach the Theory of Plate Tectonics in your classroom. It includes worksheets, posters, activities, handouts, and flashcards – all featuring my watercolor science diagrams!

Recommended products

Explore more science units from Wild Earth Lab:

If you enjoyed these plate tectonics activities, I know you will love using my environmental science materials in your classroom!


Are you interested in more activity ideas like these? Subscribe or follow Wild Earth Lab using the links below!


Sharing options and discussion for this post:

Posted on — 2 Comments

10 Nature-inspired art projects for kids to try in your classroom!

A variety of brightly-colored art projects for kids laid out on a wooden table. Projects shown include animal masks, phenology wheels, color wheels in nature, resistance watercolor landscapes, textures in nature, scratch art, one-point perspective forests, and oil pastel planets on black paper!

Wild Earth Lab is supported by readers like you. This post includes links to my own products and affiliate products. If you purchase through links on my site, I may earn a small commission at no additional cost to you.

Today, I wanted to share with you some of my favorite nature art projects from my recent art camp, so that you can try them with your students too! These educational art projects will help students use art as a lens for learning about nature and science – all while trying new art mediums and creating beautiful masterpieces! I hope these nature art projects for kids bring joy to your classroom!

photograph of blank sketchbook and paint brushes

1. Nature’s color wheel

For this nature art project, students create their own color wheels – with a twist. Instead of drawing blotches of each color, have students draw things from nature that are each color of the rainbow. Start with a short brainstorming session as a class. Then, students draw their own color wheels with one thing from nature for each color.

This activity is also great for introducing the concept of biodiversity. The reason we have so many different colors of animals, plants, and flowers in nature is that we have many unique species! Teach students more about biodiversity and colors in nature with my Colors in Nature Activity Pack.

What goes great with nature art projects? Of course my Colors in Nature Activity Pack!

2. Trees with 1-point perspective

Ask students to sit in a circle around the base of a tall tree. Observe how the trunk appears narrower higher up. Then, show students how to use 1-point perspective to create the image of a tall tree or trees viewed from below.

As a bonus, teach your students about forest ecology and the symbiotic relationships of trees when you introduce this art project! It will add another layer of depth to this project and you might even learn something new too! Find my lesson plans for forests and trees below:

3. Animal masks

Why mess with a classic? Students can draw and cut out masks of their favorite animals.

Start by drawing a line down the middle of the paper and discussing symmetry. Next, have students line up the center of the paper with their noses and mark where their eyes should go, with the help of a classmate or teacher. Then, students can draw the animal’s face around the eyes and color it in with their art supplies of choice.

If you prefer printable mask templates, check out my osprey and owl mask templates.

4. Phenology wheels

Phenology wheels help us observe and connect with nature throughout each month of the year. Use a printed phenology wheel template for students or use a compass/string and a ruler to draw a circle and divide it into 12 sections – one for each month. You can also use a light wash of watercolor to create stunning gradient backgrounds for your phenology wheels.

Ask students to think of things they’ve seen in nature during the current month. Consider plants, seasonal changes, types of animals, animal behaviors, weather, and more. Fill out the current month, then send students home with the phenology wheel so they can keep adding to this nature art project during the rest of the year!

I like this free phenology template from the Montana Natural History Center and this one from the Bureau of Land Management too. There are also tons of other phenology wheel templates around the web.

5. Textures in nature

Practice drawing different textures using things from nature. Print out close-up images of bark, fur, scales, insect wings, shells, etc… or better yet, head out into nature and examine natural things up close (with the exception of wildlife, of course!).

Have students draw 4-6 different observed textures. Ask them to consider how their shading, linework, pressure, and color choices help to create the appearance of different textures.

6. Watercolors for creativity

This activity is a great way to practice letting go of rigid expectations for our art. This can be especially beneficial for anyone who tends to become frustrated when their drawings don’t turn out the way they intended.

First, have students use bright colors to create abstract watercolor blotches on a piece of paper. Once the paint dries, use a black pen to turn the blotches into wildflowers, plants, or other images. This is a similar idea to cloud watching and finding images in the clouds. Encourage students to “find” images in the abstract blotches rather than trying to force the blotches to become a desired form. Students will use the pen to accentuate images found within the abstract painting.

Encourage students to apply this technique in their artwork in general – especially when working with mediums that we cannot easily erase or undo, such as carving, colored pencils, and watercolors. Think about ways we can turn “mistakes” into part of the drawing, rather than starting over or giving up.

Need watercolor painting supplies and instructions? It may help to try a beginner-friendly watercolor art kit.

7. Resistance watercolors & mountain landscapes

It has been said that mountains are like the water towers of the world – they collect huge amounts of snow through the winter and then fill our streams and rivers with snowmelt in the spring.

Reflect on mountains’ important role in the water cycle while painting mountains with watercolors – but with a twist! Use crayons first to make a part of the drawing – e.g., snowcapped peaks, the sun over the mountains, a river flowing down from the mountains, etc… Then, paint over the crayon with watercolor. The wax from the crayons repels the watercolors – creating a cool, mixed-media effect!

You can teach your kiddos the basics of watercolors with a kids’ watercolor art kit. And if you want to go the extra mile and learn all about the water cycle while completing this craft, try out my Water Cycle Lesson:

8. Drawing spheres to make planets, moons, and suns

Space provided the building blocks for planet Earth. Similarly, 3D shapes provide the building blocks for much more complex images in art! Learning to draw and shade simple 3D shapes can help us become better artists.

Teach students how to trace a lid and shade a circle to make it look like a 3D sphere. Then, use oil pastels to draw planets, moons, suns, or other space objects on black paper. Your students will love the way these turn out!

Best yet, all you need is oil pastels and black paper to complete this art activity!

9. Scratch-art for nocturnal critters and nighttime

Teach students about nocturnal animals. Then draw your favorite nocturnal animals on scratch art boards. Owls, bats, raccoons, and moths are all great options.

Scratch-art sheets are the perfect medium for drawing nighttime scenes because you start with a dark canvas and then scratch the black coating off with a stylus to reveal a lighter color beneath. Scratch-art is also a great medium for underwater scenes, outer space, and geometric pattern work.

You can also learn more about nocturnal, diurnal, and crepuscular animals with my desert ecosystem mini study!

10. Picture charades

pexels-photo-8923942.jpeg

Picture Charades is always hilarious, fast-paced fun. To set up, pick a theme, then write words or common phrases related to that theme on little pieces of paper to put in a hat. For example, if the theme is “wildlife”, you could write down frog, butterfly, deer, snake, eagle, etc…

Then, divide the class into two groups. Each group sends one “illustrator” to the front of the room. The illustrators take one piece of paper from the hat and look at it together. When you say “go”, the two illustrators draw on the whiteboard while their teams guess. The illustrators should be silent and should not write any letters or words. The first team to correctly guess the word/phrase wins the round. Then, each team sends up a new illustrator. Repeat until everyone has taken a turn drawing, or for as long as desired.

Picture charades are a wonderful activity for taking a break in between more structured art projects. It provides a silly way to make art while moving around and having a laugh.

Picture Charade Ideas

Wildlife: frog, butterfly, deer, snake, eagle, robin, worm, rabbit, wolf, fish, bee, and skunk.

Forest: pine tree, pinecone, leaf, root, berries, vine, owl, fox, squirrel, bush, branch, and acorn.

Ocean: shell, seagull, wave, jellyfish, starfish, shark, seaweed, bubbles, beach, sand, dolphin, and sea turtle.

Pond: lily pad, algae, cattail, frog, tadpole, fish, dragonfly, duck, goose, water strider, turtle, and heron.

Explore units from Wild Earth Lab:

If you enjoyed the nature art projects in this post, I know you will love using my nature-inspired classroom units!


Are you interested in more nature activities and project ideas? Subscribe or follow Wild Earth Lab using the links below!


Sharing options and discussion for this post:

Posted on — Leave a comment

10 Waterbird and waterfowl activities for kids to try in your classroom!

bird masks and the text "waterfowl and waterbirds activity roundup!"

Waterfowl and other waterbirds are some of the best wildlife to go view with kids in wetlands and other natural areas, regardless of your location. If you are planning a waterfowl field trip – or a whole waterfowl and waterbird unit – this waterbird & waterfowl activities list is the place to start!

In case you are wondering, waterfowl are ducks, geese, and swans – birds in the biological order Anseriformes. Meanwhile, “waterbirds” is a more general term. Waterbirds refers to a large group including waterfowl and other water-loving birds. This includes wading birds (e.g., herons, egrets, cranes), shore birds (e.g., sand pipers, plovers), as well as loons, grebes, coots, cormorants, and more!

Try out some of these waterbird and waterfowl activity ideas with your class!

1. Waterfowl Origami

Fold an origami crane, swan, or duck. Or all three! Here are a few helpful online tutorials:

  • The National Crane Foundationโ€˜s instructions for folding Origami Cranes โ€“ with printable directions and a video!
  • Fold an Origami Swan โ€“ with this video from Origami Plus โ€“ Easy Origami Tutorials on YouTube!
  • How to Fold an Origami Duck โ€“ with this easy tutorial from WikiHow

2. Birdwatching

Go on a birdwatching adventure at a local wetland or lake. Bonus: before you head out, print out a species checklist of local waterfowl and waterbirds!

Here are a few online resources to help you begin birdwatching like a pro!

Photo by Mike on Pexels.com

3. Bird Stories

Read a childrenโ€™s book featuring waterfowl! Possibilities include โ€œMake Way for Ducklingsโ€ by Robert McCloskey and โ€œThe Trumpet of the Swanโ€ by E. B. White.

Here are some websites that put together lists of bird-related books:

Photo by Karolina Grabowska on Pexels.com

4. Pond Projects

Learn more about waterbird habitats! Try out these pond activities. Or, check out complete my Pond Ecology Unit!

5. Bird Beaks

Try a bird beak lab โ€“ use different โ€œbeaksโ€ (e.g., chopsticks, tweezers, slotted spoon), to pick up different โ€œfood sourcesโ€ (pasta, seeds, peas). See which beak is the best at โ€œcatchingโ€ each food.

There are lots of versions of Bird Beaks Labs around the web. Here are a few good ones:

This bird beaks lab activity comes from my Waterfowl and Waterbirds Unit! Perfect for learning about animal adaptations and natural selection!

6. DIY Duck Calls

Learn how to create a simple duck call. Then listen to recordings of the different sounds ducks make. Can you imitate any of them?

Here are a few examples of easy DIY duck calls to get you started:

Photo by Billel Moula on Pexels.com

7. Swim like a swan!

Experience swimming like a swan (or duck, or grebe…)! Grab a pair of swimming flippers (aka snorkeling fins) and head to a local pool or swimming area.

Bonus: toss some diving rings and practice diving under the surface of the water like a diving duck to retrieve them!

8. Duck Masks & Art Projects

Do a waterbird art or writing project! Learn to draw or paint a waterbird from your area. Write a poem about your favorite waterbird! Decorate a duck mask! Write a short story. Sit by a wetland habitat as you sketch, draw, or nature-journal!

These duck masks are one of the many activities in my Waterfowl and Waterbirds Unit!

9. Be a Habitat Helper

Volunteer to help clean up waterbird habitat in your local area. Research local conservation groups to find out about park and natural area clean-up days in your community.

grey heron bird on wetland
Photo by Tom Fisk on Pexels.com

10. Study Birds with Wild Earth Lab

Try out my Waterfowl and Waterbirds Unit in your classroom! It’s got lots of activities and all the worksheets, handouts, decorations, and guides you will need for a wonderous waterbirds unit in your classroom or homeschool!

Explore curriculum from Wild Earth Lab:

If you enjoyed these waterfowl activities, I know you will love using my environmental science materials in your classroom!


Are you interested in more nature activity ideas? Subscribe or follow Wild Earth Lab using the links below!


Sharing options and discussion for this post:

Posted on — 2 Comments

Tree Anatomy: the parts of trees and their functions

a banner with pictures of trees that says "Let's learn about tree anatomy"

In this post, we will examine overall tree anatomy and the key parts of a tree. Then, we will peek inside the tree to examine the layers of a tree’s trunk and their functions.

A special note for educators: Are you planning to teach your students about trees? I offer a complete Trees Unit as well as a Forest Ecology Unit. And they are both found within my discounted Forest Bundle. I know your students will love the beautiful diagrams and hands-on activities โ€“ and you’ll support this blog with your purchase! โค๏ธ

Recommended products

Overall Tree Anatomy

We can think of trees as having three main parts. Let’s take a look at each.

  1. Roots are the underground parts of a tree that take up water and dissolved minerals. They also help anchor the tree to the soil.
  2. The trunk is the main woody stalk of a tree which supports all other branches.
  3. The crown is the top portion of a tree. It includes the branches and leaves or needles extending from the main trunk. The crown of a tree will look quite different in different types of trees. Picture the crown of a deciduous tree, conifer tree, or palm tree. Let’s take a closer look at the parts of the crown:
    • A branch is any woody stalk extending from the main trunk.
    • The leavesย  are parts of a tree that produce the treeโ€™s food through photosynthesis. In deciduous trees, leaves are broad and flat, and fall off the tree at the end of each growing season.
    • The needles are the leaves of a coniferous tree, which produce the treeโ€™s food through photosynthesis. Needles do the same job as broad, flat leaves but stay attached to the tree throughout the entire year.

Tree Trunk Anatomy

Inside a human body, you will find different organs: a heart, intestines, lungs, kidneys, etc. Just like humans, trees have different organs inside their trunks too. The trunk of a tree is made up of several layers, each performing a different function. Let’s take a look.

The anatomy of a tree trunk coloring activity for kids to learn about tree science
brown tree log
Photo by Pixabay on Pexels.com
  1. Barkย is the rough, protective outer coating. Bark helps protect the tree from insect and fungi invaders.
  2. The phloem underlies the bark. The phloemโ€™s function is to transport sugars. Sugars form in the leaves during photosynthesis, and the phloem moves the sugars to other parts of the plant where they are needed for growth.
  3. The cambium is a thin layer of dividing cells between the xylem and phloem. This is where secondary (outward) growth occurs. In temperate climates, the most growth happens during the summer. This is why tree rings form.
  4. Theย sapwoodย underlies the cambium. The sapwood is the living part of theย xylem,ย which actively moves water upwards through the tree. Water is drawn up through the ground via the treeโ€™s roots. Water leaves the tree through tiny pores called stomata in the leaves, in a process called transpiration. The xylem grows from the cambium – we can see tree rings in the xylem.
  5. The heartwood is old, inactive xylem tissue. Heartwood no longer has living cells and does not move water. Heartwood provides structural support. Both living and dead xylem parts (sapwood and heartwood) contain tree rings that formed each year as the tree grew inwards from the cambium.
  6. The pith is at the very center of the tree trunk and plays a role in the movement of nutrients. In older trees the pith is often very tiny or diminished, relative to the size of the heartwood.

Free Tree Anatomy Materials:

My email newsletter subscribers can access my full collection of free learning resources. Sign up today to access all the freebies, including these:

  1. Tree Trunk Anatomy Coloring Activity:

2. Print this free tree anatomy poster.

Wild Earth Lab’s Tree Teaching Materials

If you enjoyed this post and the freebies, I know you will love the Tree Unit and my other units too!

Explore more units from Wild Earth Lab:

I know you will love using my environmental science materials in your classroom!


Are you interested in reading more posts like this? Subscribe or follow Wild Earth Lab using the links below!


Sharing options and discussion for this post:

Posted on — 1 Comment

Deciduous vs Coniferous Trees: differences between, examples, and learning activity!

banner of a hand holding a pinecone with the text "let's learn about coniferous and deciduous trees"
text that says share this post

Trees are perennial plants with long, woody trunks. Trees of temperate latitudes are often grouped into two main categories: deciduous trees that lose and regrow their leaves each year, and coniferous trees that stay green year-round! Let’s take a closer look at deciduous vs coniferous trees…

Before we dive in:ย If youโ€™re an educator planning toย teach about trees in your classroom, great activities and visuals are key to deepening understanding! I think you and your students will love my complete Trees Unit (plus youโ€™ll support this blog with your purchase! โค๏ธ)

Deciduous Trees

View looking up at the rough bark of a tall deciduous tree

Here are a few properties of deciduous trees. A tree is a deciduous tree if it:

  • Has broad, flat leaves
  • Does photosynthesis during the warm growing season only
  • Leaves change color at the end of the growing season
  • Loses its leaves and regrows its leaves once a year

Examples of Deciduous Trees

  • Ash
  • Birch
  • Maple
  • Oak
  • Willow

Coniferous Trees

pine tree

Here are a few characteristics of coniferous trees. A tree is coniferous if it:

  • Has needles
  • Does photosynthesis year-round, but may slow down in winter
  • Needles stay green year-round (โ€œevergreenโ€)
  • Needles stay on branches year-round
  • Has cones

Examples of Conifers

  • Cedar
  • Fir
  • Juniper
  • Pine
  • Spruce

Other Evergreens

It’s worth noting that conifers are not the only trees that stay green year-round. You will find many evergreen trees growing at tropical latitudes around the equator. This is because close to the equator, there is little to no temperature difference between summer and winter. Consequently, you will find many unique types of trees growing in the tropics that do not need to shed leaves in wintertime. One example is a palm tree.

Learning Activity Idea:

Close up of tattered, damp pinecone help up in front of a forested background.

Play “Deciduous or Coniferous?” Collect samples of parts from several different deciduous and coniferous trees (leaves, needles, seedpods, flowers, fruits, cones, etc.). Grab two jars and label one โ€œdeciduousโ€ and one โ€œconiferousโ€. Ask your child to sort the parts into the jars.

Support Wild Earth Lab with your purchase?

If you enjoyed this post, I think you will love my Trees Unit! It’s a complete set of printable learning materials for teaching kids all about trees – featuring my illustrations! You’ll learn about deciduous vs coniferous, tree anatomy, life cycles, tree ring science, and more!

Read More About Trees:

More Learning Resources From Wild Earth Lab:


Are you interested in reading more posts like this? Subscribe or follow Wild Earth Lab using the links below!


Sharing options and discussion for this post:

Posted on — 3 Comments

Trigonometry in Action: Tree Height Measurement Step-by-Step Guide

tall tree

I don’t know about you, but I think math is more interesting when we can apply it to real-world situations! If you’re teaching trigonometry, right triangles, or angles in your classroom or homeschool, you and your students will love this tree-height applied math activity! In this simple learning activity, students will learn how to make a homemade inclinometer – a device for measuring the angle of inclination. Then, they will take measurements and calculate the height of a tree.

A note for educators: This tree height activity comes from my Math in the Forest Unit. If youโ€™re an educator planning to try this activity, I recommend checking out the unit. It includes the necessary printable directions, diagrams, and worksheets for this activityโ€”perfect for teachers and homeschoolers looking to bring applied math fun to the classroom! ๐Ÿ’š

The challenges of measuring tree height

Unless you are measuring a short seedling, you probably wonโ€™t be able to measure tree height directly because you can’t reach the top. So how do you measure something so tall? Answer: Use an inclinometer and trigonometry!

View looking up at the rough bark of a tall deciduous tree
How do you measure the height of something taller than you? Answer: use trigonometry!

An inclinometer is a device for measuring an angle of inclination above the horizontal. We can use an inclinometer to help us find the height of tall objects, such as trees! When you’re looking up at the top of a tree, you can use the angle of inclination and your distance from the tree to calculate the tree height. This is possible thanks to trigonometry โ€“ a branch of mathematics dealing with angles and the sides of triangles.

So how do we do this? In this blog post, I’ll walk you through all the steps to calculate tree height with your students. The first step is to make your own inclinometer out of common household objects…

Part 1: Make an inclinometer

Follow these steps to make your own inclinometer from common household items. You’ll use the inclinometer to find an angle of inclination, which you’ll use to calculate tree height.

Materials

All the materials you need to make a homemade inclinometer to measure tree height!

Step-by-Step Directions

  1. Tape the straw across the center of the protractor at 90ฬŠ.
  2. Use the scissors to shorten the straw (as needed).
  3. Cut a short piece of thread or dental floss.
  4. Tie the small weight to the end of the floss.
  5. Tie the other end of the floss to the straw.
  6. Check that the thread hangs over the 0ฬŠ mark when holding the inclinometer with the straw parallel to the ground. Adjust the position of the thread on the straw as needed.
1. Tape the straw across the center of the protractor at 90ฬŠ.
2. Use the scissors to shorten the straw (as needed).
3. Cut a short piece of thread or dental floss.
4. Tie the small weight to the end of the floss.
5. Tie the other end of the floss to the straw.
6. Check that the thread hangs over the 0ฬŠ mark when holding the inclinometer with the straw parallel to the ground. Adjust the position of the thread on the straw as needed.

Part 2: Using your homemade inclinometer

Use your homemade inclinometer to measure the angle of inclination when looking up at the top of the tree. The homemade inclinometer requires two people to operate – one person to look through the inclinometer and one person to read the angle off of the side.

Materials

  • Homemade inclinometer
  • Tape measure
  • A friend

Directions

  1. Stand a short distance away from the tree, far enough away that you can see the top of the tree. This works best if you are on flat ground – not uphill or downhill from the tree. Measure your distance from the tree.
  2. Look through the straw with the curved edge of the protractor facing your eyeball. Do not touch the straw to your eyeball.
  3. As you look through the straw, tip the inclinometer upwards until you can see the top of the tree through the straw.
  4. Hold still and have a friend look at the side of the inclinometer. Have them read the angle where the thread crosses.
  5. Measure the height to your eye level.
Measure your distance from the tree
Look through the straw with the curved edge of the protractor facing your eyeball. Do not touch the straw to your eyeball.
As you look through the straw, tip the inclinometer upwards until you can see the top of the tree through the straw. Have a friend read the angle on the side of the inclinometer where the thread crosses.

Part 3: Calculate tree height

You can use trigonometry to calculate the tree height from the measurements you took with the tape measure and inclinometer. The imaginary horizontal line at eye level, the imaginary line from your eyes to the top of the tree, and the tree itself create a right triangle (see figure below).

There is a relationship between the angles in a right triangle and the lengths of its sides. If you know two angles and the length of one side, you can calculate the length of the other sides of the triangle. Look at the diagram and then check out the example calculation below.

Calculate tree height! (My email subscribers can download this printable diagram on the free resources page of my website!)

Example Calculation

Question: I want to know the height of a tree in my backyard. When I was standing 15 feet away from the tree and looking up at its top, I used my inclinometer to find an angle of 20ฬŠ. The height to my eye level is 5.2 feet.

distance x TAN(angle) = tree height above eye level

15 feet * TAN (20ฬŠ) = 5.5 feet

tree height above eye level + eye level = tree height

5.5 feet + 5.2 feet = 10.7 feet

Answer: The tree is about 10.7 feet tall!

Printable Directions & Worksheets

Trying this activity in your classroom? You can find worksheets and printable directions for measuring tree height in my Math in the Forest Unit:

worksheets and homemade inclinometer

Find your next unit…


Are you interested in more hands-on science activities? Subscribe or follow Wild Earth Lab using the links below!


References and Further Reading

  1. South Carolina Government Website (n.d.). Get Acquainted with Forestry Tools. Available: https://www.state.sc.us/forest/edutools.htm
  2. University of British Colombia (n.d.). Height Measurements. Available: https://bigtrees.forestry.ubc.ca/measuring-trees/height-measurements/
  3. Massachusetts Government Website (n.d.). How to measure trees. Available: https://www.mass.gov/how-to/how-to-measure-trees

Sharing options and discussion for this post:

Posted on — Leave a comment

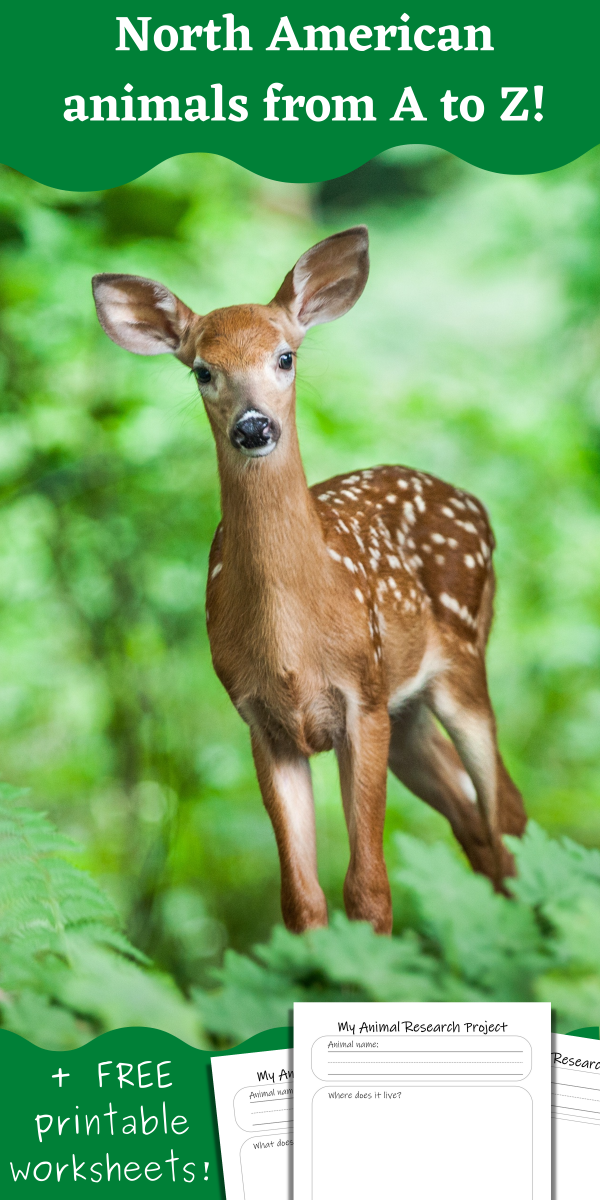
Alphabet of North American Animals

young deer

There’s a whole alphabet of animals out there in nature for you to discover!

For a recent project, I illustrated North American Animals from A to Z (you can find those illustrations here)! During this project, I reviewed many incredible critters that I studied while earning my degree in Wildlife Biology! I wanted to share more about these cool creatures with you! You may already know and love some of these animals, many of which have wide ranges in North America (and beyond) – like ants, crows, and frogs! Others are small, rare, or hard to spot – and might even be creatures you’ve never seen before! Which ones can you spot in your local habitats?

In this post, you’ll find a little more information about the featured alphabet animals (which you can also learn more about from my Alphabet in Nature Unit)! You’ll also find links to outside websites with more information about each animal! There’s also a free PDF worksheet for younger children or students to do a research project on their favorite animal from this unit!

I created this Alphabet Animals post to go along with one of my latest educational resource packs, the Alphabet in Nature Unit! It comes with flashcards, a poster, and indoor and outdoor activities for practicing the alphabet with an nature-themed twist! You can also find it in my Nature Preschool Bundle! If you haven’t already, be sure to check it out ๐Ÿ™‚

How to use this page:

  1. Use the links on this page to learn about the alphabet animals of North America.
  2. Download and print these free animal research project worksheets for your students.
  3. Students can pick their favorite animal from the Alphabet in Nature Unit to learn more about!
  4. Help your student research their favorite animal using the online resources linked below or other resources, such as books from your local library.
  5. Students may use the worksheets to draw and write about what they learned!

Ant

Photo by Egor Kamelev on Pexels.com

Ants are common insects! They can be spotted on every continent except Antarctica. They live in colonies where there are workers and a queen! There are many species of ants. These are some of the different types of ants:

  • Leafcutter Ants
  • Fire Ants
  • Carpenter Ants

Check out these websites to learn more about ants!

Bat

Photo by Surendra Singh Shekhawat on Pexels.com

Bats are unusual because they’re a mammal but they can fly! Depending on the species of bat, they will eat a variety of foods, such as insects, flower nectar, and fruit! Some common North American bats include:

  • Little brown bats
  • Mexican Free-tailed bats
  • Fruit bats
  • Long-nosed bats

Check out these websites to learn more about bats!

Crow

Photo by Pixabay on Pexels.com

Crows are incredibly intelligent birds found world wide. They’ve been observed using tools, and can recognize human faces! Check out these web resources about crows:

Duck

Photo by Billel Moula on Pexels.com

Ducks are waterfowl. There are many types of ducks in North America including dabbling ducks and diving ducks. Some common North American ducks are:

  • Mallard
  • Wood ducks
  • Ring-neck ducks
  • Teals
  • Wigeons
  • Mexican Duck

Check out these websites to learn more about ducks!

Earthworm

Earthworm photographed in the backyard of Valerie from Wild Earth Lab, in Northern Colorado!

Earthworms are annelids, the phylum of segmented and ring worms. Earthworms are beloved for their importance to agriculture. They are decomposers that move nutrients through soil by consuming and digesting waste and decaying matter. They also create large pores as they move through soil, which provide paths for water, gases, and plant roots to move through soil. You can see earthworms come to the surface of the soil to breathe during rainstorms in many habitats. Learn more about earthworms using these websites:

Fox

Photo by Steffi Wacker on Pexels.com

Foxes are omnivorous mammals. Grey foxes and kit foxes are found in the southern parts of North America. Red foxes are common in northern parts of North America. Arctic foxes are found near the arctic circle, in Canada and Alaska. Visit these web resources to learn more about foxes!

Goose

Photo by Ellie Burgin on Pexels.com

There are many species of geese world wide. Canada geese are commonly found in North America from northern Canada around the arctic circle to the the northern parts of Mexico. Many are migratory, spending their winters in warmer southern climates and their summers in far-north breeding grounds. Learn about Canada geese on these websites!

Hawk

A red-tailed hawk in the care of a raptor center. Photo by Valerie (Wild Earth Lab) in Northern Colorado

Hawks are raptors, or “birds of prey”. They are carnivores and top predators found across a wide range of habitats. Here are some of the different types of hawks found in North America:

  • Red-tailed Hawk
  • Northern Goshawk
  • Cooper’s Hawk
  • Ferguson Hawk
  • Sharp-shinned Hawk

Check out these websites to learn more about hawks!

Inchworm

Caterpillars devour a green leaf
Inchworms devour leaves in West Virginia, photo by Valerie from Wild Earth Lab.

Inchworms or cankerworms are the larval stage of the geometer moth. They are known and named for the way they move, inching forward with the front of their body then their rear. Inchworms undergo complete metamorphosis, in which they have a pupa stage before becoming adult moths. Learn more about inchworms and geometer moths here:

Jellyfish

Photo by Oday Hazeem on Pexels.com

There are many species of jellyfish found in multiple oceans and seas. There is also one unique species of freshwater jellyfish in North America. Jellyfish are not really fish at all! They are invertebrates in the phylum Cnidaria. There are different types of jellyfish found off the coast of North America:

  • Moon Jelly
  • Lion’s Mane Jelly
  • Bay Nettle
  • Portuguese Man-of-War

Check out these websites to learn more about jellyfish!

Kingfisher

Photo by Frank Cone on Pexels.com

Kingfishers are small birds that can be spotted near estuaries, wetlands, lakes, and other bodies of water. There are a few species of kingfishers found in North America, including:

  • Belted Kingfisher
  • Great Kiskadee
  • Green Kingfisher
  • Ringed Kingfisher

Check out these websites to learn more about bats!

Lady Beetle

Photo by Skyler Ewing on Pexels.com

Lady beetles, also known as ladybugs, are not really bugs! Bugs are a specific type of insects that belong to the order Hemiptera, like box elder bugs and leaf hoppers. Lady beetles belong to the beetle order of insects, Coleoptera. Amusingly, while ladybugs are not bugs themselves, they do eat bugs – one of their favorite foods is aphids, a member of the order Hemiptera (true bugs). Learn more about lady beetles using the links below:

Minnow

A sketch of a fathead minnow by Valerie from Wild Earth Lab

Minnow is a general term for many different species of small freshwater fish including chubs, shiners, and daces. Minnows provide an important food source for larger fish species higher up on the food chain and for waterfowl. Check out these websites to learn more about minnows!

Newt

Eastern spotted newt photographed by Valerie (Wild Earth Lab) in the eastern United States along the Appalachian Trail.

Newts are amphibians and a type of salamander. It’s never a good idea to pick up a newt because they have very delicate and absorbent skin – chemicals and oils on our hands can be very harmful to them! They come in many different colors – from green, to brown, to bright orange. Learn about newts on these websites:

Otter

Photo by Flickr on Pexels.com

Otters are mammals that love the water! River otters live in freshwater, and sea otters live along coasts. Learn more about otters on these websites:

Preying Mantis

Preying mantis photo in Northern Colorado by Valerie (Wild Earth Lab)

Preying mantises are insects that are voracious predators of other insects! Gardeners love them because they help keep away pesky crop-eating insects such as grasshoppers. Learn more about preying mantises on these websites:

Quail

Photo by Brett Sayles on Pexels.com

Quail are small game birds found in a variety of habitats. There are several different types of quail, such as:

  • California quail
  • Scaled quail
  • Montezuma quail
  • Bobwhite quail

Learn more about quail:

Rabbit

Photo by Pixabay on Pexels.com

Rabbits are common herbivorous mammals in the lagomorph order, which also includes hares and pika. They are sometimes mistaken as rodents. Humans have domesticated rabbits and they are beloved pets. Learn more about wild rabbits with these internet resources:

Snail

Photo by Laura Reed on Pexels.com

Snails are common shelled gastropods found world wide! They live on land and in water. Check out these websites about snails:

Turtle

A box turtle hiding in its shell by Valerie (Wild Earth Lab), along the Appalachian Trail in the eastern United States.

Turtles are common shelled reptiles found world wide! They are found in many types of habitats, including ponds, salt water, islands, and even the desert! There are many species of turtles. Some common North American turtles include:

  • box turtles
  • sea turtles
  • snapping turtles

Check out these websites to learn more about turtles!

Urchin

Photo by Ish Sookun on Pexels.com

Sea urchins are found in salt water. If you live near a coast, you may spot them in tide pools! Although they might not seem like it, sea urchins are in fact animals, belonging to the phylum Echinodermata. Learn about sea urchins here:

Vole

Photo by DSD on Pexels.com

Voles are rodents, like mice and rats. They are prey for a variety of predators, such as hawks, owls, and foxes. Check out these websites to learn more about voles!

Water Strider

Photo by Tanguy Sauvin on Pexels.com

Water striders are amazing insects that harness the power of surface tension to walk across water. They are common insects that can be seen at many lakes, ponds, wetlands, and even in the slow-flowing pools and eddies of streams and rivers. Learn more about water striders:

Xeme

A sketch of a xeme (sabrine’s gull) by Valerie at Wild Earth Lab

Xemes, also called Sabrine’s gulls, are a migratory gulls. In the summer, they are found in their summer breeding range near the arctic circle in northern Canada and Alaska. They may be seen passing through off the west coasts of Canada and the United States as they make the long journey to their winter range in the Pacific Ocean off the coast of South America. Check out these websites to learn more about xemes!

Yellow Jacket

Photo by Pixabay on Pexels.com

Yellow jackets are a common type of wasp. They are omnivores and feed on a variety of foods including other insects and flower nectar. They can be pollinators – animals which move pollen between flowers, transferring plants’ genetic material which allows for the production of seeds and new plants. Learn more about yellow jackets:

Zebra Swallowtail Butterfly

Photo by Erik Karits on Pexels.com

Zebra swallowtail butterflies are a butterfly species found in the southeastern part of the United States. They undergo complete metamorphosis like all butterflies and moths. Learn about zebra swallowtail butterflies here:

Are you interested in reading more posts like this? Subscribe or follow Wild Earth Lab using the links below!


Sharing options and discussion for this post: