Posted on — 2 Comments

10 Nature-inspired art projects for kids to try in your classroom!

A variety of brightly-colored art projects for kids laid out on a wooden table. Projects shown include animal masks, phenology wheels, color wheels in nature, resistance watercolor landscapes, textures in nature, scratch art, one-point perspective forests, and oil pastel planets on black paper!

Wild Earth Lab is supported by readers like you. This post includes links to my own products and affiliate products. If you purchase through links on my site, I may earn a small commission at no additional cost to you.

Today, I wanted to share with you some of my favorite nature art projects from my recent art camp, so that you can try them with your students too! These educational art projects will help students use art as a lens for learning about nature and science – all while trying new art mediums and creating beautiful masterpieces! I hope these nature art projects for kids bring joy to your classroom!

photograph of blank sketchbook and paint brushes

1. Nature’s color wheel

For this nature art project, students create their own color wheels – with a twist. Instead of drawing blotches of each color, have students draw things from nature that are each color of the rainbow. Start with a short brainstorming session as a class. Then, students draw their own color wheels with one thing from nature for each color.

This activity is also great for introducing the concept of biodiversity. The reason we have so many different colors of animals, plants, and flowers in nature is that we have many unique species! Teach students more about biodiversity and colors in nature with my Colors in Nature Activity Pack.

What goes great with nature art projects? Of course my Colors in Nature Activity Pack!

2. Trees with 1-point perspective

Ask students to sit in a circle around the base of a tall tree. Observe how the trunk appears narrower higher up. Then, show students how to use 1-point perspective to create the image of a tall tree or trees viewed from below.

As a bonus, teach your students about forest ecology and the symbiotic relationships of trees when you introduce this art project! It will add another layer of depth to this project and you might even learn something new too! Find my lesson plans for forests and trees below:

3. Animal masks

Why mess with a classic? Students can draw and cut out masks of their favorite animals.

Start by drawing a line down the middle of the paper and discussing symmetry. Next, have students line up the center of the paper with their noses and mark where their eyes should go, with the help of a classmate or teacher. Then, students can draw the animal’s face around the eyes and color it in with their art supplies of choice.

If you prefer printable mask templates, check out my osprey and owl mask templates.

4. Phenology wheels

Phenology wheels help us observe and connect with nature throughout each month of the year. Use a printed phenology wheel template for students or use a compass/string and a ruler to draw a circle and divide it into 12 sections – one for each month. You can also use a light wash of watercolor to create stunning gradient backgrounds for your phenology wheels.

Ask students to think of things they’ve seen in nature during the current month. Consider plants, seasonal changes, types of animals, animal behaviors, weather, and more. Fill out the current month, then send students home with the phenology wheel so they can keep adding to this nature art project during the rest of the year!

I like this free phenology template from the Montana Natural History Center and this one from the Bureau of Land Management too. There are also tons of other phenology wheel templates around the web.

5. Textures in nature

Practice drawing different textures using things from nature. Print out close-up images of bark, fur, scales, insect wings, shells, etc… or better yet, head out into nature and examine natural things up close (with the exception of wildlife, of course!).

Have students draw 4-6 different observed textures. Ask them to consider how their shading, linework, pressure, and color choices help to create the appearance of different textures.

6. Watercolors for creativity

This activity is a great way to practice letting go of rigid expectations for our art. This can be especially beneficial for anyone who tends to become frustrated when their drawings don’t turn out the way they intended.

First, have students use bright colors to create abstract watercolor blotches on a piece of paper. Once the paint dries, use a black pen to turn the blotches into wildflowers, plants, or other images. This is a similar idea to cloud watching and finding images in the clouds. Encourage students to “find” images in the abstract blotches rather than trying to force the blotches to become a desired form. Students will use the pen to accentuate images found within the abstract painting.

Encourage students to apply this technique in their artwork in general – especially when working with mediums that we cannot easily erase or undo, such as carving, colored pencils, and watercolors. Think about ways we can turn “mistakes” into part of the drawing, rather than starting over or giving up.

Need watercolor painting supplies and instructions? It may help to try a beginner-friendly watercolor art kit.

7. Resistance watercolors & mountain landscapes

It has been said that mountains are like the water towers of the world – they collect huge amounts of snow through the winter and then fill our streams and rivers with snowmelt in the spring.

Reflect on mountains’ important role in the water cycle while painting mountains with watercolors – but with a twist! Use crayons first to make a part of the drawing – e.g., snowcapped peaks, the sun over the mountains, a river flowing down from the mountains, etc… Then, paint over the crayon with watercolor. The wax from the crayons repels the watercolors – creating a cool, mixed-media effect!

You can teach your kiddos the basics of watercolors with a kids’ watercolor art kit. And if you want to go the extra mile and learn all about the water cycle while completing this craft, try out my Water Cycle Lesson:

8. Drawing spheres to make planets, moons, and suns

Space provided the building blocks for planet Earth. Similarly, 3D shapes provide the building blocks for much more complex images in art! Learning to draw and shade simple 3D shapes can help us become better artists.

Teach students how to trace a lid and shade a circle to make it look like a 3D sphere. Then, use oil pastels to draw planets, moons, suns, or other space objects on black paper. Your students will love the way these turn out!

Best yet, all you need is oil pastels and black paper to complete this art activity!

9. Scratch-art for nocturnal critters and nighttime

Teach students about nocturnal animals. Then draw your favorite nocturnal animals on scratch art boards. Owls, bats, raccoons, and moths are all great options.

Scratch-art sheets are the perfect medium for drawing nighttime scenes because you start with a dark canvas and then scratch the black coating off with a stylus to reveal a lighter color beneath. Scratch-art is also a great medium for underwater scenes, outer space, and geometric pattern work.

You can also learn more about nocturnal, diurnal, and crepuscular animals with my desert ecosystem mini study!

10. Picture charades

pexels-photo-8923942.jpeg

Picture Charades is always hilarious, fast-paced fun. To set up, pick a theme, then write words or common phrases related to that theme on little pieces of paper to put in a hat. For example, if the theme is “wildlife”, you could write down frog, butterfly, deer, snake, eagle, etc…

Then, divide the class into two groups. Each group sends one “illustrator” to the front of the room. The illustrators take one piece of paper from the hat and look at it together. When you say “go”, the two illustrators draw on the whiteboard while their teams guess. The illustrators should be silent and should not write any letters or words. The first team to correctly guess the word/phrase wins the round. Then, each team sends up a new illustrator. Repeat until everyone has taken a turn drawing, or for as long as desired.

Picture charades are a wonderful activity for taking a break in between more structured art projects. It provides a silly way to make art while moving around and having a laugh.

Picture Charade Ideas

Wildlife: frog, butterfly, deer, snake, eagle, robin, worm, rabbit, wolf, fish, bee, and skunk.

Forest: pine tree, pinecone, leaf, root, berries, vine, owl, fox, squirrel, bush, branch, and acorn.

Ocean: shell, seagull, wave, jellyfish, starfish, shark, seaweed, bubbles, beach, sand, dolphin, and sea turtle.

Pond: lily pad, algae, cattail, frog, tadpole, fish, dragonfly, duck, goose, water strider, turtle, and heron.

Explore units from Wild Earth Lab:

If you enjoyed the nature art projects in this post, I know you will love using my nature-inspired classroom units!


Are you interested in more nature activities and project ideas? Subscribe or follow Wild Earth Lab using the links below!


Sharing options and discussion for this post:

Posted on — Leave a comment

10 Waterbird and waterfowl activities for kids to try in your classroom!

bird masks and the text "waterfowl and waterbirds activity roundup!"

Waterfowl and other waterbirds are some of the best wildlife to go view with kids in wetlands and other natural areas, regardless of your location. If you are planning a waterfowl field trip – or a whole waterfowl and waterbird unit – this waterbird & waterfowl activities list is the place to start!

In case you are wondering, waterfowl are ducks, geese, and swans – birds in the biological order Anseriformes. Meanwhile, “waterbirds” is a more general term. Waterbirds refers to a large group including waterfowl and other water-loving birds. This includes wading birds (e.g., herons, egrets, cranes), shore birds (e.g., sand pipers, plovers), as well as loons, grebes, coots, cormorants, and more!

Try out some of these waterbird and waterfowl activity ideas with your class!

1. Waterfowl Origami

Fold an origami crane, swan, or duck. Or all three! Here are a few helpful online tutorials:

  • The National Crane Foundationโ€˜s instructions for folding Origami Cranes โ€“ with printable directions and a video!
  • Fold an Origami Swan โ€“ with this video from Origami Plus โ€“ Easy Origami Tutorials on YouTube!
  • How to Fold an Origami Duck โ€“ with this easy tutorial from WikiHow

2. Birdwatching

Go on a birdwatching adventure at a local wetland or lake. Bonus: before you head out, print out a species checklist of local waterfowl and waterbirds!

Here are a few online resources to help you begin birdwatching like a pro!

Photo by Mike on Pexels.com

3. Bird Stories

Read a childrenโ€™s book featuring waterfowl! Possibilities include โ€œMake Way for Ducklingsโ€ by Robert McCloskey and โ€œThe Trumpet of the Swanโ€ by E. B. White.

Here are some websites that put together lists of bird-related books:

Photo by Karolina Grabowska on Pexels.com

4. Pond Projects

Learn more about waterbird habitats! Try out these pond activities. Or, check out complete my Pond Ecology Unit!

5. Bird Beaks

Try a bird beak lab โ€“ use different โ€œbeaksโ€ (e.g., chopsticks, tweezers, slotted spoon), to pick up different โ€œfood sourcesโ€ (pasta, seeds, peas). See which beak is the best at โ€œcatchingโ€ each food.

There are lots of versions of Bird Beaks Labs around the web. Here are a few good ones:

This bird beaks lab activity comes from my Waterfowl and Waterbirds Unit! Perfect for learning about animal adaptations and natural selection!

6. DIY Duck Calls

Learn how to create a simple duck call. Then listen to recordings of the different sounds ducks make. Can you imitate any of them?

Here are a few examples of easy DIY duck calls to get you started:

Photo by Billel Moula on Pexels.com

7. Swim like a swan!

Experience swimming like a swan (or duck, or grebe…)! Grab a pair of swimming flippers (aka snorkeling fins) and head to a local pool or swimming area.

Bonus: toss some diving rings and practice diving under the surface of the water like a diving duck to retrieve them!

8. Duck Masks & Art Projects

Do a waterbird art or writing project! Learn to draw or paint a waterbird from your area. Write a poem about your favorite waterbird! Decorate a duck mask! Write a short story. Sit by a wetland habitat as you sketch, draw, or nature-journal!

These duck masks are one of the many activities in my Waterfowl and Waterbirds Unit!

9. Be a Habitat Helper

Volunteer to help clean up waterbird habitat in your local area. Research local conservation groups to find out about park and natural area clean-up days in your community.

grey heron bird on wetland
Photo by Tom Fisk on Pexels.com

10. Study Birds with Wild Earth Lab

Try out my Waterfowl and Waterbirds Unit in your classroom! It’s got lots of activities and all the worksheets, handouts, decorations, and guides you will need for a wonderous waterbirds unit in your classroom or homeschool!

Explore curriculum from Wild Earth Lab:

If you enjoyed these waterfowl activities, I know you will love using my environmental science materials in your classroom!


Are you interested in more nature activity ideas? Subscribe or follow Wild Earth Lab using the links below!


Sharing options and discussion for this post:

Posted on — 2 Comments

Tree Anatomy: the parts of trees and their functions

a banner with pictures of trees that says "Let's learn about tree anatomy"

In this post, we will examine overall tree anatomy and the key parts of a tree. Then, we will peek inside the tree to examine the layers of a tree’s trunk and their functions.

A special note for educators: Are you planning to teach your students about trees? I offer a complete Trees Unit as well as a Forest Ecology Unit. And they are both found within my discounted Forest Bundle. I know your students will love the beautiful diagrams and hands-on activities โ€“ and you’ll support this blog with your purchase! โค๏ธ

Recommended products

Overall Tree Anatomy

We can think of trees as having three main parts. Let’s take a look at each.

  1. Roots are the underground parts of a tree that take up water and dissolved minerals. They also help anchor the tree to the soil.
  2. The trunk is the main woody stalk of a tree which supports all other branches.
  3. The crown is the top portion of a tree. It includes the branches and leaves or needles extending from the main trunk. The crown of a tree will look quite different in different types of trees. Picture the crown of a deciduous tree, conifer tree, or palm tree. Let’s take a closer look at the parts of the crown:
    • A branch is any woody stalk extending from the main trunk.
    • The leavesย  are parts of a tree that produce the treeโ€™s food through photosynthesis. In deciduous trees, leaves are broad and flat, and fall off the tree at the end of each growing season.
    • The needles are the leaves of a coniferous tree, which produce the treeโ€™s food through photosynthesis. Needles do the same job as broad, flat leaves but stay attached to the tree throughout the entire year.

Tree Trunk Anatomy

Inside a human body, you will find different organs: a heart, intestines, lungs, kidneys, etc. Just like humans, trees have different organs inside their trunks too. The trunk of a tree is made up of several layers, each performing a different function. Let’s take a look.

The anatomy of a tree trunk coloring activity for kids to learn about tree science
brown tree log
Photo by Pixabay on Pexels.com
  1. Barkย is the rough, protective outer coating. Bark helps protect the tree from insect and fungi invaders.
  2. The phloem underlies the bark. The phloemโ€™s function is to transport sugars. Sugars form in the leaves during photosynthesis, and the phloem moves the sugars to other parts of the plant where they are needed for growth.
  3. The cambium is a thin layer of dividing cells between the xylem and phloem. This is where secondary (outward) growth occurs. In temperate climates, the most growth happens during the summer. This is why tree rings form.
  4. Theย sapwoodย underlies the cambium. The sapwood is the living part of theย xylem,ย which actively moves water upwards through the tree. Water is drawn up through the ground via the treeโ€™s roots. Water leaves the tree through tiny pores called stomata in the leaves, in a process called transpiration. The xylem grows from the cambium – we can see tree rings in the xylem.
  5. The heartwood is old, inactive xylem tissue. Heartwood no longer has living cells and does not move water. Heartwood provides structural support. Both living and dead xylem parts (sapwood and heartwood) contain tree rings that formed each year as the tree grew inwards from the cambium.
  6. The pith is at the very center of the tree trunk and plays a role in the movement of nutrients. In older trees the pith is often very tiny or diminished, relative to the size of the heartwood.

Free Tree Anatomy Materials:

My email newsletter subscribers can access my full collection of free learning resources. Sign up today to access all the freebies, including these:

  1. Tree Trunk Anatomy Coloring Activity:

2. Print this free tree anatomy poster.

Wild Earth Lab’s Tree Teaching Materials

If you enjoyed this post and the freebies, I know you will love the Tree Unit and my other units too!

Explore more units from Wild Earth Lab:

I know you will love using my environmental science materials in your classroom!


Are you interested in reading more posts like this? Subscribe or follow Wild Earth Lab using the links below!


Sharing options and discussion for this post:

Posted on — 1 Comment

Bugs vs Insects vs Arthropods: what’s the difference?

banner with a picture of an insect and the text "what's the difference... bugs, insects, and arthropods"

Many people misuse โ€œbugโ€ when talking about any insect. However, only certain insects are considered true bugs. In this post, you will learn the difference between a bug, and insect, and an arthropod and why they are not quite the same thing. Learn when to say bugs vs insects vs arthropods when talking about creepy crawly little critters!

What are bugs?

Ask an entomologist (insect scientist) what their biggest pet peeve is, and there is a good chance they will tell you it is the misuse of the word โ€œbugโ€. Many people misuse โ€œbugโ€ when talking about any insect. However, only certain insects are considered true bugs (specifically, the ones in the order Hemiptera). Several aquatic insects are true bugs: water striders, backswimmers, and water scorpions. Also, some terrestrial insects are true bugs including aphids, leafhoppers, stink bugs, and cicadas.

Bugs vs insects

All bugs are insects, but not all insects are bugs. So, what makes bugs different from the rest of the insects? Bugs have specialized, beak-like mouthparts for piercing.

What are insects?

โ€œInsectโ€ is another challenging term for many people. Insects are animals that belong to the class Insecta. They have an exoskeleton, 6 legs, and three main body segments: head, thorax, and abdomen.

Insects vs arthropods

But not all creepy-crawly little critters are insects. For example, people often mistakenly label spiders, scorpions, and centipedes as insects. Clearly, these animals have a lot in common with insects, but they do not have 3 body segments and 6 legs. Instead, you can use the word โ€œarthropodโ€ when talking about this larger group that includes insects and their various cousins that also have exoskeletons.

What are arthropods?

Arthropods are animals in the phylum Arthropoda. This is a very diverse group. Scorpions, spiders, lobsters, millipedes, centipedes, beetles, bugs, and butterflies are just a few examples of arthropods! All arthropods have exoskeletons, segmented bodies, and jointed legs. Different arthropods have different numbers of legs and body segments.

Intro to Taxonomy

Taxonomy is the science of organizing and classifying living beings into groups, called taxa. This was historically done based on shared traits. Today, genetic tests help scientists determine how organisms are related to one another and evolved from common ancestors. Read more about taxonomy here.

Bug Lesson Plan

If you enjoyed this post, you might also enjoy my It’s a Bug…. Right? lesson plan for kids! It’s a full set of activities and classroom materials you can use to teach kiddos about arthropods, insects, and bugs and introduce them to taxonomy!

Explore more curriculum from Wild Earth Lab:

I know you will love using my environmental science materials in your classroom! Check out these units and more!


Are you interested in reading more posts like this? Subscribe or follow Wild Earth Lab using the links below!


Sharing options and discussion for this post:

Posted on — 3 Comments

Nocturnal, Diurnal, and Crepuscular Animals: differences explained, plus examples!

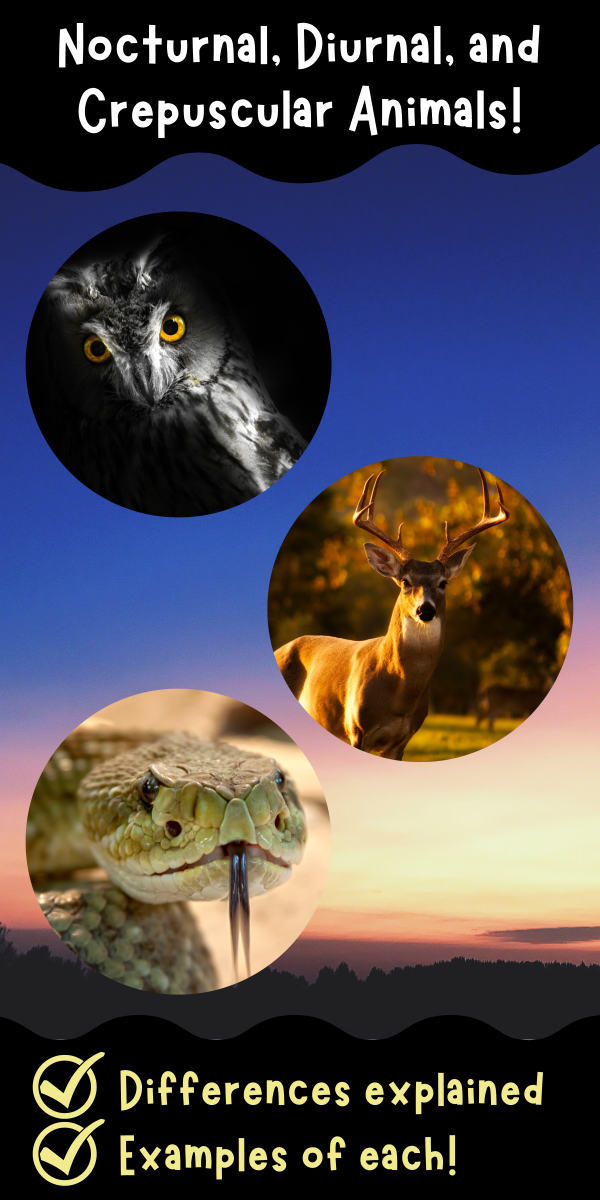
banner with the text "nocturnal, diurnal, and crepuscular animals" and pictures of animals overlaid on the sunset

Wild Earth Lab is supported by readers like you. This post includes links to my own products and affiliate products. If you purchase through links on my site, I may earn a small commission at no additional cost to you.

The change from daytime to nighttime creates a world of difference for animals. Different animals are more active at different times of the day. This is an important animal adaptation that helps animals survive and find food in their habitats. Wildlife biologists sort animals into three categories based on the time of day when they are most active. Diurnal animals are most active during the daytime. Nocturnal animals are most active at night. There is also a third, less well-known category: crepuscular animals. Crepuscular animals are most active at dusk and dawn.

For Teachers: Animal adaptations (including nocturnal, diurnal, and crepuscular) are one of many topics covered in my Desert Unit! Your students will love learning about nocturnal, diurnal, and crepuscular desert wildlife with this illustrated activity setโ€“plus you’ll support this blog with your unit purchase! ๐Ÿ’š

Recommended products

These categoriesโ€“nocturnal, diurnal, and crepuscularโ€“are not always cut and dry. Animals may shift between categories depending on conditions. For example, some animals that are normally nocturnal or diurnal become crepuscular for part of the year to avoid extreme heat or extreme cold.

Additionally, animals will adjust their behavior depending on their habitat. An animal species that is crepuscular in a mild climate may be fully nocturnal in hotter parts of its range to avoid overheating. Furthermore, human activity impacts the behaviors of animals, including the times of day when animals are most active. Wild and domestic animals living in close quarters with humans may alter their natural patterns of activity and rest.

Let’s take a closer look at nocturnal, diurnal, and crepuscular animals!

Nocturnal Animals

Nocturnal animals are most active at night!

Benefits: coolest temperatures to prevent overheating; prey can avoid diurnal predators like hawks and eagles

Challenges: difficulties seeing in the dark for some animals; in winter or in cold climates, it is difficult to stay warm enough at nighttime; nocturnal predators like owls are active

Examples: bats, owls, some rodents, raccoons, moths, badgers, some frogs and toads, geckos

Diurnal Animals

Diurnal animals are most active in the daytime!

Benefits: full daylight makes it easy to see; easy time to stay warm enough; prey can avoid nocturnal predators like owls

Challenges: in summer or hot climates, it is easiest to overheat during the daytime; diurnal predators like hawks and eagles are active

Examples: many snakes and other reptiles, hummingbirds, hawks, eagles, falcons, ducks, bees, butterflies, moose

Crepuscular Animals

Crepuscular animals are most active during twilight – at dusk and/or dawn!

Benefits: cooler temperature than daytime; partial light for visibility

Challenges: for prey animals, many predators are also active at this time

Examples: deer, cougars, some rabbits and hares, some songbirds, coyotes, foxes, some beetles, some frogs and toads

Nature Journaling Activity

close up of woman writing in a journal outdoors

Head out to a natural area in the middle of the day. Sit for 10-15 minutes as you look and listen for animals that are active during the day. Make a list of all the diurnal animals that you observed. Then brainstorm some benefits and drawbacks of being active during the daytime.

Repeat this exercise at either dawn or dusk to observe crepuscular animals, and at night to observe nocturnal animals. Compare your lists.

New to nature journaling? There are many wonderful options for guided nature journals and handmade notebooks on Etsy. Here are a few popular options to help get you started with nature journaling:

Studying Animal Adaptations?

Animal adaptations (including nocturnal, diurnal, and crepuscular activities) are one of many topics covered in my Desert Unit! Your students will love this illustrated activity set, plus you’ll support Wild Earth Lab with your unit purchase!

More Units from Wild Earth Lab:


Are you interested in reading more posts like this? Subscribe or follow Wild Earth Lab using the links below!


Sharing options and discussion for this post:

Posted on — 1 Comment

Deciduous vs Coniferous Trees: differences between, examples, and learning activity!

banner of a hand holding a pinecone with the text "let's learn about coniferous and deciduous trees"
text that says share this post

Trees are perennial plants with long, woody trunks. Trees of temperate latitudes are often grouped into two main categories: deciduous trees that lose and regrow their leaves each year, and coniferous trees that stay green year-round! Let’s take a closer look at deciduous vs coniferous trees…

Before we dive in:ย If youโ€™re an educator planning toย teach about trees in your classroom, great activities and visuals are key to deepening understanding! I think you and your students will love my complete Trees Unit (plus youโ€™ll support this blog with your purchase! โค๏ธ)

Deciduous Trees

View looking up at the rough bark of a tall deciduous tree

Here are a few properties of deciduous trees. A tree is a deciduous tree if it:

  • Has broad, flat leaves
  • Does photosynthesis during the warm growing season only
  • Leaves change color at the end of the growing season
  • Loses its leaves and regrows its leaves once a year

Examples of Deciduous Trees

  • Ash
  • Birch
  • Maple
  • Oak
  • Willow

Coniferous Trees

pine tree

Here are a few characteristics of coniferous trees. A tree is coniferous if it:

  • Has needles
  • Does photosynthesis year-round, but may slow down in winter
  • Needles stay green year-round (โ€œevergreenโ€)
  • Needles stay on branches year-round
  • Has cones

Examples of Conifers

  • Cedar
  • Fir
  • Juniper
  • Pine
  • Spruce

Other Evergreens

It’s worth noting that conifers are not the only trees that stay green year-round. You will find many evergreen trees growing at tropical latitudes around the equator. This is because close to the equator, there is little to no temperature difference between summer and winter. Consequently, you will find many unique types of trees growing in the tropics that do not need to shed leaves in wintertime. One example is a palm tree.

Learning Activity Idea:

Close up of tattered, damp pinecone help up in front of a forested background.

Play “Deciduous or Coniferous?” Collect samples of parts from several different deciduous and coniferous trees (leaves, needles, seedpods, flowers, fruits, cones, etc.). Grab two jars and label one โ€œdeciduousโ€ and one โ€œconiferousโ€. Ask your child to sort the parts into the jars.

Support Wild Earth Lab with your purchase?

If you enjoyed this post, I think you will love my Trees Unit! It’s a complete set of printable learning materials for teaching kids all about trees – featuring my illustrations! You’ll learn about deciduous vs coniferous, tree anatomy, life cycles, tree ring science, and more!

Read More About Trees:

More Learning Resources From Wild Earth Lab:


Are you interested in reading more posts like this? Subscribe or follow Wild Earth Lab using the links below!

Sharing options and discussion for this post:

Posted on — 4 Comments

Parts of a mushroom: anatomy of mushrooms plus a fun learning activity!

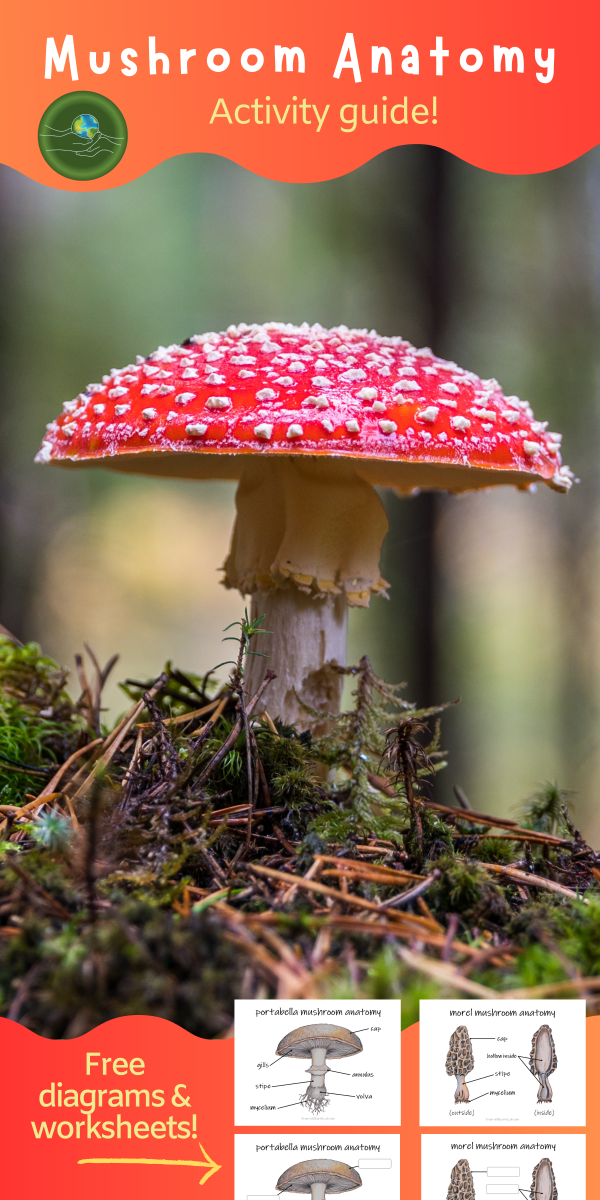
banner with a photo of a mushroom advertising "free diagrams and worksheets"

Mushroom anatomy is a great science activity for students of any age! Try dissecting a mushroom at home, such as a portabella mushroom or shiitake, and identifying these parts! Continue reading to learn about the main parts of a mushroom, or skip to the bottom to download some mushroom anatomy diagrams!

1. Cap

The top portion of the fruiting body of a mushroom, which provides a protective covering.

Little brown mushroom grows out of a stump in Colorado near Cameron Pass.

2. Gills

The gills are located on the underside of the cap. The spores are released from the gills.

brown mushrooms on beige surface
Photo by Laker on Pexels.com

3. Stipe

The stipe is the main supportive stalk of the fruiting body of the mushroom.

4. Annulus

The annulus is located around the stipe of some mushroom, below the gills in some mushrooms. The annulus is the remains of a protective veil that once covered the gills. When it is time to release the spores, the veil breaks away from the gills.

banner with a photo of a mushroom advertising "free diagrams and worksheets"

5. Volva

The volva is a cup-like structure at the base of the fruiting body of a mushroom, above the mycelium in some mushrooms. It is also made of remnants of a veil.

6. Mycelium

There is a lot more to a mushroom than what meets the eye! The mycelium is a network of underground filaments, below the fruiting body. A single filament is called a hyphae. Some of a mycelium’s functions are similar to the functions of a plant’s roots. The mycelium helps anchor the mushroom in the soil. However, mycelia do much more than that! They break down and digest organic matter in the soil, which feeds the mushroom. They also connect mushrooms to one another underground.

Free Mushroom Anatomy Diagrams:

I created these mushroom diagrams in the early days of Wild Earth Lab, and now I’d like to gift them to you and your classroom as a little thank you for your support! They feature my colored pencil illustrations and they are free to download for email subscribers. ๐Ÿ™‚

Study Mushroom Anatomy With Wild Earth Lab!

Are you creating a mushroom lesson plan to teach in your classroom or homeschool? You can save time by purchasing my mushroom anatomy resources, available as instant downloads for quick and convenient printing.

NOTE: You can also find these mushroom anatomy worksheets within my complete Mushrooms Unit, which includes materials for studying mushroom anatomy, fungi life cycles, and more!

More mushroom printables from Wild Earth Lab:

I offer a variety of mushroom-themed activities and learning materials in my Etsy shop! Your purchase helps me continue delivering fun educational content and resources! Your purchase from my shop or Etsy store will help me continue delivering fun educational content and resources!


Are you interested in reading more posts like this? Subscribe or follow Wild Earth Lab using the links below!


Sharing options and discussion for this post:

Posted on — 2 Comments

How does pollination work? A step-by-step guide to pollination and the plant life cycle

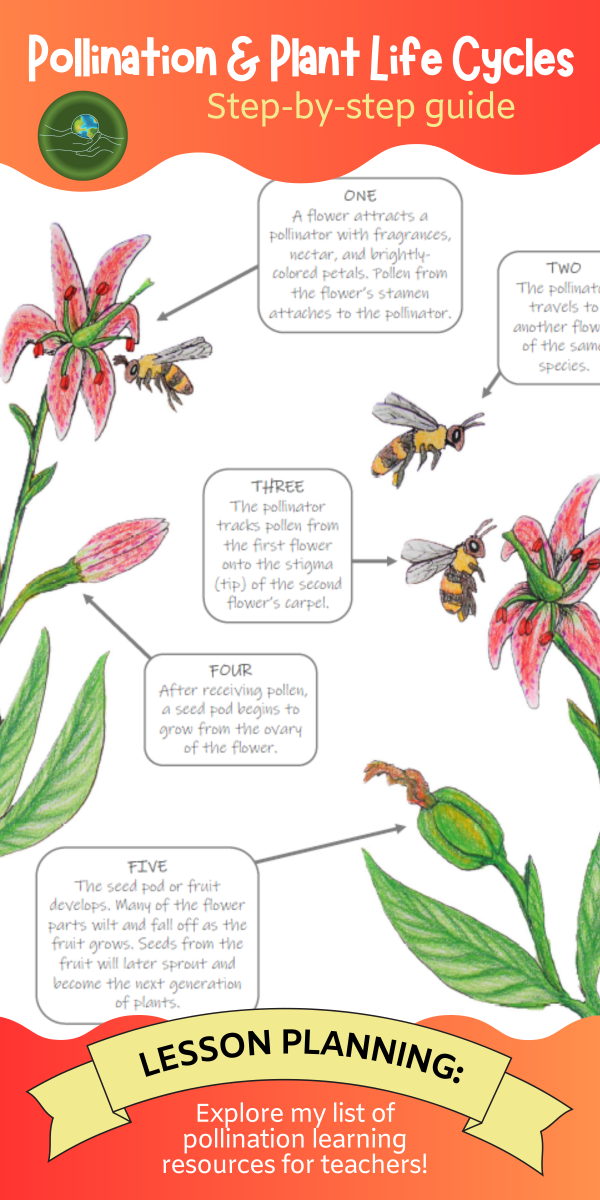
banner advertising a blog post about pollination and plant life cycles with a diagram of bees pollinating flowers
text that says share this post

In this post, we will take a closer look at the steps of animal pollination and the plant life cycle. You might already know that pollination is the transfer of pollen from the stamen to the carpel of a flowering plant (psst – brush up on your plant anatomy by reading my flower anatomy post or checking out my Flowers Unit!). Once pollinated, the plant forms a fruit. Fruits contain seeds, which will grow into the next generation of plants.

A variety of animals can be pollinators, such as bees, butterflies, and many others that may surprise you. The relationship between a pollinator and a plant is key to the survival of both species. This relationship is so important to both the plant and the pollinator that it influences how they evolve. In other words, plants and pollinators coevolved. Plant species developed traits to help them attract pollinators, such as brightly colored petals, sweet nectars, and strong scents. As pollinator species grew reliant on nectar as a food source, they developed body parts and habits for collecting flower nectar more efficiently.

Before we dive in: If youโ€™re an educator planning to teach pollination in your classroom, great activities are key to deepening understanding! I think you and your students will love my Pollination Unit, which is also found within my Botany Collection (plus youโ€™ll support my blog with your purchase! โค๏ธ)

Recommended products

Now, let’s take a look at the steps of pollination and the plant life cycle!

Step 1: Attracting pollinators

A flower attracts a pollinator with fragrances, nectar, and brightly-colored petals. Pollen from the flowerโ€™s stamen attaches to the pollinator.

A pollinator visiting a flower.

Step 2: Pollen transfer

The pollinator travels to another flower of the same species.

A pollinator traveling between flowers of the same species.

Step 3: Pollination

The pollinator tracks pollen from the first flower onto the stigma (tip) of the second flowerโ€™s carpel. Pollen travels via the style to the flower’s ovary.

The pollinator transfers the pollen to a second flower.

Step 4: Fruit growth

 After receiving pollen, a fruit or seed pod begins to grow from the ovary of the flower. Many of the flower parts wilt and fall off as the fruit/seed pod grows.

A fruit starts to form from the flower’s ovary.

Step 5: Seed dispersal

The seed pod or fruit develops. Once the fruit is ripe, the plant must disperse its seeds. At this point, some plants rely on another animal (separate from the pollinator) to help with seed dispersal. After the animal eats the fruit, it travels away from the parent plant and deposits the seeds in its scat. However, many plants do not rely on animals for seed dispersal. Alternative methods for seed dispersal utilize forces such as wind, water, and gravity.

Almost ready for seed dispersal.

Step 6: Germination and growth

After seed dispersal, seeds will germinate (or sprout) into tiny plants. The luckiest of the tiny plants will grow and reach maturity. Once mature, the plants make flowers of their own to attract pollinators, and the cycle begins again!

Germination process.

Teaching Pollination and Plant Life Cycles

Are you teaching pollination in your classroom? Here are some additional activity ideas and resources!

1. Try my free pollinator guessing game in your classroom:

Directions and cards for a pollinator guessing game are available on the free resources page of my website. My email subscribers gain access to the free resources page (plus receive my newsletters with new activity ideas, project guides, and science teaching inspiration!).

2. Read my post about weird and wild pollinators!

3. Check out my list of pollinator activity ideas for classrooms!

4. Try the flower anatomy activity in this blog post:

5. Study pollination with Wild Earth Lab!

Your students will love my Pollination Unit and other science units! I created this set of printable pollination learning materials and it is packed with activities and information, as well as my pollination artwork!

Recommended products

Here are some more units that I think you’ll love:


Are you interested in reading more posts about environmental science topics? Subscribe or follow Wild Earth Lab using the links below!


Sharing options and discussion for this post:

Posted on — Leave a comment

8 tree activity ideas and forest crafts for kids!

a child hugging a tree with the text "8 tree activity ideas for kids!" and "forest and tree learning activities and nature crafts"

Wild Earth Lab is supported by readers like you. This post includes links to my own products and affiliate products. If you purchase through links on my site, I may earn a small commission at no additional cost to you.

Whether you’re studying forest ecology, plant life cycles, or just looking for a fun nature craft to do after school, you’ll love these tree activity ideas and forest crafts for kids. Try them all!

A note to educators: Looking for great tree teaching materials? I think you will love my complete Trees Unit. It is full of printable worksheets, handouts, activity directions, and everything you need to study trees. Plus, you’ll support this blog with your purchase!

Recommended products

1. Create Your Own Forest Layers Mini-Booklet!

Draw each layer of the forest (floor, understory, canopy, and emergent layers) on a separate piece of paper and cut them out. Assemble them into a booklet, so you can flip through each layer of the forest! These free printable templates will help with this illustration activity. OR, if drawing isn’t your thing, try this completed printable forest layers booklet.

2. Leaf Shapes

Create your own poster of the common leaf shapes by taking leaf rubbings of different-shaped leaves. Place paper over a leaf and rub the surface of the paper with the side of a crayon. Then label each leaf shape with a marker or pen.

Leaf rubbing activity

3. Tree Trunk Model

Build a model of tree trunk anatomy by stacking different-sized circles made of construction paper, play dough, or even pancakes! Or – you can use this free printable worksheet as an example/template, or do this as a coloring activity!

If you really want to dive into tree anatomy, I also recommend trying out my tree anatomy mini-study, which includes tree anatomy diagrams and much more:

4. Calculate Tree Height

This is one of my favorite tree activity ideas because it uses math! Make your own inclinometer and use it to calculate tree height! Here’s another article about how to make your own inclinometer and measure tree height, and also download this free tree height math poster!

You can also find additional worksheets and directions for a tree-height activity in my Math in the Forest unit. If you are interested in hands-on math activities and real-world math applications, I think you’ll enjoy this one:

5. Measure Tree Circumference, Diameter, & Radius

Here’s another math-based tree activity idea! Teach your students about circumference, diameter, and radius in a unique and hands-on way! Head outside with a tape measure and measure the circumference of different trees, then calculate their diameter and radius! Or use diameter and circumference measurements on a tree stump to back-calculate pi and see how close you can get to 3.14159265359….

I also created a mini-study with printable posters, worksheets, and activity guides for a pi, diameter, and radius lesson using tree measurements! You can support my blog by checking it out and purchasing it:

6. Tree Perspective Drawing

The canopy is the upper part of a forest. What does the canopy look like from below? Create a 1-point perspective drawing of the forest canopy. This is a fun way to add an art project to your studies of trees!

A perspective drawing of the forest canopy

7. Tree Ring Crafts

Cut thin slices of a tree trunk or branch. Count the rings to figure out the age of the tree (or branch). Drill a small hole through the top of each slice and then paint them to make hanging ornaments or name tags!

Don’t want to cut your own slices? Fortunately, you can also purchase wood slices in bulk.

Plus, you can read more here about tree rings, why they form, and how scientists use them!

brown tree log
Photo by Pixabay on Pexels.com

8. Deciduous or Coniferous?

Collect samples of parts from several different deciduous and coniferous trees (leaves, needles, seedpods, flowers, fruits, cones, etc.). Grab two jars and label one โ€œdeciduousโ€ and one โ€œconiferousโ€. Sort the parts into the jars.

Study Trees & Forests with Wild Earth Lab:

All the printable worksheets, directions, & materials you’ll need for the activities in this post are found in my Forest Collection. It’s a bundle of 3 tree and forest-themed units that I know you and your students will love:

More Units from Wild Earth Lab:

If you enjoyed this post, I know you’ll love my other environmental science and nature units:


Are you interested in more nature & science activity ideas? Subscribe or follow Wild Earth Lab using the links below!


Sharing options and discussion for this post:

Posted on — 2 Comments

Disturbance and succession: examples of ecological disturbances and wildfire ecology

drawing of trees on fire with the text "learn about wildfire and ecological succession!" and "with pictures and diagrams"

In this post, you’ll learn about ecological disturbance and succession, starting with definitions and examples of disturbances. We will cover the differences between primary succession and secondary succession, as well as the steps of the ecological succession process. Finally, you’ll read about why disturbances like wildfire can be important and natural processes in ecosystems!

A note for teachers: before we dive in, I want to direct you to the classroom materials that I created for teaching this topic. I think you’ll love my wildfire ecology mini study, which is also found within my larger Forest Ecology Unit. Plus, you will support this blog with your purchase!

photo of classroom handouts for studying wildfire and forest succession
Explore fire ecology and forest succession with these materials!

What is a disturbance?

What is a disturbance in ecology?

A disturbance is some sort of event that causes a large and rapid change in an ecosystem. Disturbances may abruptly change the ecological community – the plants, animals, fungi, etc. in an ecosystem. Disturbances may also impact non-living features of an ecosystem such as the soil and water. Examples of disturbances in nature include wildfires, parasitic insect outbreaks, landslides, avalanches, volcanic eruptions, and floods.

What is ecological succession?

Succession is the natural and gradual change in an ecosystem over time. Different species may live and thrive in an environment depending on how far along the ecosystem is in the succession process.

What are the types of ecological succession?

There are two main types of ecological succession. Primary succession, and secondary succession. Primary succession occurs when species are colonizing a new habitat that was previously devoid of life. An example of primary succession is the formation of an ecological community atop newly formed igneous rocks after a volcanic eruption. Because the rocks just formed, the community is forming on them for the first time (hence, primary succession). Secondary succession happens after a disturbance that caused a sudden change in an existing ecosystem, such as a wildfire or flood. Such disturbances may (temporarily) wipe out or scare off many of the species living there before the disturbance.

The Steps of Ecological Succession

  1. Disturbance: A disturbance is an event that causes a large and rapid change in an ecosystem. Natural disturbances include wildfires, insect infestations, landslides, avalanches, volcanic eruptions, and floods.
  2. Post-Disturbance: After a disturbance, there are significant changes to the ecological community (plants, animals, fungi, etc.) as well as to non-living features such as the soil and water. Some severe disturbances may leave behind little more than bare rock.
  3. Pioneer Species: Pioneer species are the first to grow in the post-disturbance landscape. These usually include hardy lichen, fungi, and plant species that can survive in rocky soils without many nutrients. Pioneer plant species are often introduced to a disturbed area when wind or water carries in seeds from nearby. As the pioneer species live and die, they help make a nutrient-rich topsoil, which allows for more plants to grow.
  4. Intermediate (shade intolerant) species: Intermediate plant species include grasses, shrubs, and some trees that can survive in thin topsoil. Intermediate species often include shade-intolerant plants which thrive in the relatively open, post-disturbance landscape. As more and more plant species become established, they help create habitats for different animal species to return to.
  5. Climax (shade tolerant) species: Climax species are the last species to return to an area following a disturbance. Climax species require a thicker layer of nutrient-rich topsoil to grow. Climax species often include shade-tolerant tree species, which can grow from seedlings beneath a canopy of shade-intolerant trees, as well as any animals that rely on these tree species.

Why are ecological disturbances important?

Ecosystems naturally experience a cycle of disturbance and succession. We call the natural timing and magnitude of disturbances in an ecosystem a disturbance regime. Maintaining a natural disturbance regime helps keep an ecosystem healthy! For example, regular, small wildfires can clear out diseased trees and overgrown brush, which helps prevent more severe fires and insect outbreaks from happening later on! Additionally, natural disturbances create the conditions for new trees to grow. Interestingly, some tree species even have cones that only open to release their seeds when they are exposed to extreme heat during wildfires!

How do humans impact disturbance and succession?

Humans impact the cycle of disturbance and succession in many ways. People create unnatural disturbances such as clearcutting forests. Humans sometimes introduce invasive species that take the place of native species during the succession process. We also alter the timing of disturbances, causing disturbances to take place more or less often than they should naturally. Humans often try to prevent disturbances like fires, floods, and landslides because they damage our buildings, roads, and homes. However, altering natural disturbance regimes has a history of coming back to haunt us. For example, preventing small, natural fires can lead to a larger, more damaging fire later on. For this reason, forest managers now set and closely supervise controlled burns over small areas, to mimic natural disturbances in a safer way.

More ways to study forests, trees, and ecology:

Recommended products


Are you interested in reading more posts like this? Subscribe or follow Wild Earth Lab using the links below!


References and Further Reading

  1. Free Fire Ecology Curriculum for multiple grade levels, from smokeybearlive.org!
  2. Project Learning Tree’s STEM activities about forest fires!
  3. Forest Ecology Basics from Michigan Tech
  4. Wildlife Ecology Basics from Michigan Tech

Sharing options and discussion for this post: