Posted on 1 Comment

Camouflage Lab: try this simple science activity in your classroom to learn about animal adaptations!

A banner that says "study natural selection and adaptation! Camouflage Lab!"

Are you studying animal adaptations with your class? If so, there is nothing quite like a camouflage lab to learn first-hand how concealing coloration can help animals avoid being eaten by predators! This lab activity is very simple and effective for showing students how natural selection favors animals that can hide from predators.

This lab is entertaining because students get to be the “predators” by hunting for different “prey” (black and white beans) in a “habitat” made of white rice. Which prey will they capture most easily? Which prey will survive? Try this lab activity to find out!

Find these worksheets and handouts in my camouflage lab mini study!

In this post, you will learn how to set up a camouflage lab in your classroom. You can also get printable versions of these directions, worksheets, handouts, and classroom posters to use during this lab in my Camouflage Lab Mini Study!

If you are looking for even more ways to study animal adaptations, I think you will also like my bird beaks lab – read the separate post about the bird beaks lab.

This bird beak adaptations lab is another great way to study animal adaptations!

Gather Your Materials

Gather the following materials for the camouflage lab. Each lab group will need:

  • Dry white rice
  • Dry black beans
  • Dry white beans
  • Tweezers
  • Pie tin or shallow bowl
  • Paper cup
  • Stopwatch
  • Student lab handouts (1 set per student)

Set-Up & Directions

  1. Pour some rice into each bowl. The rice will be the background or habitat.
  2. Mix equal numbers of black beans and white beans into each bowl. The black beans are the regular animals. The white beans are the camouflaged animals.
  3. In each lab group, one student will be the predator and another student will be the timer. Students can take turns in these different roles.
  4. The predator will use the tweezers or “beak” to catch as many beans as possible in 30 seconds and place them in the paper cup or “stomach”.
  5. After 30 seconds, count how many beans of each color were captured, and how many beans of each color survived.
  6. Repeat as needed so all students have a turn being the predator.
  7. Check with your students: which “animal” was eaten the most? Which avoided the predators the most?
  8. After the activity, discuss the benefits of concealing coloration with your students.
  9. Students should complete the reflection questions.
Don’t forget to download the worksheets and printable directions for this camouflage lab activity!

Reflection Questions

  1. Did more black beans or white beans survive?
  2. Which beans were easiest to spot in the rice?
  3. How does camouflage help animals?
  4. Would the results of the lab activity be different if you used black rice as the background? How so?
  5. Would the results of the lab activity be different if you used gray rice as the background? How so?
  6. Which would get eaten more in a forest with lots of leaves and moss: a green lizard or a yellow lizard?
  7. Which would get eaten more in a desert with lots of sand, rocks, and dry plants: a greenish blue snake or a tan and gray snake?

Expand on this Activity

Try these ways to expand on your camouflage lab:

1. Natural selection over several generations:

Expand on this activity to learn about natural and adaptations.  Repeat the activity a few times to represent successive generations. Use the proportion of beans of each color after predation to determine the proportion of beans of each color in the next generation.

For example, if you started with 50 total beans (25 black beans and 25 white beans), and 5 black beans and 20 white beans remained after predation, then you should start the next generation with 10 black beans and 40 white beans.

Have students perform these calculations to add math to this lab.  Afterwards, discuss which coloration thrived in the long run. Did either coloration disappear from the population after several generations?

2. Mimicry:

Did you know that some harmless animals mimic dangerous animals? A good example of this is the harmless viceroy butterfly, which looks very similar to the poisonous monarch butterfly. Another example is a non-venomous milk snake, which has nearly the same red and black stripes (called “warning coloration“) as a venomous coral snake! This type of disguise is called “mimicry“, and it is a type of camouflage.

Expand on your camouflage lab by adding in a mimicry lab activity. The purpose of a mimicry activity is to show how pretending to be dangerous benefits prey animals. There are many versions of a mimicry lab, such as the activity shown in this candy camouflage YouTube Video from Science Buddies.

This lab comes from my Reptiles Unit!

Your students will love the illustrated learning materials, plus you’ll support Wild Earth Lab with your curriculum purchase!

Explore more curriculum from Wild Earth Lab:

If you enjoyed this post, I know you will love using my environmental science materials in your classroom!


Are you interested in reading more posts like this? Subscribe or follow Wild Earth Lab using the links below!


Sharing options and discussion for this post:

Posted on Leave a comment

What is a keystone species? Definition and four examples!

banner that says "heroes of biodiversity: keystone species!" and pictures of a beaver, wolf, saguaro cactus, and prairie dog

A keystone species is an organism that plays an exceptionally large role in its ecosystem. It provides materials or services that enrich the lives of other organisms in the ecosystem. Without the keystone species, the ecosystem would look very different and other organisms that rely on the keystone species would suffer. Now, let’s look at a few examples of keystone species!

Beavers in Wetlands

A common example of a keystone species is a beaver in a wetland. Beavers build dams on streams, causing water to back up and form ponds and wetlands. The result is a much more complex ecosystem with a greater variety of habitats.

A beaver wetland can support a very diverse plant and animal community. Beaver ponds provide a place for other animals to live and forage. A beaver wetland is a great habitat for wetland plants that like to grow in standing water. Without the beaver, the wetland ecosystem slowly degrades.

Saguaro Cactus in the Sonoran Desert

close up photo of prickly cactus plant

Like the beaver, the saguaro cactus is a keystone species. In the Sonoran Desert ecosystem, the saguaro plays a central role providing shelter and food for many other species.

Birds like elf owls, hawks, and woodpeckers live in cavities within the saguaro’s trunk. The saguaro’s flesh helps keep these homes temperature regulated so their occupants stay cool during hot desert days.

The saguaro flower provides nectar that feeds desert pollinators, like bats, doves, and bees. Once pollinated, the saguaro makes large fruits that are also a vital food source for desert animals. Coyotes, tortoises, birds, and others eat the fruit and disperse the saguaro’s seeds in their scat.

Many desert animals have a type of symbiotic relationship with saguaros known as mutualism. This means both the animal and the saguaro benefit from the relationship.

If you are studying keystone species in your classroom, I highly recommend checking out my Saguaro Cactus learning materials, and my Desert Ecology Unit!

Prairie Dogs in Grasslands

Prairie dogs are keystone species in grasslands and prairies because of their tunnels. They are exceptional excavators that build large networks of underground tunnels. These tunnels actually help keep the soil healthy. Digging tills and aerates the soil, and prairie dog scat provides a fertilizer for prairie plants.

Additionally, when prairie dogs abandon burrows, other prairie animal species can move in and use these homes. Not all animals are as good at digging as prairie dogs, so they rely on abandoned prairie dog homes for shelter. Finally, prairie dogs are a food source for grassland predators like coyotes and hawks.

Wolves in Forests

Although scarce today, wolves are a natural keystone species in many types of forests. Wolves help keep the populations of deer, elk, and other undulates under control through hunting them. Amazingly, this impacts the plant community of the forest! Let me explain: deer and elk are voracious plant eaters. When deer and elk numbers grow unnaturally high, plants struggle to grow fast enough to keep up with the hungry undulates. But when wolves are around, the deer and elk populations stay in check, and the plants benefit.

Even a few wolves can really make an impact. These is because the presence of wolves changes the behaviors of deer and elk, scaring them into more protected parts of a habitat. When there are no wolves around, deer and elk will more freely browse in any part of the habitat, including open areas like meadows and riparian zones.

Explore curriculum from Wild Earth Lab:

If you enjoyed this post, I know you will love using my environmental science materials in your classroom!


Are you interested in reading more posts about wildlife biology? Subscribe or follow Wild Earth Lab using the links below!


References and Further Reading

  1. Donegan, C. (2021). Leave It to Beavers: Keystone Species Provides Nature-based Restoration. Maryland Department of Natural Resources. Available: https://news.maryland.gov/dnr/2021/01/01/leave-it-to-beavers-keystone-species-provides-nature-based-restoration/
  2. Fortin, D., Beyer, H. L., Boyce, M. S., Smith, D. W., Duchesne, T., & Mao, J. S. (2005). Wolves influence elk movements: behavior shapes a trophic cascade in Yellowstone National Park. Ecology86(5), 1320-1330.
  3. Kotliar, N. B., Baker, B. W., Whicker, A. D., & Plumb, G. (1999). A critical review of assumptions about the prairie dog as a keystone species. Environmental management24, 177-192.
  4. McDonald C. (n.d.). Saguaro (Carnegiea gigantea). Plant of the Week. U.S. Forest Service. Available: https://www.fs.usda.gov/wildflowers/plant-of-the-week/carnegiea_gigantea.shtml
  5. National Park Service (n.d.). Prairie Dogs: Pipsqueaks of the Prairie. Badlands National Park. Available: https://www.nps.gov/articles/prairie-dogs.htm
  6. Ripple, W. J., & Beschta, R. L. (2004). Wolves and the ecology of fear: can predation risk structure ecosystems?. BioScience54(8), 755-766.

Sharing options and discussion for this post:

Posted on 1 Comment

The Saguaro Cactus Life Cycle: step-by-step guide with pictures!

A picture of the saguaro cactus life cycle with the text "saguaro cactus life cycle: a step-by-step guide"
text that says share this post

Some saguaro cacti live for 200 years or longer! Saguaro cacti grow very slowly. The speed of growth depends on many factors such as precipitation, temperature, and soil quality. Let’s explore the saguaro cactus life cycle in five steps! Notice that desert animals play a key role in two of these steps.

For Teachers and Parents: If you’re an educator planning to teach kids about cacti in your classroom or at home, great activities and visuals are key to deepening understanding! I think you and your students will love my complete Cactus Unit (plus you’ll support my blog with your purchase! ❤️)

1. Germination

Saguaro cactus seedling

A seed germinates. The two cotyledons open to form a tiny plant. Seeds that germinate in shady areas such as beneath palo verde trees are most likely to survive through the fragile young stages and reach maturity.

The seedling cactus grows through its first summer and develops more areoles and spines. At just a few millimeters in height, the seedling is so small that it can be difficult to spot.

2. Maturity

It may take ~35 years for a saguaro cactus to reach maturity and produce its first flowers.

The rate of growth depends on environmental conditions such as precipitation, temperature, soil quality, and the type of cactus. For saguaro cacti, growth happens very slowly over many years.

When a cactus reaches reproductive maturity, it can produce its own flowers. Time to reach maturity depends on the cactus species. For example, the saguaro cactus takes several decades to reach maturity.

3. Flowering & Pollination

The lesser long-nosed bat is a nighttime pollinator of the saguaro cactus

The cactus flowers bloom. Cactus flowers make tasty nectar to attract pollinators like bats, bees, and doves. Pollen is transferred between plants by the pollinators. This is a type of symbiotic relationship called mutualism because both the pollinator and the plant benefit. The pollinator gets a tasty meal of nectar, and the plant gets pollinated.

4. Fruiting

Saguaro fruits are a food source for many animals in the Sonoran desert. People sometimes eat the fruit too.

Once pollinated, the cactus fruit begins forming from the ovary of the flower. Cacti can produce huge amounts of fruit. For example, a single saguaro cactus may produce upwards of 100 fruits each year. That’s a lot of fruit! The ripened fruit splits open, revealing sweet flesh and seeds.  This sends the signal to animals that the fruit is ready to eat!

5. Seed Dispersal

When an animal eats the saguaro fruit, it ingests some seeds. The seeds are then dispersed in the animal’s scat.

Desert animals like birds, coyotes, and tortoises eat cactus fruit and disperse seeds in their scat. This is another example of a mutualistic relationship between an animal and a cactus. The animal gets a meal of fruit, and the cactus gets its seeds dispersed. If the cactus is lucky, some of its seeds will be deposited in locations with good growing conditions. Over its lifespan, a single saguaro may produce millions of seeds. However, only a few of those seeds will germinate, grow, and reach maturity.

Classroom cactus materials:

Explore units from Wild Earth Lab:

If you enjoyed this post, I know you will love using my environmental science materials in your classroom!


Are you interested in reading more posts like this? Subscribe or follow Wild Earth Lab using the links below!


References and Further Reading

  1. Ceotto, E. (2009). Cultivation of Carnegiea gigantea from seeds: a journey in desert ecology. Desert Plants25(1), 10. Available: https://repository.arizona.edu/bitstream/handle/10150/556548/dp_25_01-010-015.pdf?sequence=1
  2. Dimmitt, M. (n.d.). Cactaceae (cactus family). Arizona-Sonora Desert Museum. Available: https://www.desertmuseum.org/books/nhsd_cactus_.php
  3. Helmy, Olga. 2021. Carnegiea gigantea, saguaro. In: Fire Effects Information System, (Online). U.S. Department of Agriculture, Forest Service, Rocky Mountain Research Station, Missoula Fire Sciences Laboratory (Producer). Available: www.fs.usda.gov/database/feis/plants/cactus/cargig/all.html
  4. National Park Service (n.d.). The Saguaro Cactus (Carnegiea gigantea). Organ Pipe Cactus National Monument. Available: https://www.nps.gov/orpi/learn/nature/saguaro-cactus.htm
  5. National Park Service (2017). How Saguaros Grow. Saguaro National Park. Available: https://www.nps.gov/sagu/learn/nature/how-saguaros-grow.htm

Sharing options and discussion for this post:

Posted on 1 Comment

Bird Beaks Lab: try this hands-on classroom activity to learn about adaptations and natural selection!

materials for a bird beaks lab activity for studying natural selection and animal adaptations
text that says share this post

Maybe you have already heard of a bird beaks lab. But if not, the basic idea is this: students use different “beaks” (e.g., chopsticks, tweezers), to pick up different “food sources” (pasta, seeds, peas). Throughout this process, students figure out which beak is the best for “catching” each food.

This is a hilarious and hands-on way to experience competition between species and learn about natural selection and animal adaptations. Students will experience first-hand how specialized beaks can help birds quickly gather the most food and outcompete other types of birds.

In this post, you will learn how to set up your bird beaks lab in your classroom!

Get the most out of this activity: If you’re an educator planning to teach this activity, you’ll find all the worksheets, printable directions, and visual aids you need in my Bird Beaks Lab Mini Study and also within my complete Waterbirds and Waterfowl Unit (plus you’ll support my blog with your purchase! ❤️)

Gather Your Materials

Gather the following materials for the bird beaks lab:

Beaks:

  • Binder clip or chip clip
  • Tweezers
  • Fork
  • Slotted spoon or small strainer (holes should be smaller than a pea)
  • Chopsticks
  • Eyedropper

Food Sources:

  • Gummy candies (20+)
  • Sunflower seeds or grains of uncooked rice (20+)
  • Marshmallows (20+)
  • Peas (20+)
  • Cooked pasta such as bowties or spirals (20+ pieces)
  • Skinny container filled with water and food coloring (for use with eyedropper)

Other Materials:

  • Liquid measuring cup
  • 2 large bowls filled with water
  • 6 Paper cups or other containers
  • Paper plates
  • Food coloring
  • Permanent marker
  • Timer/watch
  • Towel for cleaning up spills
  • Lab worksheets (1 set per student)
Find these worksheets and handouts in my bird beak adaptations lab mini-study!

Set-Up

  1. Start by setting up six “food source” stations:
    • Place 20  gummy candies on a plate. Label the plate “insects”.
    • Place 20 grains of rice or seeds on a plate. Label the plate “seeds”.
    • Place 20 marshmallows on a plate. Label the plate “rodents”.
    • Place ~20 tsp (~100 mL)of food-colored water in a skinny container. Label the container “flower nectar”. Place a liquid measuring cup next to the container for students to deposit the water into.
    • Place 20 peas in a large bowl of water. Label the bowl “aquatic plants”.
    • Place 20 pieces of pasta in another large bowl of water. Label the bowl “fish”.
  2. Write “stomach” on each paper cup.
  3. Give each student a “stomach” and one of the 6 “beaks”. You can have each student use just one beak, then share answers with students who used other beaks afterward. Or, if you have a small group (and lots of time), you may wish to have each student try out each beak.

Lab Activity

  1. Have students rotate through the food source stations with their beaks.
  2. Instruct students to use their beaks to pick up as much food as they can in 20-60 seconds, placing food into the “stomach” containers. Start the timer and say “go!” (Longer periods may be necessary for very young groups).
  3. After 20-60 seconds, say “stop!”. Students should use the lab datasheets to record the number of pieces of food they picked up (or the volume of liquid at the flower nectar station).
  4. Instruct students to empty their “stomach” cups and put the station back the way it was before moving to the next station.
  5. Once finished with all stations, ask each student to share their beak’s results with the class. Determine which beak(s) worked best for each food source.
  6. Ask students to complete the graphing activity. Students will make a graph for each food source comparing the amount caught by each of the 6 beaks.
  7. Have students work through the reflection questions in groups or individually.

Other Suggestions

  • For groups larger than 6 students, create multiple copies of each station. Or, have groups of 6 take turns rotating through the stations for this lab while the rest of the class completes other work.
  • After or during this lab, discuss adaptations and natural selection. Explain how in nature, animals compete for the same food sources. Birds that can quickly and easily gather lots of food have the best chances of surviving and raising offspring. Ask students to consider what happens when two birds with different beaks compete for the same food source. Discuss how the availability of different food sources may affect the shape of birds’ beaks over time.

Reflection Questions

  1. Which beak(s) worked best for each food source?
  2. Imagine a habitat where two groups of waterbirds compete for aquatic plants to eat. One group of birds has a filtering beak (like the slotted spoon), and one group of birds has a short, grasping beak (like the clip). What do you think would happen to each group of birds over time?
  3. Imagine a bird species with a large, pointy beak (like the chopsticks) that eats seeds. Imagine that one year a few birds are born with shorter, more precise beaks (like the tweezers). Do you think the birds with the new beak type will thrive? What could happen to this bird species over time?

Printables for this Activity:

Find the printable materials for this activity in my Bird Beaks Mini Study. These same materials are also found within my complete Waterbirds and Waterfowl Unit:

Explore more units from Wild Earth Lab:

If you enjoyed this post, I know you will love using my environmental science materials in your classroom!


Are you interested in reading more posts with science activity ideas? Subscribe or follow Wild Earth Lab using the links below!


Sharing options and discussion for this post:

Posted on 1 Comment

Intro to Taxonomy: how living beings are sorted and classified

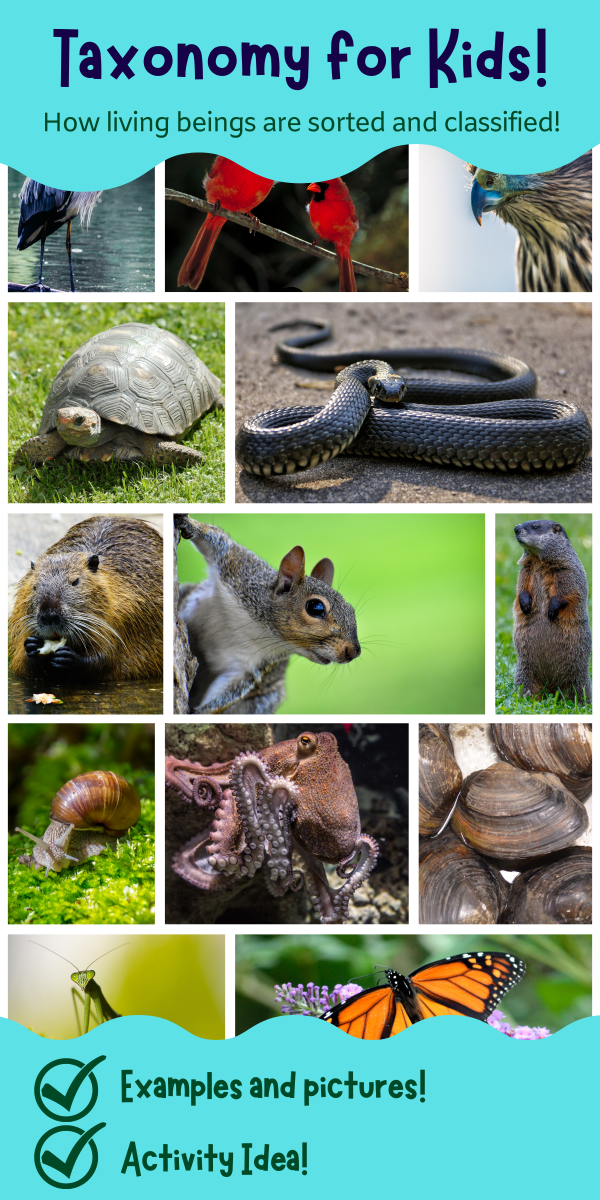
a banner with many different animals and the text "taxonomy for kids"

Taxonomy is the science of organizing and classifying living beings into groups. It is important in the fields of wildlife biology, botany, mycology, zoology, microbiology, ecology and more! Introducing your students to taxonomy is a great way to start exploring the biodiversity of life on earth!

What is Taxonomy?

As previously mentioned, taxonomy is the science of organizing and classifying living beings into groups, called taxa (singular: “taxon”). This was historically done based on shared traits. Today, genetic tests help scientists determine how organisms are related to one another and evolved from common ancestors.

Some taxa are broad and include many diverse organisms, such as kingdoms (e.g., kingdom Animalia contains all animals; kingdom Plantae contains all plants). Broad taxa are divided up into smaller and smaller groups using 8 “ranks” of taxa.

Taxonomic ranks:

  1. domain
  2. kingdom
  3. phylum
  4. class
  5. order
  6. family
  7. genus
  8. species

These ranks form the taxonomic classification system. This system provides an organized way to identify living beings and see how closely they are related to one another.

Take for example: a squirrel and a snake. Both are animals, belonging to the domain Eukarya, the kingdom Animalia, and the phylum Chordata. But the similarities stop there. Squirrels are in the class Mammalia (mammals), while snakes belong to the class Reptilia (reptiles) . A squirrel is much more similar to a groundhog. Both belong to the same order, Rodentia (rodents), and the same family, Sciuridae.

Example:

Let’s try an example – we will look at the different taxonomic ranks for one species: a western green drake mayfly (D. Grandis). We will start with the least specific taxonomic rank, domain, and work down to the most specific rank, species.

Domain: Eukarya

Kingdom: Animalia

Phylum: Arthropoda

Class: Insecta

Order: Ephemeroptera

Family: Ephemerellidae

Genus: Drunella

Species: D. grandis

Activity: Taxonomic Ranks!

Try it out! Work through an example with a different species of your choosing. Pick a local wildlife species, favorite garden flower, type of pet, or something else of interest. Find the domain, kingdom, phylum, class, order, family, genus, and species and write them down. Do you recognize any of the taxon names? Which ones? Do you know of any other organisms that might belong in some of the same taxa?

close up of woman writing in a journal outdoors

Scientific and Common Names

An organism’s scientific name is its genus and species. For example, an organism of the genus Danaus and the species plexippus has the scientific name “Danaus plexippus”. But usually, this organism is just called a “monarch butterfly”. This is its common name.

Confusingly, common names of organisms often misguide us. For example, crayfish are not fish at all. Another example is water scorpions, which are insects, unlike actual scorpions, which are arachnids. Also confusingly, some insects that are not true bugs have “bug” in their common names. For example, ladybugs are insects (class Insecta) and, more specifically, a type of beetle (order Coleoptera). They are actually not bugs. True bugs are insects belonging to the order Hemiptera. For this reason, some people feel that “lady beetle” is a better name for this insect.

Taxonomy Lesson Plan

If you enjoyed this post, you might also enjoy my It’s a Bug…. Right? lesson plan for kids! It’s a full set of activities and classroom materials you can use to teach kiddos about arthropods, insects, and bugs and introduce them to taxonomy!

Explore curriculum from Wild Earth Lab:

If you enjoyed this post, I know you will love using my environmental science materials in your classroom!


Are you interested in reading more posts like this? Subscribe or follow Wild Earth Lab using the links below!


Sharing options and discussion for this post:

Posted on 4 Comments

Desert Adaptations: 8 strategies plants and animals use to survive in the desert!

banner with cacti and the text "life with less water... desert adaptations!"
text that says share this post

Wild Earth Lab is supported by readers like you. This post includes links to my own products and affiliate products. If you purchase through links on my site, I may earn a small commission at no additional cost to you.

A desert is a place that is very dry. Deserts typically get only about 25 centimeters (10 inches) of precipitation or less each year. That’s not very much water! But life is still possible in these dry conditions, thanks to desert adaptations!

Desert plants and animals have adapted to survive in dry conditions over many, many generations. An adaptation is a trait or behavior that helps an organism survive in its environment. Adaptations evolve through a process called natural selection.

To understand natural selection, take the following example. Imagine that one individual plant of a plant species develops a random mutation that impacts the depth of its roots. The deeper-rooted version is better at getting water during droughts, so it more easily survives and passes on its genes. Repeat this over many generations, and you will see more and more of the deep-rooted version of the plant in the habitat. That’s natural selection at work!

Now, let’s take a look at 8 amazing strategies that plants and animals use to survive in the desert!

Before we dive in: If you’re an educator planning to teach desert adaptations, great activities and visuals are key to deepening understanding! I think you and your students will love my Desert Ecology Unit and my Cacti Unit (plus you’ll support my blog with your purchase! ❤️)

1. Store water

close up shot of an african desert turtle
Desert tortoise. Photo by Rutpratheep Nilpechr on Pexels.com

A desert tortoise survives dry spells by storing extra water within its bladder. This can sustain it through times without rainfall and during periods of inactivity.

2. Escape the heat

close up photo of prickly cactus plant
An owl in a cavity nest within a saguaro cactus. Photo by Nicole Ashley Rahayu Densmoor on Pexels.com

Animals escape the desert sun inside a den or cavity. For example, elf owls will hide inside cavity nests in cacti during the heat of the day. Jackrabbits and prairie dogs find shade inside dens underground when it is hot out.

3. Get water from food

feral pigeon on stone in nature
A dove. Photo by Ellie Burgin on Pexels.com

Kangaroo rats are known for getting all the water they need through their food. They do not need to drink liquid water because the juices in the insects and plants they eat will sustain them. Kangaroo rats are not the only desert animals using this strategy. Some birds such as white-winged doves get water through food too.

4. Rest when it is hot

photo of a cougar near a log
A mountain lion resting during the day. Photo by Nicky Pe on Pexels.com

Crepuscular and nocturnal animals rest during the daytime when it is hottest. These animals hunt and forage in the evenings and at night to reduce the amount of energy they spend keeping their bodies cool. Examples of nocturnal animals include owls, bats, and kangaroo rats. Examples of crepuscular animals include mountain lions, deer, and jackrabbits.

5. Reduce water loss through thick skin

close up shot of a scorpion
Scorpions have thick exoskeletons. Photo by Annalise Tingler on Pexels.com

Both animals and plants try to avoid water loss in the desert. Animals such as scorpions have thick exoskeletons to avoid losing water. Many desert plants have thick, waxy skin or bark for this same purpose.

6. Reach deeper water

American Ginseng root, Panax quinquefolius

Many desert trees and plants have deep taproots to reach down to deep groundwater sources. A great example of this is a mesquite tree. Trees like mesquites have such deep taproots that they try to tap into the water table. Plants like this are known as phreatophytes.

7. Lose your leaves

Ocotillo without leaves. Photo taken by the author, near Tuscon, AZ.

Big leaves are great for performing lots of photosynthesis, but big leaves also lose lots of water through transpiration. And in the desert, that’s no good! Desert plants have developed ways to live with fewer (or no) leaves. The ocotillo plant only briefly grows leaves when conditions are moist. Palo verde trees just have tiny leaves, but make up for this by also doing photosynthesis through their green bark. Most cacti have done away with leaves altogether and perform photosynthesis through their green skin instead.

8. Defend your water

Desert plants must live on very little water. And to make things even harder, desert animals want to eat plants for both nutrients and water. Desert plants like cacti defend themselves from hungry, thirsty animals with sharp spines.

Nature Journaling Prompts

Desert Adaptations

close up of woman writing in a journal outdoors

Ask your students to reflect on the following questions in their nature journals:

  1. Humans use a lot more water than animals. How can you live life using less water?
  2. Humans grow non-native plants in many places, for food, livestock feed, and landscaping. What problems might arise from growing non-desert plants in a desert?

New to nature journaling? There are many wonderful options for guided nature journals and hand-made notebooks on Etsy. Here are a few popular options to help get you started with nature journaling:

Teaching Desert Ecology & Adaptations!

If you enjoyed this post, I know you will love my Desert Ecology Unit! Plus, your purchase in my shop supports Wild Earth Lab to create more environmental science content!

Explore more units from Wild Earth Lab

If you enjoyed this post, I know you will love using my environmental science materials in your classroom!


Are you interested in reading more posts like this? Subscribe or follow Wild Earth Lab using the links below!


References and Further Reading

  1. Arizona-Sonora Desert Museum (n.d.). Sonoran Desert Fact Sheets. Available: https://www.desertmuseum.org/kids/oz/long-fact-sheets/
  2. National Park Service (n.d.). Animals. Organ Pipe Cactus National Monument Arizona. Available: https://www.nps.gov/orpi/learn/nature/animals.htm
  3. Nevada Dept. of Wildlife (n.d.). Desert Kangaroo Rat. Available: https://www.ndow.org/species/desert-kangaroo-rat/
  4. National Park Service (n.d.). Animals. Saguaro National Park. Available: https://www.nps.gov/sagu/learn/nature/animals.htm
  5. San Diego Zoo Wildlife Alliance (n.d.). Desert. Available: https://animals.sandiegozoo.org/habitats/desert
  6. Texas Parks and Wildlife (n.d.). Black-tailed Jackrabbit (Lepus californicus). Available: https://tpwd.texas.gov/huntwild/wild/species/rabbit/
  7. U.S. Fish and Wildlife Service (n.d.). Desert Tortoise. Available: https://www.fws.gov/species/desert-tortoise-gopherus-agassizii

Sharing options and discussion for this post:

Posted on 3 Comments

Nocturnal, Diurnal, and Crepuscular Animals: differences explained, plus examples!

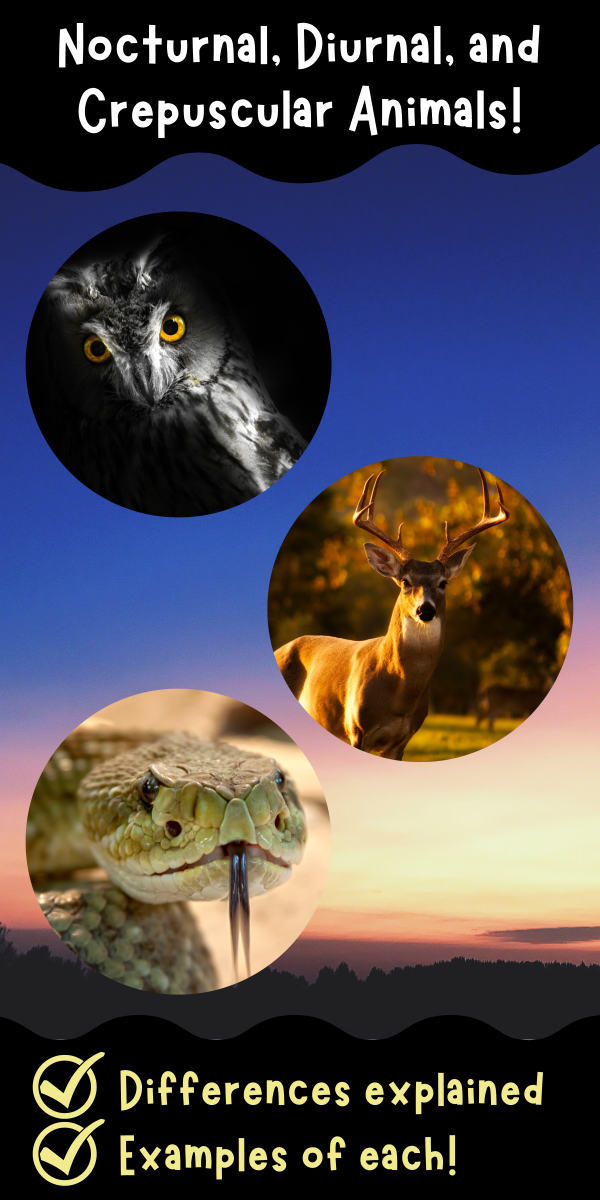
banner with the text "nocturnal, diurnal, and crepuscular animals" and pictures of animals overlaid on the sunset

Wild Earth Lab is supported by readers like you. This post includes links to my own products and affiliate products. If you purchase through links on my site, I may earn a small commission at no additional cost to you.

The change from daytime to nighttime creates a world of difference for animals. Different animals are more active at different times of the day. This is an important animal adaptation that helps animals survive and find food in their habitats. Wildlife biologists sort animals into three categories based on the time of day when they are most active. Diurnal animals are most active during the daytime. Nocturnal animals are most active at night. There is also a third, less well-known category: crepuscular animals. Crepuscular animals are most active at dusk and dawn.

For Teachers: Animal adaptations (including nocturnal, diurnal, and crepuscular) are one of many topics covered in my Desert Unit! Your students will love learning about nocturnal, diurnal, and crepuscular desert wildlife with this illustrated activity set–plus you’ll support this blog with your unit purchase! 💚

Recommended products

These categories–nocturnal, diurnal, and crepuscular–are not always cut and dry. Animals may shift between categories depending on conditions. For example, some animals that are normally nocturnal or diurnal become crepuscular for part of the year to avoid extreme heat or extreme cold.

Additionally, animals will adjust their behavior depending on their habitat. An animal species that is crepuscular in a mild climate may be fully nocturnal in hotter parts of its range to avoid overheating. Furthermore, human activity impacts the behaviors of animals, including the times of day when animals are most active. Wild and domestic animals living in close quarters with humans may alter their natural patterns of activity and rest.

Let’s take a closer look at nocturnal, diurnal, and crepuscular animals!

Nocturnal Animals

Nocturnal animals are most active at night!

Benefits: coolest temperatures to prevent overheating; prey can avoid diurnal predators like hawks and eagles

Challenges: difficulties seeing in the dark for some animals; in winter or in cold climates, it is difficult to stay warm enough at nighttime; nocturnal predators like owls are active

Examples: bats, owls, some rodents, raccoons, moths, badgers, some frogs and toads, geckos

Diurnal Animals

Diurnal animals are most active in the daytime!

Benefits: full daylight makes it easy to see; easy time to stay warm enough; prey can avoid nocturnal predators like owls

Challenges: in summer or hot climates, it is easiest to overheat during the daytime; diurnal predators like hawks and eagles are active

Examples: many snakes and other reptiles, hummingbirds, hawks, eagles, falcons, ducks, bees, butterflies, moose

Crepuscular Animals

Crepuscular animals are most active during twilight – at dusk and/or dawn!

Benefits: cooler temperature than daytime; partial light for visibility

Challenges: for prey animals, many predators are also active at this time

Examples: deer, cougars, some rabbits and hares, some songbirds, coyotes, foxes, some beetles, some frogs and toads

Nature Journaling Activity

close up of woman writing in a journal outdoors

Head out to a natural area in the middle of the day. Sit for 10-15 minutes as you look and listen for animals that are active during the day. Make a list of all the diurnal animals that you observed. Then brainstorm some benefits and drawbacks of being active during the daytime.

Repeat this exercise at either dawn or dusk to observe crepuscular animals, and at night to observe nocturnal animals. Compare your lists.

New to nature journaling? There are many wonderful options for guided nature journals and handmade notebooks on Etsy. Here are a few popular options to help get you started with nature journaling:

Studying Animal Adaptations?

Animal adaptations (including nocturnal, diurnal, and crepuscular activities) are one of many topics covered in my Desert Unit! Your students will love this illustrated activity set, plus you’ll support Wild Earth Lab with your unit purchase!

More Units from Wild Earth Lab:


Are you interested in reading more posts like this? Subscribe or follow Wild Earth Lab using the links below!


Sharing options and discussion for this post:

Posted on 4 Comments

Parts of a mushroom: anatomy of mushrooms plus a fun learning activity!

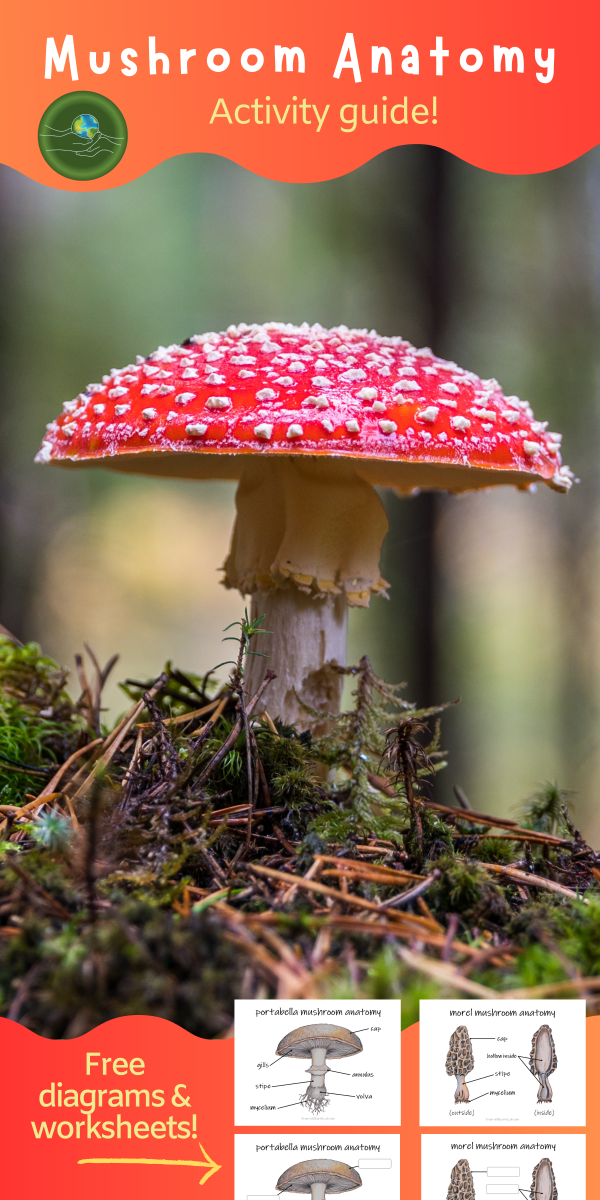
banner with a photo of a mushroom advertising "free diagrams and worksheets"

Mushroom anatomy is a great science activity for students of any age! Try dissecting a mushroom at home, such as a portabella mushroom or shiitake, and identifying these parts! Continue reading to learn about the main parts of a mushroom, or skip to the bottom to download some mushroom anatomy diagrams!

1. Cap

The top portion of the fruiting body of a mushroom, which provides a protective covering.

Little brown mushroom grows out of a stump in Colorado near Cameron Pass.

2. Gills

The gills are located on the underside of the cap. The spores are released from the gills.

brown mushrooms on beige surface
Photo by Laker on Pexels.com

3. Stipe

The stipe is the main supportive stalk of the fruiting body of the mushroom.

4. Annulus

The annulus is located around the stipe of some mushroom, below the gills in some mushrooms. The annulus is the remains of a protective veil that once covered the gills. When it is time to release the spores, the veil breaks away from the gills.

banner with a photo of a mushroom advertising "free diagrams and worksheets"

5. Volva

The volva is a cup-like structure at the base of the fruiting body of a mushroom, above the mycelium in some mushrooms. It is also made of remnants of a veil.

6. Mycelium

There is a lot more to a mushroom than what meets the eye! The mycelium is a network of underground filaments, below the fruiting body. A single filament is called a hyphae. Some of a mycelium’s functions are similar to the functions of a plant’s roots. The mycelium helps anchor the mushroom in the soil. However, mycelia do much more than that! They break down and digest organic matter in the soil, which feeds the mushroom. They also connect mushrooms to one another underground.

Free Mushroom Anatomy Diagrams:

I created these mushroom diagrams in the early days of Wild Earth Lab, and now I’d like to gift them to you and your classroom as a little thank you for your support! They feature my colored pencil illustrations and they are free to download for email subscribers. 🙂

Study Mushroom Anatomy With Wild Earth Lab!

Are you creating a mushroom lesson plan to teach in your classroom or homeschool? You can save time by purchasing my mushroom anatomy resources, available as instant downloads for quick and convenient printing.

NOTE: You can also find these mushroom anatomy worksheets within my complete Mushrooms Unit, which includes materials for studying mushroom anatomy, fungi life cycles, and more!

More mushroom printables from Wild Earth Lab:

I offer a variety of mushroom-themed activities and learning materials in my Etsy shop! Your purchase helps me continue delivering fun educational content and resources! Your purchase from my shop or Etsy store will help me continue delivering fun educational content and resources!


Are you interested in reading more posts like this? Subscribe or follow Wild Earth Lab using the links below!


Sharing options and discussion for this post:

Posted on 1 Comment

What are aquatic macroinvertebrates? Their role in food webs and use as bioindicators!

Drawings of macroinvertebrates overlaid with the text "Let's learn about aquatic macroinvertebrates!" and "topics covered : ecological importance, role in food webs, uses as bioindicators"

What is an aquatic macroinvertebrate? Perhaps you are studying aquatic ecology or bioindicators and came across this term. In this case, the name provides us with a few hints… Let’s break it down:

Aquatic – lives in or on water.

Macro – large enough to be seen by the naked eye.

Invertebrate – animal with no backbone.

So… an aquatic macroinvertebrate is an animal with no backbone that lives in or on water and is big enough that you can see it with your naked eye. This includes animals like aquatic insects, other aquatic arthropods (e.g., crayfish, water mites), aquatic mollusks (e.g., mussels), aquatic worms, and more.

What do these ten animals have in common? They are all aquatic macroinvertebrates! 1. stonefly, 2. caddisfly, 3. mayfly, 4. aquatic beetle, 5. water strider, 6. freshwater snail, 7. freshwater mussel, 8. aquatic worm, 9. water mite, 10. crayfish.

Why do aquatic macroinvertebrates matter?

Aquatic food webs

Now that you know what aquatic macroinvertebrates are, your next question is likely… “Why should I care about them?” True, these tiny critters may seem unremarkable, or even “icky”. However, these creatures have important roles in aquatic ecosystems. Aquatic macroinvertebrates are key members of aquatic food webs. Many macroinvertebrates help recycle nutrients back into the food web by consuming detritus (decaying matter) that settles to the bottom of the water. All those nutrients would be lost if the aquatic macroinvertebrates were not around to use them!

Macroinvertebrates are a key food source for other aquatic animals. Many fish, birds, and amphibians eat macroinvertebrates. If the macroinvertebrate community is not thriving, all the animals that rely on macroinvertebrates as food will feel the impact. Problems for the macroinvertebrate community are problems for the whole ecosystem!

An example of an aquatic food chain

Use as bioindicators

Also, certain macroinvertebrates are very sensitive to poor water quality and other human impacts. For this reason, scientists consider some macroinvertebrate species to be excellent bioindicators. A bioindicator is a type of organism whose wellbeing relates closely to ecological conditions and is studied by scientists

Scientists sometimes struggle to find ways to quantitatively measure overall ecosystem health. Ecosystem health depends on many factors (e.g., temperature, nutrient cycling, water chemistry). How do we know if an ecosystem is healthy? How can we tell if our actions are improving or harming an ecosystem?

To help answer these questions, scientists created indexes of biological integrity. Indexes basically allow us to give an ecosystem a score for its overall health, based on its community. Indexes use things like species richness to represent ecosystem health. A popular index for aquatic ecosystem health looks at EPT richness – that is the number of different types of Ephemeroptera, Plecoptera, and Trichoptera (mayflies, stoneflies, and caddisflies).

Indexes of biological integrity use the relationships between number of taxa and the level of human impact on an ecosystem

Study macroinvertebrates in your classroom!

If you enjoyed this post, I know you will love my Aquatic Ecology: Macroinvertebrates Unit. It includes posters, lab activities, readings, worksheets – everything you need for an awesome aquatic macroinvertebrates unit with your class! Find it in my shop!

Your curriculum purchase supports my blog and helps me create more educational content for the environmental sciences.

Thank you for your support!

More from Wild Earth Lab:


Are you interested in reading more posts like this? Subscribe or follow Wild Earth Lab using the links below!


References and Further Reading

  1. Merritt, R. W., Cummins, K. W., & Berg, M. B. (2008). Aquatic insects of North America (4th edition). Kendall Hunt, Dubuque.
  2. Pyron, M. (2010) Characterizing Communities. Nature Education Knowledge 3(10):39. Available: https://www.nature.com/scitable/knowledge/library/characterizing-communities-13241173/
  3. Stumpf, S., Valentine-Darby, P., & Gwilliam, E. (2015). Aquatic Macroinvertebrates – Habitat and Life History. NPS Inventory and Monitoring Program, 2009. Available: https://www.nps.gov/articles/aquatic-macroinvertebrates-habitat.htm
  4. UNH Center for Freshwater Biology (2013). An image-based key to stream insects. Department of Biological Sciences, University of New Hampshire, Durham, NH 03824 USA. Available: http://cfb.unh.edu/StreamKey/html/index.html
  5. Ward, J. V., Kondratieff, B. C., & Zuellig, R. E. (2002). Mountain stream insects of Colorado (2nd edition). University Press of Colorado.

Sharing options and discussion for this post:

Posted on 3 Comments

10 pond activities to try in your classroom!

banner advertising a blog post with a pond activity round up and an image of a pond food web on a whiteboard

Wild Earth Lab is supported by readers like you. This post includes links to my own products and affiliate products. If you purchase through links on my site, I may earn a small commission at no additional cost to you.

Ponds are an amazing place to teach children about ecology, biodiversity, and wildlife. Here are 10 fun pond activity ideas to try out with your students! I hope these lesson ideas help you have a great pond field trip or pond unit study with your class.

A Special Note For Teachers: are you planning to teach your students about ponds? For great printable handouts, worksheets, and activity directions, look no further than my complete Pond Ecology Unit. Plus, you’ll support this blog with your purchase! 💚

1. Bird Biodiversity:

Grab your binoculars and go birdwatching for waterfowl at a local pond or wetland! How many different types of birds can you spot? Find a bird guidebook or waterfowl species checklist for your local area. Can you identify any of the birds you see? And if you are ready to take flight into the amazing world of wetland birds, I recommend trying my Waterfowl and Waterbirds Unit or reading my blog post about Waterbird Activities.

2. Aquatic Insects:

Did you know that the larvae of many common insects like dragonflies and mayflies live in pond water? Flip over rocks and logs in shallow water and see how many aquatic insects you can find! Learn more about the different types of aquatic insects in my recent blog post or grab some materials and worksheets for identifying common aquatic insects in my Aquatic Insects Mini Study! Finding aquatic insects is one of my personal favorite pond activities and I think your students are going to love it too!

photo of printed classroom handouts for learning about aquatic insects
Study aquatic insects – the cool critters living at the bottom of ponds and streams- with these unique printable study aids!

3. Pond Dipping:

Learn about some of the tiniest of pond plants & critters. Grab a sample of pond water and look at it under a microscope or with a magnifying glass. What can you see?

4. Petite Pond:

Create your own mini model of a pond habitat in an aquarium or tank. Include abiotic features like rocks and sand, and biotic features like pond plants, algae, and sticks. You can even go a step further and capture a few aquatic insects such as water beetles to release into your habitat!

Prefer a kit? Skip the hassle of gathering materials by trying a Wabi Kusa Ecosystem Kit – perfect for making your very own pond ecosystem in a pretty vase!

5. Froggy Fun:

Study the frog life cycle and learn about the roles that frogs play in pond ecosystems. Then learn to fold an origami frog with this tutorial!

6. Riparian Research:

Teach students about riparian areas: the ecologically important boundary zones between water and land. After teaching students about riparian areas, ask students to research a favorite plant or animal that lives in or uses riparian areas – there are many possibilities, including cattails, willows, waterfowl, and frogs. I’ve created some complimentary animal research project worksheets that you can download for free. To access these worksheets and my full library of free learning resources, sign up for my newsletter using the link below:

7. Give Back to Nature:

Participate in a clean-up day at a local pond or wetland. Help pick up trash to improve a pond ecosystem! Then you can stick around afterwards to complete some of the other pond activities. You can also read about the signs of a healthy aquatic ecosystem in these two blog posts:

8. Try nature journaling!

Use different senses to observe the pond! Then write or draw about it. You can find guided natural journals with weekly prompts on Etsy like this one (external link). Or, for a free option, I’ve put together this free pond nature journaling page for kids. To access the free journaling page (and more free resources), sign up for my email newsletter below:

A worksheet for a visit to a pond

9. Pond Scavenger Hunt:

Ponds are a great place to observe tons of biodiversity! See how many different species you can spot with this free pond scavenger hunt worksheet:

A worksheet for a scavenger hunt

10. Try out my Pond Ecology Unit:

If you enjoyed these pond activity ideas, I think you’re going to love my Pond Ecology Unit! It includes tons of activities, worksheets, posters, and more for an awesome pond unit study – all featuring my artwork!

Or, find more Wild Earth Lab Units to try…

Are you interested in reading more posts with activity ideas? Subscribe or follow Wild Earth Lab using the links below


Sharing options and discussion for this post: