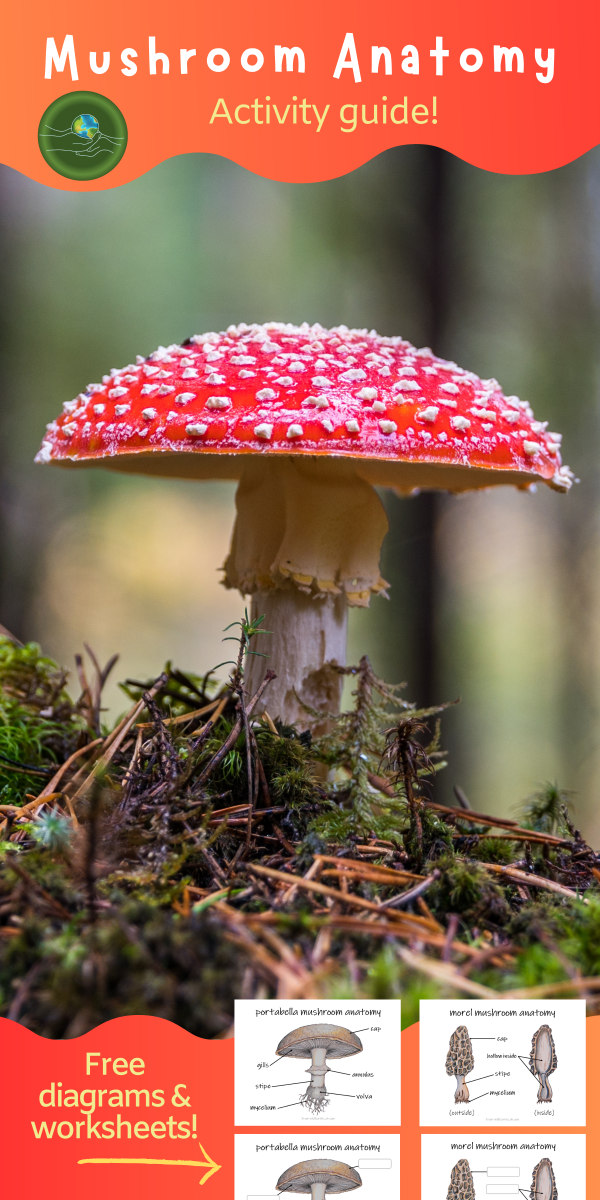
Mushroom anatomy is a great science activity for students of any age! Try dissecting a mushroom at home, such as a portabella mushroom or shiitake, and identifying these parts! Continue reading to learn about the main parts of a mushroom, or skip to the bottom to download some mushroom anatomy diagrams!
1. Cap
The top portion of the fruiting body of a mushroom, which provides a protective covering.
2. Gills
The gills are located on the underside of the cap. The spores are released from the gills.
The stipe is the main supportive stalk of the fruiting body of the mushroom.
4. Annulus
The annulus is located around the stipe of some mushroom, below the gills in some mushrooms. The annulus is the remains of a protective veil that once covered the gills. When it is time to release the spores, the veil breaks away from the gills.
5. Volva
The volva is a cup-like structure at the base of the fruiting body of a mushroom, above the mycelium in some mushrooms. It is also made of remnants of a veil.
6. Mycelium
There is a lot more to a mushroom than what meets the eye! The mycelium is a network of underground filaments, below the fruiting body. A single filament is called a hyphae. Some of a mycelium’s functions are similar to the functions of a plant’s roots. The mycelium helps anchor the mushroom in the soil. However, mycelia do much more than that! They break down and digest organic matter in the soil, which feeds the mushroom. They also connect mushrooms to one another underground.
Free Mushroom Anatomy Diagrams:
I created these mushroom diagrams in the early days of Wild Earth Lab, and now I’d like to gift them to you and your classroom as a little thank you for your support! They feature my colored pencil illustrations and they are free to download for email subscribers. 🙂
Are you creating a mushroom lesson plan to teach in your classroom or homeschool? You can save time by purchasing my mushroom anatomy resources, available as instant downloads for quick and convenient printing.
NOTE: You can also find these mushroom anatomy worksheets within my complete Mushrooms Unit, which includes materials for studying mushroom anatomy, fungi life cycles, and more!
More mushroom printables from Wild Earth Lab:
I offer a variety of mushroom-themed activities and learning materials in my Etsy shop! Your purchase helps me continue delivering fun educational content and resources! Your purchase from my shop or Etsy store will help me continue delivering fun educational content and resources!
Are you interested in reading more posts like this? Subscribe or follow Wild Earth Lab using the links below!
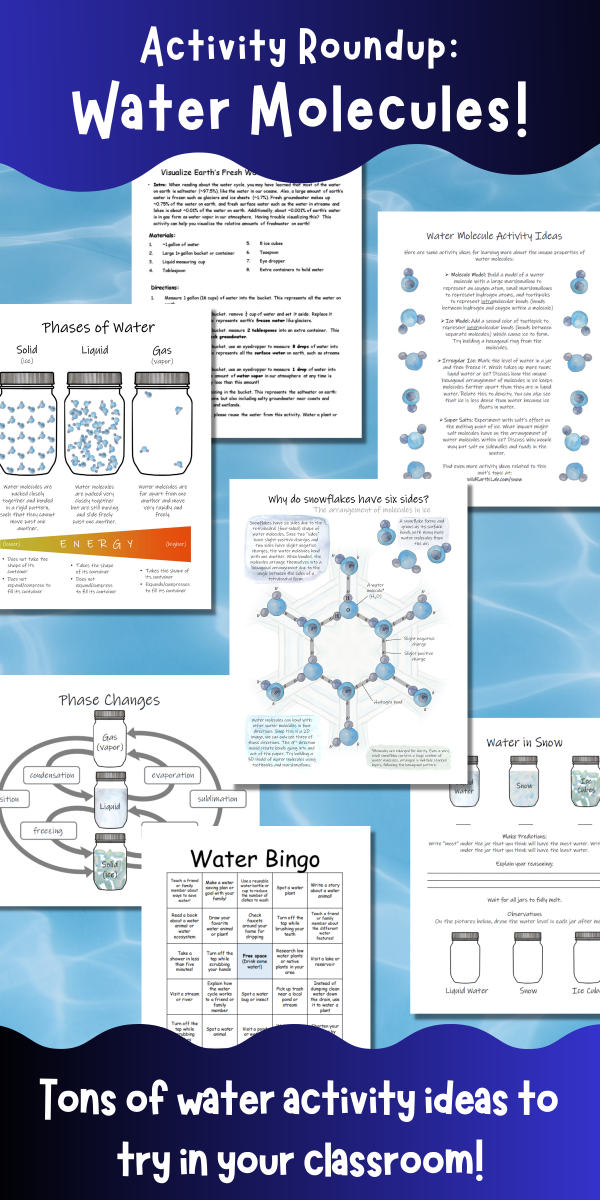
Water. It covers over 70% of the earth’s surface and even makes up about 60% of the human body. But did you know that water has some incredible properties that make it different from other liquids? This is due to water molecules’ unique molecular structure. If you are studying water in your classroom, here are a few fun water molecule activities to help your students “discover” some of water molecules’ weirder properties:
But first, here is a little background info on water molecules. We can think of water molecules as tetrahedral, meaning they behave like a 4-sided shape. Since two “sides” have slight positive charges and two sides have slight negative charges, the water molecules bond with one another. When bonded, the molecules arrange themselves into a hexagonal arrangement due to the angle between the sides of a tetrahedral form.
1. Build a water molecule activity
Build a model of a water molecule with a large marshmallow to represent an oxygen atom, small marshmallows to represent hydrogen atoms, and toothpicks to represent intramolecular bonds (bonds between hydrogen and oxygen within a molecule)
2. Molecular model of ice
After building a water molecule model (see above), continue on to build the hexagonal structure of ice! Add a second color of toothpick to represent intermolecular bonds (bonds between separate molecules) which cause ice to form. Try building a hexagonal ring from the molecules.
3. Volume change: ice vs water
Mark the level of water in a jar and then freeze it. Which takes up more room: liquid water or ice? Discuss how the unique hexagonal arrangement of molecules in ice keeps molecules farther apart than they are in liquid water. Relate this to density. You can also see that ice is less dense than water because ice floats in water.
4. Salt and water – melting point experiment
Experiment with salt’s effect on the melting point of ice. What impact might salt molecules have on the arrangement of water molecules within ice? Discuss why people may put salt on sidewalks and roads in the winter.
Salt impacts the melting and freezing points of water. Photo by Castorly Stock on Pexels.com
5. Study snow with Wild Earth Lab!
If you like these activity ideas, I think you’ll love my Science in the Snow Unit. It’s a complete set of interdisciplinary learning materials to help you teach a fantastic unit on the scientific study of snow and ice for your middle school or high school class. Students will learn about the molecular structure of ice, phase changes, snow water equivalent measurements, snow hydrology, weather stations, and more! Click the link below to learn more!
Wild Earth Lab is supported by readers like you. This post includes links to my own products and affiliate products. If you purchase through links on my site, I may earn a small commission at no additional cost to you.
Ponds are an amazing place to teach children about ecology, biodiversity, and wildlife. Here are 10 fun pond activity ideas to try out with your students! I hope these lesson ideas help you have a great pond field trip or pond unit study with your class.
A Special Note For Teachers: are you planning to teach your students about ponds? For great printable handouts, worksheets, and activity directions, look no further than my complete Pond Ecology Unit. Plus, you’ll support this blog with your purchase! 💚
Grab your binoculars and go birdwatching for waterfowl at a local pond or wetland! How many different types of birds can you spot? Find a bird guidebook or waterfowl species checklist for your local area. Can you identify any of the birds you see? And if you are ready to take flight into the amazing world of wetland birds, I recommend trying my Waterfowl and Waterbirds Unit or reading my blog post about Waterbird Activities.
Did you know that the larvae of many common insects like dragonflies and mayflies live in pond water? Flip over rocks and logs in shallow water and see how many aquatic insects you can find! Learn more about the different types of aquatic insects in my recent blog post or grab some materials and worksheets for identifying common aquatic insects in my Aquatic Insects Mini Study! Finding aquatic insects is one of my personal favorite pond activities and I think your students are going to love it too!
Study aquatic insects – the cool critters living at the bottom of ponds and streams- with these unique printable study aids!
3. Pond Dipping:
Learn about some of the tiniest of pond plants & critters. Grab a sample of pond water and look at it under a microscope or with a magnifying glass. What can you see?
Create your own mini model of a pond habitat in an aquarium or tank. Include abiotic features like rocks and sand, and biotic features like pond plants, algae, and sticks. You can even go a step further and capture a few aquatic insects such as water beetles to release into your habitat!
Prefer a kit? Skip the hassle of gathering materials by trying a Wabi Kusa Ecosystem Kit – perfect for making your very own pond ecosystem in a pretty vase!
5. Froggy Fun:
Study the frog life cycle and learn about the roles that frogs play in pond ecosystems. Then learn to fold an origami frog with this tutorial!
Teach students about riparian areas: the ecologically important boundary zones between water and land. After teaching students aboutriparian areas, ask students to research a favorite plant or animal that lives in or uses riparian areas – there are many possibilities, including cattails, willows, waterfowl, and frogs. I’ve created some complimentary animal research project worksheets that you can download for free. To access these worksheets and my full library of free learning resources, sign up for my newsletter using the link below:
Participate in a clean-up day at a local pond or wetland. Help pick up trash to improve a pond ecosystem! Then you can stick around afterwards to complete some of the other pond activities. You can also read about the signs of a healthy aquatic ecosystem in these two blog posts:
Use different senses to observe the pond! Then write or draw about it. You can find guided natural journals with weekly prompts on Etsy like this one (external link). Or, for a free option, I’ve put together this free pond nature journaling page for kids. To access the free journaling page (and more free resources), sign up for my email newsletter below:
If you enjoyed these pond activity ideas, I think you’re going to love my Pond Ecology Unit! It includes tons of activities, worksheets, posters, and more for an awesome pond unit study – all featuring my artwork!
Are you teaching your students about rivers and streams? Taking your own stream measurements is a great way to turn your lesson into a hands-on science adventure. These are real-world techniques used by watershed scientists and hydrologists to study streams and rivers. Furthermore, it’s an interdisciplinary activity that combines math, measurement, and science to answer questions about rivers and streams.
For Educators: Want printable directions, worksheets, and diagrams for this activity? You will find them in my complete Rivers Unit.
Why should we study rivers and streams? Rivers and streams are important pathways in the water cycle, transporting water between different places. People use river water for drinking, household uses, agriculture, energy production, and more. However, people must be careful when using water from rivers because taking too much too quickly can impact other communities and ecosystems downstream. Hydrologists can collect stream measurements to help ensure that we are not using our water resources too quickly or in unsustainable ways.
Rivers are also facing big issues, including the impacts of climate change. Rivers fed by snowmelt and seasonal monsoons are particularly susceptible to the impacts of climate change. Climate change affects the amount of snow that builds up in the winter and the timing of melt and seasonal monsoons. Pollution is another key issue for rivers. As runoff makes its way over the land, it crosses many surfaces such as roadways, lawns, and farm fields. Chemicals and waste from these surfaces are swept up by the running water and become concentrated in streams and rivers, impacting the river ecosystem and creatures that live there. Scientists and water managers work hard to understand and find solutions to the issues that rivers face today and promote healthy streams and rivers.
Measuring river width and depth
Water depth and width are common stream measurements. The depth and width may vary dramatically as you move upstream or downstream along any stream or river. Width expands as a river moves across flat plains and decreases as the river enters narrow valleys and canyons. Additionally, stream depth typically varies as you move from one side of a stream to the other. The deepest part of a stream cross-section, also known as the thalweg, is not always in the middle – it is sometimes off to the side.
My watercolor painting of students measuring stream width and depth.
Cross-sectional area
Depth and width measurements can be used to estimate cross-sectional area in a location of interest on a river. The cross-sectional area is the area of an imaginary flat surface perpendicular to the direction of flow, bounded by the streambed and water’s surface.
Cross-sectional area of a stream
Calculating River Velocity
Velocity is the speed at which the water is flowing. There are many great tools that hydrologists can use to estimate velocity with high precision and accuracy. However, you can estimate a stream’s velocity in a more low-tech way with just a stopwatch and a stick. Simply time a small item as it floats down a measured length of stream. Then divide the float distance by the time it took the stick to float that far to get velocity!
Velocity is important to know for river safety and boating. Velocity is also used to calculate discharge.
How fast are these ducks moving? That’s the stream velocity!
Measuring River Discharge
Discharge tells us about the amount of water flowing through a river. More specifically, discharge is defined as the volume of water that flows through some cross-section of a river, per unit of time. Think of it this way – velocity is a distance per unit time, and discharge is a volume per unit time. A small creek and a huge river that have the same velocity would not have the same discharge. Discharge is a measurement that allows us to see the difference between that small creek and a huge river because it is a volumetric flow rate.
Measuring discharge helps us keep track of water resources for uses like drinking and growing food. Monitoring river discharge over many years allows water managers to predict and prepare for floods and droughts.
How much water flows out of the dam? It’s important to know the discharge!
Field Trip Activity: Calculate stream discharge!
Materials
Tape measure
Meterstick or yardstick
Stopwatch
Small floating item (e.g., a stick)
A net to catch the floating item (optional)
A small, easily-wadable stream
A buddy or two
Worksheets, diagrams, and printable directions for this activity (available in my complete Science on the River Unit)
Part 1: Estimate Velocity
You can estimate a stream’s velocity in a low-tech way with just a stopwatch and a floating object (e.g., a stick). Simply time a small item as it floats down a measured length of stream.
Time a small item as it floats down a length of the river to estimate the water’s velocity. Photo by Mariana Mileeva on Pexels.com
In a small, easily wadable stream, use the tape measure a short float length (5-10 meters, or 15-30 feet) along the bank, parallel to the stream. Use a shorter distance if the stream is flowing very slowly.
At the upstream end of your measured float length, drop a stick or other small floating object into the water. Drop the stick into a part of the stream that is flowing, not into a pool or eddy.
As you drop the stick, start the stopwatch.
Wait for the stick to float the measured float length. You may need to start over at step 3 if the stick becomes stuck.
When the stick reaches the downstream end of your float length, stop the stopwatch. Record the time in seconds. (If the item you are floating is human-made like a paper boat or rubber duck, be sure to retrieve it so that it doesn’t become litter!)
Repeat steps 2 through 5 two more times. Calculate the average time by adding the three times together and dividing that number by 3.
Divide the float length by the average time to find the velocity.
Part 2: Find Discharge
Discharge is the flow of water in a stream. You can calculate discharge by multiplying the velocity of the stream by the approximate cross-sectional area of the stream.
Return to the same place where you measured the velocity in part 1. In this same place, measure the width of your stream. Hold one end of the tape measure and toss the other end across the stream to a partner on the other side of the stream. Record the width from the water’s edge to the water’s edge.
Use a meterstick or yardstick to measure the depth of the stream in three different places along the tape measure spanning the stream. For example, measure the depth near the left side, near the right side, and close to the center of the stream. Take the average of the three depth measurements.
Multiply the average depth by the width to find the approximate cross-sectional area of the stream.
Multiply the cross-sectional area by the velocity (from part 1) to find the discharge.
Note: use the same units for all the numbers when doing calculations. E.g., if your velocity is in feet per second, then be sure to measure width and depth in feet.
Trying the activity with your class?
You’ll find a complete set of printable worksheets, activity guides, and visual aids for this activity and more cool hands-on science activities in my Science on the River Unit! (Plus you’ll support this blog with your purchase – which is pretty cool too😉).
Wild Earth Lab is supported by readers like you. This post includes links to my own products and affiliate products. If you purchase through links on my site, I may earn a small commission at no additional cost to you.
If you’re learning about pollination with your students or kids this school year, try out some of these fun pollination activity ideas in your classroom!
Special note for educators: if you’re planning to teach pollination, you can find all the activity directions, handouts, and printable materials you’ll need in my complete Pollination Unit– and you will support this blog with your purchase.
A flower that looks fairly plain to the human eye may look completely different through the eyes of an insect! Flower petals sometimes reflect UV and infrared light, which are colors that the human eye cannot see but are visible to some insect pollinators.
Grab a UV marker plus black light set, paper, and regular markers. Start by using a regular marker to draw the outline of a flower and cut it out. Then, create “invisible” patterns on the petals with the black light marker. Then shine the black light on your flower to reveal the hidden designs!
A flower that looks fairly plain to the human eye may look completely different through the eyes of an insect!
2. Pollinator Garden
Plant a pollinator garden with native wildflower species to attract pollinators to your yard. Start by researching native wildflower species in your local area. A plant nursery or garden center can be a great place to start, and you can also find seeds online. To further promote pollinator habitat in your yard, you can even build a pollinator hotel!
3. Flower Dissection
Dissect a flower to learn about flower anatomy. Can you find the stamen, carpel, petals, and sepals? Talk about how brightly colored petals can attract pollinators, how stamens spread pollen onto the pollinator’s body or legs, and how carpels have pollen tracked onto them by the pollinators.
Anatomy of a flower!
4. DIY Flower Anatomy Diagram
Here’s a fun pollination activity idea that’s completely free! I created this free printable flower anatomy coloring activity. You can download and print it from my free resources page. To access the free resources page, simply join my newsletter (you can unsubscribe at any time, but stay subscribed if you’d like my fun science and nature-related activities and more sent to your inbox!)
Visit a butterfly pavilion or butterfly house to observe pollination up close!
Better yet, raise your own butterflies from caterpillars, then release them into your garden where they can feed on your flowers! You do this using a butterfly grower’s kit or by finding caterpillars in your yard to raise.
Raise and release monarch or painted lady butterflies. You can even find kits to band monarch butterflies and discover if they migrated successfully! For more information on monarch banding and tracking, visit Monarch Watch.
7. Healthy Habitats
Participate in an invasive species removal workday at a local natural area. This will help create room for the native wildflowers to grow and feed pollinators!
8. Honey Fun
Learn about how bees make honey (for example, here’s an article about bees making honey from Southern Cross University). Then cook or bake something with honey!
Read about or watch a video of the “waggle dance” that bees use to tell hive members the distance and direction to flowers (e.g., here’s a waggle dance video on YouTube from Bienentanz GmbH). Then, try doing your own waggle dance in the same pattern as the bee!
10. Pollination at Night
If you have night-time opening flowers in your area (e.g., evening primrose, moonflower, night phlox), go for a nighttime walk with a flashlight to observe the open flowers. Go back during the day to see them when they are closed.
Learn about some unusual pollinators with this fun ice-breaker game! I’ve created a printable handout with the game directions and free cards. You can download and print it from my free resources page. To access the free resources page, simply join my newsletter.
Did you know that pollination is a type of symbiotic relationship between a plant and a pollinator? Learn more about symbiotic relationships with my mini study pack:
Biomimicry, also called biomimetics, is when people draw inspiration from nature to design items and solve problems. Plant, fungi, and animal species evolved features and behaviors over vast periods of time to overcome challenges they face in their habitats. Engineers may mimic these features and behaviors from nature to improve their own designs.
A note to teachers: Are you teaching your students about biomimicry, design inspired by nature? I think you’ll love my Tree Frogs STEM unit – it discusses biomimicry and helps build STEM skills through hands-on activities. It’s so much more than “just a frog unit,” and every purchase helps support this blog!
Did you know that tree frog toes are helping to inspire designs for car tires? Tree frog toes have grippy pads. If you could look closely at these pads, you would see a pattern of deep, hexagon-shaped grooves. The grooved pattern helps tree frogs stick to the damp surface of trees. By studying the toes of tree frogs, scientists and engineers are learning to design better tread patterns for car tires to improve traction on damp roads!
Tree frogs and biomimicry: The tiny, grippy patterns on tree frogs’ toes help them stick to vertical surfaces and climb. Similar grippy patterns are seen in tire tread!
Owls/Hummingbird wings and quiet flight
Owls have specialized noise-dampening feathers on the fronts of their wings so they can fly silently and sneak up on prey. Hummingbirds also have similar noise-dampening feathers to keep the sound to a minimum as they beat their wings dozens of times per second! Studying the wings of these birds helped engineers design wings for quieter airplanes.
A hummingbird in flight. Photo by Philippe Donn on Pexels.com
Burs and Velcro
Velcro’s hooks mimic the way that burs stick to the fur of passing animals (or the leg of your hiking pants!). The soft side of the Velcro is like the animal fur, and the rigid side is like the hooks on the bur. Burs evolved as a way for plants to disperse their seeds. There is a seed inside of each bur. By attaching seeds to animals, the plants can reach new habitats, rather than all growing next to the parent plant.
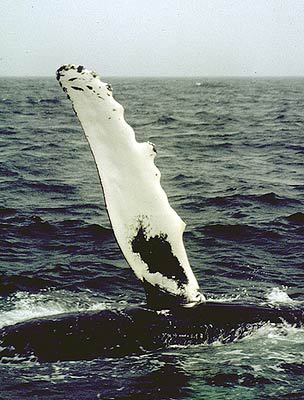
Humpback whale fins helped inspire the design of wind turbine blades. A whale’s unique fin shape is great for increasing lift and decreasing drag. This shape helps the whale glide through the water, and it helps wind turbines spin to generate renewable energy!
Spiders build their webs so that small insects will accidentally fly into the webs and become trapped in the sticky threads. But spiders don’t want larger flying animals like birds to run into and destroy the webs they painstakingly build. To avoid this, some spiders make silk with an ultraviolet coating. The ultraviolet colors are highly visible to birds, but not to many other species. This allows birds to see the web before they inadvertently fly into it and destroy it. A window glass company was inspired by these spiders to create glass windows with a UV-reflective pattern throughout. While not visible to humans, the reflective pattern lets birds know there’s something in their path before they collide with the window and injure themselves.
Spiderweb. Photo by NastyaSensei on Pexels.comWindow glass – a hazard to birds. Photo by Sergey Filippov on Pexels.com
Flying squirrels, sugar gliders, and wingsuits
Wingsuits sometimes used by daredevils in extreme sports like skydiving and base jumping mimic the skin flaps that allow flying squirrels and sugar gliders to sail through the air from tree to tree!
Flying squirrel.
Biomimicry Activity Ideas For Kids
Here are a few activity ideas for teaching students about biomimicry!
Case Study: Have each student research in-depth one particular case of biomimicry. What animal(s) are being mimicked? What traits are being mimicked? How are humans using these traits? What products or systems did it help create?
DIY Biomimicry: provide each student with blank paper and have them brainstorm their own idea for an item or system they could create using biomimicry. Encourage them to start by listing a few favorite animals, and jotting down some of the characteristics/behaviors of each animal. How could those characteristics/behaviors benefit humans? Once they have their ideas, students can draw or write about their design.
Tree Frogs and Biomimicry: Consider downloading my Tree Frogs STEM Unit for kids! It’s a complete unit designed to build math, engineering, and science skills, with activities themed around tree frogs! It includes some fun origami engineering activities as well as information on tree frog biomimicry!
Wild Earth Lab is supported by readers like you. This post includes links to my own products and affiliate products. If you purchase through links on my site, I may earn a small commission at no additional cost to you.
Whether you’re studying forest ecology, plant life cycles, or just looking for a fun nature craft to do after school, you’ll love these tree activity ideas and forest crafts for kids. Try them all!
A note to educators: Looking for great tree teaching materials? I think you will love my complete Trees Unit. It is full of printable worksheets, handouts, activity directions, and everything you need to study trees. Plus, you’ll support this blog with your purchase!
Draw each layer of the forest (floor, understory, canopy, and emergent layers) on a separate piece of paper and cut them out. Assemble them into a booklet, so you can flip through each layer of the forest! These free printable templates will help with this illustration activity. OR, if drawing isn’t your thing, try this completed printable forest layers booklet.
Create your own poster of the common leaf shapes by taking leaf rubbings of different-shaped leaves. Place paper over a leaf and rub the surface of the paper with the side of a crayon. Then label each leaf shape with a marker or pen.
Build a model of tree trunk anatomy by stacking different-sized circles made of construction paper, play dough, or even pancakes! Or – you can use this free printable worksheet as an example/template, or do this as a coloring activity!
If you really want to dive into tree anatomy, I also recommend trying out my tree anatomy mini-study, which includes tree anatomy diagrams and much more:
4. Calculate Tree Height
This is one of my favorite tree activity ideas because it uses math! Make your own inclinometer and use it to calculate tree height! Here’s another article about how to make your own inclinometer and measure tree height, and also download this free tree height math poster!
You can also find additional worksheets and directions for a tree-height activity in my Math in the Forest unit. If you are interested in hands-on math activities and real-world math applications, I think you’ll enjoy this one:
5. Measure Tree Circumference, Diameter, & Radius
Here’s another math-based tree activity idea! Teach your students about circumference, diameter, and radius in a unique and hands-on way! Head outside with a tape measure and measure the circumference of different trees, then calculate their diameter and radius! Or use diameter and circumference measurements on a tree stump to back-calculate pi and see how close you can get to 3.14159265359….
I also created a mini-study with printable posters, worksheets, and activity guides for a pi, diameter, and radius lesson using tree measurements! You can support my blog by checking it out and purchasing it:
The canopy is the upper part of a forest. What does the canopy look like from below? Create a 1-point perspective drawing of the forest canopy. This is a fun way to add an art project to your studies of trees!
A perspective drawing of the forest canopy
7. Tree Ring Crafts
Cut thin slices of a tree trunk or branch. Count the rings to figure out the age of the tree (or branch). Drill a small hole through the top of each slice and then paint them to make hanging ornaments or name tags!
Don’t want to cut your own slices? Fortunately, you can also purchase wood slices in bulk.
Plus, you can read more here about tree rings, why they form, and how scientists use them!
Collect samples of parts from several different deciduous and coniferous trees (leaves, needles, seedpods, flowers, fruits, cones, etc.). Grab two jars and label one “deciduous” and one “coniferous”. Sort the parts into the jars.
All the printable worksheets, directions, & materials you’ll need for the activities in this post are found in my Forest Collection. It’s a bundle of 3 tree and forest-themed units that I know you and your students will love:
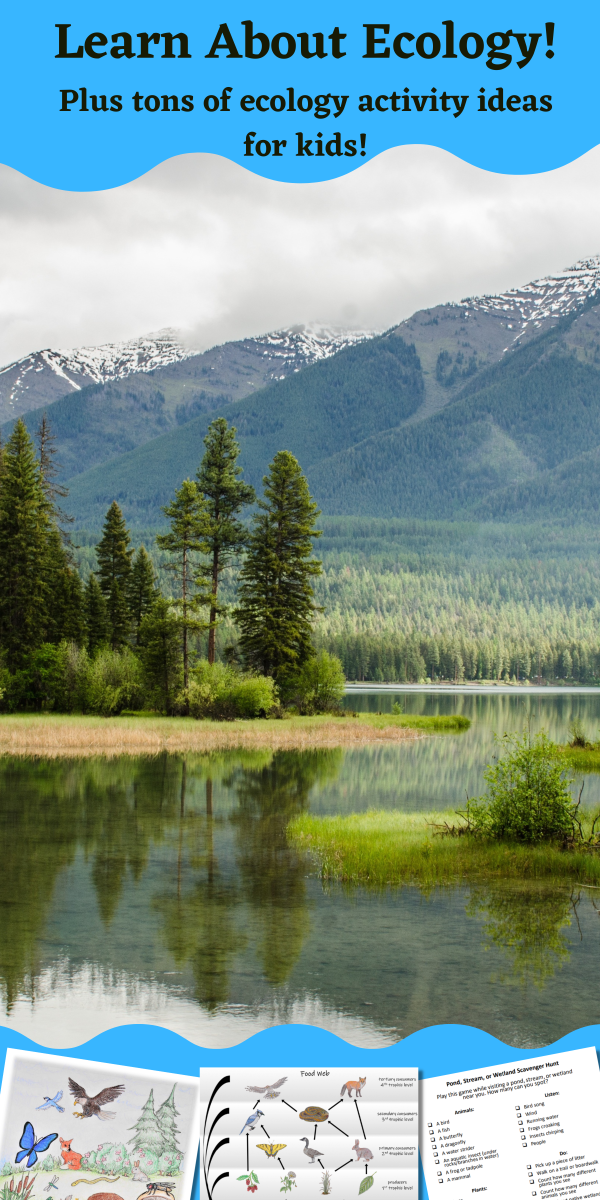
In this article, learn about ecosystems and ecology! Plus, you’ll learn the difference between biotic and abiotic. Also, read about why ecology is important and learn about what ecologists study!
Click here to skip to the the list of Ecology Activity Ideas for Kids!
An ecosystem is a community of living things (or organisms) that interact with one another and the environment where they live. Ecosystems include living (biotic) things such as animals, fungi, and plants. Furthermore, ecosystems also includes non-living (abiotic) parts of the environment, such as rocks, soil, water, and weather. All the living and non-living parts of an ecosystem are interacting and affecting each other over time in many ways.
Looking for ecology lessons? Try out my food webs unit!
What is ecology?
Ecology is a type of science that looks at the relationships living things have with one another and with their environment. In other words, ecology is all about understanding the connections between organisms and their surroundings.
An ecosystem includes both living and non-living parts of an environment!
Why is ecology important?
We as humans do not live outside of ecosystems. Just like mushrooms, mice, and maple trees, humans are organisms that are a part of ecosystems! The ecosystems around us affect our lives, and often more noticeably, we affect our ecosystems. It’s important for us to understand the inner workings of ecosystems and how we impact them, so that we can find ways to go about our lives while also promoting healthy ecosystems. The scientists doing this work are called ecologists.
Ecologists study many topics that relate to ecosystems and the species that live in them. Here are some important topics that ecologists study:
Food webs
Relationships between species, including symbiotic relationships!
Impacts of natural disasters on ecosystems (e.g., wildfire, floods, volcanic eruptions)
Succession (changes in ecosystems after disturbances like fire)
Types of habitats and the ways that species use them
The impacts caused by invasive species
Assessing ecosystem health and human impacts
An example of a food web!
Ecology Activity Ideas for Kids:
Food Chains & Food Webs: Print out some animal, plant, and fungi pictures and build your own food chains and food webs (example here)
Biotic & Abiotic: Fill an egg carton or other container with tiny treasures found outdoors (e.g., pebbles, feathers, shells, a clump of dirt, etc.). Sort the items into two piles: biotic things (are living or were once part of a living thing) and abiotic things (never were alive)
Clean it Up: Participate in a clean up day at a natural area and help improve your local ecosystems!
Invasive Species: Participate in a invasive species removal day at a local natural area!
Symbiosis: Learn about symbiotic relationships! Check out this resource.
Population Sampling: Learn how to estimate populations with random sampling. Here’s an example of an ecological sampling lesson plan from Northern Arizona University.
Teaching kids about ecology with Wild Earth Lab:
I have tons of both free and paid resources to help you teach your kids or students all about ecology! Please check out the following:
In this video activity, students will learn to fold an origami jumping frog! Origami is the art of folding paper. Through origami, a simple piece of paper takes on different shapes, and can even be transformed into complex figures such as boxes, flowers, animals, and much more. In this activity, you will fold your own jumping tree frog out of paper!
Folding a jumping frog is a great activity to do with students of any age. It’s a great add-on activity to a frog life cycle unit! Folding a frog helps students practice the art form of origami and follow a step-by-step procedure. Students can practice measuring how far the frog can jump. Furthermore, students can modify their frogs to try to make them jump further – a great way of practicing adaptability, problem-solving, and innovation skills central to STEM fields.
Fold an Origami Jumping Frog: Video Tutorial
Origami Frog Materials
To fold your jumping frog, all you need is a piece of paper. You may also use markers, pencils, or any other art supplies of your choice to decorate your finished jumping frog.
Fold a Jumping Frog: Written Step-by-Step Directions
Start with a rectangular piece of paper. If it has a colorful side, place it facing down.
Fold diagonally so that the top corner meets the opposite edge. Crease then unfold.
Repeat the previous step with the other top corner. Unfold.
Flip the paper over. The creases will form an X.
Fold the top edge down to create another crease through the center of the X.
Unfold, then press in on the new crease to start popping up the paper like a tent.
Flatten the paper by pinching together the top and bottom of the X.
Flip over.
Fold the two triangular flaps toward the top and crease. This will be the frog’s front arms.
Fold both sides into the center line.
Flip over. This will be the frog’s back.
Now begin folding the frog’s springy back legs. Fold approximately the bottom fourth of the paper up over the back.
Flip over. Now fold the bottom the same amount over the front to create a spring.
Flip over your completed frog. Add eyes or decorate your frog.
To get the frog to jump, place the frog on a hard, flat surface. Press down on the back end of the frog, compressing the springy back legs, then quickly release.
Did you know tree frogs can jump about 50 times their body length?
Visit the Wild Earth Lab shop for nature-based STEM curricula!
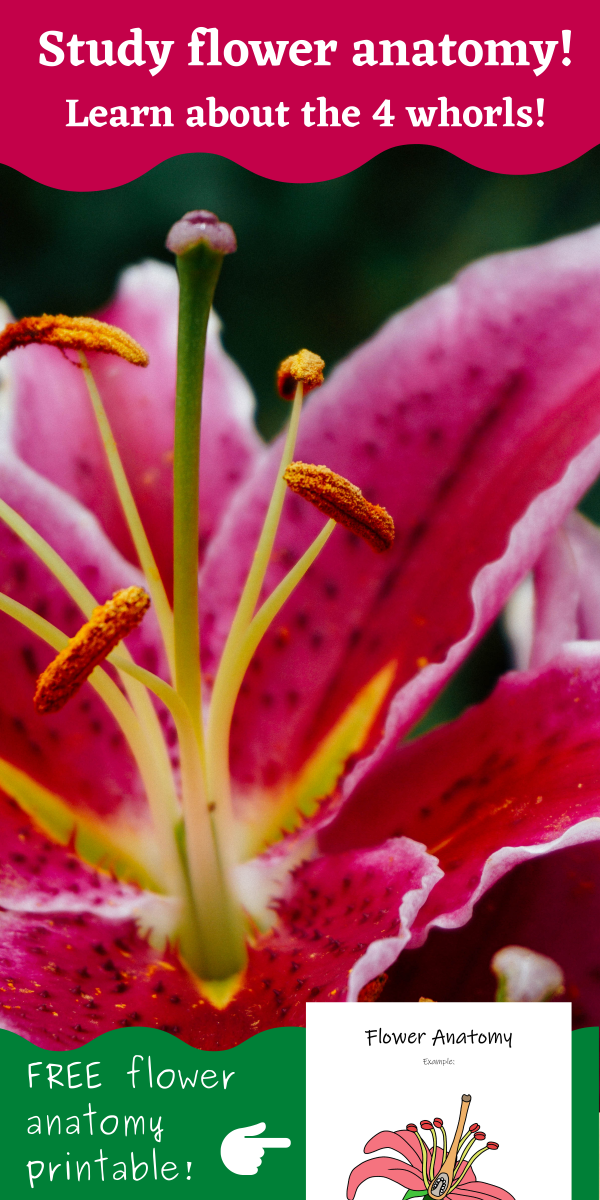
Flower anatomy is an important concept in botany! Whether you and your students are studying fruits, pollination, or plant life cycles, understanding the basics of flower anatomy is important background knowledge. Specifically, this post covers the basic parts of flower anatomy: the 4 “whorls” of complete flowers (sepals, petals, carpel, and stamen) as well as other basic parts supporting the flower’s structure.
A note for teachers: Are you teaching flower anatomy and life cycles? I think you will love my complete Flowers Unit. It includes all the hands-on activities, worksheets, and handouts that you’ll need to teach flowers. The Flowers Unit is also found within my Botany Bundle. Every unit I create is designed to bring the real experience of being a scientist to the classroom and features my original watercolor artwork in diagrams and other visuals–plus you’ll support this blog with your purchase! 💚
Before we dive into the four whorls of flower anatomy, take a look at this flower anatomy diagram, which shows the main parts of a flower.
A flower anatomy diagram of a complete flower (lily) with all four floral whorls: sepals, petals, stamens, and carpel.
Sepals
The sepals are small modified leaves located around the base of a flower. Sepals support the flower and protect the other flower parts while the flower is closed before and after pollination. You can find sepals still attached to some fruits.
The green sepals of a sunflower. Photo by Hilary Halliwell on Pexels.com
Petals
The petals are modified leaves that help attract pollinators to the flower. Petals are often large and brightly colored and may have patterns of colors in the ultraviolet spectrum which can be seen by insects even though it is invisible to the human eye. Interestingly, petals’ bright colors and patterns have evolved to send a signal to pollinators: “This way to the food!”
The brightly colored petals of a rose. Photo by Pixabay on Pexels.com
Stamen
The stamens are the male part of a flower that produces pollen. The job of the stamen is to ensure the pollen is gently attached to pollinators‘ bodies as they visit the flower to drink nectar. Each stamen has two main parts:
Anther – the top portion of the stamen, which contains the pollen.
Filament – a short stalk supporting the anther.
A flower with six purple and pink stamens. Photo by Anthony on Pexels.com
Carpel
The carpel is the female part of a flower that receives the pollen (also known as the pistil). Primarily, the carpel awaits pollen to be tracked onto it by a pollinator as it travels from flower to flower. The carpel has three main parts:
Stigma– the tip of the carpel that receives the pollen.
Style – a tube connecting the stigma to the ovary. Genetic material travels from the stigma, down the style, and to the ovary.
Ovary – the part of the carpel that develops into a fruit after pollination. The ovary contains ovules that develop into seeds.
A flower’s carpel. The orange stigma sits atop the long green style. Photo by Skyler Ewing on Pexels.com
Pedicel
A pedicel is a short stalk holding a single flower. A stalk holding more than one flower is called a peduncle. Both pedicels and peduncles serve the function of supporting flowers and transporting water and nutrients to the flowers.
Receptacle
The receptacle is the thickened top portion of the pedicel that connects to the flower’s base. This part supports the flower and holds the floral whorls. The receptacle becomes part of the fruit in certain fruits such as raspberries and strawberries.
Complete vs Incomplete Flowers and Perfect vs Imperfect Flowers
Flowers are classified as complete or incomplete and perfect or imperfect. Perfect flowers have both male and female parts (stamen and carpel). Imperfect flowers have either male or female parts but not both.
Any flower that has all four whorls (sepals, petals, stamens, and carpel) is called a complete flower. Complete flowers will also always be perfect flowers. However, perfect flowers are not always complete. A flower that has three or fewer whorls is called an incomplete flower. A flower can be incomplete and still be perfect (for example, a flower with petals, stamens, carpel, but no sepals).
Flower Anatomy Activities
1. Flower anatomy coloring activity:
The Free Resourcespage of my website includes this flower anatomy coloring activity. My email subscribers can access and download my full collection of free resources!
Are you teaching your students about the parts of a flower or plant anatomy? Sometimes the best way to understand how something works is by taking it apart. A flower dissection is a…
If you’re an educator planning to teach plant or flower anatomy, great activities and visuals are key to deepening understanding! I think you and your students will love my Flower Anatomy Diagrams, which you can also find within my complete Flowers Unit or the even more comprehensive Botany Collection (Plus you’ll support my blog with your purchase! ❤️)