Posted on Leave a comment

Measuring Soil Infiltration Rates: A Science Classroom Activity

students observe a white cylinder inserted into the soil
text that says share this post

Are you teaching the water cycle or studying soil in your classroom or homeschool? Measuring infiltration rates in different types of soils is a hands-on activity that helps students explore how water interacts with the ground. This soil infiltration activity also ties in perfectly with studies of porosity and permeability. This engaging experiment works as a stand-alone lesson or as part of a broader unit on soil science or the water cycle.

Before we dive in: The activity from this post comes from my complete Water Cycle Unit. If youโ€™re an educator planning to teach infiltration and the water cycle, you’ll find printable directions, worksheets, and much more in the Water Cycle Unit (plus youโ€™ll support my blog with your purchase! โค๏ธ)

Materials

Gather the following materials to complete this activity:

  • Short tube or pipe with openings on both ends, something sturdy works best:
    • A short PVC pipe
    • Or potentially a sturdy can opened on both ends (file down any sharp edges before use)
  • Ruler
  • Permanent marker
  • Hammer or rubber mallet
  • Water
  • Stopwatch
  • Student worksheets & printable directions (available in my Water Cycle Unit!)
A photo showing classroom handouts for studying infiltration of water into soil

Measuring Soil Infiltration: Step-by-Step Directions

The basic idea of this soil infiltration activity is that you will hammer a tube shallowly into the soil, then pour water in, and observe the water level drop as the water seeps into the ground. Assist your students as they work through the following steps.

Pre-Lab

In this lab, students will compare the infiltration rate in at least three different locations with different types of soil. For example, they could compare a sandy soil, a clay soil, and a soil rich in organic matter.

Before starting the lab activity, ask your students to observe and handle the three different soils. Students should write a description of each soil’s observable properties (color, texture, moisture, particle size). Then, students should predict which soils will have the highest and lowest infiltration rates. Students should explain their reasoning for their predictions.

Part 1: Set Up Your Infiltrometer

First, you and your students will need to set up your “infiltrometer” (tube for measuring infiltration rates).

  1. Use a ruler and permanent marker to make measurement markings up the inside of the tube, starting from one end.
  2. Hammer the infiltrometer (tube) into the soil โ€“ the goal is to create a seal with the soil so that water wonโ€™t leak out under the tubeโ€™s rim. (An adult should complete this step for younger students.)
sketches showing a tube being hammered into the soil then filled with water.

Part 2: Measure Infiltration

Once you’ve set up the infiltrometer, you are ready to continue with the soil infiltration activity and collect your measurements.

  1. Pour water into the infiltrometer.
  2. Note the starting height of the water and start the stopwatch.
  3. Watch the water level in the infiltrometer lower as the water seeps into the soil.
  4. Repeatedly record the water level over time on the student worksheet.
  5. Repeat in different soils โ€“ compare a sandy soil, flowerbeds, mulch, gravel, sand, compost, etc.

Post-Lab

For an extra math challenge: Calculate the infiltration rate for each of the soils:

You may also wish to ask your students to reflect on their predictions. Were their predictions correct? Which soil had the highest infiltration rate? The lowest? What might cause this?

What’s Next?

Once you’ve measured infiltration, why not measure other water cycle processes? Be sure to check out my blog post explaining how to measure evaporation and my post on making a DIY rain gauge to measure precipitation with your students!

Materials for Teaching Infiltration and the Water Cycle

Save time preparing for this activity! My Water Cycle Unit includes printable directions and worksheets for this activity and two other water cycle activities. Plus flashcards, diagrams, and more. Check it out:

photo of at home science lab activity handouts and worksheets

Explore more lessons from Wild Earth Lab:

If you enjoyed this post, I know you will love trying my other printable science and nature units in your classroom too!


Are you interested in reading more posts with science activity ideas? Don’t forget to subscribe or follow Wild Earth Lab using the links below!


Subscribe, share, and comment:

Posted on Leave a comment

DIY Rain Gauge Activity for Teaching the Water Cycle

plastic bottles and scissors on a classroom desk
text that says share this post

Teaching your students about the water cycle? Building a DIY rain gauge from a plastic bottle is a fun, hands-on activity to explore a key water cycle process: precipitation. This simple project is perfect for your classroom or homeschool and can be a stand-alone lesson or part of a larger study of water cycle processes.

Before we dive in:ย The activity from this post comes from my complete Water Cycle Unit. If youโ€™re an educator planning toย teach precipitation and the water cycle, you’ll find printable directions, worksheets, and much more in the Water Cycle Unit (plus youโ€™ll support my blog with your purchase! โค๏ธ)

Materials

Gather the following materials to complete this activity:

  • 2 empty plastic soda bottles of the same size
  • Scissors
  • Ruler
  • Permanent marker
  • Student worksheets & printable directions (available in my Water Cycle Unit!)
A photo showing classroom handouts for teaching students how to build a precipitation gauge

Measuring Precipitation: Step-by-Step Directions

The basic idea of this lab is that you will build your own rain gauges out of plastic soda bottles and then use them to collect and measure precipitation in two places. Assist your students as they work through the following steps.

Pre-Lab

In this lab, students will compare the precipitation measured in at least two different locations. For example, they could compare an area with trees and an area out in the open. Or they could give one rain gauge to a friend on the opposite side of town.

Before starting the lab activity, ask your students to make some predictions and explain their reasoning. Which location will receive more precipitation? Or will both locations receive the same amount? Explain your reasoning.

Part 1: Make Your Precipitation Gauge

You will need to build your precipitation gauges and then wait several days to collect your results. First, here’s how to make your own precipitation gauges from plastic bottles:

  1. Cut the plastic soda bottles in half below the tapered necks (an adult should do this step for younger children).
  2. Turn the bottlenecks upside down to make funnels.
  3. Use a ruler and permanent marker to make measurement markings (e.g., centimeters or inches) up the side of the bottle, starting from the bottom.
images depicting cutting a bottle in half then using the top half to make a funnel into the bottom half

Part 2: Measure Precipitation

Several days later, complete the experiment:

  1. Place each precipitation gauge outside. You may wish to stack rocks around the gauges to keep them from tipping over.
  2. Compare the precipitation in two locations. Try placing one precipitation gauge somewhere with trees and one out in the open. Or give one gauge to a friend or family member who lives nearby.
  3. In winter, if you have snow, remove the funnel from the top of each gauge bottle to allow snow to fall directly into the base of the bottle. Bring the gauge inside to allow the collected snow to melt to measure snow water equivalent.

Post-Lab

For an extra math challenge: Measure the diameter (D) of the precipitation gauge and then calculate the volume of water that you collected in each rain gauge using the volume of a cylinder equation:

volume of a cylinder equations

You may also wish to ask your students to reflect on their predictions. Were their predictions correct? Which location received more precipitation? What mechanism might have caused this?

What’s Next?

Once you’ve measured precipitation, why not measure other water cycle processes? Be sure to check out my blog post explaining how to measure stream flow with your students and how to measure evaporation!

Materials for Teaching Precipitation and the Water Cycle

Save time preparing for this activity! My Water Cycle Unit includes printable directions and worksheets for this activity and two other water cycle activities. Plus flashcards, diagrams, and more. Check it out:

photo of at home science lab activity handouts and worksheets

Explore more lessons from Wild Earth Lab:

If you enjoyed this post, I know you will love trying my other printable science and nature units in your classroom too!


Are you interested in reading more posts with science activity ideas? Subscribe or follow Wild Earth Lab using the links below!


Subscribe, share, and comment:

Posted on Leave a comment

Hands-On Water Cycle Activity: Measure Evaporation

Jars with blue water
text that says share this post

Looking for a simple, hands-on way to teach the water cycle? Measuring evaporation is an easy activity that brings the process to life for your students. Perfect for classrooms or homeschools, this experiment makes learning about the water cycle engaging and interactive! You can measure evaporation as a stand-alone activity or as part of a larger exploration of water cycle processes.

Before we dive in: The activity from this post comes from my complete Water Cycle Unit. If youโ€™re an educator planning to teach evaporation and the water cycle, you’ll find printable directions, worksheets, and much more in the Water Cycle Unit (plus youโ€™ll support my blog with your purchase! โค๏ธ)

Materials

Gather the following materials to complete this activity:

  • Two small see-through jars or cups
  • Liquid measuring cup (or graduated cylinder)
  • Water
  • Food coloring
  • Permanent marker
  • Student worksheets & printable directions (available in my Water Cycle Unit!)
A photo showing classroom handouts for teaching evaporation lab activities

Measuring Evaporation: Step-by-Step Directions

The basic idea of this lab is that you will have two jars, one with a lid and one without. You will observe the change in the water level in the two jars over several days due to evaporation. Assist your students as they work through the following steps.

Pre-Lab

Before starting the lab activity, ask your students to make some predictions and explain their reasoning.

Will the jar with the lid:

  • Loose water?
  • Gain water?
  • Remain the same?

Will the jar without a lid:

  • Loose water?
  • Gain water?
  • Remain the same?

Part 1: Set Up

You will need to set up the experiment and then wait several days to collect your results. On the first day, take the following steps:

  1. Use a liquid measuring cup to measure equal amounts of water into two small glass jars.
  2. Put a drop of food coloring in each jar.
  3. Use the marker to mark the water level in each jar.
  4. Leave one jar open. Put a lid on the other jar โ€“ this will be your control. Discuss with your classmates and/or instructor the purpose of a control in a science experiment.
  5. Place the jars under a covered area so rain canโ€™t fall into them. Wait several days or weeks. Evaporation may occur very slowly in humid climates.

Part 2: Measure Evaporation

Several days later, complete the experiment:

  1. Once the water level is visibly lower in the open jar, use the graduated cylinder or liquid measuring cup to measure the amount of water in each jar. Record the volume on the student worksheet.
  2. The difference between the two jars is the amount of water that evaporated.
  3. Discuss whether water evaporated from each jar โ€“ why or why not?

Post-Lab

Ask your students to reflect on their predictions. Were their predictions correct? Why or why not? Which jar lost water? What caused it to lose water?

What’s Next?

Are your students up for a bigger challenge? Now that you’ve observed evaporation, why not measure some other water cycle processes? Be sure to check out my blog post explaining how to measure stream flow with your students and how to measure snow!

Materials for Teaching Evaporation and the Water Cycle

Save time preparing for this activity! My Water Cycle Unit includes printable directions and worksheets for this activity and two other water cycle activities. Plus flashcards, diagrams, and more. Check it out:

photo of at home science lab activity handouts and worksheets

Explore more lessons from Wild Earth Lab:

If you enjoyed this post, I know you will love trying my other printable science and nature units in your classroom too!


Are you interested in reading more posts with science activity ideas? Subscribe or follow Wild Earth Lab using the links below!


Subscribe, share, and comment:

Posted on Leave a comment

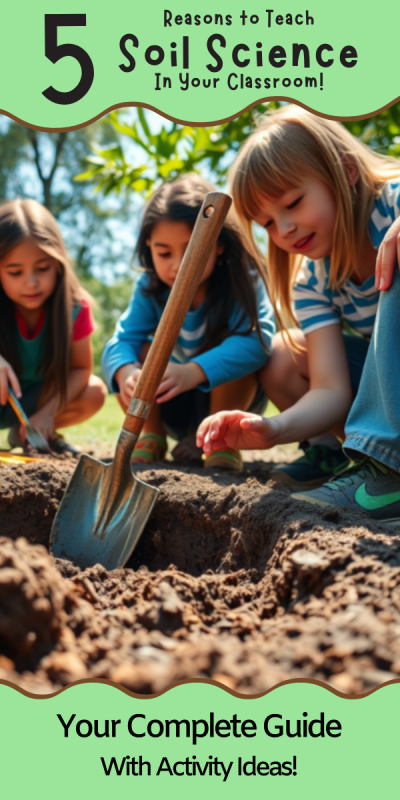
5 Reasons to Teach Soil Science in Your Classroom

Children gathered around a hole dug in the soil
text that says share this post

Soil is often overlooked as a classroom topic, yet itโ€™s a fascinating and practical area of science to explore with one’s students. Whether youโ€™re introducing elementary schoolers to the basics of earth science or tackling advanced environmental science concepts with high schoolers, soil science offers countless opportunities for hands-on learning with real-world applications. Here are five compelling reasons to incorporate soil science into your classroom curriculum.

But first: if you’re already on the hunt for great soil science teaching materials, I think you and your students will love my complete soil science unit. It includes directions for five soil lab activities, worksheets, readings, and engaging diagrams. Plus you’ll support this blog with your purchase!

1. Soil Science is an Interdisciplinary STEM Subject

One of the most exciting things about teaching soil science is its interdisciplinary nature. It bridges various STEM (Science, Technology, Engineering, and Math) fields, letting your students experience how scientific disciplines interconnect. For example, students will use math to calculate soil porosity and permeability and apply chemistry to analyze pH levels and organic matter content. Biology comes into play when learning about soil microorganisms! And even physics will come up when looking at how water moves through different soils.

Teaching soil science allows you to create lessons that naturally integrate multiple disciplines. For instance, you might try a lab where students add water to sandy and silty soils, calculate porosity, and graph their results. You can read my blog post about how to calculate porosity in your classroom! Activities like this, while simple, reinforce STEM skills!

a lab bench with a clipboard, some soil in dishes, and a bottle of liquid
A soil organic matter lab activity. Find directions online or printable versions.

2. Soils Impact Our Food, Water, Climate, and Ecosystems

Soil is so much more than just dirt! Soil is necessary for food production, water filtration, carbon storage, and ecosystem health. Teaching students about soil helps them understand the connections between soil and global challenges like food security and climate change.

For example, healthy soils are necessary to grow crops that feed Earth’s growing population. Soils also act as natural filters, purifying water as it percolates through its layers. Furthermore, soils tie into ecosystems and the climate, since they store carbon and other nutrients. Studying soil science is a great way to begin a discussion on sustainability and environmental conservation with your students.

3. Soil is Great for Hands-on Activities!

When you teach soil science, you’ll have the chance to try many hands-on learning activities with your students. For example, you could analyze soil textures – for example, by doing the soil textures “jar lab” I wrote previously about in my blog. The basic idea is this: students mix soil samples with water, shake them, and let the particles settle into layers of sand, silt, and clay. The larger, heavier particles settle out first, which lets your students observe the amount of sand, silt, and clay in the soil. This simple experiment visually demonstrates the concept of soil texture and allows students to connect theoretical knowledge with real-world observations.

Another activity is testing soils’ organic matter content. This activity relies on chemistry: when applied to soil, hydrogen peroxide reacts with organic matter, causing bubbling and fizzing. If you’d like to try this activity, you can find step-by-step directions in my blog post about detecting soil organic matter with hydrogen peroxide.

Truly, thereโ€™s no shortage of soil science experiments and activities to try. Additional options could include measuring soil pH levels and growing plants in different soil types to observe how soil composition impacts growth. These hands-on labs make lessons more interactive and also teach science skills like hypothesis testing and data collection.

a jar with soil and water and a stopwatch on a table next to handouts and worksheets
A soil textures jar lab. Find the directions online or printable versions.

4. Soil Knowledge is Useful in Many Career Paths

A little soil science knowledge goes a long way for students who dream of working outdoors or making a difference in the environment. Professions in agriculture, conservation, environmental science, land management, and urban planning all require a deep understanding of soil. Additionally, careers in engineering, hydrology, and ecology often intersect with soil science, offering even more opportunities for students with this foundational knowledge.

Introducing soil science in the classroom helps students see how their lessons could lead to fulfilling careers. You can highlight professionals who work in these fields, invite guest speakers, or assign projects where students explore soil-related careers. These activities provide opportunities to explore a variety of career paths for students who may not yet see how their classroom studies relate to their future goals.

corn plant on field
Soil knowledge is key in many careers, including agriculture. Photo by Flambo on Pexels.com

5. Soil Science Gets Students Outside

Another great reason to teach soil science is the opportunity to take your class outdoors. No matter where you live, thereโ€™s soil to explore! Outdoor activities like digging into a local soil horizon, observing soil erosion, or starting a classroom composting project can help students apply their classroom knowledge to real-world observations.

Fieldwork can be as simple or elaborate as you want it to be. You might organize a short walk around your school grounds to collect soil samples or partner with a local park for a more in-depth study. Outdoor experiences are sure to enrich your soil lessons. Plus, theyโ€™re a great way to encourage physical activity and break up the monotony of a traditional classroom setting.

Teaching Soil Science in Your Classroom

If youโ€™re an educator planning toย teach soil science, great learning resources are key to deepening understanding! I think you and your students will love my complete Soil Science Unit (plus youโ€™ll support my blog with your purchase!)

Explore more lessons from Wild Earth Lab:

If you enjoyed this post, I know you will love trying my other printable science and nature units in your classroom too!


Are you interested in reading more posts like this? Subscribe or follow Wild Earth Lab using the links below!


Subscribe, share, and comment:

Posted on Leave a comment

Teaching Climate Change: hands-on sea ice albedo experiment

Albedo lab materials - tubs with water and foil

Are you looking for a hands-on activity to teach climate change? In this lab, students will create a model of sea ice and ocean water albedo using aluminum foil and two tubs of water. Students will track the temperature in a covered and un-covered tub on a sunny day. Students will learn about albedo and the impacts of positive feedback loops in climate change.

Important: Iโ€™ve made the directions for this albedo lab activity available for free here in this post. If you would like printable directions and worksheets for this activity, you can purchase them in my Albedo Lab mini-study. These materials are also included within my complete Antarctica Unit and Polar Bundle.

Printable directions for the albedo lab activity are available in my mini-study.

Materials

Each lab group will need the following materials:

  • Two clear-bottomed shallow plastic tubs of equal size
  • Cold liquid water
  • A large piece of dark blue or black paper or cloth
  • Aluminum foil
  • 2 thermometers
  • Printed student handouts and worksheets
Student worksheets for the albedo lab activity.

Tips for Success

  • Complete this lab on a sunny, warm day close to mid-day when the sun is overhead. This lab may not work on cold or overcast days, or in the early morning or afternoon when the sun is at a lower angle in the sky.
  • Students should record the water temperature in the two tubs at a 5-minute interval. If the water is warming slowly, you can instruct students to switch to a 10-minute interval.
  • Once students see a clear trend or pattern, you may instruct them to stop taking measurements.
two tubs of water, one covered in foil

Activity Structure and Emphasizing Key Concepts

  • Before starting the lab, ask your students if they would feel cooler wearing a black or white shirt on a sunny day. Or, ask them if they would be more comfortable standing barefoot on blacktop or grass on a hot day.
  • During the lab, introduce the term โ€œalbedoโ€ to your students โ€“ the amount of solar radiation reflected by a surface. Relate this to the black vs white shirt example and the blacktop vs grass example.
  • After completing the lab procedure, ask your students what they think happens to ocean water at the poles when it is no longer covered in sea ice. Discuss how positive feedback loops work.
positive feedback loop diagram
I created this positive feedback loop diagram for you. It’s available in my shop, and you can support my blog with your purchase!

Step-by-Step Procedure

Head out to a sunny area, pass out the materials, then help your students work through the following steps:

  1. Fill the two clear plastic tubs with equal amounts of cold liquid water.
  2. Check the starting temperature of the water in both tubs. Record the temperatures on the worksheet. The starting temperature should be the same in both tubs.
  3. Fully cover one tub in aluminum foil. This tub represents ocean water covered in a layer of reflective sea ice. The other tub represents uncovered ocean water.
  4. Lay your dark fabric on the ground or table outside in direct sunlight. The dark fabric represents the dark color of ocean water.
  5. Position your tubs on top of the dark fabric in direct sunlight.
  6. Wait 5 minutes.
  7. Check the temperature in both tubs, by inserting the thermometer into the water at the center of the container. Poke a small hole through the foil to insert the thermometer when you check the temperature in the foil-covered tub. Record the temperatures on your worksheet.
  8. Continue to check and record the temperatures every 5 minutes.
  9. Which tub is warming faster? Discuss why.

Discussion Questions

After working through the lab procedure, have your students discuss the following questions in small groups or as a whole class.

  1. Which tub became warmer faster? Explain why.
  2. Which would get warm faster, ocean water covered in reflective sea ice or exposed ocean water? Explain why.
  3. What is albedo? *in your own words
  4. What is a positive feedback loop? *in your own words
  5. In your own words, describe a positive feedback loop involving melting sea ice and climate change.

Worksheets and Printable Directions

There’s no need to put together worksheets and handouts for this lab – I’ve already created them for you! You can purchase them in my Albedo Lab Mini Study. These materials are also found within my complete Antarctica Unit and Polar Bundle.

The albedo lab materials are also found within these products:

Explore more units from Wild Earth Lab:

If you enjoyed this post, I know you will love trying my other science and nature units in your classroom too!


Are you interested in reading more posts with science activity ideas? Subscribe or follow Wild Earth Lab using the links below!


Subscribe, share, and comment:

Posted on Leave a comment

Flower Dissection: try this simple hands-on science activity in your classroom!

pink flower, tweezers, and scissors with worksheets.

Are you teaching your students about the parts of a flower or plant anatomy? Sometimes the best way to understand how something works is by taking it apart. A flower dissection is a simple and engaging hands-on activity that brings plant anatomy to life in your classroom. In this activity, students will carefully examine and identify key flower structures like petals, sepals, carpels, and stamens. Plus, theyโ€™ll explore the fascinating connection between flowers and Fibonacci numbers in nature!

If you’re looking for more background information about flower anatomy, be sure to check out my blog post where I cover the four main whorls of a flower. You can also learn more about the functions of flowers and their various parts in the plant life cycle in this post about pollination and the plant life cycle!

Please Note: I’ve made the directions for this flower dissection activity available for free here in this post. If you would like printable directions and worksheets for this activity, you can find them in my complete Flowers Unit in my shop.

Materials

Each student will need the following materials:

  • Flowers
  • Tweezers
  • Glue
  • Pencils or pens
  • Printed student directions and lab worksheet (available in my Flower Unit)

Tips for Success

  • Have flower and plant anatomy diagrams on hand so your students can reference them as they dissect their flowers.
    • You can find my hand-drawn flower & plant anatomy diagrams in my flowers unit (linked above)
    • You can also find a free flower diagram on my free resources page (pictured below)!
  • Use a large flower so that students can easily see all the parts.
  • Use a complete flower with all four main flower parts: sepals, petals, carpels, and stamens. For example, lilies, hibiscuses, or tulips are all good choices.
diagram showing the parts of a flower

Directions

Part 1: Flower Dissection

Pass out the materials to your students. Give a brief overview of the main parts of a flower. Then, assist your students as they work through the following steps to dissect their flowers:

  1. Use the tweezers or your fingers to carefully remove the sepals and then the petals from your flower.
  2. Break apart the carpel(s) and stamens.
  3. Count the number of sepals, petals, carpels, and stamens and record the number of each.
  4. Glue one of each part to the lab worksheet.
  5. Use a pencil or pen to draw arrows and label the stigma, style, and ovary on the carpel glued to the lab worksheet.
  6. Use a pencil or pen to draw arrows and label the anther and filament on the stamen glued to the lab worksheet.

Part 2:  Fibonacci Numbers in Nature

Fibonacci numbers form a sequence so that each number is the sum of the previous two numbers (e.g., 1+1 = 2; 2+1 = 3, 3+2 = 5; 5+3=8; and so on). Fibonacci numbers are often found in nature. Students should answer the following questions:

  1. Calculate and write down the next 5 numbers in the Fibonacci sequence: 1,1,2,3,5,8,… ___, ___, ___, ___, ___
  2. Look back at your lab worksheet. How many petals did your flower have? Is this a Fibonacci number? What about the sepals? Carpels? Stamens?

Study Flowers with Wild Earth Lab!

If you enjoyed this activity, I know you’ll love my Flowers Unit! It includes everything you need for this activity and other flower projects too!

OR – take your botany learning to the next level with my Botany Collection. It’s a bundle of three plant units: Flowers, Pollination, and Fruit!

Ready for another dissection?

Read my blog post on how to do a Mushroom Dissection Lab!

Explore more lessons from Wild Earth Lab:

If you enjoyed this post, I know you will love trying my other science and nature units in your classroom too!


Are you interested in reading more posts with directions for science activities? You can subscribe or follow Wild Earth Lab using the links below!


Subscribe, share, and comment:

Posted on Leave a comment

5 Winter-Themed STEM Activities: snowflakes, glaciers, and more!

Winter classroom STEM activities

Looking for fun and educational ways to bring STEM learning into your homeschool or classroom this winter? These winter-themed activities are perfect for exploring science, technology, engineering, and math through hands-on projects that celebrate the season. From measuring snow and studying glaciers to investigating the science behind snowflakes and symmetry, these activities will keep students engaged all winter long. Grab your winter coat and get ready to dive into these exciting winter STEM activities!

Wild Earth Lab is supported by readers like you. This post includes links to my own products and affiliate products. If you purchase through links on my site, I may earn a small commission at no additional cost to you.

1. Measure snow like a scientist

If you live somewhere that gets snow in winter, youโ€™ve likely measured the depth of snow before! But with a few extra steps, you can turn this simple task into an awesome, hands-on snow science activity.

Start by learning about snow water equivilent and how to calculate it. This can be a great way to start a conversation about snow in the water cycle, and the ways snow supplies our rivers and aquifers with an important input of water.

You can find the full activity directions for a snow measurements activity in my blog! Or better yet, you can save time and support my blog when you purchase the printable worksheets and directions for this activity in my complete Science in the Snow Unit.

โ˜ž Upgrade your outdoor learning:

Measuring snow with your students? You can track the snow all winter long by placing a metal snow gauge in your yard or outdoor learning area. Whether you’re teaching in the classroom or at home, you can create an inspiring outdoor learning area for studying snow, weather, and more.

Cardinal Snow Gauge: product and image from Soldarmetals on Etsy.
Snow Gauge: product and image from Swenproducts on Etsy.

2. Explore glaciers and climate science

Why study glaciers this winter? Glaciers tie in to many important science topics – not just geology and landforms, but also climate science, sea level rise, and water resources! Glaciers are an important reservoir of frozen freshwater on Earth. However, glaciers all over the world are receding and disappearing due to climate change, putting communities at risk of flooding and altering ecosystems.

Furthermore, glaciers teach scientists about our Earth’s past! Glacial ice is like a time capsule, holding important clues about the history of our Earth and its climate. By studying glaciers, students can learn about and discuss the past, present, AND future of our climate!

Ready to study glaciers? You can read more about the types of glaciers and how they form in my blog post! Or better yet, you can save time and support my blog when you purchase my Glaciers Unit – complete with classroom activities, worksheets, handouts and more.

valley glacier diagram

3. Read about how snowflakes form

If you’ve ever looked at a snowflake under a microscope or magnifying glass, you know that each snowflake is a unique, beautiful formation. But how do these amazing water crystal structures form? It all starts high in earth’s atmosphere, with a dust particle and water vapor. Since every snowflake takes a slightly different path to the ground, each snowflake runs into unique conditions along the way. These different experiences impact the way each snowflake forms.

Learning about the formation of snow ties in to studies of meterology and the three phases of water. Because of this, snowflake formation is an engaging winter science topic at many different levels.

Need materials for studying snowflakes? Read a step-by-step description of how snowflakes form in my blog post! Or, find printable snowflake formation materials in my Snowflake Mini Study or in my complete Geometry in the Snow Unit.

formation of a snowflake diagram

4. Learn about symmetry with paper snowflakes

When it comes to geometry, snowflakes provide a great tool for learning about symmetry with a winter-y twist! Cutting paper snowflakes from coffee filters or paper is a great hands-on way to study rotational symmetry, planes of symmetry, and more!

Paper snowflakes are an easy activity to DIY! But if you’re looking for a little guidance, I’ve got you covered. Activity directions and worksheets for a paper snowflakes & lines of symmetry lesson are also found in my Geometry in the Snow Unit.

lines of symmetry classroom handouts

5. Study the animals of the poles!

Winter is the perfect time to study the survival strategies of animals that live in the coldest places on earth! Topics could include survival strategies like migration, hibernation, and insulation or the food webs and ecosystems of the Arctic or Antarctic.

Studying and modeling arctic food webs is a fun, hands-on ecology activity that students love. You can learn how to build your own food webs in my blog post. Furthermore, you can learn all about arctic ecology and find materials for an arctic food webs lesson in my Arctic Unit.

handouts and classroom printables

Winter studies with Wild Earth Lab!

Thereโ€™s no need to scramble to put together the perfect winter science lesson  โ€“ Iโ€™ve already created some for you! The winter stem activities from this post come from my winter STEM units:

Explore more lessons from Wild Earth Lab:

If you enjoyed these winter stem activities, I know you will love trying my other science and nature units in your classroom too!


Are you interested in reading more posts with STEM activity ideas? Subscribe or follow Wild Earth Lab using the links below!

Subscribe, share, and comment:

Posted on Leave a comment

Rock ID Lab: directions and materials list for a classroom geology activity

a box of rock samples

In this activity, students will become familiar with rocksโ€™ physical properties and the basics of rock identification. Students will sort rocks into groups based on their observations and learn about the physical properties of rocks. At the end of the rock ID lab, students can try identifying rocks by type, subtype, and name.

No prior rock ID experience is needed for students to complete this lab activity. Part A especially is a great way for beginners to explore the physical properties of rocks! However, before beginning parts B and C of this activity, students should already be familiar with the rock cycle and the three main types of rocks (igneous, sedimentary, and metamorphic!) and their sub-types.

Before starting the lab, students should also know the difference between rocks and minerals. Often, it makes sense to do a mineral lab before diving into a rocks ID lab. You can find my mineral lab online write up (free) or the printable directions (for purchase).

Please Note: I’ve made the directions for this rock ID lab activity available for free here in this post. However, if you want printable directions, worksheets, flashcards, readings, and teaching posters for a rock ID lab, you can purchase them in my shop. The printable rock ID flashcards are included but also sold individually. Or, you can find all these materials plus more in my complete Rocks and Minerals Unit.

Materials

This activity requires one of each item per lab group unless stated otherwise.

  • 10+ rock  samples labeled with numbers 1-10+
    • Recommended: granite, gabbro, rhyolite, basalt, limestone, conglomerate, mudstone, gneiss, slate, and marble
    • You can complete this lab with a different rock sample set, but it is ideal to have a mixture of common igneous, sedimentary, and metamorphic rocks.
  • Hand lens or microscope
  • Juice of a lemon
  • Eye dropper
  • Student worksheets (1 set per student)
  • Teaching posters
  • Rock cards
Save preparation time AND support my blog: purchase all the printable materials you need to complete a rock ID lab in my shop!

Modifications (optional)

  • To make this rock ID lab simpler, do parts B and C all together as a class.
  • As an alternative to parts B and C, you could tell students which rocks are igneous, sedimentary, and metamorphic and then ask students to find some similarities between the rocks within each group.
  • To simplify part C, tell your students which 10 rock samples they have, but do not tell them which is which. This allows students to use the process of elimination to identify the most difficult samples.

Safety Notes

  • Read and comply with any warnings on the packaging and safety information sheets of rock samples and test kit tools used to complete this lab.
  • Adult supervision is required at all times while completing this lab.

Directions

Part A: Examine the Rocks

  1. Allow the students to familiarize themselves with the rock samples by picking them up, looking at them, etc…
  2. Ask the students to take note of which rock samples…
    • Are light colored?
    • Are dark colored?
    • Have several different colors?
    • Are one solid color?
    • Are made of crystals? (use hand-lens or microscope)
    • Are made of sediment particles stuck together? (use hand-lens or microscope)
    • Are fine-grained?
    • Sparkle?
    • Are dull?
    • Are soft or break or crumble easily?
    • Are very solid and don’t break or crumble?
    • Have stripes or layers? (foliation)
    • React to an acid (lemon juice)?
      • Note for acid reactions: rocks with a very high calcium carbonate content (e.g., marble, limestone, and coquina) should react with a drop or two of acidic lemon juice. They will bubble and fizz. Rocks with a lower calcium carbonate content (e.g., some mudstones) may bubble and fizz slightly.
Need worksheets and handouts? Purchase my set of printable materials that complement this activity!

Part B: Rock Types & Sub-Types

  1. As a class, review or research the properties of igneous, sedimentary, and metamorphic rocks and their sub-types. Create a list of the properties (texture, composition, foliation, etc…) you might see in each of these rock types and subtypes:
    • Igneous:
      • Extrusive
      • Intrusive
    • Sedimentary:
      • Chemical
      • Clastic
      • Biochemical and organic
    • Metamorphic:
      • Foliated
      • Nonfoliated
  2. As you create your lists, introduce/review the following concepts: mafic vs felsic, igneous textures, grain sizes, and foliation. For this step, the teaching posters found in my product will be a helpful visual aid.
  3. Students should write detailed descriptions of each rock sample, noting the following physical properties:
    • Texture (use a microscope or hand lens)
    • Composition
    • Luster
    • Color
    • Foliation (use hand lens if needed)
    • Acid reaction (strong reaction, weak reaction, no reaction)
    • Other properties
  4. See if your students can correctly identify the type or subtype of any of the rock samples.
    • Start with rocks that can be most easily identified. For example, a rock with clear foliation can quickly be identified as a metamorphic foliated rock. A rock that is made of sediment particles cemented together can be quickly identified as a sedimentary clastic rock.
    • It is OK if there are some rocks that your students are unsure about. Discuss why they are unsure and if there are any types/sub-types they can rule out. It may not be possible to identify certain rocks in a classroom setting.
  5. After this part of the lab is complete, reveal which rocks were sedimentary, igneous, and metamorphic. You may also lead a discussion on how the physical properties of rocks relate to how they formed. E.g., large crystals form deep underground, foliation forms under directional pressure, etc…
Teaching posters for this Rock ID activity(available for purchase)

Part C: Rock ID

  1. Pass out the rock information flashcards or a different rock ID guide of your choosing.
    • For an added challenge: encourage students to only look at the front (info/text-only) side of the flashcards while making their IDs. The backs of the flashcards include pictures and names of the rocks.
  2. The students should read the properties listed on each flashcard.
  3. Students can compare the rock properties on the flashcards to their written descriptions of each sample.
  4. Students should do their best to match each rock sample to its correct identity.
  5. Rock ID is challenging: assist students if they become stuck.
  6. End the lab by revealing the correct identity of each sample.
My Rock ID cards make identifying common rocks a breeze!

Study Rocks and Minerals with Wild Earth Lab!

Save time by purchasing all the printable materials you need for a rock ID lab! This set includes all the worksheets, teaching posters, flashcards, and handouts you need for completing this rock ID activity:

OR: you can also find all the above materials plus more in my full Rocks and Minerals Unit:

Explore more lessons from Wild Earth Lab:

If you enjoyed this post, I know you will love trying my other science and nature units in your classroom too!


Are you interested in more earth science activity ideas? Subscribe or follow Wild Earth Lab using the links below!


Subscribe, share, and comment:

Posted on 1 Comment

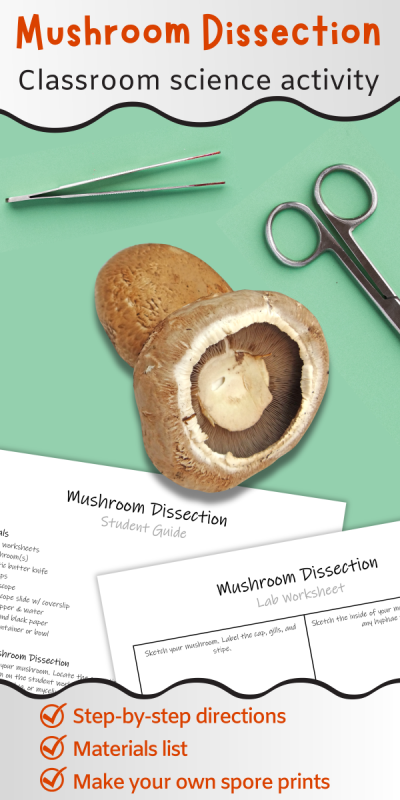
Mushroom Dissection + Spore Prints: Try this fun mycology activity in your classroom!

mushrooms, metal instruments, and worksheets

Studying the parts of a mushroom is a fun biology activity for students at many levels. One of the best, hands-on ways to learn mushroom anatomy is by dissecting one. In this mushroom dissection activity, students will observe the internal and external parts of a mushroom. Students will operate a microscope to observe spores and mushroom gill anatomy. Finally, students will create their own spore prints by allowing mushrooms to release their spores onto paper.

Please Note: I’ve made the directions for this mushroom dissection activity available for free here in this post. If you would like printable directions and worksheets for this activity, you can purchase them in my shop. You can find these materials and more mushroom learning materials in my complete Mushrooms Unit!

Materials

  • Printed copies of the Mushroom Dissection Student Guide (1 per student)
  • Printed copies of the Mushroom Dissection Lab Worksheet (1 per student)
  • Printed copies of the Mushroom Anatomy Diagram (1 per lab bench)
  • Fresh, mature mushrooms like portabella, shitake, etc… (a few of each variety per lab bench)
  • Plastic butter knives (1 per lab bench)
  • Forceps (1 per lab bench)
  • Microscopes (1 per lab bench)
  • Microscope slides w/ coverslips (1 per lab bench)
  • Eyedroppers & water (1 per lab bench)
  • Sheets of white and black paper (1 of each per lab bench)
  • Small containers or bowls (1 per lab bench)

Safety Notes and Suggestions

  • Do not eat the mushrooms handled during this lab.
  • Use caution and always supervise your students when handling sharp instruments including forceps, butter knives, and glass microscope slides.
  • You will have a better chance of observing spores using fresh, mature mushrooms (i.e., the gills are visible) rather than immature button mushrooms.
  • If you do not have a microscope skip steps 6-8 in Part 1.
brown mushrooms on beige surface
Photo by Laker on Pexels.com

Directions

Part 1: Mushroom Dissection

A mushroom is the fruiting body of certain fungi. By dissecting a mushroom, you can see the parts of a mushroom up close. These parts help the fungi produce and release spores to create more fungi.

  1. Examine your mushroom. Locate the cap, stipe, and gills (or veil covering the gills). Sketch your mushroom on the student worksheet, labeling the cap, stipe, gills, and other parts you see such as an annulus, volva, or mycelium still attached.
  2. Using fingers or forceps, gently peel away and remove any veil covering the gills (if needed).
  3. Remove the stipe from the cap by gently pulling or twisting on the stipe.
  4. Break or cut the stipe in half length-wise.
  5. Do you see any long, thin filaments or strings on the inside of the stipe? These are hyphae. Sketch the inside of the stipe on the student worksheet, labeling any hyphae.
  6. Remove one gill from the mushroom. Use the forceps to grasp and gently pull away one gill.
  7. Place the gill on a microscope slide. Add a drop of water and a coverslip.
  8. Examine your gill under the microscope and sketch what you see. Basidia are tiny knobs on the gill that make spores. Label the basidia and any spores you see attached to them in your sketch.
  9. If you have a second type of mushroom, repeat steps 1-8 with the second mushroom.
  10. Once finished, discard all mushroom parts EXCEPT for the cap(s) and clean your microscope slide.

Part 2:  Spore Prints

Spores are released from mushrooms as part of the life cycle of a fungus. You can make unique artwork by allowing mushroom caps to drop their spores onto paper.

  1. You can use the mushroom cap(s) from part 1 to make a spore print. Ask your instructor for additional mushrooms to make additional prints.
  2. With any new mushrooms: remove the stipes and peel away any veils covering the gills.
  3. Spores may be light or dark-colored. Try using both black and white paper for your spore prints to ensure the spores are visible.
  4. Place the mushroom caps with the gills facing down on top of the papers.
  5. Place an upside-down container or bowl over the mushroom caps to protect them.
  6. Leave the caps alone overnight. During this time, the gills will release spores which will fall onto the paper.
  7. The next day: remove the containers and mushroom caps to reveal the spore prints.

Study Mushrooms with Wild Earth Lab!

Thereโ€™s no need to create your own mushroom dissection worksheets and print directions – I’ve already made them for you! You can save time and support my blog with your purchase from my shop.

Explore more lessons from Wild Earth Lab:

If you enjoyed this post, I know you will love trying my other science and nature units in your classroom too!


Are you interested in reading more posts with directions for science activities? Subscribe or follow Wild Earth Lab using the links below!

Subscribe, share, and comment:

Posted on Leave a comment

Journey of a Snowflake: learn how snow forms

Watercolor snowflakes overlaid with text: "let's learn about the journey of a snowflake read about how snow forms in 6 steps!"
text that says share this post

Are you ready to learn how snowflakes form? Whether you’re teaching at home or in the classroom, studying the formation of snowflakes with your students is a fun winter learning activity. In this post, we’ll follow the journey of a snowflake as it forms high in the atmosphere and then falls to Earth! Snow is frozen precipitation; snowflakes are made of ice crystals – water in the solid phase.

Since every snowflake takes a slightly different path to the ground, each snowflake runs into unique conditions along the way (temperatures, wind currents). These different experiences impact the way each snowflake forms. Because of this, every snowflake looks different! However, each snowflake has six sides because of the properties of water molecules.

I made this printable diagram of a snowflake forming! You can download and print this poster from my shop, or find the poster within my Snowflake Mini Study or my Geometry in the Snow Unit.

If you live in a place that receives snow in the winter, studying snow and snowflakes can be a fun activity to do with your class or homeschool. If you’re an educator planning a lesson, be sure to check out my snowflake lesson materials that go along with this blog post. You can also read my post about how to measure snow as a hands-on classroom activity for learning about snow and the water cycle!

Now, let’s see how a snowflake forms, in six steps…

One

The formation of a snowflake begins with a dust particle high in the earthโ€™s atmosphere with temperatures below freezing.

Two

Water vapor from the air is attracted to the dust particle.

Three

As water from the air freezes around the dust particle, it begins forming a six-sided prism.

Four

As more water from the air freezes on the snowflakeโ€™s surfaces, branches may form on each of the six sides.

Five

As the snowflake becomes larger, additional branching may develop off each main branch.

Six

If temperatures at ground level are below freezing, the frozen snowflake will reach the ground.

Learn about snow with Wild Earth Lab:

Are you putting together a snow lesson plan for your science classroom or homeschool? Be sure to check out my snow learning materials! I have options for various grade levels, and best of all you’ll save time planning your lesson while supporting my blog with your purchase!

Check out my Snowflake Mini Study!

Explore more units from Wild Earth Lab:

If you enjoyed this post, I know you will love using my environmental science materials in your classroom!


Are you interested in reading more posts like this? Subscribe or follow Wild Earth Lab using the links below!

Subscribe, share, and comment: