Posted on Leave a comment

Understanding Amphibians: 5 Key Traits

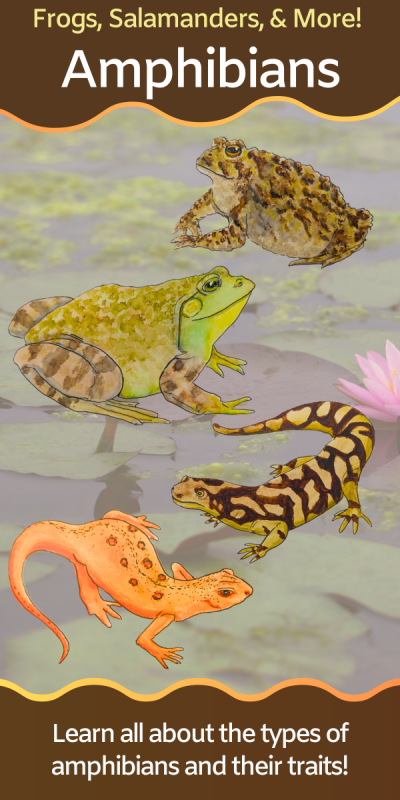
drawings of multiple amphibians
text that says share this post

Amphibians are some of the most fascinating creatures on Earth, bridging the gap between water and land with unique adaptations. Understanding amphibian traits can help students grasp key biological concepts like life cycles, metamorphosis, and environmental adaptations. Whether you’re teaching about frogs, salamanders, or caecilians, exploring what makes amphibians special is a great way to spark curiosity about the natural world.

๐Ÿ“šA Note for Teachers ๐ŸŽ: If youโ€™re an educator planning to teach amphibians, great learning resources are key to deepening understanding! I think you and your students will love my complete Amphibian Unit (plus youโ€™ll support my blog with your purchase! โค๏ธ)

What Are Amphibians?

Poster of Types of Amphibians

Before we dive into the traits of amphibians, it helps to answer the question “what are amphibians?”. Amphibians are a group of vertebratesโ€”animals with backbonesโ€”that share some key traits. There are seven classes of vertebrates on Earth: amphibians, birds, mammals, reptiles, and three types of fish.

But how do scientists know which animals belong in each class? It all comes down to family trees! Each class of vertebrates shares a common ancestor from long ago. If you traced their lineage back far enough, youโ€™d find that all amphibiansโ€”frogs, salamanders, and moreโ€”descend from the same ancient relative. Thatโ€™s why a salamander is more closely related to a frog than to a reptile like a lizard.

Thanks to their shared lineage, amphibians share some characteristics. In this post, we’ll discover some key amphibian traits…

A Backbone

Like all vertebrates, amphibians must have a backbone. A backbone is actually made of many individual, smaller bones called vertebrae, all stacked up in a flexible column. Amphibiansโ€™ spines help us tell them apart from invertebrate (backbone-less) creatures like insects and mollusks.

Cold-Blooded

Ever wonder why you see a frog sitting out on a lily pad in the sun? Amphibians are cold-blooded or ectothermic animals, which means their body temperature depends on the temperature of the air or water around them. They must rely on external (outside of themselves) heat sources to stay warm rather than making their own body heat.

When amphibians need to warm up, they sun themselves. If they get too hot, they go into cool water, underground, or find shade. Because they rely on external heat sources, their temperature varies a lot.  Amphibians, reptiles, and most fish are cold-blooded animals.

Moist, Permeable Skin

One of their most distinctive features is their moist, scale-free skin. Amphibians, even the ones that look bumpy, like toads, never have scales. This is one of the key differences between amphibians and reptiles.

To stay hydrated, amphibians usually live in damp environments or near water. Their skin contains special mucus glands to keep it moist. Itโ€™s also permeable, allowing water and gases to pass through. This means amphibians can absorb water and even breathe through their skin! However, most species also have lungs or gills for breathing.

Metamorphosis

Salamander Life Cycle Diagram

Another trait of amphibians is metamorphosisโ€”a dramatic transformation during their life cycle. For example, a tadpole with gills and a tail changes into an adult frog with lungs and legs.

Most amphibians go through metamorphosis, but there are a few types of amphibians that are exceptions. Some species of caecilians, a group of legless amphibians, develop differently and donโ€™t go through metamorphosis the way frogs and salamanders do.

Carnivorous

Finally, all adult amphibians are carnivores. Often, they hunt and eat small invertebrates – little animals without a backbone – like insects and worms. However, some large amphibians like bullfrogs will even hunt small vertebrates like smaller amphibians, reptiles, and even mammals like mice.

While adult amphibians are carnivores, larval amphibians often are not. This is because before going through metamorphosis, they are more suited to eating plant matter. For example, a tadpole lives in a pond and eats plant matter before it grows up into a frog that eats insects.

Study Amphibians with Wild Earth Lab!

Thereโ€™s no need to scramble to put together the perfect amphibians lesson โ€“ Iโ€™ve already created it for you! This set includes all the printable materials you need for studying amphibians.

Explore more lessons from Wild Earth Lab:

If you enjoyed learning about amphibian traits in this post, I know you will love trying my other printable science and nature units in your classroom!


Are you interested in reading more posts like this? Subscribe or follow Wild Earth Lab using the links below!


References and Further Reading

  1. Clark, M.A., Douglas, M., and Choi, J. (2018). Biology. Open Stax. Ch 29.3. Available: https://openstax.org/books/biology-2e/pages/29-3-amphibians
  2. Fowler, S., et al. (2013). Concepts in Biology. OpenStax. Ch 15.6. Available: https://openstax.org/books/concepts-biology/pages/15-6-vertebrates
  3. San Diego Zoo (n.d.). Salamander and Newt. Available: https://animals.sandiegozoo.org/animals/salamander-and-newt
  4. Wake, DB and Koo, MS. 2018. Primer: Amphibians. Current Biology 28(21): R1237-R1241. https://doi.org/10.1016/j.cub.2018.09.028

Subscribe, share, and comment:

Posted on 1 Comment

Stargazing Guide: Plan a Night Sky Field Trip for Kids

three children pointing at the night sky
text that says share this post

There’s nothing quite like stepping outside on a clear night and gazing up at the stars. A night sky field trip is a fantastic way to bring hands-on science and astronomy into your homeschool or learning groupโ€”no expensive equipment is required! With just a little planning, you can explore the wonders of the universe, from identifying constellations to spotting planets, meteor showers, and more. In this guide, you’ll find simple steps to help you prepare, along with tips for making your stargazing adventure a success. Grab a blanket, check the night sky forecast, and get ready for an unforgettable learning experience under the stars!

A Note for Teachers:ย If youโ€™re an educator planning toย teach the night sky, great learning resources are key to deepening understanding! I think you and your students will love myย complete printable Night Sky Unit (plus youโ€™ll support my blog with your purchase! โค๏ธ)

Purpose

The purpose of this field trip is to observe some of the night sky phenomena that your class studied during your space & night sky unit. Students can practice identifying night sky objects, including lunar phases, constellations, planets, and more.

Suggested Materials

  • Constellation information cards – printable cards are included in my night sky unit and also sold as individual printable sets for Zodiac and Northern Hemisphere constellations
  • Compass
  • A star chart
  • Flashlight
  • Warm layers
  • Binoculars (optional)
  • Telescope (optional)
  • Student worksheets – available in my night sky unit

Preparations

  • To find constellations, I recommend finding a star chart for your location and season in advance. For example, you can find online star charts from websites like Stellarium Web or Sky and Telescope (external links).
  • In advance, look up any night sky phenomena you expect to observe. Here are a few helpful web links for staying in the know about what’s happening in the night sky (external links):

Directions

  1. Go to a dark, open area away from city lights and tall trees/buildings that block the view of the sky.
  2. Find the Moon and identify the phase.
  3. Use the compass to orient yourself. This will help you interpret the star chart.
  4. Use the star chart to identify constellations in your area.
  5. Northern Hemisphere only: use the constellation Ursa Minor to locate the North Star (Polaris). The North Star never moves in the sky, while the rest of the stars and constellations rotate around it over time. This makes the North Star useful for navigation.
  6. If itโ€™s dark enough, find the Milky Way. The Milky Way looks like a grayish band across the night sky.
  7. Locate any planets currently visible in the night sky. Once you locate a planet, view it through your binoculars or telescope, if possible. Does it look different from the stars?
  8. Take note of any other night sky phenomena, which may vary depending on your location and the time of year. E.g., meteor showers, satellites, lunar eclipse, polar lights, etc…

Related Activities

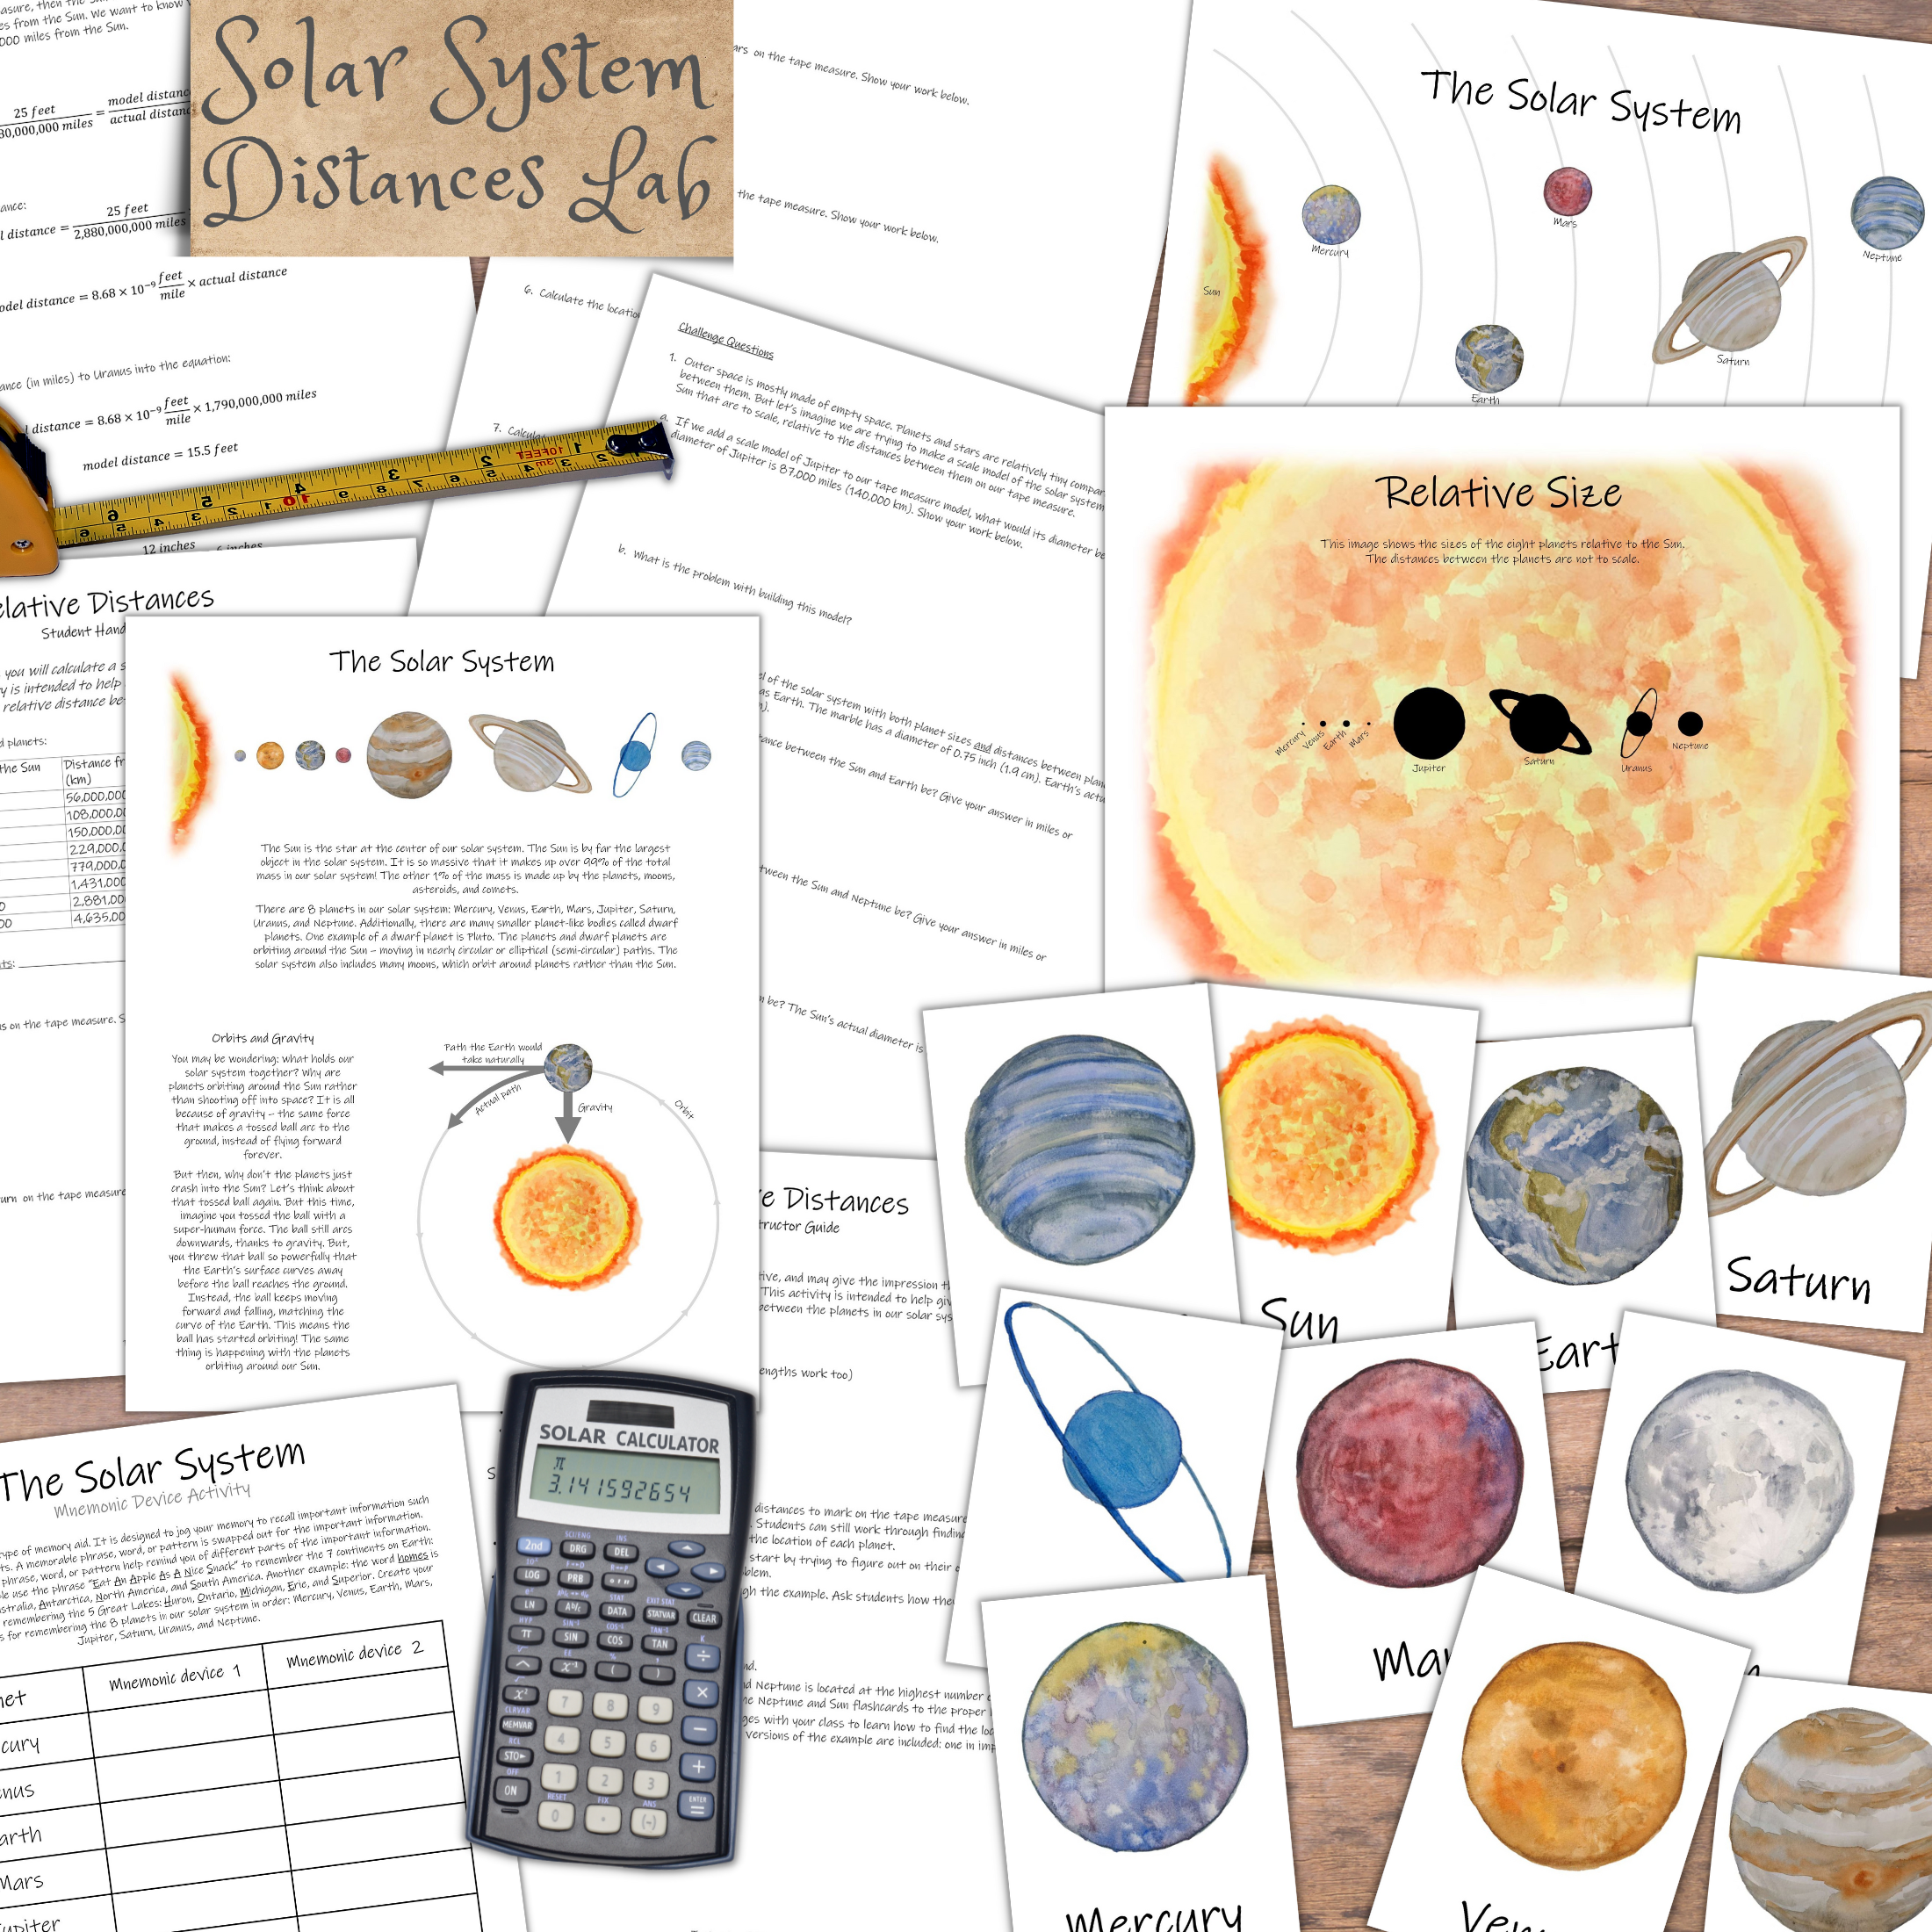
Looking for more ways to explore outer space in your classroom or homeschool? Try this solar system distances lab or this constellations snack activity. You can also check out this list of 11 outer space activity ideas and this guide to 9 sun and star activities!

Everything you need to learn about the night sky:

Trying to plan the perfect Night Sky lesson for your classroom or homeschool to go along with your night sky field trip? Iโ€™ve already created it for you! This set includes all the printable materials you need for studying night sky objects and outer space!

Explore more lessons from Wild Earth Lab:

If you enjoyed this post, I know you will love trying my other printable science and nature units in your classroom too!


Are you interested in reading more posts like this? Subscribe or follow Wild Earth Lab using the links below!


Subscribe, share, and comment:

Posted on Leave a comment

Types of Amphibians: Frogs, Salamanders, and More!

Illustrations of frogs and salamanders
text that says share this post

Amphibians are a diverse group of vertebrate animals. They come in many shapes and sizesโ€”from long-tailed salamanders to tailless frogs and even legless caecilians! Some are huge, like giant salamanders that grow to nearly six feet (two meters) long, while others are so tiny they could sit on your pinky finger. Amphibians also display striking colors, like the brightly patterned fire salamander or the brilliantly huedโ€”but toxicโ€”poison dart frog. In this post, we’ll explore the different types of amphibians – some you’ve probably seen before, and perhaps a few you’ve never heard of!

๐Ÿ“šA Note for Teachers ๐ŸŽ: If youโ€™re an educator planning to teach amphibians, great learning resources are key to deepening understanding! I think you and your students will love my complete Amphibian Unit (plus youโ€™ll support my blog with your purchase! โค๏ธ)

There are 3 main types of amphibians: frogs, salamanders, and caecilians. Each has its own unique characteristics, described below.

Frogs and Toads

green frog
close up shot of a frog
  • Class: Amphibia
  • Order: Anura

Key traits

Frogs and toads are amphibians with four limbs and no tails as adults. They also have powerful hind legs and vocal sacs for croaking. Frogs and toads start their lives in water as aquatic larvae called tadpoles. As tadpoles, they have gills and a tail for swimming. As frogs develop, they grow lungs and most species can come onto land. There are, however, some frogs that are aquatic as adults, such as African clawed frogs.

But even adult frogs like to live in damp habitats to help keep their moist skin from drying out. Frogs, like all amphibians, have moist skin rather than scales – one of the differences between reptiles and amphibians. Their skin is permeable, allowing them to drink water and breathe air through their skin.

Examples of Frogs and Toads

  • Bullfrog
  • Grass frog
  • Tree frog
  • Poison dart frog
  • Common toad
  • African clawed frog

Fun Fact

There are about 5,000 different species of frog worldwide! They are found on 6 of 7 continents (everywhere but Antarctica).

Salamanders

Small red-orange colored newt crawls over fallen leaves and detritus.
purple tropical axolotl
  • Class: Amphibia
  • Order: Urodela

Key traits

Salamanders are amphibians with long, thin tails and usually four limbs. Like all amphibians, they have moist skin that they can breathe through. Most salamanders also have gills, lungs, or even both at different stages of their life cycle. Like frogs, most salamanders go through metamorphosis. The larvae are often aquatic, with no limbs, tails for swimming, and frilly-looking external gills around their necks. Adults may live in water, on land, or both, depending on the species. Like all amphibians, adult salamanders are carnivores – often they eat small invertebrates.

Perhaps you’re wondering, what is the difference between a salamander and a newt? A newt is one type of salamander. So while all newts are salamanders, not all salamanders are newts.

Examples of Salamanders

  • Tiger salamander
  • Giant Salamander
  • Newt
  • Axolotl
  • Amphiuma

Fun Facts

Salamanders struggle to lift their bodies off the ground due to the position of their limbs on the sides of their bodies. To walk on land, they must wiggle from side to side while dragging their bodies across the ground.

The axolotl is a species of salamander that never grows up (sort of)! Even as an adult, it lives in water and has gills like a larva.

Caecilians

  • Class: Amphibia
  • Order: Gymnophiona

Key traits

The third type of amphibian is caecilians. If you’ve never heard of them or seen one, don’t worry! They are only found in the tropics, and they live underground, burrowing in the soil.

Caecilians are different from other amphibians in several ways. They have no legs, and long, worm-like bodies with grooves or rings that look like segments. Furthermore, caecilians don’t go through metamorphosis like frogs and salamanders.

Fun Facts

Though they have no legs, caecilians evolved from a legged ancestor. Over many generations, they lost their legs since they didnโ€™t need them to survive in their habitat.

What’s Next?

Continue reading about the different types of reptiles or the different types of mammals. Or learn about the differences between reptiles and amphibians.

Study this topic with Wild Earth Lab!

Thereโ€™s no need to scramble to put together the perfect lesson for teaching amphibians  โ€“ Iโ€™ve already created it for you! This set includes all the printable materials you need for studying amphibians.

Explore more lessons from Wild Earth Lab:

If you enjoyed this post, I know you will love trying my other printable science and nature units in your classroom too!


Are you interested in reading more posts like this? Subscribe or follow Wild Earth Lab using the links below!


References and Further Reading

  1. Black, R. (2012). Worldโ€™s Smallest Frog Discovered. BBC News. Available: https://www.bbc.com/news/science-environment-16491477
  2. Clark, M.A., Douglas, M., and Choi, J. (2018). Biology. Open Stax. Ch 29.3. Available: https://openstax.org/books/biology-2e/pages/29-3-amphibians
  3. Fowler, S., et al. (2013). Concepts in Biology. OpenStax. Ch 15.6. Available: https://openstax.org/books/concepts-biology/pages/15-6-vertebrates
  4. San Diego Zoo (n.d.). Chinese Giant Salamander. Available: https://animals.sandiegozoo.org/animals/chinese-giant-salamander
  5. San Diego Zoo (n.d.). Goliath Frog. Available: https://animals.sandiegozoo.org/animals/goliath-frog
  6. San Diego Zoo (n.d.). Salamander and Newt. Available: https://animals.sandiegozoo.org/animals/salamander-and-newt
  7. Wake, DB and Koo, MS. 2018. Primer: Amphibians. Current Biology 28(21): R1237-R1241. https://doi.org/10.1016/j.cub.2018.09.028

Subscribe, share, and comment:

Posted on Leave a comment

Learning in Nature: 5 outdoor educational activities to try this summer!

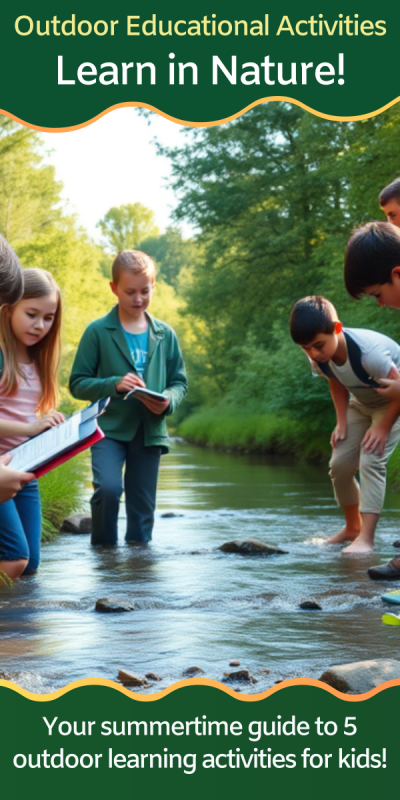
children with clipboards wading in a shallow river
text that says share this post

Are you a parent or educator looking for fun ways to take learning outside this summer? Whether you’re reviewing math and science concepts from the school year or looking for ways to connect with your local ecosystems, I’ve got you covered with these 5 outdoor educational activities!

In this post, you’ll find directions for nature activities for learning outside this summer! From catching aquatic macroinvertebrates to measuring the infiltration rates of soils, your students are sure to enjoy these fun outdoor learning activities!

Before we dive in:ย If youโ€™re an educator or parent looking for fun outdoor educational activities, great learning resources are key to deepening understanding! I think you and your students will love my Earth & environmental science units (plus youโ€™ll support my blog with your purchase! โค๏ธ)

Stream Measurements

painting showing three people taking measurements in a stream
Illustration of students measuring the width and depth of a stream!

For this activity, learn how to measure water flow with your students as a river field trip activity! With a few household items, you can collect river measurements. All you need are some simple measurement tools like a tape measure, yardstick, and stopwatch!

Water resource scientists, called hydrologists, collect stream measurements to ensure we are not using our water resources too quickly or in unsustainable ways. In this hands-on activity, students will not only practice math and measurements, but they’ll also learn about how scientists measure and study our rivers!

Catch Aquatic Macroinvertebrates

types of aquatic macroinvertebrates
A poster of the types of aquatic macroinvertebrates.
A cartoon of two people in a river using a net to catch aquatic insects
A diagram showing two students collecting aquatic macroinvertebrates in a stream using a net.

Catching aquatic macroinvertebrates is a memorable and educational field trip experience your students will love! Aquatic macroinvertebrates are little creatures like insect larvae and crayfish found at the bottoms of most ponds and streams. Just flip over a few river rocks or submerged logs near the shore of a pond and you’re likely to spot a macroinvertebrate underneath!

But here’s the cool part: macroinvertebrates are bioindicators – creatures that teach us a lot about the overall health of their ecosystems! That makes this outdoor activity a great way to review your classroom studies of biodiversity, bioindicators, entomology, or aquatic food webs. It’s also a great way to build connections with local ecosystems – almost any pond or small stream will work for this activity!

Measure the heights of trees using math!

A diagram showing how to find the height of a tree, with equations. Line 1: tree height above eye level equals distance times tan of angle. Second line: tree height equals eye level plus tree height above eye level.
This diagram shows how you can calculate the height of a tree using math!

Unless you are measuring a short seedling, you probably wonโ€™t be able to measure tree height directly because you canโ€™t reach the top. So how do you measure something so tall? Answer: use an inclinometer and trigonometry!

I donโ€™t know about you, but I think math is more interesting when we can apply it to real-world situations! If youโ€™re reviewing trigonometry, right triangles, or angles in your classroom or homeschool, you and your students will love this tree-height appliedย math activity! In this simple learning activity, students will learn how to make a homemade inclinometer โ€“ a device for measuring the angle of inclination. Then, they will take measurements and calculate the height of a tree in this outdoor educational activity.

Outdoor Experiment for Climate Change & Sea Ice

yellow arrows from the sun bouncing off of ice but not water
Sea ice is more reflective than ocean water.
two tubs of water, one covered in foil
Materials for a sea ice experiment.

A sunny summer day is the perfect time for this outdoor activity that’s all about heat, solar radiation, and reflection! For this activity, all you need is a warm sunny day, containers with cold water, foil, and a thermometer!

ย In this outdoor educational activity, students will create a model of sea ice and ocean water albedo using aluminum foil and two tubs of water. Students will track the temperature in a covered and uncovered tub on a sunny day. It’s a great way to learn about albedo and the impacts ofย positive feedback loopsย in climate change.

Measure Soil Infiltration Rates

sketches showing a tube being hammered into the soil then filled with water.
Steps for measuring soil infiltration rate

Summer is the perfect time to study soils! If you have a summer garden, you know the importance of healthy and permeable soil. Measuring soil infiltration rates is an activity that you can easily do in your garden with a few simple household items.

Why study soil infiltration? Infiltration rates of soils are important for many reasons. First, they are important in agriculture – different crops require soils that drain at different rates. Soil infiltration also plays a role in natural disasters like flooding and landslides. Finally, infiltration is an important part of the water cycle – when water seeps into the earth, it becomes part of the groundwater. Humans access groundwater with wells – an important source of water for drinking and growing plants!

Learn in Nature with Wild Earth Lab!

Thereโ€™s no need to scramble to put together the perfect materials for your outdoor educational activitiesโ€“ Iโ€™ve already created them for you! Check out my Earth and environmental science units, complete sets of printable learning materials with activities, posters, handouts, and more!


Are you interested in reading more posts with outdoor educational activities? Subscribe or follow Wild Earth Lab using the links below!


Subscribe, share, and comment:

Posted on Leave a comment

Metamorphic Rocks: properties, formation, and subtypes!

a large foliated rock sample being examined by students
text that says share this post

Learning about rocks and the rock cycle in your classroom this year? You may already know that there are three main types of rocks: igneous, sedimentary, and metamorphic. In this post, we will take a closer look at metamorphic rocks. Get ready to explore the formation, subtypes, properties, and examples of metamorphic rocks!

For Teachers:ย If youโ€™re an educator planning to teach rocks, great visuals and activities are key to deepening understanding! Try my my Rocks Unit – a complete set of all the printable worksheets, activity directions, and visuals you’ll need (plus youโ€™ll support this blog with your purchase! โค๏ธ)

How do metamorphic rocks form?

Metamorphic rocks form deep below the Earthโ€™s surface.ย Metamorphic rocks form when other rocks experience lots of heat and pressure underground. The heat comes from the Earth’s interior and the pressure comes from the weight of overlying layers of rock and sediment.

Every metamorphic rock was once a different rock, called the parent rock, or protolith. The protolith can be sedimentary, igneous, or even a different metamorphic rock. For example, when the sedimentary rock sandstone is exposed to intense heat and pressure, it can become the metamorphic rock quartzite. This transformation, called metamorphism, forces the minerals in the parent rock to reorganize into a more compact structure, making metamorphic rocks quite sturdy and dense.

Metamorphism can only happen when the amount of heat and pressure are just right. If there is too little heat and pressure, metamorphism will not happen. If the heat and pressure grow too high, the rock will melt into magma instead.

Properties of Metamorphic Rocks

There are many different metamorphic rocks, and they do not all look the same. Shimmering schist, sturdy slate, and glimmering marble are all metamorphic! Their varied appearances are influenced by several properties including their mineral composition, grain (crystal) size, and foliation. Let’s learn some more about each of these properties…

Composition

As you now know, metamorphic rocks all share one important thing in common: they formed under heat and pressure. However, each rock has its own special blend of minerals. Metamorphic rocks are made of one or more minerals. If you can identify the mineral(s) in a rock, it will help you identify the rock.

Grain Size

Metamorphic rocks are made of crystals of minerals. Crystals come in different sizes. Rocks with large crystals can appear sparkly or shimmery, like schist or marble. But not all crystals are big. In fact, some rocks are made of crystals so tiny that you need a microscope to see them. Rocks made of microscopic crystals may appear more dull.

In general, bigger crystals form under higher heat and pressure. A rock with large, visible crystals formed under higher heat and pressure than a rock made of tiny crystals.

Foliation

Some (but not all) metamorphic rocks have foliation – which means banding or layering. Foliation presents in several different ways, depending on the conditions while the rock is formed and the mineral crystals in the rock. A foliated rock with large crystals formed under high heat and pressure. This rock may appear to have bands or stripes of different colored mineral crystals. An example of this is gneiss, which appears to have alternating bands of light and dark crystals. However, a foliated rock with microscopic crystals formed under lower heat and pressure. This rock may appear to be made of layers or plates, like slate.

diagram of igneous rock textures: phaneritic, aphanitic, porphyritic, bubbly, glassy, and pyroclastic

Metamorphic Subtypes

There are two types of metamorphic rocks: foliated and nonfoliated. With a little practice, you can learn to tell them apart. Let’s learn a little more about each.

Metamorphic Foliated

Metamorphic foliated rocks have bands or layers. Some, like gneiss, have alternating bands of light and dark crystals. Others, like phyllite and slate, look like they are made of sheets or layers. Foliation forms when a rock is being squeezed hardest in a particular direction rather than from all sides. This may happen when a rock is buried deep underground. The directed pressure forces the minerals to line up in the same direction, creating the bands or layers.

Metamorphic Nonfoliated

Metamorphic nonfoliated rocks form when the pressure comes from all sides or if the minerals do not line up. Consequently, nonfoliated rocks do not have bands or layers. Instead, nonfoliated rocks are usually a single solid color and made of interlocking mineral crystals. These crystals can be quite large or appear fine-grained. Some nonfoliated rocks, like marble, are prized for their strength and beauty, which makes them popular in construction and fine arts.

Teaching rocks? Check out my printable handouts with info on metamorphic, igneous, and sedimentary rocks!

Examples of metamorphic rocks

Here are some examples of common metamorphic rocks. If you’re studying rock identification or creating a rock collection, you’ll want to make sure to examine the following rocks:

Foliated Rocks

  • Gneiss
  • Schist
  • Phyllite
  • Slate

Nonfoliated Rocks

  • Marble
  • Quartzite
  • Hornfels

What’s Next?

For everyone: there’s more to learn about rocks! Take a closer look at igneous rocks or sedimentary rocks. Or, continue reading more about the rock cycle or the difference between rocks and minerals.

For educators: check out my posts on how to set up a rock ID lab activity, directions for a fun rock ID review bingo game, and a list of rock and mineral activity ideas that you can try in your classroom!

Study this topic with Wild Earth Lab!

Iโ€™ve already created an easy way for you to make teaching rocks & minerals in your classroom fun and engaging! This set includes all the printable materials you need for studying rocks and minerals, including diagrams, readings, activity directions, and worksheets!

Explore more lessons from Wild Earth Lab:

If you enjoyed this post, I know you will love trying my other printable science and nature units in your classroom too!


Are you interested in reading more posts like this? Subscribe or follow Wild Earth Lab using the links below!


References and Further Reading

  1. Earle, S. (2019). Physical Geology. BCcampus Open Education. (Chapters 2-7). Available: https://opentextbc.ca/physicalgeology2ed/
  2. Johnson, C., Affolter, M.D., Inkenbrandt, P., & Mosher, C. (2017). An Introduction to Geology. Salt Lake Community College. (Chapters 3-6). Available: https://opengeology.org/textbook/
  3. Jones, C. E. (n.d.). Igneous Textures. University of Pittsburg. Department of Geology and Planetary Science. Available: https://sites.pitt.edu/~cejones/GeoImages/2IgneousRocks/IgneousTextures.html
  4. Plummer C.C., Carlson D.H., & Hammersley L. (2019). Physical Geology. McGraw-Hill Education. (Chapters 1-7).

Subscribe, share, and comment:

Posted on Leave a comment

Sedimentary Rocks: properties, formation, and subtypes!

students examining rock samples in a science classroom
text that says share this post

Are you ready to learn all about rocks and the rock cycle in your classroom this year? If so, it’s important to know all about the three main types of rocks: igneous, sedimentary, and metamorphic. In this post, we will take a closer look at sedimentary rocks. Get ready to learn all about the formation, subtypes, properties, and examples of sedimentary rocks!

For Teachers: If youโ€™re an educator planning to teach rocks, great visuals and activities are key to deepening understanding! Try my sedimentary rock printables, also found within my complete Rocks Unit – a complete set of all the printable worksheets, activity directions, and visuals you’ll need (plus youโ€™ll support this blog with your purchase! โค๏ธ)

How do sedimentary rocks form?

Sedimentary rocks form at or near the Earthโ€™s surface.  They form from deposits of sediments, minerals, and/or organic matter.

On the Earth, forces like water and shifting temperatures work endlessly to break rocks down. The tiny broken-down pieces of rocks are called sediments. Some of the minerals in rocks may also dissolve in water, the same way sugar dissolves in tea. We call the dissolved minerals solutes.

Sediments and solutes move and are deposited in new places through a process called erosion. As sediments build up, something special happens. Sediments compact together under their own weight or are cemented together by crystallizing minerals. This forms new rocks, known as sedimentary.

Properties of Sedimentary Rocks

There are many different sedimentary rocks, and they do not all look the same. Soft mudstones, rough sandstones, and even coal are all sedimentary! Their varied appearances are influenced by several properties including their mineral makeup and grain (sediment particle) size. Let’s learn more about some of the properties of sedimentary rocks…

Sedimentary Grain Sizes

You already know that many sedimentary rocks are made from compacted and cemented sediments. The size of those sediments determines the type of sedimentary rock. Mudstones are made from the tiniest clay particles that are so small you cannot see them. Sandstones are made from little grains of sand, which you can see with your naked eye if you look at them up close. Conglomerate and breccia are made from the largest sediments – like gravel and small pebbles.

diagram of igneous rock textures: phaneritic, aphanitic, porphyritic, bubbly, glassy, and pyroclastic

Geologists call the size of the particles in a rock the “grain size”. Grain size is important because it impacts the porosity and permeability of a rock. Very porous rocks like sandstone and conglomerate make good aquifers that store water underground. Do you know where your drinking water comes from? If you drink well water, then your drinking water comes from an aquifer!

Sedimentary Composition

Sedimentary rocks contain compacted and cemented grains, crystals of mineral precipitates, or sometimes organic materials. However, each rock has its own special blend of minerals.

Some sedimentary chemical rocks (those made from recrystallized solutes) contain carbonates. Carbonates are minerals that react with acid – just like how baking soda reacts with vinegar. Geology students find out if a rock contains carbonates by placing a drop of acid on the rock and watching for bubbling or fizzing. Rocks that fizz or bubble in a reaction with acid contain carbonates.

Other sedimentary rocks contain organic carbon and consequently burn. Geologists test for organic matter by attempting to combust a rock. The organic matter in the rock will burn in a combustion reaction – allowing the geologist to see how much of the rock was organic.

Sedimentary Subtypes

There are several subtypes of sedimentary: clastic, chemical, organic, and biochemical. They are formed from different materials. Letโ€™s learn a little more about each.

Sedimentary Clastic Rocks

Sedimentary clastic rocks, such as sandstone and siltstone, form from tiny solid particles of rock called sediments. Sediments form through a process called weathering, in which rocks break down over time into smaller pieces. These pieces move around thanks to forces like flowing water, wind, and gravity, eventually coming together to form new rocks.

But how do loose sediments become a solid rock? Two processes, compaction and cementation, are responsible. Compaction happens when sediments are buried and pressed into a rock by the weight above. Cementation happens when water evaporates, leaving behind minerals that act like cement, holding the sediments together. Clastic rocks vary in their grain sizes, from microscopic particles in mudstone to large gravel pieces in breccia and conglomerates.

Sedimentary Chemical Rocks

Have you ever stirred sugar into water until it disappears?  Although you cannot see the sugar, it is still there, dissolved in the water. Like sugar, many minerals dissolve in water too! Most liquid water on Earth contains dissolved minerals.

Now perhaps you are wondering: how does water make rocks? Imagine an ancient ocean, with water rich in dissolved minerals. As time passes, the ocean begins to shrink, eventually drying up completely. When the water evaporates, the minerals from the water recrystallize to form sedimentary chemical rocks. This process, called precipitation, is the opposite of dissolving. Sedimentary chemical rocks are crystalline but often look fine-grained. Some are made of carbonate and react strongly to acid. Rock salt and limestone are two examples of sedimentary chemical rocks.

Sedimentary Organic Biochemical Rocks

Sedimentary organic and biochemical rocks are similar to sedimentary clastic rocks. However, they aren’t composed of sediments but rather form from buried plant and animal matter. Through compaction and cementation, the matter eventually becomes rock. Examples include coal, formed from compressed plant matter, and coquina, made of compacted and cemented shell fragments. These rocks can tell us fascinating stories about life on Earth in prehistoric times!

Examples of sedimentary rocks

Here are some examples of common sedimentary rocks. If you’re studying rock identification or creating a rock collection, you’ll want to make sure to examine the following rocks:

Clastic Rocks

  • Mudstone
  • Siltstone
  • Sandstone
  • Conglomerate
  • Breccia

Chemical Rocks

  • Limestone
  • Rock salt
  • Chert
  • Ironstone

Biochemical and Organic Rocks

  • Fossiliferous Limestone
  • Coquina
  • Diatomite
  • Anthracite
  • Coal

What’s Next?

For everyone: there’s more to learn about rocks! Take a closer look at igneous rocks. Or, continue reading more about the rock cycle or the difference between rocks and minerals.

For educators: check out my posts on how to set up a rock ID lab activity, directions for a fun rock ID review game, and a list of rock and mineral activity ideas that you can try in your classroom!

Study this topic with Wild Earth Lab!

Iโ€™ve already created an easy way for you to make teaching rocks & minerals in your classroom fun and engaging! This set includes all the printable materials you need for studying rocks and minerals, including diagrams, readings, activity directions, and worksheets!

Explore more lessons from Wild Earth Lab:

If you enjoyed this post, I know you will love trying my other printable science and nature units in your classroom too!


Are you interested in reading more posts like this? Subscribe or follow Wild Earth Lab using the links below!


References and Further Reading

  1. Earle, S. (2019). Physical Geology. BCcampus Open Education. (Chapters 2-7). Available: https://opentextbc.ca/physicalgeology2ed/
  2. Johnson, C., Affolter, M.D., Inkenbrandt, P., & Mosher, C. (2017). An Introduction to Geology. Salt Lake Community College. (Chapters 3-6). Available: https://opengeology.org/textbook/
  3. Jones, C. E. (n.d.). Igneous Textures. University of Pittsburg. Department of Geology and Planetary Science. Available: https://sites.pitt.edu/~cejones/GeoImages/2IgneousRocks/IgneousTextures.html
  4. Plummer C.C., Carlson D.H., & Hammersley L. (2019). Physical Geology. McGraw-Hill Education. (Chapters 1-7).

Subscribe, share, and comment:

Posted on Leave a comment

Igneous Rocks: properties, formation, and subtypes!

igneous rocks - texture diagram
text that says share this post

Are you studying rocks and the rock cycle in your classroom this year? If you’re ready to take a deep dive into all things rocks, it’s important to know all about the three main types of rocks: igneous, sedimentary, and metamorphic. In this post, we will take a closer look at igneous rocks. Get ready to learn all about the formation, subtypes, properties, and examples of igneous rocks!

For Teachers: If youโ€™re an educator planning to teach rocks, great learning resources are key to deepening understanding! I think you and your students will love my complete Rocks Unit – a set of all the printable worksheets, activity directions, and visuals you’ll need (plus youโ€™ll support my blog with your purchase! โค๏ธ)

How do igneous rocks form?

All igneous rocks form from molten rock. When molten rock is underground, we call it magma. Molten rock is only called lava when it’s on Earth’s surface. The intense pressure and heat deep underground keep magma in the molten (liquid) form. However, when the heat and pressure lessen, the molten rock solidifies, forming crystals. This can happen very slowly while the rock is still underground. If the molten rock reaches the Earth’s surface, it cools much more rapidly. This is because the surface of the Earth is very cool compared to the Earth’s insides.

Properties of Igneous Rocks

There are many different igneous rocks, and they do not all look the same. Bubbly pumice, smooth obsidian, and sparkly granite are all igneous rocks! Their varied appearances are influenced by their mineral makeup and the specific conditions during their formation. Igneous rocks come in a wide variety of different textures and compositions. Let’s learn more about both of these properties…

Igneous Textures

As molten rock cools, it forms crystals. The size of these crystals depends on how quickly the rock cools. Slow cooling provides time for big, interlocking crystals to form. Rapid cooling makes tiny, fine-grained crystals. We use special terms to describe these different textures: phaneritic (big crystals), aphanitic (tiny crystals), and porphyritic (a mixture of both).  But thatโ€™s not all! Some lava rocks, like pumice, have a bubbly texture filled with tiny holes. Others, like obsidian, are smooth and look glassy. There are even rocks made of many pieces of volcanic debris all stuck together, giving them what is known as a pyroclastic texture.

diagram of igneous rock textures: phaneritic, aphanitic, porphyritic, bubbly, glassy, and pyroclastic

Igneous Compositions

Igneous rocks also come in different colors, which can tell us a lot about the minerals inside them โ€“ i.e., their mineral compositions. Light-colored minerals rich in silicon and oxygen are called felsic minerals. Rocks with lots of felsic minerals, like granite and rhyolite, are usually light and warm in color. On the other hand, dark-colored minerals rich in iron or magnesium are called mafic minerals. Rocks with lots of mafic minerals, like gabbro and basalt, are mostly dark gray, black, or green.

Subtypes

There are two main subtypes of igneous rocks: intrusive and extrusive. The main difference between them is where they form. Intrusive rocks form within the Earth while extrusive rocks form on the Earthโ€™s surface.

Igneous Intrusive Rocks

More specifically, an igneous intrusive rock starts as magma, which is what we call molten rock located underground. The magma is insulated deep within the Earth, so it cools very slowly. The slow cooling allows plenty of time for large interlocking crystals to form. Granite, diorite, and gabbro are examples of igneous intrusive rocks.

Igneous Extrusive Rocks

In contrast, igneous extrusive rocks form when hot lava cools on the Earthโ€™s surface such as when a volcano erupts. Lava cools very quickly on the surface, so there is not enough time for big crystals to form. If you are trying to decide if an igneous rock is intrusive or extrusive, texture is your biggest clue! While intrusive rocks are always made of large interlocking crystals, extrusive rocks come in a variety of other textures: fine-grained, glassy, bubbly, and more! Basalt, rhyolite, and pumice are igneous extrusive rocks.

Examples of igneous rocks

Here are some examples of common igneous rocks. If you’re studying rock identification or creating a rock collection, you’ll want to make sure to examine the following rocks:

Aphanitic or Porphyritic Rocks

  • Granite
  • Diorite
  • Gabbro
  • Peridotite

Phaneritic Rocks

  • Rhyolite
  • Andesite
  • Basalt

Vesicular Rocks

  • Pumice
  • Basalt
  • Scoria

Others (pyroclastic & glassy)

  • Tuff
  • Volcanic Breccia
  • Obsidian

What’s Next?

For everyone: there’s more to learn about rocks! Continue reading more about the rock cycle or the difference between rocks and minerals.

For educators: check out my posts on how to set up a rock ID lab activity, directions for a fun rock ID review game, and a list of rock and mineral activity ideas that you can try in your classroom!

Study this topic with Wild Earth Lab!

Thereโ€™s no need to scramble to put together the perfect rocks lesson  โ€“ Iโ€™ve already created it for you! This set includes all the printable materials you need for studying rocks and minerals.

Explore more lessons from Wild Earth Lab:

If you enjoyed this post, I know you will love trying my other printable science and nature units in your classroom too!


Are you interested in reading more posts like this? Subscribe or follow Wild Earth Lab using the links below!


References and Further Reading

  1. Earle, S. (2019). Physical Geology. BCcampus Open Education. (Chapters 2-7). Available: https://opentextbc.ca/physicalgeology2ed/
  2. Johnson, C., Affolter, M.D., Inkenbrandt, P., & Mosher, C. (2017). An Introduction to Geology. Salt Lake Community College. (Chapters 3-6). Available: https://opengeology.org/textbook/
  3. Jones, C. E. (n.d.). Igneous Textures. University of Pittsburg. Department of Geology and Planetary Science. Available: https://sites.pitt.edu/~cejones/GeoImages/2IgneousRocks/IgneousTextures.html
  4. Plummer C.C., Carlson D.H., & Hammersley L. (2019). Physical Geology. McGraw-Hill Education. (Chapters 1-7).

Subscribe, share, and comment:

Posted on Leave a comment

Geology Review Game Idea: mineral ID bingo

mineral ID bingo cards
text that says share this post

Are you teaching rocks & minerals in your science classroom? If you’ve taught your students the basics of mineral ID, but need a fun review game to end your unit, look no further than mineral ID bingo. In this post, I’ll go over how to play mineral ID bingo in your classroom and the materials you will need to play!

Before we dive in:ย If you’re an educator planning to try this game with your students, you can save yourself the time of making your own bingo cards and calling cards. My printable mineral ID bingo card set is available on TpT and Etsy. The set includes 25 unique bingo cards with illustrations of each mineral, plus calling cards with a list of each mineral’s properties (plus youโ€™ll support this blog with your purchase! โค๏ธ)

Prior Knowledge Required

To do this activity, your students must know the difference between rocks and minerals. They should have already practiced some mineral ID and be familiar with common minerals such as:

  • Biotite
  • Calcite
  • Feldspar
  • Galena
  • Halite
  • Muscovite
  • Pyrite
  • Quartz

Furthermore, your class should be familiar with the physical properties of minerals, including:

You can brush up on mineral ID and mineral physical properties by reading my post about mineral physical properties. You could also try a mineral ID lab with your class, by following these directions or reading my list of fun rock & mineral activity ideas for the classroom.

Finally, you can get my most comprehensive rock and mineral teaching materials in the Rocks and Minerals Unit. It’s my complete set of printable materials for teaching rocks and minerals – with worksheets, activity directions, diagrams, and much more. I know you will love it!

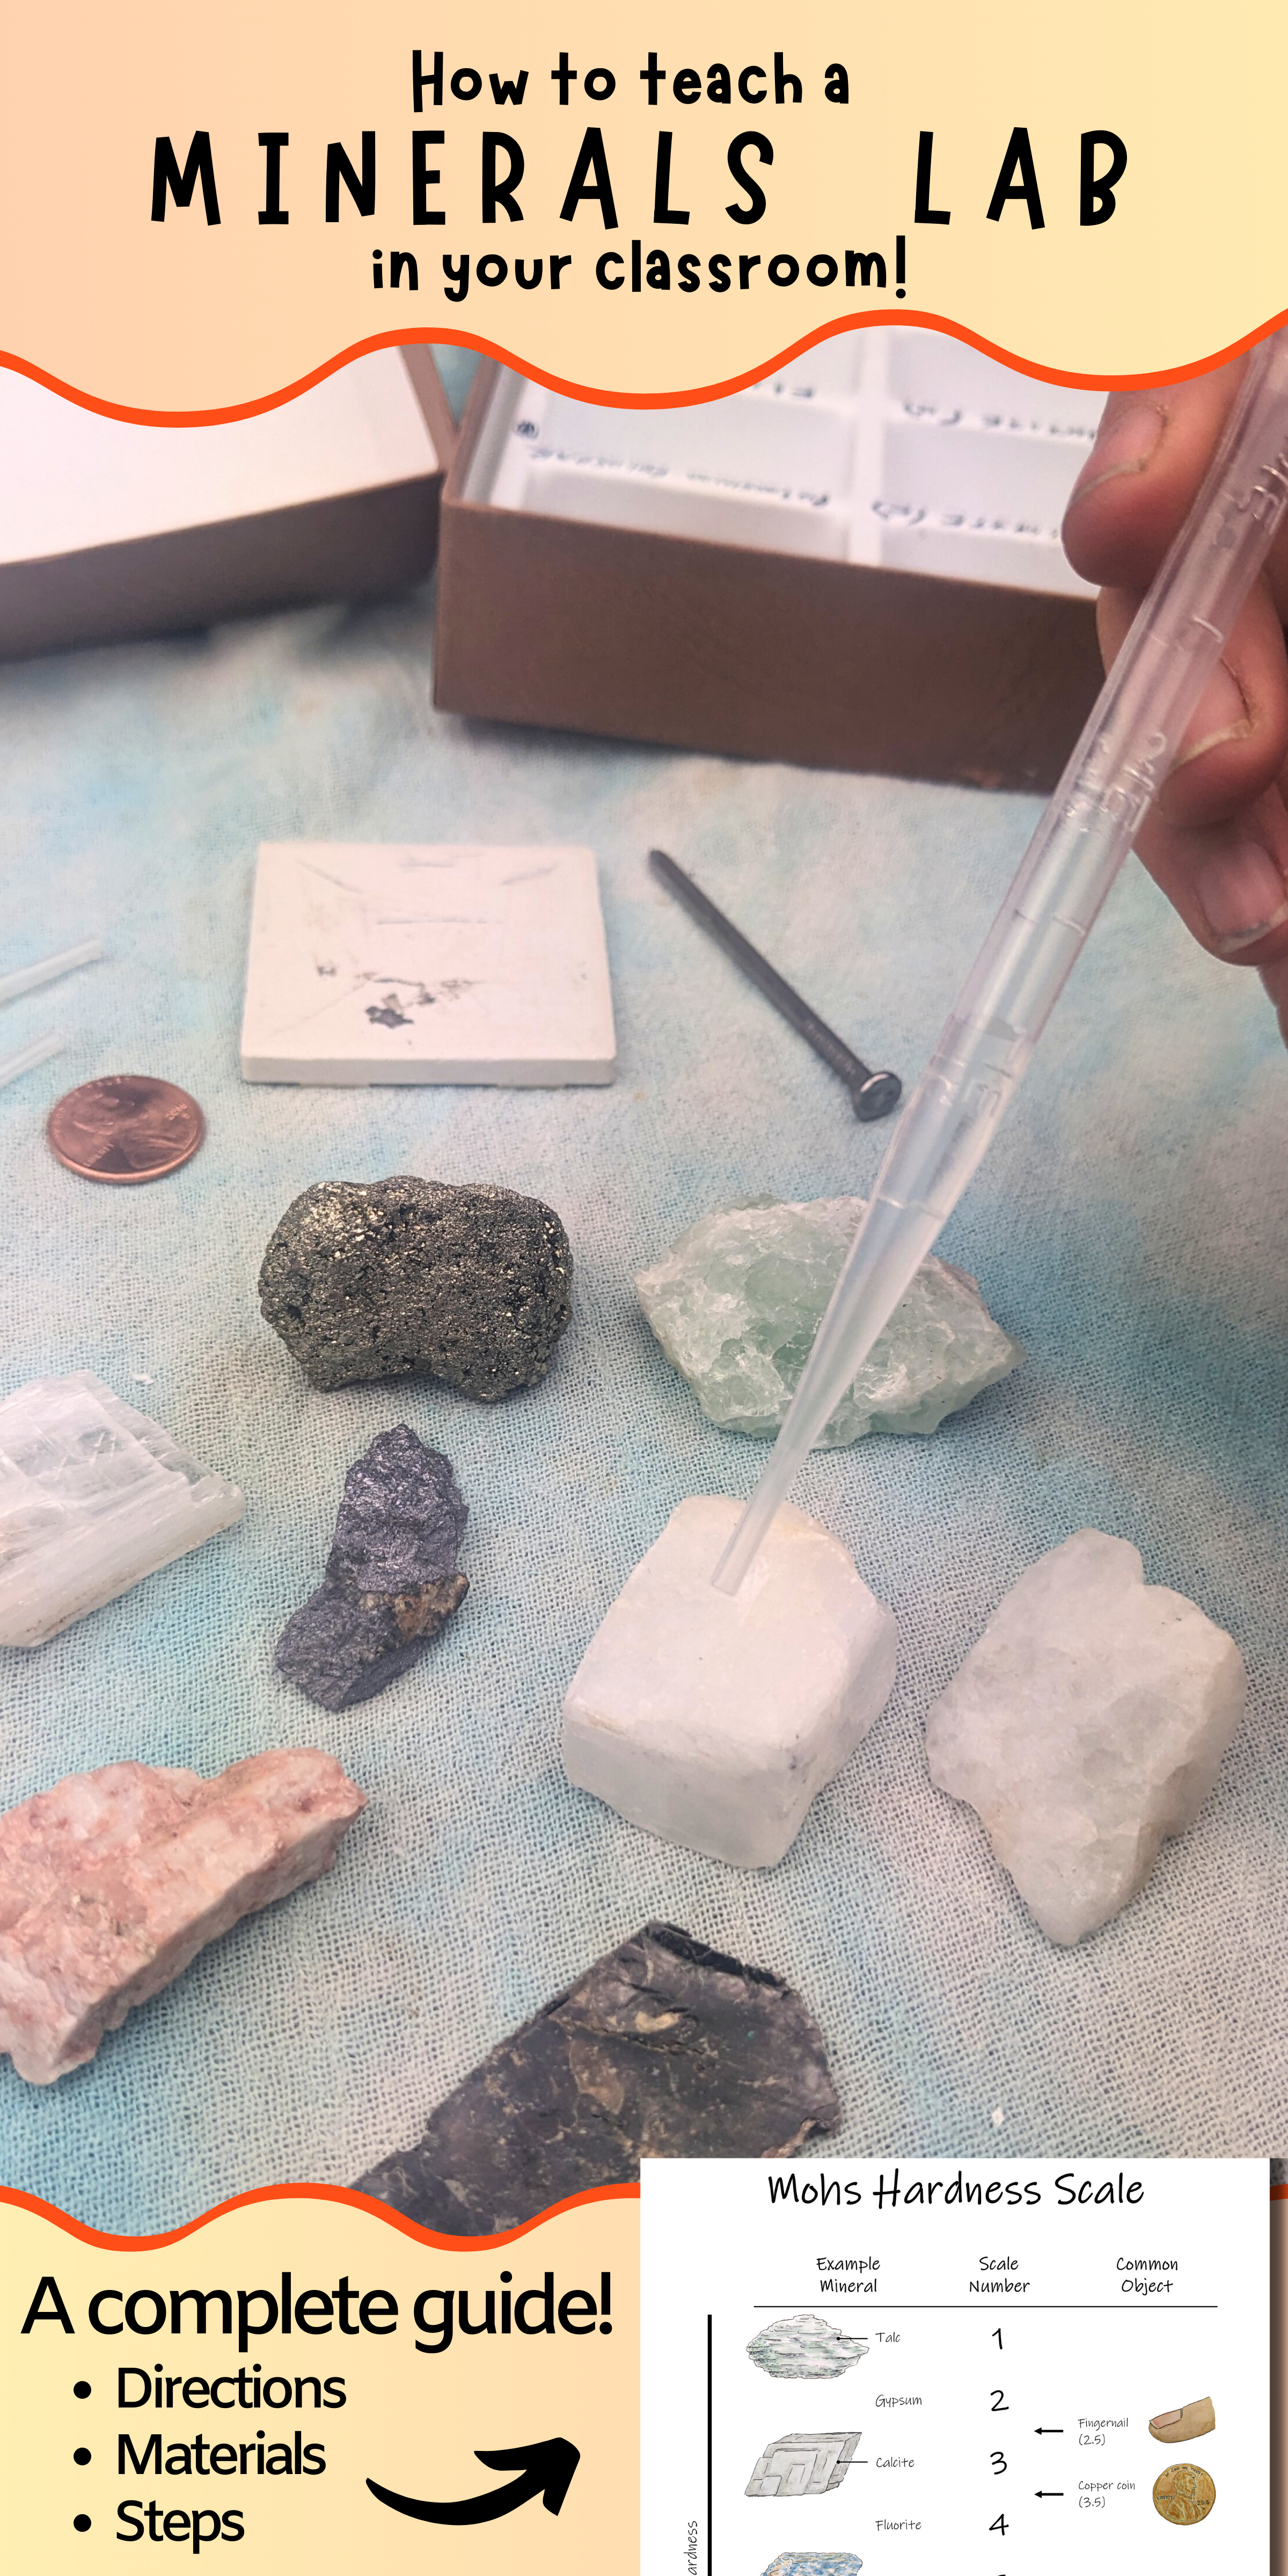
an eye dropper held above some mineral samples
Example of a Mineral ID lab activity

Materials

To play mineral ID bingo, you will need the following materials

  • 25 unique bingo cards featuring different minerals (download & print mine here, featuring common minerals, or create your own with your minerals of choice)
  • Calling cards – a list of each mineral’s physical properties (hints) on small pieces of paper or index cards (also included in my printable bingo set!)
  • A hat or bucket
  • Bingo chips or small items (pennies, candies) to place over the squares on the bingo cards

How to Play

Follow these steps to play mineral ID bingo with your students:

  1. Each student gets one unique bingo card.
  2. Cut apart the calling cards with each mineral’s physical properties. Place your calling cards into a hat or bucket.
  3. Pull one calling card at a time and read it out loud to the class, sharing the physical properties of the mineral without revealing the name of the mineral.
  4. Students should find the corresponding mineral on their bingo cards and mark or cover it.
  5. The first student to get four minerals in a row gets โ€œbingoโ€ (across, diagonal, or vertical).
  6. Check the student’s card to ensure all minerals were identified correctly.

Helpful Hints

When reading out clues for a mineral, start with the more obscure hints, and then progress to the more obvious clues.

Products Mentioned in this Post:

Thereโ€™s no need to scramble to put together the perfect printable materials for this activity ย โ€“ Iโ€™ve already created it for you! This bingo set includes all the printable materials you need for playing mineral ID bingo.

For more rocks and minerals learning fun, try my Rocks & Minerals Unit – a complete set of printable classroom materials for teaching this subject:

Studying Rock ID too? Check out my rock ID bingo review game as well:

Explore more lessons from Wild Earth Lab:

If you enjoyed this post, I know you will love trying my other printable science and nature units in your classroom too!


Are you interested in reading more posts like this? Subscribe or follow Wild Earth Lab using the links below!


Subscribe, share, and comment:

Posted on Leave a comment

Explore the Universe: 11 Hands-On Night Sky and Outer Space Activities

stargazer with telescope
text that says share this post

Wild Earth Lab is supported by readers like you. This post includes links to my own products and affiliate products. If you purchase through links on my site, I may earn a small commission at no additional cost to you.

Studying the night sky is a great way to spark curiosity and wonder about the universeโ€”and the best way to learn is by doing! Whether you’re teaching about constellations, the solar system, or space exploration, these hands-on activities will bring astronomy to life in your classroom or homeschool. From creative art projects and snack activities to real-world stargazing, this list has something for every young space enthusiast. Plus, I’ve included links to both free and paid ready-to-use materials to make your space lessons even more engaging. Get ready to explore the cosmos with your students with 11 hands-on space activities.

A Note For Teachers: If youโ€™re an educator planning to teach the night sky in your classroom, great activities & visuals are key to deepening understanding! Materials for many of the night sky and space activities in this post are included in my Night Sky Unit. It’s a bundle of printable classroom resources for learning all about the night sky and space (plus youโ€™ll support my blog with your purchase! โค๏ธ)

Constellation Snacks

Form different constellations using mini marshmallows as stars and pretzel sticks as the lines. Then eat them!

Constellation printable classroom materials – includes the printable directions and constellation image cards needed for this activity (purchase)

Online directions (free)

constellation flashcards and constellations made from pretzel sticks and marshmallows
A constellation snack activity!

Night Sky Scratch Art

Try scratch art; itโ€™s the perfect artistic medium for drawing objects in the night sky like stars, meteors, and planets!

Make your own scratch art boards guide (external link)

Purchase scratch art supplies (external link)

scratch art of an owl and the moon
Scratch art of the moon and stars.

Planetarium Field Trip

Plan a trip to a planetarium if thereโ€™s one in your area. At a planetarium, your program guide may show you how to identify stars and planets, tell you about constellation mythology, or teach you about deep-space objects.

Find a planetarium near you (external link)

Phases of the Moon Snack

Make the Moonโ€™s phases from crรจme-filled sandwich cookies. Remove the top cookie and part of the crรจme to create each lunar phase.

Printable worksheet and directions for this activity (Available to this blog’s newsletter subscribers on my Free Resources Page!)

Moon mini study printables (purchase)

moon phases sandwich cookie (e.g., Oreo) activity worksheets

Distance Model

Make a mini model of our solar system. Calculate each planetโ€™s relative distance from the Sun on a tape measure and mark it.

Distance model worksheets & printable directions (purchase)

Online directions (free)

Spot the International Space Station

If you know when and where to look, you can watch the International Space Station as it passes through the night sky above your area.

Track the International Space Station online (external link)

Star Charts

Find a star chart for your location and season. Head outside to a dark area at night and try to locate some constellations and stars. For recommended websites for online star charts, visit WildEarthLab.com/night-sky

Stellarium online star chart (external link)

Sky & Telescope online star chart (external link)

Constellation printable classroom materials (purchase)

Constellation printable classroom materials

Watch a Meteor Shower

Mark the dates of the next meteor shower on your calendar. Go to a dark area away from city lights and see how many shooting stars you can spot.

Find a meteor shower (external link)

meteoroid in the sky
A meteor seen over a house. Photo by Thirdman on Pexels.com

Eclipse Model

Model eclipses using two orbs on sticks and a flashlight. For a lunar eclipse: place the larger orb (Earth) between the light source and the smaller orb (Moon) to cast a shadow over the smaller orb. For a solar eclipse: place the smaller orb (Moon) between the light source and the larger orb (Earth).

Lunar eclipse mini study (purchase)

Solar eclipse mini study (purchase)

Read my blog posts all about solar eclipses and lunar eclipses (free)

eclipse worksheets and handouts

Become an Astrophotographer

Head outside to a dark area and capture pictures of the stars, Moon, planets, and more! Some smartphones have an astrophotography setting. A tripod will help keep the phone/camera still.

Lunar photography guide from NASA (external link)

A Guide to Smartphone Astrophotography; free online book from NASA (external link)

night sky
A photo of the Night sky. Photo by Neale LaSalle on Pexels.com

Moon Calendar

Print or create a calendar that shows the phase of the Moon on each day for the current month.

Free moon calendar (external link)

Printable moon activity pack (purchase)

Grab the complete set from Wild Earth Lab!

Thereโ€™s no need to scramble to pull together the perfect Night Sky lesson materials  โ€“ Iโ€™ve already created them for you! This set is a big bundle of many night sky printable materials and activities, many of which were linked in the blog post.

AND for even more outer space activities, try out my complete Sun and Stars Unit!

Explore more lessons from Wild Earth Lab:

If you enjoyed the space activities in this post, I know you will love trying my other printable science and nature units in your classroom too!


Are you interested in reading more posts like this? Subscribe or follow Wild Earth Lab using the links below!


Subscribe, share, and comment:

Posted on Leave a comment

Freshwater Visualization: Learning Activity With Kitchen Measurements

water cycle diagram and worksheet on a table next to measuring cups
text that says share this post

Itโ€™s hard to imagine just how little freshwater exists on Earth compared to saltwater. If you’re teaching the water cycle, your students might be amazed to learn that less than 3% of the Earthโ€™s water is freshwaterโ€”the rest is saltwater. In this post, Iโ€™ll show you a hands-on freshwater learning activity that uses simple kitchen measurements to help your students visualize these proportions. This activity is a powerful way to help students truly understand how rare freshwater is!

Before we dive in:ย If youโ€™re an educator planning toย teach the water cycle, great learning resources are key to deepening understanding! I think you and your students will love my complete Water Cycle Unit (plus youโ€™ll support my blog with your purchase! โค๏ธ)

Background Information

Most of the water on earth is saltwater (~97.5%), like the water in our oceans. Also, a significant amount of earthโ€™s water is frozen such as in glaciers and ice sheets (~1.7%). Fresh groundwater makes up ~0.75% of the water on Earth, and fresh surface water such as the water in streams and lakes is about ~0.01% of the water on Earth. Additionally, about ~0.001% of earthโ€™s water is in its gas form as water vapor in our atmosphere. Having trouble visualizing this?ย  This activity can help you visualize the relative amounts of freshwater on Earth!

Materials

Gather the following materials. You can complete this entire lab with common kitchen measuring cups.

  • ~1 gallon of water
  • Large 1+ gallon bucket or container
  • Liquid measuring cup
  • Tablespoon
  • 8 ice cubes
  • Teaspoon
  • Eye dropper
  • Extra containers to hold water

Step-by-Step Directions

Work through the following steps with your students. Explain what each measurement represents as you work through the activity.

  1. Measure 1 gallon (16 cups) of water into the bucket. This represents all the water on earth.
  2. From the water in the bucket, remove ยผ cup of water and set aside. Replace it with 8 ice cubes. These represent the earthโ€™s frozen water such as glaciers and ice sheets.
  3. From the water in the bucket, measure 2 tablespoons into an extra container.ย  This represents the Earthโ€™s fresh groundwater.
  4. From the water in the bucket, use an eyedropper to measure 8 drops of water into an extra container. This represents all the surface water on earth, such as streams and lakes.
  5. From the water in the bucket, use an eyedropper to measure 1 drop of water into an extra container. The amount of water vapor in our atmosphere at any time is represented by slightly less than this amount!
  6. Look at the water remaining in the bucket. This represents the saltwater on earth, mostly water in our oceans but also including salty groundwater near coasts and saltwater lakes, ponds, and marshes.

Free Printable Directions for This Activity

A printable version of these directions can be found on my free resources page. As my email subscriber, you’ll gain access to the free resources page and get updates about new activity ideas, project guides, new freebies and units, and cool science topics to teach in your classroom! Subscribe now to access the freebies page and more!

Water cycle diagram, measuring cups, free printable science activity guide for homeschooling, at-home-learning, or elementary school age children.

What’s Next?

If you’re teaching the water cycle, I think you’ll love some of my other blog posts too. Read my posts about explaining the water cycle in 10 stages and human impacts on the water cycle. You can also learn how to measure different water cycle processes including evaporation, precipitation, infiltration, and stream flow!

Explore more lessons from Wild Earth Lab:

If you enjoyed this freshwater learning activity, I know you will love trying my printable science and nature units in your classroom too!


Are you interested in reading more posts with science activity ideas? Subscribe or follow Wild Earth Lab using the links below!


Subscribe, share, and comment: